This post contains affiliate links. If you buy something from one of our links we may earn a commission. Thanks
If you’re looking for an easy way to add fresh, nutritious produce to your diet, you should try growing microgreens at home.
5 Reasons To Grow Microgreens
Key Takeaways:
- Microgreens are a quick and easy way to incorporate fresh, nutritious greens into your diet.
- They’re easy to grow, requiring only a small space and minimal equipment.
- Rich in vitamins A, C, and E, as well as minerals like iron and potassium, they significantly boost your nutritional intake.
- Their versatility allows incorporation into a variety of dishes, enhancing flavors and aesthetics.
- Lastly, growing microgreens is cost-effective, providing a cheaper alternative to store-bought ones, while also offering a satisfying, hands-on gardening experience.
Microgreens are a great way to get the benefits of vegetables and herbs without having to wait for them to mature.
Growing microgreens is easy even for beginners and we will show you how to get started growing your own microgreens.
Are Microgreens Just A Fad?
Microgreens are all the rage right now. But are they just a passing fad, or will they be around for a while?
Let’s take a look at some of the pros and cons of microgreens, and see if they’re here to stay or not.
While microgreens have only recently gained popularity at the grocery store in the United States, they have been grown and consumed in Asia for centuries.
In recent years, however, microgreens have begun to appear on the menus of upscale restaurants and in the weekly baskets of food delivery services.
Some food critics argue that microgreens are nothing more than a fad, but others believe that they are here to stay.
Time will tell whether microgreens are a passing trend or a lasting staple in the world of healthy eating. Here is some microgreen history in the U.S.:
Microgreens began showing up on chefs’ menus as early as the 1980s in San Francisco. In Southern California, microgreens have been grown since the mid‑90s.
Initially, a few varieties were offered; those available were: arugula, basil, beets, kale, cilantro, and a colorful mixture of those called a “Rainbow Mix”.
Having spread eastward from California, they are now being grown in most areas of the United States, with an increasing number of varieties. Today, the U.S. industry for microgreens consists of a variety of seed companies and growers. https://en.wikipedia.org/wiki/Microgreen
PROS:
1. Microgreens are incredibly nutritious. They’re packed with vitamins, minerals, and antioxidants that can boost your health in a variety of ways.
2. Microgreens are easy to grow. All you need is some soil, some water, and a little bit of sunlight from a south-facing window to grow microgreens. Even if you are a new gardener you can grow your own microgreens. Growing microgreens is the easiest way to start gardening even if you only have a little space.
3. Microgreens are versatile. You can use them in salads, sandwiches, soups, and a variety of other dishes.
CONS:
1. Microgreens can be expensive. They’re often sold in small quantities at premium prices.
2. Microgreens can be difficult to find. Not all grocery stores carry them, and they can be sold out quickly when they are available.
3. Microgreens have a short shelf life. Once they’re harvested, they only last a few days before they start to wilt.
So, what’s the verdict?
Are microgreens a fad or here to stay? Only time will tell. But one thing is for sure: they’re a delicious and nutritious addition to any diet!
But I believe microgreens are here to stay. They have become an important product for urban agriculture. They have been consumed in Asia for centuries.
Because they are often in short supply demand for them is high. Fast turnover times can make them an important food source for local marketing.
Since it’s easy to grow microgreens at home more and more gardeners will be growing them themselves I can only see them growing in popularity.
If you live in an urban area you might be able to start a business growing microgreens. Make sure you have a market before trying this.
Incidentally, sunflowers are the most popular variety of microgreens. Sunflower microgreens are high in protein and vitamin B. The best variety to grow for microgreens is Black Oil Sunflower. They are easy to plant and grow and are a good choice.
So now that you know a bit about microgreens this article will teach you how to grow microgreens indoors at home.
5 Reasons To Start Growing Microgreens At Home:
1. They’re easy to grow – You don’t need a lot of space or special equipment to grow microgreens. All you need is light, a container, some soil, and microgreens seeds.
2. They’re nutritious – Microgreens are high in nutrients, including vitamins A, C, and E, as well as minerals like iron and potassium.
3. They’re versatile – You can use microgreens in a variety of dishes, from salads to soups to sandwiches.
4. They’re affordable – Growing your own microgreens is much cheaper than buying them at the store.
5. They taste great – Microgreens have a delicate, yet flavorful taste that is sure to please your taste buds.
So what are you waiting for? We will show you how to grow microgreens indoors even if you are a beginner or live in an apartment with limited space for plants.
Growing Microgreens Indoors In A Nutshell
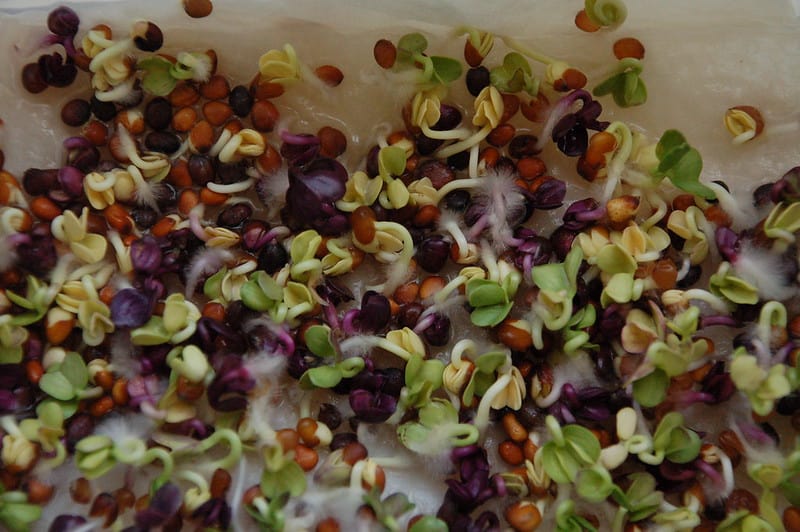
Microgreens are young greens that are typically harvested when they have grown between 2 and 3 inches tall. But some crops like peas may be harvested at 5 inches. This is still much faster than growing an entire plant in the garden.
These tender greens pack a powerful punch of flavor and nutrition, making them a popular choice for chefs and home cooks alike.
Microgreens are relatively easy to grow, and they can be grown indoors or outdoors. There’s no reason why you can’t learn how to grow microgreens too.
All you need is a shallow container, some potting soil, and a few seeds. You can even grow microgreens with no soil at all!
Once the planted seeds have germinated, you will need to give them a few weeks to grow and fill your tray.
Then you can start harvesting by cutting the microgreens as needed above the soil line, using scissors or a sharp knife.
Whether you prefer the mild flavor of radish greens or the peppery taste of arugula, growing your own microgreens is a fun and rewarding experience.
Even if you are a complete beginner and have never grown anything before you will be successful growing microgreens.
Microgreens Vs Sprouts What’s The Difference?
A lot of people think microgreens and sprouts are the same things but they are different.
Microgreens are young greens that are grown in trays and harvested when they’re a few inches tall when they start to grow their first set of true leaves.
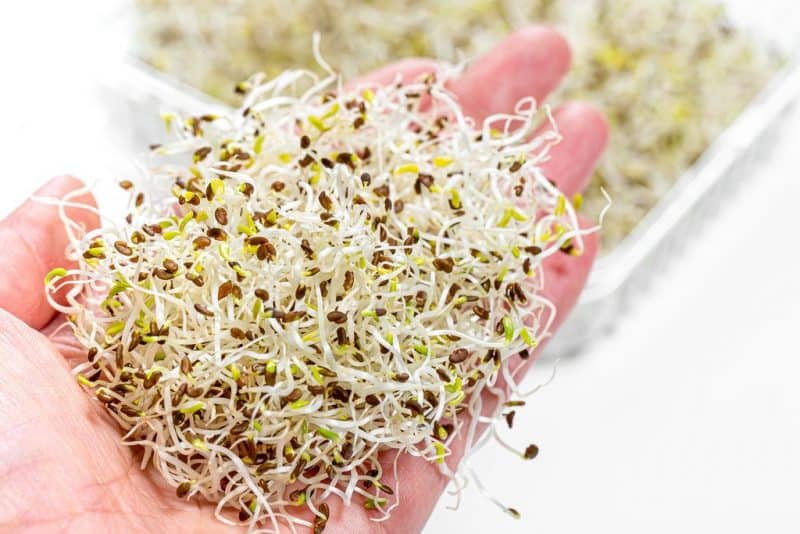
Sprouts, on the other hand, are germinated seeds that are harvested when they sprout. They are often grown in jars and no rooting medium is used, only water.
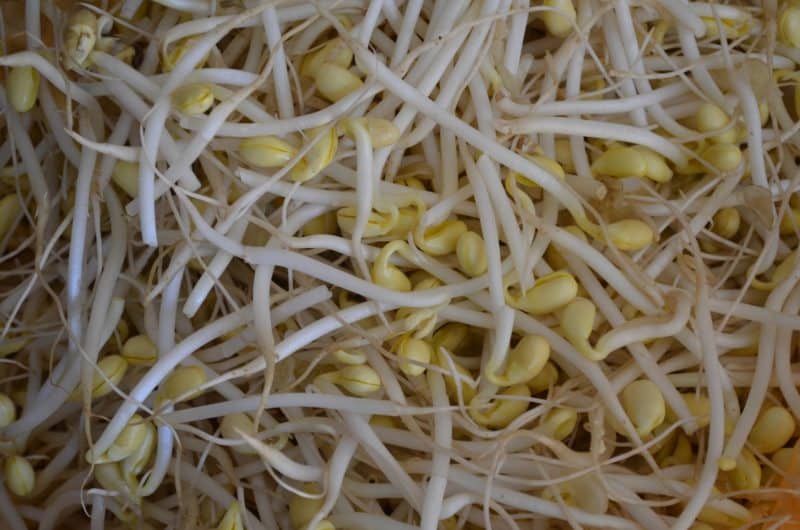
Both microgreens and sprouts are packed with nutrients and offer a variety of health benefits.
However, microgreens tend to be more flavorful than sprouts and are more versatile in the kitchen. Typically they can be harvested in 1-2 weeks.
On the other hand, sprouts will be ready much sooner (often in a week) because they are used as soon as they sprout.
The biggest difference between sprouts and microgreens is that sprouts do not have leaves but microgreens do. The addition of leaves is what makes microgreens more nutritious.
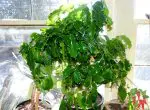
Another group of related plants is baby greens. These are microgreens that have been allowed to grow larger and produce leaves for use in salads.
Often the same plants are grown but not planted as densely. The advantage of baby greens is they can produce multiple harvests. It takes about 30 days or more to reach this stage depending on the plants grown.
What Are The Health Benefits Of Microgreens?
Microgreens are a type of vegetable that is becoming more and more popular. They are smaller than regular greens, but they pack a powerful nutritional punch.
Microgreens are rich in antioxidants, vitamins, and minerals. They have been shown to offer a number of health benefits.
What Are the Health Benefits of Microgreens?
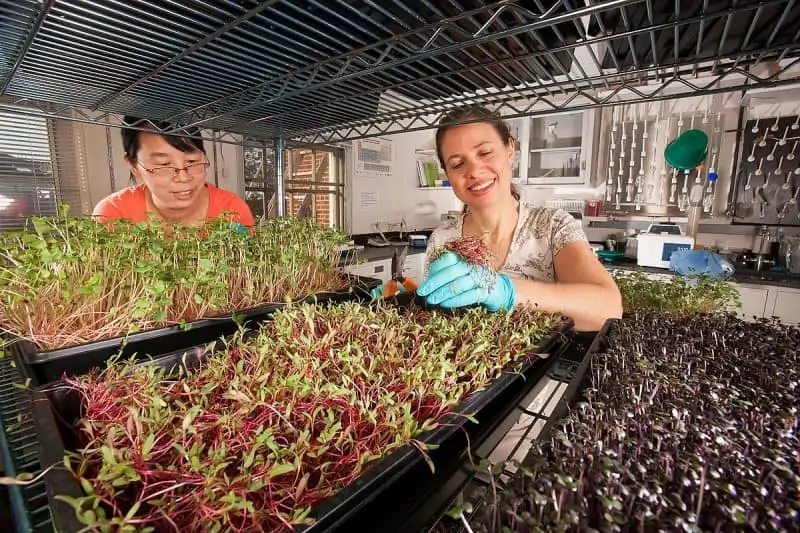
Microgreens have become increasingly popular in the past handful of years, and a great deal of ongoing research seeks to understand all the health benefits these tiny plants offer.
Early research has indicated that microgreens contain up to 40% more phytochemicals (beneficial nutrients and components) than their full-grown counterparts.
Though these little greens are small in stature, they contain extremely high levels of powerful vitamins, minerals, and health-supporting components.
Microgreens can lower blood pressure. Foods that are high in fiber and vitamin K can be helpful in maintaining a healthy blood pressure, and microgreens are high in both of these important elements as well as other vitamins and minerals.
Microgreens might help fight cancer. Research is ongoing into this subject, but some early evidence suggests that sulforaphane — a compound found at especially high levels in broccoli sprouts — may help fight cancer.
Some microgreens can help lower cholesterol. A study found that red cabbage microgreens lower levels of LDL cholesterol, liver cholesterol, and inflammatory cytokines — all factors that can increase your risk for heart disease.
Microgreens can support gut health. Foods that are high in dietary fiber, like microgreens, can ease constipation or other gastro-intestinal distress when eaten as part of a healthy, balanced diet.
Research also indicates that dietary fiber serves as a ” prebiotic,” or material that provides an ideal environment for the “good” bacteria in the human microbiome to flourish. https://www.webmd.com/diet/what-to-know-about-microgreens
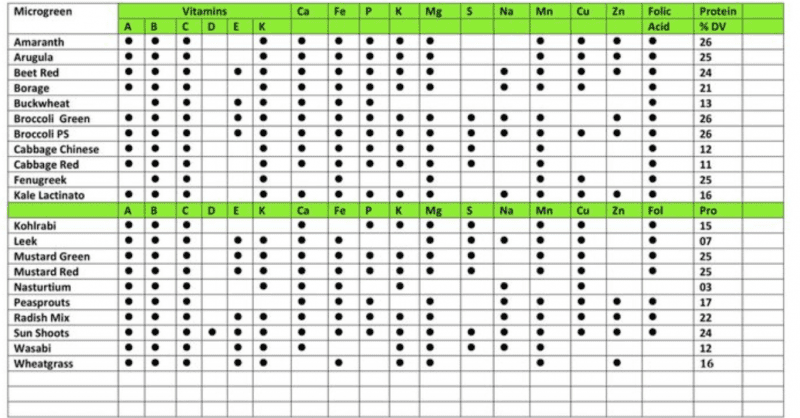
Microgreens Are Nutritious
Microgreens are packed with nutrients.
While their nutrient contents vary slightly, most varieties tend to be rich in potassium, iron, zinc, magnesium and copper (2, 3Trusted Source).
Microgreens are also a great source of beneficial plant compounds like antioxidants (4Trusted Source).
What’s more, their nutrient content is concentrated, which means that they often contain higher vitamin, mineral and antioxidant levels than the same quantity of mature greens (4Trusted Source).
In fact, research comparing microgreens to more mature greens reports that nutrient levels in microgreens can be up to nine times higher than those found in mature greens (5).
Research also shows that they contain a wider variety of polyphenols and other antioxidants than their mature counterparts (6Trusted Source). https://www.healthline.com/nutrition/microgreens#nutrition
How Do You Eat Microgreens?
Microgreens are miniature versions of mature greens that are typically harvested just seven to fourteen days after seed germination.
These nutrient-packed greens can be enjoyed in a variety of ways, from being used as a garnish or added to salads, to being used as a healthy and flavorful ingredient in smoothies or soups.
Microgreens can also be enjoyed simply by snacking on them straight from the container.
No matter how you choose to enjoy microgreens, one thing is for sure – these little greens pack a big nutritional punch.
So go ahead and add them to your diet in whatever way you see fit – your body will thank you for it!
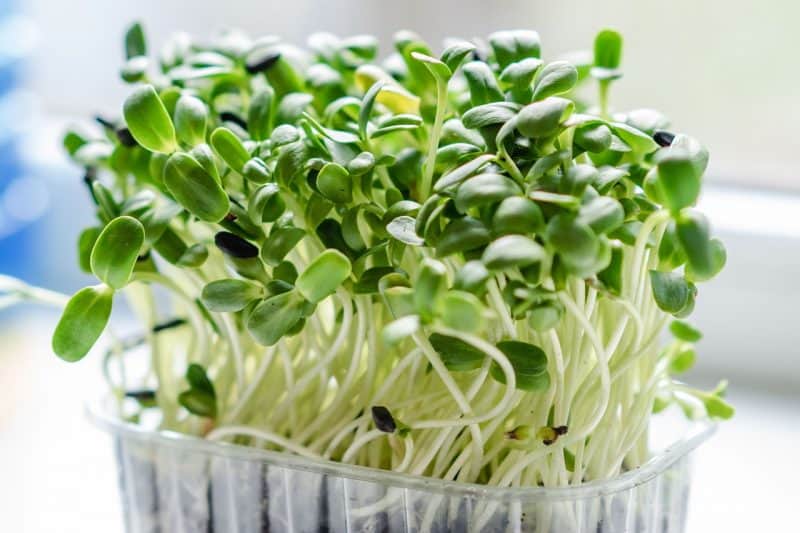
The Best Microgreens To Grow Indoors
Here is a list of some of the plants and vegetables you can grow as microgreens
Amaranth
Arugula
Basil
Broccoli
Buckwheat
Beets
Cabbage
Carrot
Celery
Chives
Cilantro
Collards
Cress
Dill
Sugar peas
Fennel
Fenugreek
KohlrabiKomatsuna (Japanese mustard spinach)
Lemon grass
Swiss Chard
Mizuna (Japanese mustard greens)
Nasturtium
Onion
Orach
Pac Choi
Purslane
Radish
Russian Kale
Shiso (Red perilla)
Shungiku (Chrysanthemum Greens)
Sorrel
Spinach
Sunflower
Parsley
Popcorn
Spinach
This is not a complete list and there are many other varieties of microgreens that also work.
Wheatgrass is a popular microgreen and is simply sprouted wheat seeds. Most other grains can also be included.
One plant I am growing is lettuce microgreens. Most of us think of more exotic microgreens to grow but I think looseleaf lettuce is an often overlooked microgreen.
Always Use Untreated Seeds
Some seeds are treated with fungicides and other chemicals. These are mostly seeds for commercial farm crops but some vegetable seeds are also treated.
Most seeds suitable for growing microgreens will be certified organic and non-GMO and that is what you want to use.
Plants You Should Never Grow As Microgreens
Plants in the nightshade family should never be grown as microgreens. Some popular vegetables in the nightshade family are:
Tomato, Tomatillo, Naranjilla, Eggplant, Potato (excluding sweet potato), Pepper (includes hot and sweet varieties as well as spices like paprika, chili powder, cayenne, and Tabasco), Pimento, Goji berry (wolfberry), Tamarillo, Cape gooseberry/ground cherry, Pepino, Garden huckleberry.
Read more at Gardening Know How: Learn More About Vegetables In The Nightshade Family
Growing Microgreens Indoors For Beginners
Growing microgreens is an easy project even for beginners. You don’t need a lot of equipment and it doesn’t take long to get results either. Here is what you need:
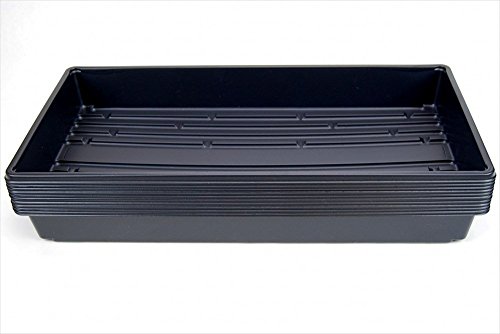
Growing Trays
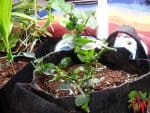
You are going to need trays to grow your seedlings. I use standard 10 x 20-inch seed flats but you can use any recycled plastic container you have on hand.
We will show you how to grow microgreens indoors in trays. You will have a choice of growing medium you can use in trays.
Growing Media
You can grow microgreens with potting soil, coco coir, Rockwool, or even with paper towels. I am using coco grow mats at this time.
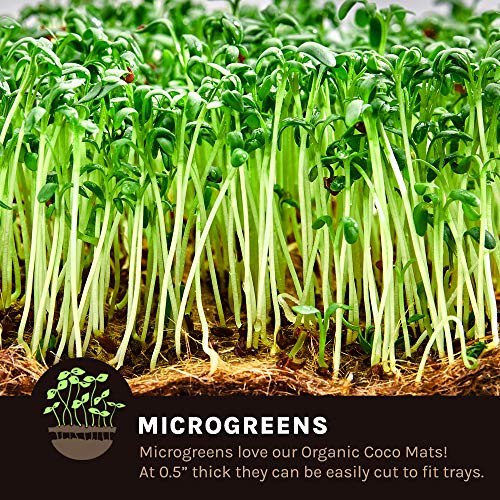
I think the coco mats will eliminate the mess of loose coco or soil. And once the plants are harvested the mats can go into my worm composting bin.
Coco is considered a hydroponic grow medium but there are other ways you can grow microgreens hydroponically. Since it’s not the easiest method for beginners we will save that for later.
Some folks even grow microgreens on paper towels. If you try this you need to use shallow-rooted plants. More on how to grow microgreens on paper towels later in this article.
While it can work I think you will have better results with coir or grow mats. Here is a video that shows you how to do it if you want to try it.
Plant Lighting
You can grow microgreens indoors or out but if you want to grow them indoors you will probably need supplemental lighting. We will talk about growing microgreens indoors under lights next because it is important for your success.
Growing Microgreens Indoors Under Lights
If you have a sunny windowsill you may not need supplemental lighting. But your plants will need at least 6 hours of sunlight to grow without getting leggy and falling over so they will need a light source.
Most of the United States will not have enough natural light to grow anything in the house but the hardiest shade-loving houseplants and even those may go semi-dormant.
The further North you live the less light will be available during winter and to make matters worse skies are often cloudy.
You can use fluorescent shop lights but LED grow lights will give better results. You won’t be changing bulbs and you will get more light while using less electricity.
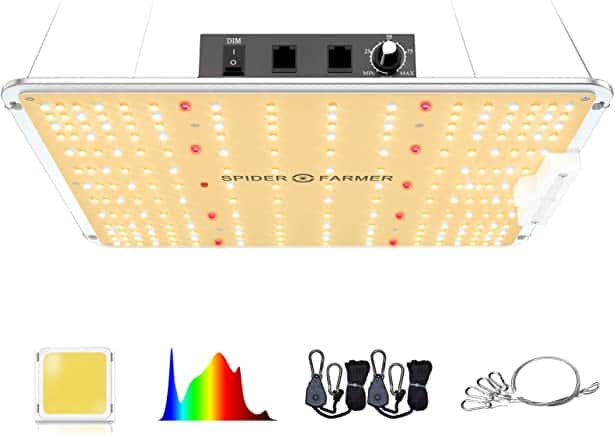
I use LED lighting and my light can easily cover a 4×6 foot area for greens. Here is a review of the LED Light I use
How To Plant Microgreens
If you want an easy way to get into gardening, microgreens may be the perfect option for you!
Microgreens are young plants that are harvested shortly after they sprout. If you are impatient and want fast results this is the crop for you.
Microgreens are nutrient-rich and can be added to salads, sandwiches, and other dishes for a burst of flavor and color.
Get Your Seeds

First, you will need to purchase some microgreen seeds. You can find these at your local garden center or online.
I think radish microgreens are the fastest grower taking a bit more than a week, while pea shoots may take a bit longer but most will be ready to harvest in 2 weeks.
You can give them another week or two to grow baby salad greens.
Get Your Tray Ready
Here’s how to grow microgreens in trays. Once you have your seeds, it is time to prepare your planting area.
You will need a shallow container or shallow tray and some potting mix or seed-starting mix.
I like to use a 1020 seed tray for my microgreens. You can find them online or probably even at your local hardware store.
Next, wet the potting mix and fill your container to close to the rim.
You can use any shallow recycled food container you have on hand.
I like to use seed starter grow trays. They work well and I recommend doubling them up if you plan on moving your seedlings around.
I use one top tray with drainage holes and one without drainage holes underneath.
That way the bottom tray can be used to bottom water my tray with soil and seeds.
After watering make sure you drain off any excess water. Bottom watering is the best way to water because the leaves themselves stay dry and seeds don’t get washed away or moved around when watering from the top.
You can use these trays with a plastic dome but I don’t recommend that. A dome can restrict airflow and lead to damping off.
Sow Your Seeds
Then, sprinkle the microgreen seeds onto the surface of the soil. Try to scatter seeds evenly over the soil surface so that they have room to grow.
This can be hard with the smaller type of seeds you may want to purchase an adjustable seed shaker for different sizes of seeds.
Seeds should be planted densely. It helps to soak larger seeds before sowing them so they sprout faster.
Always use organic seeds that are non-GMO.
Once the seeds are in place, press them into the soil and cover them with a thin layer of moist soil.
Using a light soil like coco coir will improve germination rates. Make sure your soil is at room temperature (72-76).
Then, place the container in a warm, sunny spot or under a grow light.
Direct sunlight is great and won’t harm them as long as they don’t dry out.
Keep the soil moist by misting it with water every day if it starts to dry but don’t overdo it.
Watch Them Germinate And Grow
In 7-14 days, your microgreens should start to sprout! The first set of seed leaves are called cotyledon leaves.
Once they start to grow their first true leaves and reach 2-3 inches tall, you can harvest them by cutting them at the base with a sharp pair of scissors or a sharp knife.
Enjoy Your Fresh Homegrown Microgreens!
If you follow this simple guide, you can easily learn how to plant and grow microgreens in your own home.
Give it a try today and taste the difference fresh, homegrown microgreens can make.
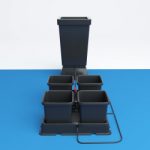
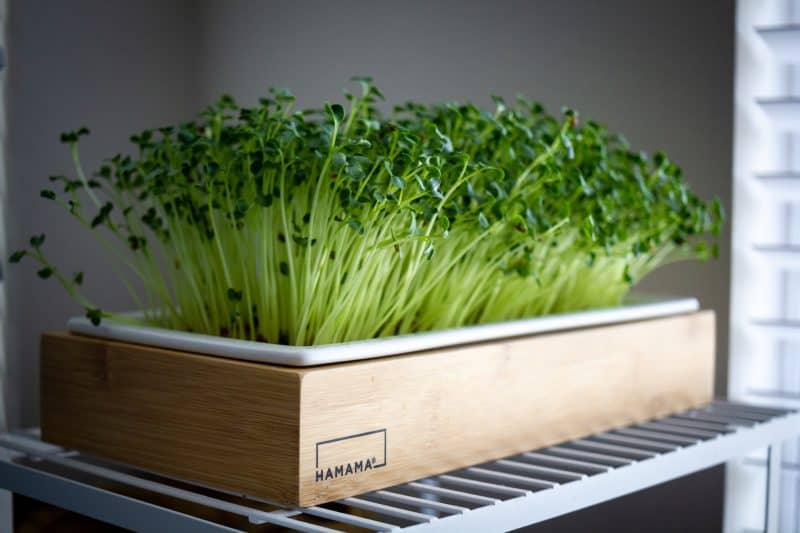
Done For You Microgreens Growing Kit

Here is a done-for-you growing system for microgreens. This microgreens growing kit has a built-in light and is easy to move around.
It includes everything you need to start growing your own microgreens.

I prefer the DIY microgreen growing method but this unit can work well where space is limited and lighting is needed.
The built-in lighting means this 15.35 x 5.9 x 7.88 inches unit can be kept on a kitchen counter, a shelf, or even on a coffee table.
This might even make a great gift if you know someone that might be interested in learning to grow microgreens
More DIY Microgreen Growing Methods
Did you know growing microgreens indoors without soil is possible? Here are two ways that explain how to grow microgreens at home without soil
Growing Microgreens Indoors Hydroponically – 2 Easy Ways
The first method uses a mason jar to grow microgreens hydroponically and uses only water to grow them and no soil.
The second method uses paper towels to grow microgreens. Although the method is similar to growing in soil, no soil is used.
Technically because it uses an inert grow medium it would also qualify as a hydroponic method.
Growing Microgreens In A Jar
Do you want to learn how to grow microgreens in a jar? It is actually very easy and can be done with just a few simple steps.
Microgreens are becoming more and more popular, as they are a great way to get nutrients into your diet. They are also very easy to grow and can be grown indoors or outdoors.
You can grow microgreens hydroponically in a mason jar. You will need a mason jar and a piece of screen that fits inside the ring.
If you don’t have a screen using some cheesecloth held in place with the ring or a rubberband might work.
You are going to fill the jar with water and some nutrients. You don’t need much fertilizer and they might even grow without it.
The seeds contain nutrients to feed the plant and you won’t be growing the plants for more than a few weeks anyway.
• Soak your seeds for a day and rinse them clean with fresh water. You can use the mason jar for this. Drain them and then refill the jar to the top with water or fertilizer solution.
• Then spread your seeds out on the screen or cheesecloth. Cover them with the lid and put them in a dark, warm place for a few days.
• They will start pushing the lid up as they grow and at that point, you can take it off and place the jar in a well-lit location.
• Make sure the water level in the jar does not drop too far down. You can add more water if you want but not more fertilizer.
• When your plants get about 3 inches tall you can start to harvest them by cutting them off near the bottom of the stem.
This is a cool way to grow microgreens because you can watch the plant and the roots grow at the same time.
If you are short on space growing microgreens at home in a jar could work for you.
Growing Microgreens On Paper Towels
Do you want to learn how to grow microgreens on paper towels? It’s really easy and doesn’t take up a lot of space.
This method not only eliminates messy soil but you also don’t need any fertilizer. The seeds themselves can supply all the nutrients your microgreens will need.
Here’s how to do it:
First, you will need to gather your supplies. You will need some paper towels, a container, some water, and some microgreen seeds.
Try to use plain paper towels and not colored ones if you can. Once you have all of your supplies, it is time to get started.
To begin, wet the paper towels and then wring them out so they are damp but not dripping wet.
Next, place the paper towels in your container. You will want to fold them over and get a few multiple layers in your container.
Then, sprinkle the microgreen seeds on top of the paper towels. Make sure that the seeds are evenly distributed.
Now, it is time to water the seeds. You will want to use a spray bottle to lightly mist the seeds.
You do not want to drench them, just make sure that the paper towels are moist. Cover your seeds with another paper towel and give the towel a very light spray of water.
Place your container in a dark spot for a few days and wait for the seeds to sprout. This usually takes about 3-5 days.
Once the seeds have sprouted, you can begin to water them more frequently. They are stronger than you think and will begin to push the top paper towel up as they grow.
At this point get rid of the top towel and make sure that the paper towels in the tray do not dry out completely. But you also do not want them to be soggy.
Once the microgreens are about 2-3 inches tall, they are ready to harvest! You can either cut them with scissors or pull them up by the roots.
And that is all there is to it! Growing microgreens on paper towels is a great way to get started with gardening.
Will Microgreens Regrow After Cutting
If you’re like me, you love to garden but maybe you don’t have the time or space for a traditional garden.
That’s where microgreens come in! Microgreens are baby plants that can be grown in a container on your kitchen counter.
They are perfect for people who want to grow their own food but don’t have a lot of experience or space.
People often ask whether or not microgreens will regrow after being cut. Most microgreens can not regrow after being cut but there are a few exceptions.
When you cut microgreens, you are essentially cutting off the plant’s food source. The part of the plant that is left behind is not capable of photosynthesis, which means it cannot produce its own food.
As a result, most microgreens will not regrow after being cut. However, there are a few plants that can regrow because they can grow a new top shoot.
Wheatgrass may be able to regrow and plants like peas and beans may also be able to regrow if a bit of stem is left.
How To Store Microgreens
Growing and eating microgreens can be a very rewarding experience, but many people struggle with how to store their harvest. Proper storage of microgreens is vital for preserving their nutritional value and freshness.
Microgreens should never be stored in an airtight container even though some recommend it. Instead use a plastic bag with holes in it or a plastic container like a clamshell.
As soon as they are harvested, wash them. Then dry them with paper towels or use a salad spinner if you have one. Once dry place them in your container with a moist paper towel and then they should be kept in the refrigerator at all times.
They will keep for a week, maybe 2. Start checking the microgreens for spoilage and discard any that are wilting or limp. By following these simple steps, you can ensure maximum freshness while still enjoying your delicious microgreen harvest days later.
Are Microgreens Safer Than Sprouts?
There has been a lot of debate lately about whether or not microgreens are safer to eat than sprouts.
Some people say that the risk of food poisoning is much lower with micro greens, while others believe that the safety risks are about the same.
So, which is it? Are microgreens really safer, or are they just a fad? Let’s explore the safety differences between microgreens and sprouts, and help you decide which is the better choice for you and your family!
Microgreens are greens that are harvested earlier than baby greens and can be any type of edible young leafy green vegetable.
Unlike sprouts, which are grown in water and then dried, microgreens are grown in soil.
This is important because when sprouts are grown in water, they can become contaminated with harmful bacteria such as E. coli and Salmonella.
Microgreens, on the other hand, are not as susceptible to contamination because they are grown in soil.
In addition, microgreens are usually harvested before they reach maturity, which means that they haven’t had a chance to develop harmful bacteria.
As a result, microgreens are generally considered to be safer than sprouts.
Microgreens FAQs
Microgreens, a delightful and nutritious addition to your meals, have surged in popularity owing to their numerous benefits.
These miniature greens are not only a visual treat but a powerhouse of nutrients. Whether you’re a seasoned gardener or a greenhorn, growing microgreens is an enjoyable venture.
The following section addresses common queries associated with microgreens, providing a deeper insight into their cultivation and utilization.
Q. What is the difference between microgreens and sprouts?
A. Microgreens and sprouts are different stages of plant growth.
Sprouts are germinated seeds harvested within 2-3 days, while microgreens are young plants harvested after they develop their first set of true leaves, usually within 7-14 days.
Unlike sprouts, microgreens are grown in soil or a soil substitute and require sunlight for growth.
Q. What are the health benefits of microgreens?
A. Microgreens are rich in antioxidants, vitamins, and minerals which contribute to your overall health.
They have been associated with lower blood pressure, reduced risk of heart disease, and improved gut health.
Some microgreens like broccoli sprouts may have cancer-fighting properties due to their high sulforaphane content.
Q. How do you grow microgreens indoors?
A. Growing microgreens indoors requires a shallow container, some soil or a soil substitute, microgreen seeds, and a sunny spot or a grow light.
Scatter the seeds over the soil, cover lightly, and keep the soil moist. Within 7-14 days, your microgreens should be ready to harvest.
Q. How should you store microgreens after harvesting?
A. After harvesting, rinse and dry the microgreens thoroughly.
Store them in a perforated plastic bag or a container with a moist paper towel to maintain humidity, and keep them in the refrigerator.
Properly stored, they can remain fresh for up to a week or two, although checking regularly for spoilage is advisable.