This post contains affiliate links. If you buy something from one of our links we may earn a commission. Thanks
Discover the secrets of calla lily care indoors potted! Learn how to keep your indoor Calla Lilies thriving with tips in our comprehensive calla lily care guide.
Potted Calla Lily care indoors involves placing the plant in indirect sunlight and maintaining a well-draining soil. Water it moderately, allowing the top inch of soil to dry between waterings. Fertilize monthly during the growing season and keep temperatures between 65-75°F for optimal growth.
Welcome to the wonderful world of Calla Lilies! If you’re looking for a stunning indoor plant that’s easy to care for, you’re in luck.
Calla Lilies are a great choice for anyone who wants to add some natural beauty to their home.
And the best part? They thrive in pots! With a little bit of know-how, you can keep your potted calla lily healthy and thriving for years to come.
In this guide, we’ll walk you through everything you need to know about calla lily care indoors potted. So, let’s get started!
Introduction To Calla Lily Care Indoors Potted

Looking to add some greenery to your indoor space? Calla Lilies are a great option that can add a touch of elegance to any room.
But how do you care for them when they’re potted indoors? In this post, we’ll cover everything you need to know about calla lily care indoors potted.
From soil and watering to light and temperature requirements, we’ll help you keep your Calla Lilies thriving and looking beautiful.
So whether you’re a seasoned plant parent or a newbie, read on to learn how to care for your potted Calla Lilies!
Brief Overview of Calla Lilies:

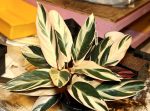
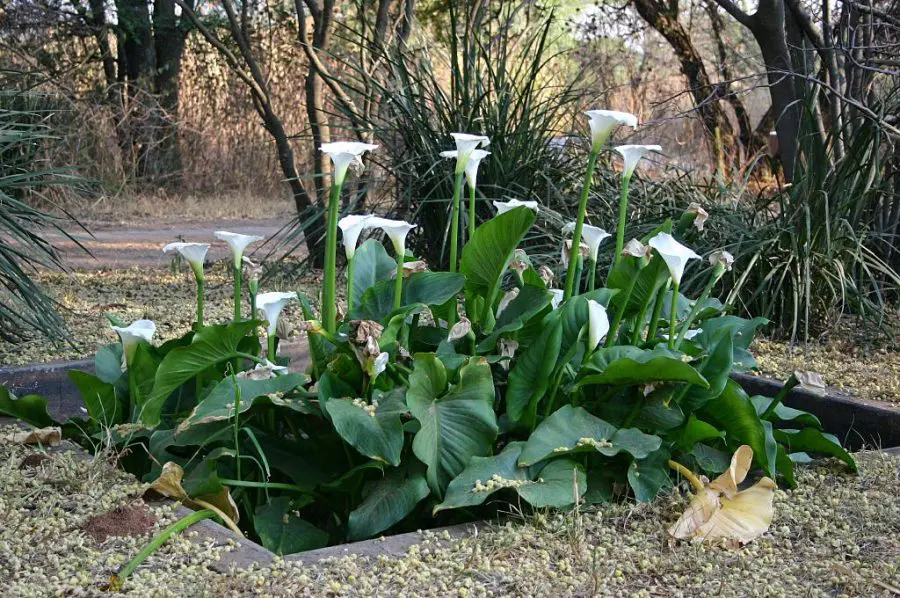
Calla Lilies are elegant and beautiful plants that are native to southern Africa.
They are popular for their striking trumpet-shaped flowers and their glossy green leaves.
Calla Lilies belong to the Araceae family, which also includes the peace lily and the philodendron.
They come in a variety of colors, including white, pink, yellow, and purple, and are easy to grow in pots indoors.
Zantedeschia is a genus of eight species of herbaceous, perennial, flowering plants in the family Araceae, native to southern Africa from South Africa north to Malawi. The genus has been introduced on all continents except Antarctica.
Common names include arum lily for Zantedeschia aethiopica and calla and calla lily for Zantedeschia elliottiana and Zantedeschia rehmannii, although members of the genus are neither true lilies of Liliaceae, true Arums, nor true Callas (related genera in Araceae).
The colourful flowers and leaves of both species and cultivars are greatly valued and commonly grown as ornamental plants. https://en.wikipedia.org/wiki/Zantedeschia
Calla Lily Benefits

• Beautify your home: Calla Lilies are stunning and elegant plants that can add a touch of sophistication to any indoor space.
• Low maintenance: Calla Lilies are relatively easy to care for and require minimal maintenance. They do not need frequent watering and can thrive in a variety of lighting conditions.
• Air purification: Like many other plants, Calla Lilies have air-purifying qualities that can help to remove harmful toxins from the air in your home.
• Versatile: Calla Lilies can be grown in pots or containers, making them perfect for indoor gardens, patios, or balconies.
• Health benefits: Some studies have shown that plants, including Calla Lilies, can help to reduce stress levels, improve mood, and boost overall well-being.
Calla Lily Plant Size
Calla Lilies are a beautiful addition to any indoor garden, and one of the many perks of these plants is their size.
When it comes to Calla Lilies, you have plenty of options to choose from.
From petite mini callas to towering giants, there’s a size for everyone. In this section, we’ll take a closer look at the different sizes of Calla Lilies, what to expect from each size, and how to care for them.
So whether you’re looking for a small plant to fit on your windowsill or a statement piece for your living room, we’ve got you covered.
Average size of calla lily plants:
Calla Lilies are known for their striking beauty and elegant form. These flowering plants typically grow to be 1-3 feet tall and 1-2 feet wide.
However, the size of a calla lily can vary depending on the variety of the plant, its growing conditions, and how well it’s taken care of.
Tips for managing plant size in smaller indoor spaces:
If you’re growing Calla Lilies indoors in a smaller space, you may be concerned about the plant outgrowing its container or taking up too much space.
Here are some tips to help manage the size of your calla lily:
Choose a smaller variety: Some calla lily varieties naturally grow smaller than others. When selecting a plant, look for a variety that is known to have a smaller mature size.
Control water and fertilizer: Calla Lilies can grow quickly with plenty of water and fertilizer.
However, in a smaller indoor space, it’s important to be mindful of how much water and fertilizer you’re giving your plant.
Over-watering or over-fertilizing can cause your plant to grow too quickly.
Prune regularly: Pruning is an effective way to manage the size of your calla lily.
Regularly removing dead or dying leaves can help keep the plant healthy and prevent it from getting too large.
Repot as needed: If your calla lily outgrows its container, it may be time to repot it into a larger container or divide it into multiple smaller containers.
This will give the plant more room to grow without taking up too much space in your indoor area.
Smaller varieties:
Calla Lily ‘Little Gem’ – grows up to 12 inches in height and produces lovely white flowers with yellow throats.
Calla Lily ‘Picasso’ – grows up to 14 inches tall and produces beautiful, bi-colored flowers in shades of purple and white.

Calla Lily ‘Vermeer’ – grows up to 16 inches tall and produces gorgeous pink flowers with white throats.
Standard varieties:
Calla Lily ‘Garnet Glow’ – grows up to 24 inches in height and produces large, deep red flowers.
Calla Lily ‘Black Star’ – grows up to 24 inches tall and produces stunning dark purple/black flowers.
Calla Lily ‘Flame’ – grows up to 36 inches tall and produces fiery orange-red flowers.
Calla Lily Growth Stages
If your calla lily starts to die back after flowering don’t throw it away!
The plant is going into a normal dormant period. It will start to grow and bloom again after its dormant cycle completes.
Calla Lilies in pots have a growth cycle of around four months, encompassing an initial six-week phase of foliage development, succeeded by a six-to-eight-week blooming period.
After blooming, the foliage will turn yellow and wither, and the plant will go into dormancy.
The Calla Lily’s rhizome will experience a new blooming cycle following this dormant stage.
The dormancy stage for Calla Lilies typically lasts for around two to three months.
After this period of rest, the plant will begin its growth cycle again, starting with foliage development and followed by blooming.
How To Plant Calla Lily Rhizomes:

Calla Lilies are beautiful and elegant flowers that can brighten up any garden or indoor space.
If you want to grow Calla Lilies in your own garden or indoors, planting the rhizomes is an essential first step.
Planting calla lily rhizomes is not difficult, but it is important to get the planting depth and location right to ensure optimal growth and flowering.
You may see them also incorrectly called calla lily bulbs.
In this blog section, we’ll guide you through the process of planting calla lily rhizomes, so you can enjoy the stunning blooms of these plants in your own home or garden.
Planting Calla Lily Rhizomes Outdoors
Calla Lilies are beautiful and elegant plants that can brighten up any garden or indoor space with their beautiful calla lily flowers.
Planting calla lily rhizomes is an easy and rewarding way to grow these stunning flowers.
In this section, we will guide you through the process of planting calla lily rhizomes, from choosing the right planting site to caring for your newly planted bulbs.
Choosing a planting site
When choosing a planting site for calla lily rhizomes, look for a location that receives bright, indirect sunlight for most of the day.
The soil should be well-draining, with a pH level of 6.0 to 6.5.
Avoid planting Calla Lilies in areas with standing water or where the soil is compacted.
Preparing the soil
Before planting your calla lily rhizomes, prepare the soil by removing any rocks or debris and adding compost or organic matter.
This will help improve the soil structure and provide your plants with the nutrients they need to thrive.
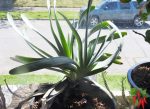
Planting the rhizomes
Dig holes that are approximately 2 to 3 inches deep and place one of the calla rhizomes in each hole with the pointed end facing up.
Cover the rhizome with soil and gently press down to remove any air pockets. Water the plant thoroughly.
Watering and fertilizing
Water your calla lily plants regularly, you want moist soil but not waterlogged or soggy soil.
Fertilize the plants every 2 to 3 weeks with a balanced fertilizer to promote healthy growth.
Mulching
Mulching can help retain moisture in the soil and prevent weed growth.
Add a layer of organic mulch, such as straw or shredded leaves, around the base of the plant.
Care and maintenance
Calla Lilies require minimal care and maintenance. Remove any dead or damaged leaves and flowers as needed.
The Calla is a tropical plant and freezing ground may kill it. I prefer planting in pots rather than in the ground.
So in colder climates, dig up the rhizomes before the danger of frost and store them in a cool, dry, dark place in a paper bag filled with some slightly moist coco coir or peat moss until the late spring planting season.
Or better still you can pot them up and move them indoors to enjoy all winter long.
By following these simple steps, you can successfully plant calla lily rhizomes and enjoy the beauty of these stunning flowers.
Calla Lilies Temperature and Humidity

Are you interested in learning how to take care of your Calla Lilies like a pro?
One crucial factor in ensuring their healthy growth is maintaining the right temperature and humidity levels.
In this section, we’ll delve into the ideal temperature and humidity requirements for Calla Lilies so that you can create the perfect environment for your potted plants.
So, let’s get started!
Ideal temperature range for Calla Lilies:
Calla Lilies are native to warm climates, which means they thrive in temperatures between 60-75°F (15-24°C).
This temperature range provides the perfect environment for the plant to grow and develop strong, healthy leaves and blooms.
However, it is important to note that temperatures below 50°F (10°C) can damage the plant and even cause it to die.
Tips for managing humidity levels for optimal growth:
Calla Lilies prefer a relatively high humidity level of around 75%.
This can be achieved by placing a tray of water near the plant, misting the leaves with water daily, or using a humidifier.
It is important to monitor the humidity levels closely, as excessively high humidity can lead to issues such as fungal growth or rot.
Additionally, it is important to ensure proper air circulation to prevent stagnant air and promote healthy growth.
Calla Lily Light Requirements

Proper lighting is crucial for any indoor plant’s growth, and Calla Lilies are no exception.
As a plant parent, it’s important to understand how much light your Calla Lilies need and how to provide it for them.
In this section, we’ll discuss the light requirements for Calla Lilies and how to ensure they get the right amount of light for optimal growth.
Why is light important for Calla Lilies?
Calla Lilies require adequate sunlight to thrive indoors.
Without enough light, they may not produce blooms, grow weak stems, or have yellowing leaves.
What are the recommended light conditions for indoor Calla Lilies?
These plants prefer bright, indirect light. It is best to place them near a sunny window that receives morning or late afternoon sun and provides some partial shade during the hottest part of the day.
However, be sure to protect them from direct full sun during the hottest parts of the day to prevent scorching.
How to manage light exposure for Calla Lilies?
Rotate the pot occasionally to ensure that all sides of the plant receive equal light exposure.
If you notice that your calla lily is not getting enough light, consider supplementing it with artificial grow lights.
On the other hand, if the plant is receiving too much light, move it to a shadier spot or filter the light with a sheer curtain.
Calla Lily Soil Mix

One of the most important factors in growing healthy Calla Lilies is the soil mix.
While outdoor Calla Lilies prefer well-draining soil, potted Calla Lilies have slightly different needs.
A good soil mix for indoor Calla Lilies should provide adequate drainage, moisture retention, and nutrients.
In this section, we’ll discuss an ideal soil mix for Calla Lilies that includes coco coir and perlite, two ingredients that can help create a healthy growing environment for your plants.
Characteristics of well-drained soil for Calla Lilies:
Calla Lilies thrive in well-draining soil that allows excess water to flow out easily, preventing waterlogging or root rot.
A light and airy soil mix is ideal for Calla Lilies, as it allows for proper air circulation and drainage.
Recommended soil mix for indoor Calla Lilies – coco coir and perlite:
Coco coir and perlite make for an excellent soil mix for indoor Calla Lilies.
Coco coir is made from coconut husks and is a natural, sustainable, and eco-friendly soil amendment that is also pH-neutral.
It is a great soil component because it helps to retain moisture and improve drainage.
Perlite is a lightweight, porous volcanic rock that helps to create air pockets in the soil mix, promoting better oxygen flow to the roots.
To make the soil mix, use two parts of coco coir to one part of perlite.
Do not use regular potting mix, as it is too dense and can retain too much moisture, leading to root rot.
Calla Lily Pot Size

When it comes to growing Calla Lilies indoors, pot size is an important factor to consider.
Choosing the right size pot can impact the overall health and growth of your plant.
In this section, we’ll take a closer look at how pot size affects calla lily care and discuss some tips for choosing the right size pot for your indoor calla lily.
Choosing the right pot size is crucial for the health and growth of indoor Calla Lilies
A pot that is too small can restrict root growth, while a pot that is too large can cause overwatering and stagnant soil.
It’s recommended to choose a pot that is only slightly larger than the plant’s current container, with enough room for roots to grow and soil to retain moisture.
Repotting is an essential aspect of calla lily care to maintain healthy growth
It’s best to repot Calla Lilies once every two years or when the plant has outgrown its container.
When repotting, gently remove the plant from its container and inspect the roots for any signs of damage or disease.
It’s essential to use fresh soil mix and ensure the plant is planted at the same depth as before.
Calla Lily Watering

Keeping your indoor Calla Lilies healthy and thriving requires a proper watering routine.
Overwatering or underwatering can lead to various issues such as root rot, yellowing leaves, and stunted growth.
In this section, we’ll cover everything you need to know about watering your potted Calla Lilies, including how often to water them, how much water to use, and signs to look for to ensure they’re getting the right amount.
So let’s dive in!
Importance of proper watering for Calla Lilies:
Calla Lilies require proper watering to thrive indoors. Overwatering or underwatering can lead to various issues such as root rot, yellow leaves, or wilting.
Recommended watering frequency for indoor Calla Lilies:
Water your calla lily plant when the top 1 inch of the soil is dry to the touch.
This usually means watering once a week, but the frequency can vary depending on factors such as temperature, humidity, and pot size.
Tips for avoiding overwatering and underwatering:
It’s important to strike the right balance when it comes to watering Calla Lilies.
To avoid overwatering, make sure that the pot has proper drainage, and don’t let the plant sit in standing water.
To avoid underwatering, make sure to water thoroughly until water drains out of the bottom of the pot.
Reasons to avoid tap water:
Calla Lilies are sensitive to the chemicals in tap water, such as chlorine and fluoride.
These chemicals can accumulate in the soil over time and harm the plant.
Use distilled or filtered water for your calla lily to avoid any potential issues.
Fertilizing Calla Lilies

Giving your Calla Lilies the right nutrients is essential to keeping them healthy and promoting optimal growth.
Fertilizing your indoor Calla Lilies can help them thrive and produce more blooms.
In this section, we’ll cover the basics of fertilizing Calla Lilies, including when to fertilize, what type of fertilizer to use, and how often to apply it.
So let’s dig in and learn how to give your Calla Lilies the nutrients they need to flourish!
Fertilizing your Calla Lilies can help them grow stronger and produce more vibrant blooms.
Providing the right nutrients can help these beautiful plants thrive and stay healthy.
When it comes to fertilizing your Calla Lilies, it’s important to use a balanced fertilizer with a ratio of 10-10-10 or 20-20-20.
You can use either a liquid or a granular fertilizer, following the instructions on the package for application frequency.
It’s best to fertilize once every two weeks during the growing season and stop fertilizing in the fall and winter when the plant goes dormant.
You can also add a slow-release fertilizer to the soil mix when repotting your Calla Lilies.
Calla Lily Repotting

If you’ve been growing Calla Lilies indoors, it’s important to keep an eye on their growth and repot them as needed.
As these plants grow, they can become root-bound in their containers, which can cause a range of issues, including stunted growth and a lack of blooms.
Repotting your Calla Lilies can help ensure they have enough space to grow and thrive, and it’s also a great opportunity to refresh the soil and check for any signs of pests or disease.
In this section, we’ll cover everything you need to know about repotting Calla Lilies, from when to do it to how to do it properly.
Signs that Calla Lilies need to be repotted
As Calla Lilies grow, they may outgrow their pots and begin to show signs that they need to be repotted.
If you notice the plant’s roots growing through the drainage holes or if the plant appears to be top-heavy and unstable, it may be time to repot.
Other signs include yellowing or wilting leaves, slow growth, or soil that dries out too quickly after watering.
Step-by-step guide to repotting Calla Lilies
Repotting Calla Lilies is a straightforward process, but it is important to do it correctly to avoid damaging the plant.
How to repot Calla Lilies:
• Choose a slightly larger pot with drainage holes.
• Fill the new pot with the recommended soil mix (coco coir and perlite).
• Water the plant thoroughly a few hours before repotting.
• Gently remove the plant from the old pot, loosening any tangled roots.
• Place the plant in the new pot and add more soil mix around the sides.
• Water the plant lightly and add more soil mix if needed.
• Place the pot in a bright, warm location and avoid direct sunlight for a few days to allow the plant to recover.
Calla Lilies Maintenance

Maintaining your indoor Calla Lilies is key to their continued health and beauty.
From proper watering and fertilizing to monitoring light and humidity levels, there are a few key things you can do to keep your plants thriving.
In this section, we’ll cover some important maintenance tips for your Calla Lilies, so you can enjoy them for years to come.
To keep your Calla Lilies healthy and thriving, regular care routines are essential.
This includes providing them with the right light, soil, and water conditions, as well as regular fertilization and pruning.
By keeping up with these tasks, your Calla Lilies will continue to produce beautiful blooms and foliage for years to come.
As with any plant, Calla Lilies can experience issues from time to time.
Some common signs of problems include yellowing leaves, wilting, or stunted growth.
These issues can be caused by a variety of factors, such as overwatering, pests, or disease.
By paying attention to your plants and addressing any issues promptly, you can help ensure their long-term health and success.
Calla Lilies Pruning

Keeping your Calla Lilies looking their best requires a bit of regular maintenance, including pruning.
By removing dead or dying leaves and spent flowers, you can encourage healthy growth and ensure your plants stay vibrant and beautiful.
But where to start? In this section, we’ll cover everything you need to know about pruning Calla Lilies, from when to do it to how to do it properly.
Let’s get started!
Importance of pruning Calla Lilies:
Pruning is an essential part of calla lily care that helps promote healthy growth and maintain the plant’s shape.
By removing dead or damaged leaves and flowers, you can prevent disease and improve the overall appearance of your Calla Lilies.
Tips for pruning Calla Lilies to encourage growth:
To encourage growth and keep your Calla Lilies looking their best, it’s important to prune them regularly. Here are some tips to help you get started:
Start by removing any dead or damaged leaves and flowers. Use sharp, clean scissors or pruning shears to make clean cuts.
Prune back any stems that have become too long or are blocking light from reaching other parts of the plant.
If you want your Calla Lilies to produce more flowers, consider cutting back the stems after they have finished blooming.
This will encourage new growth and more blooms in the future.
Be sure to dispose of any plant material that you remove, as it can harbor disease or pests if left in the pot.
With a little bit of pruning, your Calla Lilies can thrive and produce beautiful blooms year after year.
Calla Lilies Propagation

If you’re a plant lover, there’s nothing quite as satisfying as propagating your own plants.
And the good news is, Calla Lilies are relatively easy to propagate!
Whether you want to create new plants for your own collection or give them as gifts to friends and family, propagation is a fun and rewarding way to expand your indoor garden.
In this section, we’ll cover the basics of calla lily propagation and give you some tips on how to get started.
Methods for propagating Calla Lilies:
Propagation is the process of growing new plants from existing ones, and Calla Lilies can be propagated through several methods.
The most common methods include division, and seed propagation.
Division involves separating the rhizomes of the plant and planting them separately to create new individual plants.
Seed propagation involves planting seeds from the plant, though this method is less common and can be more challenging.
Division:
This method involves separating the rhizomes of an established calla lily plant and planting them in new pots or areas of the garden.
Here’s how to do it:
• Wait until the plant has finished blooming and the foliage has died back.
• Carefully dig up the entire plant and gently separate the rhizomes, making sure that each section has at least one healthy shoot and a portion of the root system.
• Replant each rhizome in its own pot or in a new location in the garden, making sure that the top of the rhizome is no more than 2 inches below the soil surface.
• Water the newly planted rhizomes thoroughly and keep the soil moist but not waterlogged.
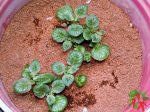
Seed propagation:
This method involves planting calla lily seeds and allowing them to grow into mature plants.
Here’s how to do it:
• Collect mature seed pods from a healthy calla lily plant and allow them to dry out completely.
• Gently break open the dried seed pods and remove the seeds.
• Plant the seeds in well-draining soil, covering them with a thin layer of soil.
• Keep the soil moist and place the pot in a warm, bright location.
• Once the seedlings have grown several leaves and are large enough to handle, transplant them into their own pots or in the garden. Seeds Flowers Easy to Grow Planting for Outdoor Indoor Home Bonsai")
If your calla lily is too young to make seeds you can buy them online at Amazon.
Tips for successful calla lily propagation:
Propagation can be a fun and rewarding way to expand your collection of Calla Lilies.
Here are some tips to help you successfully propagate your plants:
• Choose a healthy, mature plant for propagation
• Use a well-draining soil mix to avoid overwatering
• Keep the soil moist but not waterlogged
• Provide bright, indirect light for the new plant to grow
• Monitor the plant regularly for signs of disease or pests
• Be patient – propagation can take time, but with the right care, you can successfully grow new calla lily plants.
Calla Lily Pests and Diseases

When it comes to calla lily care, one of the biggest challenges is dealing with pests and diseases.
While these issues can be frustrating, it’s important to address them promptly to keep your Calla Lilies healthy and thriving.
In this section, we’ll cover some common pests and diseases that affect Calla Lilies, as well as strategies for prevention and treatment.
Common pests and diseases that affect Calla Lilies:
Like all plants, Calla Lilies are susceptible to pests and diseases that can harm their growth and appearance.
Some of the most common issues that Calla Lilies face include spider mites, aphids, and root rot.
Spider Mites:
Spider mites are tiny, sap-sucking pests that can cause significant damage to Calla Lilies.
They typically thrive in dry, warm conditions and can quickly multiply, causing yellowing leaves, stippling, and webbing on the plant’s surface.
To prevent spider mites, make sure to keep the humidity levels up around your Calla Lilies, and give them a good rinse with water periodically to wash off any pests.
If an infestation occurs, try using a neem oil or insecticidal soap to control the pests.
Aphids:
Aphids are another common pest that can affect Calla Lilies.
These small, pear-shaped insects can appear in a range of colors, from green to black, and can cause yellowing, wilting, and distorted leaves.
They reproduce quickly, so it’s essential to control them as soon as possible.
One way to prevent aphids is to keep the humidity levels high around your Calla Lilies and to rinse them with water regularly.
Insecticidal soaps and neem oil can also be effective in controlling aphids.
Root Rot:
Root rot is a fungal disease that can occur when Calla Lilies are overwatered or planted in soil that doesn’t drain well.
The disease causes the roots to decay and turn brown, leading to wilting, yellowing leaves, and stunted growth.
To prevent root rot, make sure to use a well-draining soil mix and water your Calla Lilies only when the top inch of soil feels dry to the touch.
If you suspect your plant has root rot, try reducing watering and repotting it into fresh soil, removing any diseased roots.
Fungicides can also be effective in treating root rot, but prevention is always the best course of action.
Preventative measures and treatments for calla lily pests and diseases:
Fortunately, there are steps you can take to prevent and treat common calla lily pests and diseases.
Here are a few tips to help keep your plants healthy:
• Practice good hygiene by regularly removing dead or diseased plant material.
• Monitor your plants regularly for signs of pests or disease.
• Use insecticidal soap or neem oil to control pests like spider mites and aphids.
• Avoid overwatering, as this can lead to root rot. If you suspect your plant has root rot, remove it from the soil and trim away any affected roots before replanting in fresh soil.
• Consider using a fungicide to treat fungal diseases like leaf spot.
By taking these steps, you can help prevent and treat common calla lily pests and diseases, ensuring your plants stay healthy and beautiful.
Toxicity Of Calla Lilies Precautions To Prevent Poisoning:

Toxicity of Calla Lilies:
While Calla Lilies are a beautiful addition to any indoor garden, it’s important to note that they are toxic to both pets and humans.
The plant contains calcium oxalate crystals, which can cause irritation and swelling of the mouth, tongue, and throat if ingested.
In severe cases, this can lead to difficulty breathing, vomiting, and even death.
It’s important to keep Calla Lilies out of reach of children and pets and to take precautions to prevent accidental ingestion.
Precautions to prevent poisoning:
To prevent accidental poisoning from Calla Lilies, here are some precautions you can take:
Keep Calla Lilies out of reach of children and pets, and consider using a hanging basket or placing the plant on a high shelf.
Wear gloves when handling Calla Lilies, and wash your hands thoroughly afterward.
If you have pets, consider using bitter apple spray or other deterrents to keep them away from the plants.
Educate children and other family members about the potential dangers of Calla Lilies, and make sure they know not to touch or eat the plant.
By following these precautions, you can enjoy the beauty of Calla Lilies without putting yourself or your loved ones at risk of poisoning.
FAQ About Calla Lily Care Indoors Potted

If you’re new to growing Calla Lilies, you may have a lot of questions about their care and maintenance.
In this FAQ section, we’ll address some of the most commonly asked questions about potted Calla Lilies, including their lifespan, ideal growing conditions, and how to keep them healthy and thriving indoors.
Whether you’re a seasoned plant parent or just starting out, we hope these answers will help you enjoy beautiful, healthy Calla Lilies in your home or office.
Q: How long do potted Calla Lilies last?
A: With proper care, potted Calla Lilies can last for many years as they are perennials.
They typically bloom once a year and the flowers can last for several weeks.
After blooming they will go dormant for 2-3 months before repeating their growth cycle again.
Q: Do Calla Lilies do well indoors?
A: Yes, Calla Lilies can do well indoors as long as they are given the proper care, including the right amount of light, water, and humidity.
Q: Where should I put my indoor calla lily?
A: Calla Lilies should be placed in a location that receives bright, indirect light.
They should also be kept in a room with a temperature between 60-75°F.
Q: Why is my indoor calla lily dying?
A: Indoor Calla Lilies can die for a number of reasons, including overwatering, underwatering, insufficient light, or pest infestation. Check the plant’s care conditions and adjust as needed.
Q: What to do with potted Calla Lilies after they bloom?
A: After the calla lily blooms fade, the stem can be cut back to the base of the plant.
The foliage should be allowed to continue growing, and the plant should be cared for as usual.
Q: Can you leave Calla Lilies in pots over winter?
A: Yes, Calla Lilies can be left in pots over winter, but they should be placed in a cool, dark location and watered sparingly until spring.
Q: How often do you water indoor Calla Lilies?
A: Indoor Calla Lilies should be watered when the top inch of soil feels dry to the touch.
This can range from once a week to every two weeks, depending on the humidity and temperature of the room.
Q: How do you keep lilies alive indoors?
A: To keep Calla Lilies alive indoors, they should be given bright, indirect light, kept in a room with a temperature between 60-75°F, watered when the soil feels dry, and fertilized every 2-3 months.
Q: Do Calla Lilies bloom all year inside?
A: No, Calla Lilies typically only bloom once a year and the flowers can last for several weeks.
Q: What to do with lilies in pots over winter?
A: Lilies in pots can be left in a cool, dark location and watered sparingly until spring.
Alternatively, they can be planted in the ground in suitable mild winter locations for winter dormancy.
Q: Do indoor Calla Lilies go dormant?
A: Yes, indoor Calla Lilies can go dormant during the winter months, and their growth may slow down or stop altogether.
Q: What temperature is too cold for Calla Lilies?
A: Calla Lilies are sensitive to cold temperatures and should be kept in a room with a temperature between 60-75°F. Temperatures below 50°F can cause damage to the plant.
Q: How long do calla lily blooms last indoors?
A: Calla lily blooms can last for several weeks indoors, depending on the care conditions.
Q: How do you winterize Calla Lilies?
A: To winterize Calla Lilies, they should be placed in a cool, dark location and watered sparingly until spring.
Alternatively, they can be planted in the ground in a suitable location for winter dormancy.
Q: Do Calla Lilies grow better in pots or in the ground?
A: Calla Lilies can grow well in both pots and in the ground, as long as they are given the proper care and growing conditions. Potted Calla Lilies may require more frequent watering
Calla Lily Care Indoors Potted Final Thoughts

Congratulations, you have made it to the end of our guide to calla lily care indoors potted!
We hope that you found this guide helpful in learning how to care for your Calla Lilies and keep them thriving.
Remember that Calla Lilies are not only beautiful but also easy to care for with the right knowledge and techniques.
By following the tips and tricks outlined in this guide, you can enjoy your Calla Lilies for years to come.
Don’t forget to share your success with us and happy gardening!
Recap of calla lily care tips for indoor potted plants:
To summarize, Calla Lilies are beautiful and rewarding plants to grow indoors, but they do require some care and attention. Here are the key tips to keep in mind:
• Provide plenty of bright, indirect light
• Keep the soil moist but not waterlogged, and avoid using tap water
• Use a well-draining soil mix that includes coco coir and perlite
• Choose a pot that’s the right size for your plant
• Repot as needed into a slightly larger pot
• Fertilize regularly during the growing season
• Prune regularly to maintain plant health and promote growth
• Watch out for pests and diseases, and take action promptly if you notice any problems.
Final thoughts on growing Calla Lilies indoors in pots:
Growing Calla Lilies indoors can be a fun and rewarding hobby, and with the right care, you can enjoy beautiful blooms year-round.
Whether you’re a seasoned plant parent or just starting out, we hope that these tips have been helpful in guiding you toward success with your indoor Calla Lilies.
Remember to be patient, observant, and don’t be afraid to ask for help if you need it.
With a little bit of love and attention, your Calla Lilies can thrive and bring joy to your home.
Read more: 20 Benefits Of Keeping Indoor Plants For Improved Lifestyle