This post contains affiliate links. If you buy something from one of our links we may earn a commission. Thanks
Get the best tips for growing lush, golden Creeping Jenny in pots. Our guide makes it easy, ensuring a vibrant touch to your garden or home decor.
Growing Golden Creeping Jenny in pots requires well-draining soil and partial to full sun exposure. This trailing plant thrives in moist conditions, so keep the soil consistently damp but not waterlogged.
It’s an excellent choice for hanging baskets or as a ground cover in container arrangements. Fertilize lightly during the growing season for best results.
Are you ready to add a touch of gold to your garden or home? Creeping Jenny in pots is your answer!
This versatile, low-maintenance plant is perfect for adding vibrant color and charm to your space.
With its lush, trailing foliage and adorable yellow flowers, it’s time to dive into our simple guide and discover just how easy it is to grow and care for Creeping Jenny, transforming your pots into a golden oasis.
Creeping Jenny In Pots In A Nutshell

Welcome to the wonderful world of Creeping Jenny in pots!
This vibrant, easy-to-care-for plant offers a pop of gold, perfect for brightening up any corner of your home or garden.
In this guide, we’ll cover everything you need to know to keep your plant healthy and happy from picking the right pot and soil, and understanding its watering needs, to tips on propagation and common issues to watch out for.
Whether you’re a beginner or a seasoned gardener, there’s always something new to learn about this charming creeper.
Let’s get started!
An Overview of Creeping Jenny
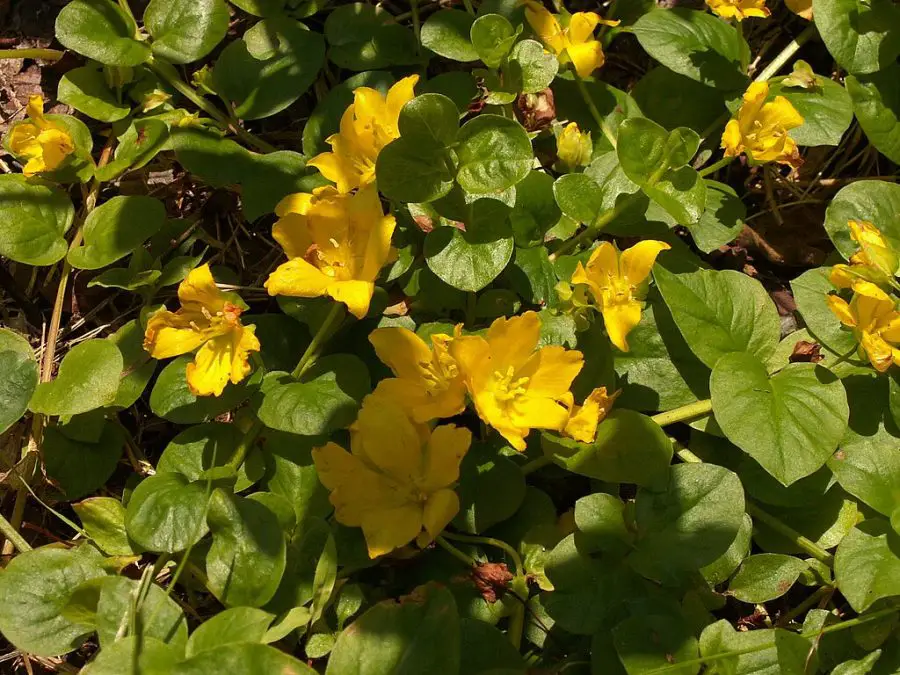
Creeping Jenny, with its golden yellow leaves, is a popular plant for container gardens and ground cover.
This herbaceous perennial, also known by its common name, twopenny grass, is native to North America, Western Asia, and parts of Europe.
It thrives in damp soil and can tolerate light foot traffic, making it a versatile choice for various garden settings.
Bloom and Growth Patterns
In early spring, this low-growing plant produces small yellow flowers, which add a burst of color to your garden.
Its evergreen foliage creates a dense carpet, offering a beautiful contrast against taller plants.
Ideal Conditions for Growth
During the growing season, Creeping Jenny enjoys morning sun and afternoon shade. In hotter climates, the plant may even prefer full shade.
Though it’s considered an invasive plant in some natural areas, with proper maintenance and care, Creeping Jenny can be an excellent addition to your garden.
It’s important to monitor its invasive growth, especially if you have it planted near water sources or other sensitive areas.
Propagation and Planting Tips
One of the easiest ways to propagate new plants is by dividing a portion of an established patch.
This can be done during the early summer or the following spring.
When planting, ensure the planting depth matches the original plant’s depth, and provide a consistent water source to encourage healthy root systems.
Creeping Jenny in Different Settings
Creeping Jenny can also thrive in window boxes and rock gardens, where it can spill over the edges, creating a cascading effect.
This fast-growing plant requires little care, making it a good choice for busy plant owners.
Just be mindful of its invasive nature, and trim it back as needed to prevent it from overtaking other plants in your garden.
If you decide to grow Creeping Jenny in pots you can tame its invasive nature drastically.
Varieties and Uses of Creeping Jenny
This evergreen perennial is part of the Primulaceae family and can be found in various garden centers, available in different varieties.
The golden variety, with its vibrant chartreuse foliage, is especially popular.
Creeping Jenny’s leaf colors can change based on the light it receives, so experimenting with light shade or full sun positions can yield different results.
As a medicinal herb, Creeping Jenny has been used historically for treating various ailments.
The Charm of Creeping Jenny
Its beautiful green leaves and yellow flowers make it an attractive addition to any garden.
And with its ability to grow in poor soil and various light conditions, it’s a versatile plant that can add charm to your outdoor space, whether as a ground cover, spiller plant, or accent in your container gardens.
In summary, Creeping Jenny is a beautiful, hardy perennial that adds a touch of color and texture to any garden.
With some attention to its invasive tendencies and proper care, it can be an attractive and low-maintenance addition to your outdoor spaces.
So why not give this charming, fast-growing plant a try? Read on for more details on how to grow Creeping Jenny in pots.
Embracing the Versatility of Creeping Jenny
Here’s a plant that’s more than just a pretty face! Creeping Jenny, with its luminous, coin-shaped leaves, is a versatile gem.
It’s a favorite among gardeners not only for its vibrant color but also for its adaptability.
Creeping Jenny can trail beautifully from hanging baskets, provide a lush carpet in garden beds, or add a pop of color to water features.
Its fast-growing nature allows it to quickly fill any space with a vibrant green or gold, depending on the variety.
Getting Acquainted with Lysimachia nummularia
Lysimachia nummularia, also known as Creeping Jenny, is a plant of many wonders.
This perennial ground cover is native to Europe but has found its way into hearts and homes across the globe.
It’s known for its circular, golden leaves that seem to glow in the right light, creating an ethereal effect.
Despite its delicate appearance, it’s a hardy plant that thrives in a variety of conditions.
It’s also a popular choice for its lovely trailing habit that can soften the edges of any pot or container.
Appreciating the Charm of Creeping Jenny
The charm of Creeping Jenny lies in its simplicity. Its trailing vines and radiant leaves create an enchanting cascade of color.
It’s the kind of plant that can make a statement on its own or complement other plants in a mixed arrangement.
In addition, it brings an element of movement to gardens and patios, as its delicate tendrils sway gently in the breeze. Despite its exotic look, it’s surprisingly easy to care for, making it a great choice for both beginners and seasoned gardeners.
Creeping Jenny indoors
 - Healthy Trailing Plant - Beautiful Spring Accent - 6\" Tall by 4\" Wide in 1 Pint Pot") You might be wondering, can the outdoor charm of Creeping Jenny be brought indoors? Absolutely!
You might be wondering, can the outdoor charm of Creeping Jenny be brought indoors? Absolutely!
While this plant is often seen gracing outdoor landscapes, it can adapt remarkably well to indoor environments too.
This section is all about helping you successfully cultivate Creeping Jenny indoors.
We’ll walk you through the nuances of indoor care, from finding the perfect spot with the right amount of light, to watering routines, and even how to deal with potential pest issues.
So, are you ready to add a bit of enchanting greenery to your indoor space with Creeping Jenny? Let’s dive in!
The Hanging Charm: Creeping Jenny in Hanging Baskets
For those of you who love the cascading effect of hanging plants, you’re in for a treat.
Creeping Jenny, with its long, trailing vines, is a fantastic choice for hanging baskets.
The delicate, round leaves will spill over the sides, creating a lush, green waterfall that adds vertical interest and a touch of whimsy to any space.
But what does it take to ensure your hanging Creeping Jenny thrives?
We’ll delve into the specifics of choosing the right basket, how to hang it for optimal growth, and the unique care considerations for this arrangement.
By the end, you’ll have all the knowledge needed to create your own hanging oasis with Creeping Jenny.
Creating Hanging Basket Art with Creeping Jenny
Creeping Jenny is an absolute gem when it comes to hanging basket arrangements.
Its trailing vines and vibrant, round leaves spill over the edges in a captivating cascade of green.
The plant’s persistent nature and ability to adapt to a variety of conditions make it an ideal choice for hanging baskets, whether indoors or out.
The key to a beautiful Creeping Jenny hanging basket is regular watering and good light exposure to maintain that charming golden hue.
The Speedy Spread: Understanding Creeping Jenny’s Fast-Growing Nature
Ever wondered how fast Creeping Jenny grows? Well, buckle up because this plant is a real sprinter in the plant world.
Its growth rate can be quite impressive, especially in ideal conditions of well-drained soil and bright, but indirect sunlight.
Creeping Jenny can cover considerable ground in a relatively short amount of time, adding a quick green touch to your garden or indoor space.
However, this quick growth rate means you might find yourself pruning often to keep it under control.
So, if you’re looking for a plant that provides instant gratification, Creeping Jenny won’t disappoint!
Green and Safe: Debunking Myths About Creeping Jenny’s Toxicity
With its rampant growth and lush foliage, you might wonder if there’s a catch with Creeping Jenny. Is it toxic, perhaps?
Well, you can breathe a sigh of relief. Despite some misconceptions, Creeping Jenny is generally regarded as non-toxic.
According to the ASPCA, it’s safe around dogs, cats, and horses.
However, it’s always a good idea to keep plants out of pets’ reach to avoid any potential digestive upset.
So, if you’re a pet owner, you can include Creeping Jenny in your indoor plant collection with confidence.
How to create a Creeping Jenny hanging basket
Here’s a step-by-step guide to creating a beautiful Creeping Jenny hanging basket:
• Gather Your Supplies
You’ll need a hanging basket, potting soil, a trowel, and of course, your Creeping Jenny plant. You might also want to have some slow-release fertilizer on hand to give your plant an extra boost.
• Prep Your Basket
Line your basket with a layer of potting soil. The amount will depend on the size of your basket, but a couple of inches is a good starting point.
• Plant Your Creeping Jenny
Using your trowel, dig a small hole in the center of the soil. Place your Creeping Jenny plant in the hole, ensuring its level with the soil surface.
Fill in around the plant with more potting soil, pressing lightly to secure the plant in place.
Remember, Creeping Jenny, is a trailing plant, so it’s best to place it near the edge of the basket where it can cascade down.
• Add Some Fertilizer
Sprinkle a little slow-release fertilizer around your plant, following the package instructions for the recommended amount.
• Water Thoroughly
After planting and fertilizing, give your Creeping Jenny a good drink of water. Be sure to wet the soil thoroughly, but avoid waterlogging it.
• Hang and Care for Your Basket
Finally, hang your basket in a spot with bright, indirect light. Remember, Creeping Jenny likes its soil to be kept moist, but not soggy.
Water regularly, particularly in hot, dry conditions, and less so in cooler months.
• Monitor Growth and Prune As Needed
Creeping Jenny grows quickly and can become invasive if not managed. Regular pruning will help control its growth and maintain a more compact, attractive shape.
Remember, every plant is unique and may require slight adjustments to its care.
However, these steps should set you up for success with your Creeping Jenny hanging basket. Happy gardening!
Creeping Jenny plant size

Are you curious about the size of Creeping Jenny plants? In this section, we’ll be diving into the fascinating world of Lysimachia nummularia, better known as Creeping Jenny, and exploring its growth patterns.
From its modest height to its impressive spread, we’ll discuss what to expect when cultivating this charming ground cover.
Whether you’re an experienced gardener or just beginning your green journey, we hope you’ll gain valuable insights about this plant’s size and how it might fit into your gardening dreams.
So, let’s unravel the mystery of the Creeping Jenny plant size together!
Unfolding the Size of Creeping Jenny
Creeping Jenny is a low-growing plant that typically reaches a height of only 2 to 4 inches.
However, don’t let its height fool you! This plant is known for its expansive spread.
In ideal conditions, Creeping Jenny can extend to a width of 18 to 24 inches, creating a luxuriant mat of bright green or golden foliage.
Factors Affecting Creeping Jenny’s Growth
The size of your Creeping Jenny plant can vary based on several factors, including sunlight exposure, soil type, and watering practices.
Full sun encourages denser growth, while partial shade might result in a slightly leggier plant.
Similarly, rich, well-draining soil and consistent watering can contribute to the plant’s rapid spread.
Keeping Creeping Jenny in Check
Despite its beauty, Creeping Jenny can become invasive if left unchecked. Therefore, it’s important to manage its growth.
Regular pruning not only helps maintain the desired size but also keeps the plant healthy by encouraging new growth.
If you’re growing Creeping Jenny in a pot, you can control its size by choosing an appropriately sized container and regularly trimming back its spread.
Creeping Jenny light requirements

Welcome to the world of Creeping Jenny, a sun-loving plant that adds a touch of golden charm to your indoor or outdoor garden!
It’s not just the cute name that makes it so appealing, but also its versatile light requirements.
In this section, we’re going to shine a light (pun intended!) on everything you need to know about the lighting needs of your Creeping Jenny.
From understanding its love for sunbaths to figuring out the perfect balance of light, we’ll cover it all.
So, buckle up and get ready to bring more light into your Creeping Jenny’s life!
Light Conditions for a Healthy Creeping Jenny
Navigating the Light Spectrum: Ensuring Creeping Jenny’s Vitality
Creeping Jenny is quite an adaptable plant and can endure a range of light conditions, from full sun to partial shade.
But if you want to see your Jenny shine the brightest, make sure you provide her with a healthy dose of sunlight.
The sun-kissed leaves display a rich, golden hue that’s truly a sight to behold. If indoors, place her near a south-facing window, if possible, for optimal light exposure.
Illuminating Effects: How Light Influences Creeping Jenny’s Vibrancy and Development
Light doesn’t just determine how well your Creeping Jenny grows; it also influences the color of its foliage.
When grown in full sun, the leaves of this charming plant take on a vibrant golden color that can brighten up any space.
On the other hand, if grown in shade, the leaves exhibit a more subdued, greenish tone.
The plant’s growth rate can also speed up in brighter light conditions.
So, if you’re after that golden glow and rapid growth, give your Creeping Jenny plenty of light.
However, remember to protect it from the scorching midday sun, which can be a bit too intense for our golden beauty.
Watering Creeping Jenny

Watering our plants is often a delicate balancing act, isn’t it? Too little, and they shrivel; too much, and they’re at risk of root rot.
Now, when it comes to our friend, Creeping Jenny, she likes it a bit on the wetter side.
We’ll be diving into all the tips and tricks to keep your Creeping Jenny hydrated and happy without overdoing it.
From understanding its water requirements to learning how to recognize signs of underwatering and overwatering, we’ve got you covered.
Buckle up and let’s embark on this watering adventure together!
Understanding Creeping Jenny’s Water Needs: The Balancing Act
Creeping Jenny is a moisture-loving plant that thrives best when its soil is consistently moist but not waterlogged.
This means that you’ll need to give it regular sips of water, but also ensure that it has good drainage to avoid waterlogging and subsequent root rot.
So, how do you strike this balance? Let’s dive in and explore!
Recognizing Signs of Underwatering and Overwatering
Remember how we mentioned that watering plants is a delicate balancing act?
Well, part of that act includes understanding when your plant is getting too much or too little water.
With Creeping Jenny, signs of underwatering can include wilting or drying leaves, while overwatering can lead to yellowing leaves and root rot.
In this section, we’ll help you decipher these signs so that you can adjust your watering routine accordingly.
The Role of Humidity in Creeping Jenny’s Water Requirements
We know that Creeping Jenny loves moisture, but did you know that it also enjoys a bit of humidity? It’s true!
While it’s not as crucial as water and light, providing a humid environment can help your Creeping Jenny thrive.
In this section, we’ll discuss the ways to increase humidity for your plant, especially if you live in a dry climate.
So, are you ready to become the best water provider for your Creeping Jenny? Let’s get started!
Developing A Watering Schedule
Firstly, understanding that a watering schedule is more of a guideline than a strict timetable is crucial.
That’s because your Creeping Jenny’s watering needs can change based on various factors like the weather, indoor climate, the size of your plant, and the type of pot it’s in.
In general, Creeping Jenny enjoys moist soil, but not waterlogged conditions.
herefore, it’s recommended to water the plant thoroughly until water drains out of the bottom of the pot, then wait until the top inch of soil feels dry to the touch before watering again.
During the warmer months, your Creeping Jenny might need watering as frequently as every other day, especially if it’s in a sunny spot.
However, in the cooler months, the plant’s water needs will reduce significantly, perhaps to once every 1-2 weeks.
The key here is observation and adjustment. Check your plant regularly.
If the leaves look wilted or the soil feels dry to the touch, it’s time to water. On the other hand, if the plant appears healthy and the soil is still moist, you can wait another day or two.
A good tip is to invest in a soil moisture meter if you’re uncertain. This handy tool can give you a more accurate read on whether it’s time to water or wait.
Remember, overwatering can lead to root rot and other diseases, so it’s better to err on the side of caution. Your Creeping Jenny will thank you for your attentiveness with lush, vibrant growth!
Creeping Jenny soil (coco coir and perlite)

Ready to talk dirt? As you might already know, the soil is a make-or-break aspect of any plant’s life, and Creeping Jenny is no exception.
This vibrant plant enjoys a well-draining soil blend to flourish. In this section, we’ll delve into why a mix of coco coir and perlite could be the winning combination for your Creeping Jenny’s happiest, healthiest life.
We’ll walk you through the benefits of each component and how to mix them for optimal plant growth. So, grab your gardening gloves, it’s time to get a little dirty!
Creating the Ideal Soil Mix for Creeping Jenny
Your Creeping Jenny will love you for providing the right soil mix. A well-draining soil helps to prevent root rot, a common issue among potted plants. So, what’s the magic formula? Let’s dig deeper into it!
Understanding the Role of Coco Coir
Coco coir is a natural by-product of the coconut industry and is a sustainable and eco-friendly alternative to peat moss.
But its appeal doesn’t stop there. It’s also great at retaining moisture, ensuring your Creeping Jenny has access to water without becoming waterlogged.
The Importance of Perlite
Perlite is another key player in our ideal soil mix. These tiny white granules might not look like much, but they’re essential for improving soil aeration.
Perlite helps to create space in the soil, enabling your Creeping Jenny’s roots to breathe and grow freely.
Mixing it All Together: Coco Coir and Perlite
So, how do you bring coco coir and perlite together for your Creeping Jenny’s benefit?
It’s all about striking a balance. A good rule of thumb is to aim for a soil mix of two-thirds coco coir and one-third perlite.
This blend provides an excellent moisture-to-air ratio, making your Creeping Jenny feel right at home.
Creeping Jenny potted – pot size and type
 Groundcover, 1 Quart, Green Leaves with Yellow Flowers")
Just like choosing the perfect outfit, selecting the right pot for your Creeping Jenny is an essential step in its care routine.
Size does matter, and so does the type! In this section, we’ll dive into the world of pots, discussing the ideal size and type for your potted Creeping Jenny.
Whether you’re a novice or an experienced gardener, you’ll pick up some useful tips on how to best accommodate your vibrant, trailing friend. Let’s get started, shall we?
Finding the Ideal Pot Size for Creeping Jenny
When it comes to Creeping Jenny, it’s not just about the plant, it’s also about its home – the pot.
One of the most important aspects to consider when potting Creeping Jenny is the size of the pot.
You don’t want it too small, constricting the plant’s growth, and you don’t want it too large, risking overwatering and root rot.
Here, we’ll discuss how to find that perfect pot size that gives your Creeping Jenny just the right amount of space to flourish.
Different Pot Types and Their Suitability for Creeping Jenny
There’s a world of pots out there, from terracotta to plastic, from ceramic to metal.
But which one is the best fit for Creeping Jenny? Each material has its pros and cons, and picking the right one can greatly influence how your plant grows.
In this section, we’ll dive into the different types of pots and uncover which might be the best fit for your Creeping Jenny.
Repotting Your Creeping Jenny: When and How?
Repotting is a regular part of plant care. As your Creeping Jenny grows, its pot might become a little snug.
So, when is the right time to give it a new, more spacious home? And more importantly, how do you do it without causing unnecessary stress to your plant?
In this part, we’ll guide you through the process of repotting, ensuring your Creeping Jenny continues to thrive.
Fertilizing Creeping Jenny
 Groundcover, 1 Quart, Green Leaves with Yellow Flowers")
Are you ready to feed your Creeping Jenny? Yes, just like us, plants need nutrients to grow and flourish.
But not all plants have the same dietary needs. In this section, we’re going to discuss all things fertilization for Creeping Jenny.
We’ll cover the best type of fertilizer, the right timing, and how to apply it without overwhelming your plant.
So, sit tight and let’s dive into the world of plant nutrition, and discover how to give your Creeping Jenny the feast it deserves!
Choosing the Right Fertilizer for Creeping Jenny
When it comes to feeding your Creeping Jenny, not any fertilizer will do.
This plant thrives best with a balanced, water-soluble fertilizer. It’s crucial to choose one that offers equal parts nitrogen, phosphorus, and potassium.
These elements support leaf growth, root development, and overall plant health, respectively.
Understanding the Proper Fertilizing Schedule for Creeping Jenny
Creeping Jenny doesn’t require constant feeding. It’s a good practice to fertilize it during its active growth period, which is usually from spring to early fall.
Apply fertilizer once a month during this time, but ease off in the winter when the plant’s growth slows down.
How to Apply Fertilizer to Creeping Jenny
Fertilizer application doesn’t have to be complicated. Simply mix the fertilizer into your water according to the package instructions and water your plant as you normally would.
The key is to water it thoroughly, so the nutrients seep down to the roots.
Signs of Over-Fertilization in Creeping Jenny
Over-fertilization can be harmful. Signs that you might be overdoing it include yellowing leaves, a crust of fertilizer on the soil surface, or a general decline in the plant’s health.
If you see these signs, it’s best to pause fertilizing, flush the soil with clean water, and let the plant recover.
The Role of Fertilizer in Creeping Jenny’s Overall Health
Fertilizer isn’t just about promoting growth. It’s also about supporting the overall health of your Creeping Jenny.
Proper fertilization helps the plant produce vibrant, green foliage and supports robust growth. Remember, a well-fed plant is a happy plant!
Temperature and humidity
 Groundcover, 1 Quart, Green Leaves with Yellow Flowers")
Let’s pivot and talk about the atmosphere. Do you know that temperature and humidity can significantly influence the well-being of your Creeping Jenny?
Well, it’s true! In the following sections, we will unpack the ideal temperature range and humidity level for your lush companion.
We’ll share tips on how to maintain the right conditions and what to do if things get a little too hot or dry.
It’s all about creating a comfortable environment for your plant to thrive!
Understanding Creeping Jenny’s Preferred Temperature
Creeping Jenny, like any plant, has a preferred temperature range where it thrives best.
This range is typically between 60 to 75 degrees Fahrenheit. These temperatures are akin to the mild climate of its natural habitats, providing a comfortable environment for optimal growth.
It’s important to remember, though, that while Creeping Jenny can handle a bit of chill, it’s not a fan of frost.
Thus, it’s always better to err on the side of warmth, especially during the colder months.
A Dive into Humidity Requirements
Next up, let’s talk about humidity. Creeping Jenny is pretty adaptable and can handle a variety of humidity levels.
However, it does appreciate a more humid environment, typically around 50% humidity.
This may seem high, especially for those living in drier climates, but don’t worry!
There are plenty of ways to increase humidity for your plant, from using a humidifier to grouping it with other plants.
Adapting to Changes in Temperature and Humidity
Creeping Jenny is a resilient little plant, but it’s not invincible. Rapid, drastic changes in temperature and humidity can stress the plant and lead to a variety of issues, from wilting to discoloration.
That’s why it’s crucial to monitor your plant’s environment and make gradual changes whenever possible.
This section will provide you with tips and tricks on how to do just that, ensuring that your Creeping Jenny stays comfortable all year round.
The ideal temperature and humidity for your Creeping Jenny:
Monitor Indoor Temperature: Use a reliable indoor thermometer to keep track of the temperature.
If you notice the temperature falling below 60 degrees Fahrenheit, you might want to move your plant to a warmer spot in your house or use a space heater to raise the temperature slightly.
Avoid Drafty Windows and Doors: During winter, cold drafts can significantly lower the temperature, especially near windows and doors.
Ensure your Creeping Jenny isn’t placed near these drafty areas.
Use a Humidifier: If you live in a dry climate, a humidifier can be a great tool to increase the humidity level in your home.
It’s especially beneficial during winter months when indoor air tends to be drier due to heating systems.
Group Plants Together: Grouping plants together can create a more humid microclimate as plants naturally release moisture into the air.
If you have other houseplants, consider placing your Creeping Jenny nearby.
Try a Pebble Tray: Fill a tray with pebbles and add water until it just covers the base of the pebbles. Place your pot on top of the pebbles, making sure the bottom of the pot isn’t touching the water.
The water will evaporate around the plant, raising the humidity in its immediate vicinity.
Avoid Sudden Temperature Changes: Sudden changes in temperature can stress your plant. Try to avoid moving it from a warm spot to a cold spot rapidly.
Remember, while it’s important to strive for the ideal conditions, Creeping Jenny is a fairly adaptable plant.
Pay attention to how your plant responds to its environment and adjust accordingly.
Trust your instincts and keep your plant’s needs in mind, and you’ll have a thriving Creeping Jenny in no time.
Misting for Increased Humidity:
Misting is another effective method to increase humidity for your Creeping Jenny.
It’s especially useful in environments where air tends to be dry. Here’s how you can incorporate it into your plant care routine:
Misting for Increased Humidity: Misting the leaves of your Creeping Jenny with a spray bottle can help raise the humidity around the plant.
However, it’s essential to remember a few key points when misting:
Don’t Overdo It: Misting should be done in moderation. Overly wet leaves can make your plant prone to fungal diseases.
Aim for a light misting that leaves your plant’s leaves damp, not soaking wet.
Use Room-Temperature Water: Cold water can shock your plant, while hot water can damage the leaves. Always use water at room temperature for misting.
Mist in the Morning: Misting is best done in the morning. This allows the water to evaporate throughout the day, preventing prolonged dampness which could lead to mold and other issues.
Clean the Leaves Occasionally: Dust can accumulate on the leaves of your Creeping Jenny, particularly if you’re frequently misting. Be sure to gently wipe down the leaves with a damp cloth from time to time to keep them clean and able to properly photosynthesize.
In combination with the other methods mentioned earlier, misting can significantly improve the comfort of your Creeping Jenny and help it flourish in its indoor setting.
Maintenance and pruning
 - Healthy Trailing Plant - Beautiful Spring Accent - 6\" Tall by 4\" Wide in 1 Pint Pot")
Ah, the art of maintenance and pruning – two crucial aspects of plant care that help ensure your Creeping Jenny stays healthy, vibrant, and well-groomed.
In this part of our guide, we’ll delve into how to keep your Creeping Jenny looking its best.
We’ll cover everything from the basic maintenance tasks, like checking for pests, to the more involved process of pruning.
We’ll also touch on the best times to prune and the right way to do it, so your plant can keep flourishing beautifully in its pot.
So, shall we begin our journey into the world of Creeping Jenny care? Let’s dive right in!
Just like any other plant, Creeping Jenny needs a bit of TLC to thrive. Regular maintenance, such as checking for pests, removing dead leaves, and keeping an eye on its growth, is crucial to keep your plant in top shape.
It’s more than just watering and placing it near a window; it’s about understanding what your plant needs and adapting your care routine accordingly.
The Art of Pruning Creeping Jenny
Pruning is not just about shaping your plant; it’s an essential part of its health and well-being.
It promotes fuller growth, removes dead or diseased parts, and allows you to control its size and shape.
With Creeping Jenny, the process is simple yet requires precision. It’s all about identifying where and when to make the cut.
We’ll delve into the specifics, providing you with a step-by-step guide on how to prune your Creeping Jenny effectively.
The Best Time to Prune Creeping Jenny
Timing is everything when it comes to pruning. For Creeping Jenny, the ideal pruning time depends on its growth cycle and health but generally, spring is the best time.
It’s crucial to understand these cycles to ensure you’re pruning at the right time, promoting optimal growth rather than hindering it.
Don’t worry – we’ll guide you through the process, providing you with the knowledge needed to make informed pruning decisions.
Pruning Techniques for Creeping Jenny
Now that we’ve covered when to prune, let’s talk about how. There are specific techniques that can help you make the most of your pruning efforts.
From angle cuts to thinning out, we’ll discuss various methods that can help your Creeping Jenny thrive.
Remember, pruning is not a daunting task; it’s a rewarding process that contributes to the overall health and aesthetics of your plant.
Here’s a straightforward, step-by-step guide on how to prune your Creeping Jenny effectively:
Prepare Your Tools: Before you start, make sure your pruning shears are clean and sharp. Dirty or dull shears can damage your plant and spread diseases.
Inspect the Plant: Examine your Creeping Jenny thoroughly. Look for areas that are overgrown, as well as any dead, dying, or diseased sections.
Decide Where to Prune: The best place to prune is just above a leaf or stem junction. This encourages new growth from that point. You’ll want to aim for a balance between the plant’s length and its fullness.
Make the Cut: Using your shears, make a clean cut at the identified spot. Try to make your cut at a slight angle, which helps the plant heal more easily.
Shape the Plant: Continue pruning around the plant, keeping your desired shape in mind. For Creeping Jenny, you’ll likely want to maintain a trailing, lush look.
Clean Up: Once you’re satisfied with the shape of your plant, remove the cut sections. Leaving them around can attract pests or lead to disease.
Monitor the Plant: After pruning, keep a close eye on your plant. Ensure it’s getting enough water and light, and watch for any signs of stress or disease.
Remember, pruning isn’t just about controlling the size of your Creeping Jenny; it’s also a great opportunity to check the overall health of your plant. Enjoy the process!
Repotting Creeping Jenny
 - Healthy Trailing Plant - Beautiful Spring Accent - 6\" Tall by 4\" Wide in 1 Pint Pot")
Welcome to the world of repotting Creeping Jenny! This part of the journey is all about giving your Creeping Jenny a new home, with more room to stretch out its roots.
We’ll be discussing everything from when and why to repot, to how to do it without causing your plant any stress.
So, let’s dive into this exciting process and ensure that your Creeping Jenny continues to thrive in its new pot!
Recognizing When to Repot Your Creeping Jenny
Creeping Jenny, like any other plant, will eventually outgrow its pot. But how do you know when it’s the right time for repotting?
Look out for tell-tale signs such as roots growing out of the drainage holes, slower growth, or the plant drying out quickly even with regular watering.
Repotting in early spring, just before the growing season, is typically the best time of year for this task.
Choosing the Right Pot-Selecting an Ideal Home for Your Creeping Jenny
Picking the right pot for your Creeping Jenny is an essential step. An average width and depth that’s slightly larger than the current pot is a good choice.
Remember, too big a pot can lead to waterlogging, and too small a pot may restrict growth. Don’t forget to check for sufficient drainage holes!
The Repotting Process
Step-by-Step Guide to Repotting Creeping Jenny
Repotting can be an exciting process, but it needs a little care.
• You’ll want to gently remove the plant from its current pot, making sure not to damage the root system.
• Loosen the roots if they’re tightly bound, and then place it in the new pot with fresh, fertile soil.
• Make sure it is planted at the same level that it grew at in the old pot.
• After repotting, give your plant a good drink of water.
Aftercare Post Repotting-Ensuring Healthy Growth Post Repotting
After repotting, your Creeping Jenny may need a little extra attention. Place the plant in a spot with the right light conditions, away from direct afternoon sun to avoid shock.
Monitor its water needs closely, as the plant may take some time to adjust to its new home.
By following these steps, you’ll help your Creeping Jenny transition smoothly into its new pot, ensuring it continues to be a fast-growing plant and a vibrant part of your indoor or outdoor garden.
Creeping Jenny in winter
 Live Plant, Gold-Green Foliage, 4.5 in. Quart")
There’s something truly captivating about the resilience of Creeping Jenny, even as the temperatures drop and the days grow shorter.
In this section, we’ll delve into what makes this plant a hardy perennial, how it stands up to the winter months, and what you can do to help it thrive.
We’ll explore why Creeping Jenny’s radiant golden yellow leaves can be a beacon of life during the grayer, colder days.
Get ready to discover how your Creeping Jenny can continue to bring joy to your garden or home during the winter season.
Understanding Creeping Jenny’s Winter Behavior
Creeping Jenny, or Lysimachia nummularia, is a hardy perennial that can withstand colder temperatures and climates.
Originating from Western Asia and North America, it’s accustomed to a range of weather conditions.
However, during winter, it’s natural for this plant to undergo some changes. One of the most noticeable changes is the slight fading of its vibrant leaf colors.
Whether you have the chartreuse foliage or the golden variety, you might observe a slight dulling of hues.
But, there’s no need to panic. This is just Creeping Jenny’s way of coping with lower light levels and temperature drops.
It’s still the same robust plant that will bounce back to its radiant self once spring arrives.
Winter Care Tips for Creeping Jenny
While Creeping Jenny is notably tough, it still appreciates some extra attention during winter.
Adjusting the water source is one of the primary steps to take. As winter conditions can be less conducive to evaporation, overwatering can lead to soggy soil and root rot.
Therefore, it’s best to reduce watering and ensure the soil drains well between watering sessions.
Protection from extreme cold is also crucial, especially for container gardens that can be brought indoors.
If your Creeping Jenny is in the ground, consider adding a layer of mulch to insulate the root system from freezing temperatures.
Preparing Creeping Jenny for Winter: When and How?
The period from late spring to early summer is an excellent time to start preparing your Creeping Jenny for winter.
This could involve tasks like gradual water reduction, checking the plant for any diseases or pests, and adding a layer of compost or mulch for extra nutrients and insulation.
This preparation helps the plant enter winter in the best possible health, increasing its chances of thriving during the colder months.
Winter Repotting: Should You or Shouldn’t You?
The question of winter repotting can be tricky. On one hand, the dormant period of winter can be less stressful for the plant, making it a good time for repotting.
On the other hand, the slower growth rate might mean the plant takes longer to recover from the process.
As such, whether to repot Creeping Jenny during winter really depends on the specific needs of your plant.
If it’s outgrown its current pot or if the soil has become depleted of nutrients, repotting might be beneficial.
But, if your plant seems content and healthy, it might be best to wait until spring.
Winter Pruning: Keeping Creeping Jenny in Shape
Winter can be a good time to prune your Creeping Jenny. Pruning not only helps to maintain the plant’s shape and size, but it can also encourage lush growth in the following spring.
However, remember to prune wisely. Remove only dead stems or those that are overly long and disrupt the plant’s shape. Always make clean cuts to prevent any damage or disease.
Recognizing and Dealing with Winter Plant Diseases
The winter months can sometimes bring along plant diseases, especially if your Creeping Jenny is living in cold, damp soil conditions with poor air circulation.
This can lead to problems like leaf spots. It’s essential to keep an eye out for any signs of disease during winter.
If you notice any spots or discolorations, remove the affected leaves immediately to prevent spreading.
Also, consider adjusting your care routine to ensure better air circulation and avoid overwatering.
Creeping Jenny propagation
 Live Plant, Gold-Green Foliage, 4.5 in. Quart")
Propagating Creeping Jenny: Starting from Seeds
From Seed to Plant: The Journey of Growing Creeping Jenny
Starting your Creeping Jenny journey from seeds can be a rewarding experience, albeit a bit challenging for some.
With patience and care, you can watch your tiny seeds transform into a thriving plant.
This section will provide you with all the knowledge you need to successfully grow Creeping Jenny from seeds.
We’ll talk about the right time of year to plant, the best soil conditions, and the care requirements for your seedlings as they grow.
Stem Cuttings
Propagating Creeping Jenny Using Stem Cuttings
Turning a Simple Stem into a Whole New Plant
For those who already have a Creeping Jenny plant, stem cuttings offer an easy and effective method of propagation.
This process involves taking a healthy portion of an established plant, nurturing it, and watching it grow into a new, independent plant.
In this section, we’ll cover the step-by-step process of taking and rooting stem cuttings.
We’ll also discuss the best times for this type of propagation and how to care for your cuttings as they establish their own root systems.
It’s an amazing way to expand your plant family without buying new plants!
Propagating Creeping Jenny: Starting from Seeds
• Gather Your Supplies: You’ll need Creeping Jenny seeds, a planting tray or small pots, and a seed-starting mix.
The seed-starting mix is typically lighter and designed to retain moisture more effectively.
• Prepare Your Planting Tray: Fill the planting tray or pots with the seed-starting mix. Lightly water the mix so it’s damp but not soaking.
• Plant Your Seeds: Sprinkle the Creeping Jenny seeds on top of the soil. They’re small, so it can help to mix them with a bit of sand for easier distribution.
Once you’ve scattered the seeds, cover them lightly with soil.
• Create a Greenhouse Effect: Cover your tray or pots with a clear plastic cover or plastic wrap.
This helps keep the humidity high, which is ideal for seed germination.
• Wait for Germination: Place the tray in a warm, bright location, but out of direct sunlight.
Keep the soil damp by misting it lightly when it starts to dry out. Seeds should germinate within a couple of weeks.
• Care for Your Seedlings: Once your seeds have sprouted, remove the plastic cover and continue to keep the soil damp.
When the seedlings have grown a few sets of true leaves, you can transplant them into larger pots or their final location.
Propagating Creeping Jenny Using Stem Cuttings
• Gather Your Supplies: You’ll need a sharp, clean pair of gardening shears, a container with potting mix, and a mature Creeping Jenny plant.
• Take Your Cutting: Select a healthy stem on your Creeping Jenny plant. Look for a stem with several leaves, but no flowers. Cut a 4-6 inch piece of the stem, making the cut just below a leaf node.
• Prepare Your Cutting: Remove the leaves from the lower half of the cutting. This is the part that will go into the soil.
• Plant Your Cutting: Poke a hole in the potting mix with your finger or a pencil. Place the cutting in the hole and firm the soil around it. You can place several cuttings in the same pot if you want.
• Care for Your Cutting: Place the pot in a warm, bright location, but out of direct sunlight. Keep the soil damp, but not soggy. In a few weeks, the cutting should develop roots and start to grow.
Remember, both of these processes will require patience and attention.
But with proper care, you’ll have new Creeping Jenny plants to enjoy or share with friends in no time!
Keeping Pests and Diseases at Bay from Your Creeping Jenny
 Live Plant, Gold-Green Foliage, 4.5 in. Quart")
Oh, the unwanted guests in your garden! Even with our best efforts, pests and diseases can sneak up on our beloved Creeping Jenny.
But we’re here to help identify these pesky invaders and arm you with effective solutions.
Troublesome Pests: Aphids, Spider Mites, and Slugs
Let’s start with the tiny nuisances that are aphids and spider mites. These minute creatures feast on the sap of your plants, causing the leaves to curl, yellow, or display a sticky residue.
The solution? A simple spray of water can often knock these pests off. For stubborn infestations, consider using insecticidal soap or neem oil, and applying it to all surfaces of the plant.
Then there’s the infamous garden party-crasher, the slug. Slugs love the moist environment of a well-cared for Creeping Jenny.
You might spot their damage as irregular holes in leaves or a silvery trail revealing their past route.
If your Creeping Jenny is growing indoors you probably will never see these pests.
You can combat slugs by reducing damp, shady spots in your garden or by creating barriers using copper tape or crushed eggshells.
Also, there are many organic slug pellets available if you have a larger slug problem.
Common Diseases: Leaf Spot and Rust
Even the hardiest plants, like Creeping Jenny, aren’t immune to diseases.
Leaf spot, presenting as brown or black spots on leaves, is a common issue. This is usually caused by a fungus or bacteria.
The good news is, that this can often be controlled by removing the affected leaves and avoiding overhead watering, as wet foliage encourages these pathogens.
Creeping Jenny can also be susceptible to rust, a fungal disease that shows as orange or brown pustules on the underside of leaves.
Treatment for rust involves removing and disposing of any affected plant parts, and considering a fungicide if the problem persists.
Remember, prevention is the best cure. Regularly check your Creeping Jenny, maintain a healthy plant with good watering, feeding and light practices and you’ll be less likely to encounter these pests and diseases.
After all, a healthy plant is the best deterrent against any unwelcome garden visitors.
Creeping Jenny companion plants
 Live Plant, Gold-Green Foliage, 4.5 in. Quart")
Picture your garden: the hues, the textures, the growth. Now, imagine accentuating that beauty with the perfect companion plants for Creeping Jenny.
In this section, we’ll explore how the vibrant foliage of Creeping Jenny can be paired with various plants to create an enchanting visual symphony in your garden.
So, whether you’re looking to create a cascade of color or a harmonious balance, we’ve got some fantastic pairings you’ll love to explore!
Creating Dynamic Contrast with Tall Plants
Picture the cascading golden yellow leaves of Creeping Jenny nestled at the base of taller plants.
The color contrast creates a visual spectacle that is both attractive and unique.
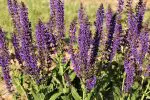
Incorporating towering plants like Delphiniums, Foxgloves, or Salvias can enhance this effect, their height contrasting beautifully with the low-growing Creeping Jenny.
Synergy with Other Ground Covers
Ground covers can be a great way to fill out your garden with a lush, dense carpet of foliage.
Pairing Creeping Jenny with other ground cover plants, such as Phlox or Sweet Woodruff, can create a vibrant tapestry of color and texture.
Harmony with Water-Loving Plants
Given its preference for damp soil, Creeping Jenny can be an excellent companion for other moisture-loving plants.
Hostas, Ferns, and Astilbe can all thrive in similar conditions and can create an appealing visual harmony when planted together.
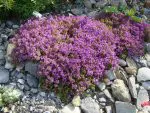
Mixing it Up with Rock Garden Plants
Creeping Jenny’s trailing nature and vibrant color make it a standout choice for rock gardens.
When paired with alpine classics like Sedum or Sempervivum, it can help to create an intriguing interplay of textures and forms.
Accentuating Container Gardens
Creeping Jenny is a popular plant for container gardens, its trailing habit and vibrant color providing an excellent contrast to other plants.
Consider pairing it with taller, upright plants, or those with contrasting foliage colors for a striking display.
In the end, your choice of companion plants for Creeping Jenny will depend on your specific garden conditions and personal preferences.
But remember, the goal is to create a harmonious blend of colors, textures, and forms that delights the senses throughout the growing season.
Creeping Jenny FAQ
 Live Plant, Gold-Green Foliage, 4.5 in. Quart")
Looking for more insights on Creeping Jenny? You’re in the right place!
Our FAQ section is like a treasure trove of knowledge, answering all the most commonly asked questions about this charming plant.
From its growth habits to its care needs, we’ll delve into the details, providing practical advice and handy tips along the way.
So, whether you’re a beginner or a seasoned gardener, we’ve got something for you! Let’s get started, shall we?
Q: Does Creeping Jenny come back every year?
A: Yes, Creeping Jenny, being a perennial plant, will indeed come back every year.
Its hardy nature allows it to survive through different seasons, adding charm to your garden with its golden-yellow foliage throughout the year.
Q: Does Creeping Jenny like sun or shade?
A: Creeping Jenny appreciates a mix of both sun and shade. While it can tolerate full sun, the intensity of the afternoon sun might cause its leaves to scorch.
Therefore, a location with morning sun and afternoon shade would be ideal. In hotter climates, it’s better off in a spot that gets part shade.
Q: Where does Creeping Jenny grow best?
A: This plant is quite versatile and can grow in a variety of environments. However, it thrives best in zones 3-9 according to the USDA plant hardiness zones.
It prefers well-drained, moist, and fertile soil, and can be grown as a ground cover plant or in containers.
Q: How do you winterize Creeping Jenny?
A: Creeping Jenny is winter-hardy and can generally survive the cold season, especially in regions where the winter isn’t too harsh.
However, in regions with extreme cold, it’s a good idea to add a layer of mulch around the plant to protect its root system from freezing temperatures.
Q: Should Creeping Jenny be cut back?
A: Yes, trimming or cutting back Creeping Jenny can promote denser growth and prevent it from becoming too leggy.
Pruning can be done at any time of the year, but early spring is often considered the best time as the plant is about to enter its active growing season.
Q: Is Creeping Jenny Invasive and will Creeping Jenny kill other plants?
A: Creeping Jenny is known for its rapid and invasive growth. However, in a controlled environment like a home garden, it can be managed effectively with regular pruning.
If left unchecked, it can indeed overtake and potentially harm other plants by depriving them of essential resources. Regular maintenance is key to keeping its growth in balance with other plants in your garden.
Creeping Jenny In Pots Final Thoughts
As we wrap up our deep dive into the world of Creeping Jenny, you’re now equipped with the knowledge to care for this charming plant effectively.
From its fast-growing nature to the rich, golden-yellow carpet it weaves across your garden or pot, this plant truly brings a unique touch to your green space.
Remember, with the right balance of light, water, and TLC, your Creeping Jenny will reward you with stunning foliage and a vibrant presence year-round.
Ready to embrace the joy of growing this lovely ground cover plant? Let’s bring the beauty of Creeping Jenny into your home or garden today!
Read more: Backyard Gardening Ideas