
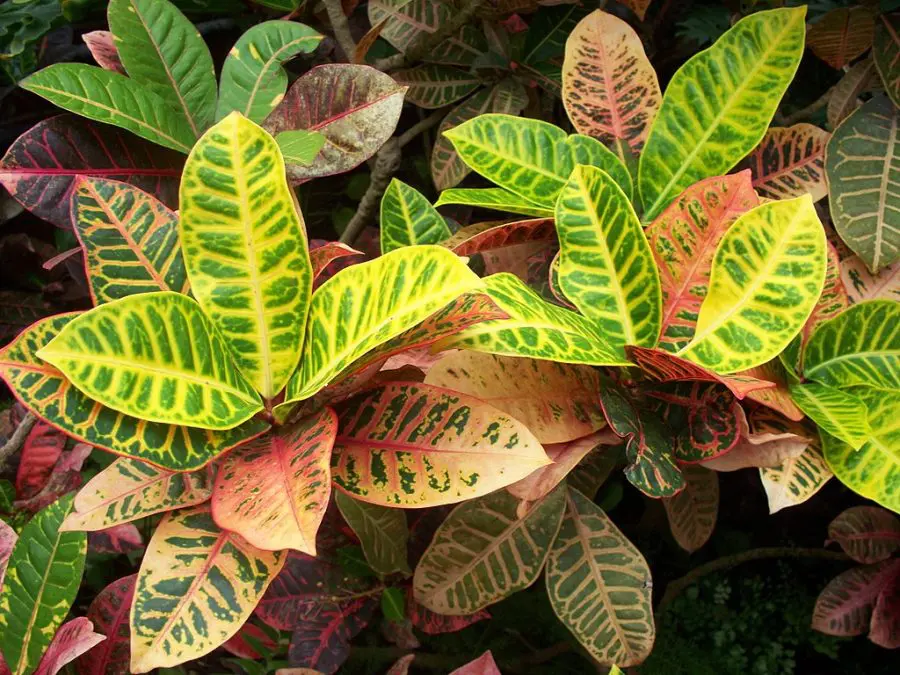
Croton plant indoor care starts with giving this colorful tropical plant plenty of light, consistent moisture, and warm indoor temperatures. Crotons are grown for their bold foliage, with leaves that can develop combinations of green, yellow, orange, red, pink, and even deep purple depending on the variety.
I like Crotons because they can add almost as much color to a room as a flowering plant, but the colorful foliage lasts much longer. Once you find a bright location and establish a consistent care routine, Crotons can make impressive indoor plants.
What You’ll Learn
- How much light an indoor Croton needs
- When and how to water your Croton
- What growing mix and container work well
- How temperature and humidity affect growth
- When to fertilize and repot your plant
- How to propagate Crotons
- How to recognize common Croton problems
- How large Crotons can grow indoors
Quick Answer
For successful Croton plant indoor care, give your plant plenty of bright light and keep it in a warm location away from cold drafts. Water when the top of the growing mix begins to dry, and use a well-draining mix such as coco coir and perlite. Good light is especially important for maintaining the bright colors Crotons are known for.
Croton Plant Indoor Care at a Glance
| Care Need | What Works |
|---|---|
| Light | Bright light; good light helps Crotons maintain their colorful foliage |
| Water | Water when the top of the growing mix begins to dry; water thoroughly and allow excess water to drain |
| Growing Mix | Well-draining mix; coco coir mixed with perlite works well |
| Container | Use a container with drainage holes and move up in pot size as the plant grows |
| Temperature | Warm indoor temperatures; protect the plant from cold drafts and sudden temperature changes |
| Humidity | Crotons appreciate higher humidity, especially when indoor air becomes dry |
| Fertilizer | Fertilize during active growth and reduce feeding during winter |
| Repotting | Repot when the plant becomes root-bound or outgrows its container |
| Propagation | Stem cuttings are an easy way to propagate new Croton plants |
| Indoor Size | Often about 3–6 feet tall indoors depending on variety, growing conditions, container size, and pruning |
| Common Problems | Leaf drop, fading color, overwatering, spider mites, mealybugs, and scale |
Enjoy Vibrant Indoor Color With Croton Petra Plants
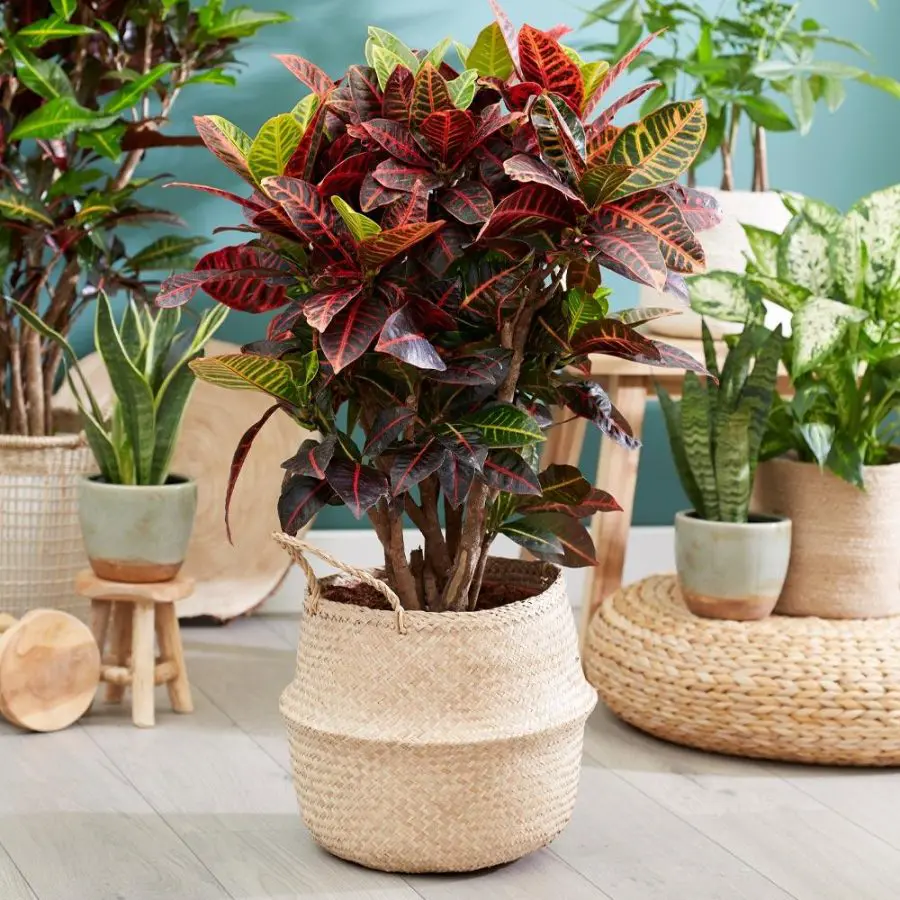
Croton Petras are exceptional indoor plants that captivate with their rich variety of hues.
The leaves showcase an array of vivid shades, including bright yellows, lush greens, fiery reds, and regal purples.
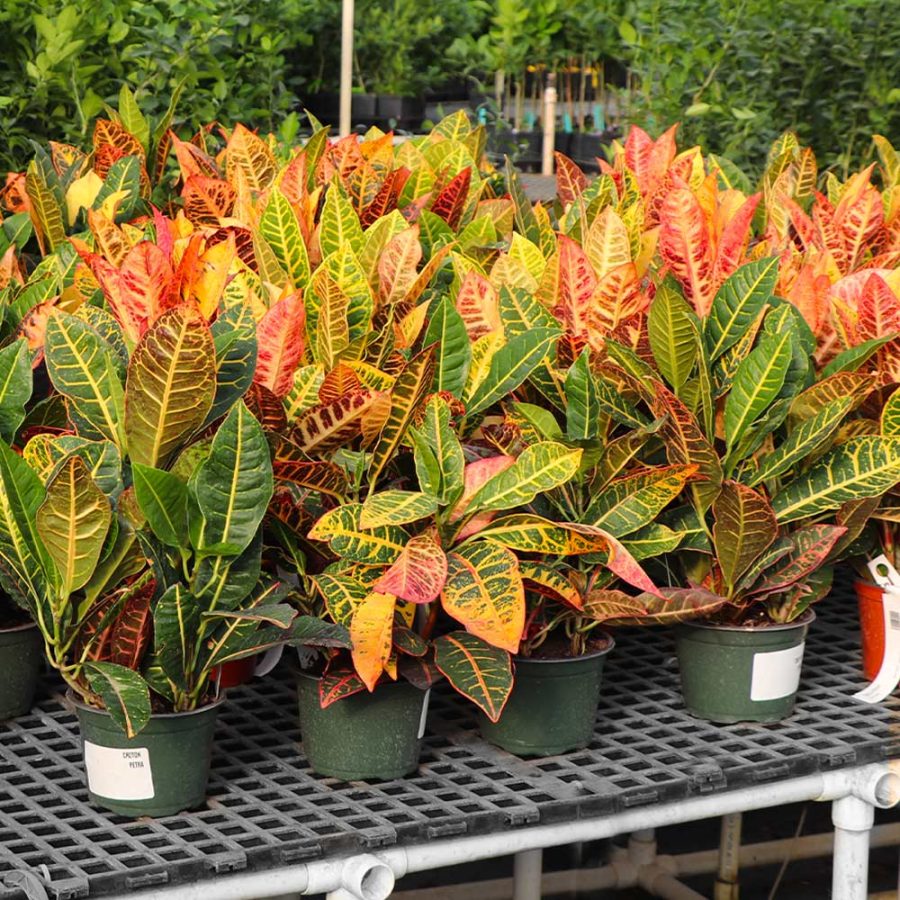
The striking color veins in the foliage are accentuated by the deeper green centers, resulting in an eye-catching display of contrasting tones.
These versatile Croton Petras flourish as compact potted plants and adapt to any indoor environment with ease.
They make an attractive centerpiece on a dining table or inject life and color into a mundane workspace.
Whether placed in a small or large container, these stunning plants continue to grow and thrive without any fuss.
Croton Plant Care Reference Guide
| Characteristic | Details |
|---|---|
| Common Name | Croton |
| Botanical Name | Codiaeum variegatum |
| Native Habitat | Tropical forests of Southeast Asia and the Pacific Islands |
| Plant Type | Evergreen perennial shrub |
| Growth Pattern | Bushy, upright growth with colorful variegated leaves |
| Mature Size | 3–6 ft indoors; up to 10 ft outdoors in tropical climates |
| Watering | Keep soil consistently moist but not soggy; reduce in winter |
| Light/Sun Exposure | Bright, indirect light; tolerates some direct sunlight for best color |
| Soil Type | Rich, well-draining potting mix with peat or compost |
| Soil pH | Slightly acidic to neutral (6.1–7.0) |
| Temperature | 60–85°F (avoid temps below 55°F) |
| Humidity | High humidity (60%+ preferred) |
| Bloom Time & Flower Color | Rare indoors; tiny white or yellow star-shaped flowers |
| Potential Problems | Leaf drop from low light, cold drafts, or underwatering; pests include spider mites, mealybugs, and scale |
| Repotting | Every 2–3 years in spring; use fresh potting mix |
| Hardiness Zones (USDA) | 10–12 |
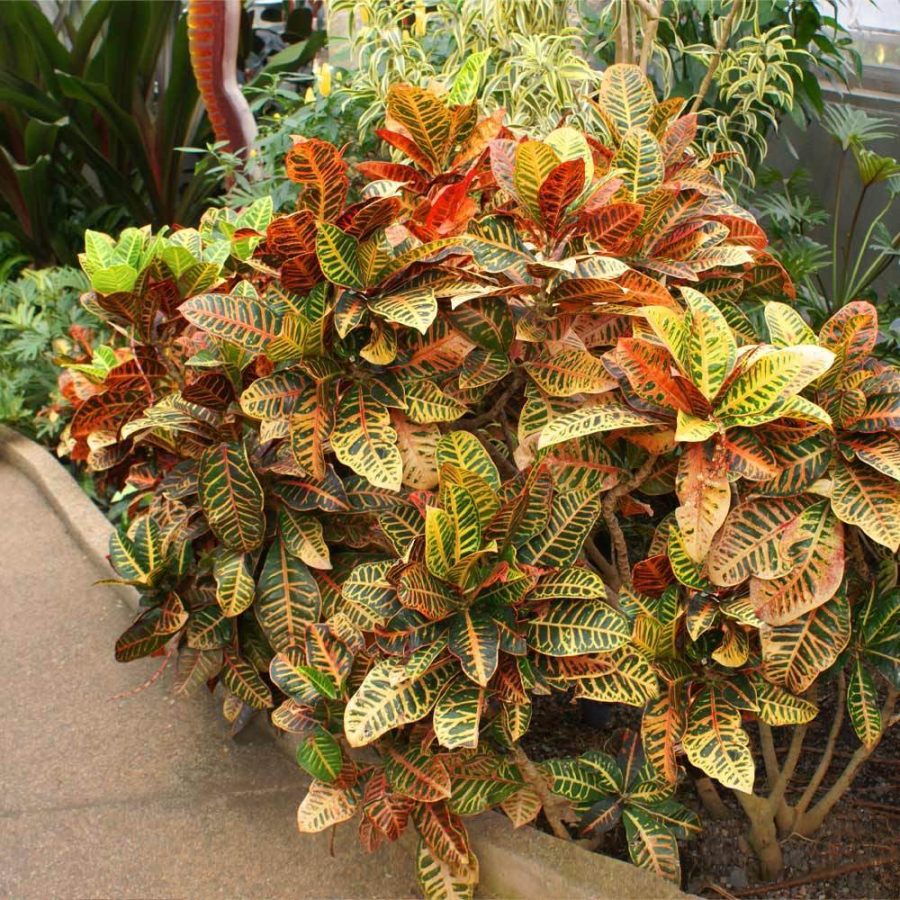
How To Care For A Croton Plant Indoors
Are you excited to dive into the world of Croton plant indoor care?
These spectacular houseplants, with their kaleidoscope of colors, can truly brighten up any living space.
If you’re curious about how to help your Croton thrive indoors, you’re in for a treat!
In this post, we’ll be covering a variety of topics, from the benefits of having a Croton plant indoors to the specifics of Croton Petra care, and even tackling common issues like leaf drop.
So, get ready to become a Croton plant expert and watch your indoor garden flourish!
A Glimpse into the World of Croton Plants
Croton plants, known for their vivid and multicolored foliage, are an incredible addition to any indoor garden.
Their scientific name is Codiaeum variegatum.
These tropical beauties hail from Southeast Asia and the Pacific Islands, boasting a wide range of leaf shapes, colors, and patterns.
From long, strap-like leaves to broader, oval-shaped ones, Croton plants are all about variety.
Their striking appearance can instantly add a touch of liveliness to your home, making them a popular choice for plant enthusiasts.
The Significance of Proper Indoor Care
Taking good care of your Croton plant is essential in order to fully enjoy its vibrant colors and healthy growth.
Providing the right conditions indoors allows your Croton to flourish, preventing issues such as leaf drop and stunted growth.
Moreover, proper indoor care not only ensures a visually appealing plant but also helps to maintain its air-purifying abilities.
By dedicating time and attention to your Croton plant’s needs, you’ll be rewarded with a happy, thriving, and an eye-catching houseplant that brings a burst of color to your living space.
Croton Plant Indoor Benefits

Ready to learn about the amazing benefits of having a Croton plant indoors?
These dazzling houseplants aren’t just a feast for the eyes; they also come with some fantastic perks that make them an even more attractive addition to your home.
You Can Buy Your Own Croton Plant On Amazon
In this section, we’ll delve into the various advantages of nurturing a Croton plant, from its air-purifying properties to the mood-boosting effects it can have on your living environment.
So, let’s uncover the hidden wonders of these colorful, tropical gems!
Fresh Air, Courtesy of Your Croton Plant
One of the lesser-known benefits of Croton plants is their air-purifying capabilities.
They help remove indoor air pollutants, such as benzene and formaldehyde, contributing to a fresher and healthier atmosphere in your home.
By incorporating a Croton plant into your living space, you’re not only adding a splash of color but also taking a step toward cleaner, more breathable air.
A Boost in Mood and Mental Well-being
It’s no secret that being surrounded by nature can have a positive impact on our mental health.
The vibrant colors and unique patterns of Croton plants can play a significant role in lifting your spirits and reducing stress.
Having a Croton plant indoors can bring a sense of calm and happiness to your everyday life, allowing you to enjoy the therapeutic benefits of connecting with nature, even from the comfort of your own home.
Aesthetic Appeal and Vibrant Colors
The star of the show when it comes to Croton indoor plants is undoubtedly their aesthetic appeal.
Their vivid, multi-hued colorful leaves, which can range from shades of red, green, yellow, orange, and purple, make them a striking addition to any interior design.
Their unique appearance can serve as a natural focal point, instantly elevating the look of your living space.
With a Croton plant, you’ll be able to enjoy the beauty and charm of a tropical paradise right in your own home.
Croton Plant Indoor Size
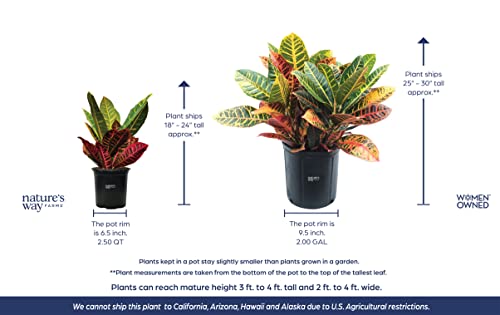
Curious about the size of Croton plants when grown indoors?
These fabulous houseplants come in various shapes and sizes, making them versatile additions to your indoor jungle.
In this section, we’ll discuss the typical growth patterns of Croton plants, the factors that influence their size, and some helpful tips to manage their growth.
So, whether you have a small windowsill or a spacious living room, let’s find out how to accommodate your Croton plant’s indoor size needs!
Size Matters: Average Size and Growth Rate
Croton plants can vary greatly in size, but when grown indoors, they typically reach a height of 3 to 6 feet, with a similar spread.
Their growth rate is moderate, so you won’t have to worry about them outgrowing their space too quickly.
With proper care, you can expect your Croton plant to steadily grow and fill out, becoming a lush and vibrant centerpiece in your home.
Influential Factors: What Affects Your Croton Plant’s Size
Several factors can influence the size of your Croton plant, with lighting and pot size being the most crucial.
Providing indirect bright light encourages more robust growth, while insufficient light can lead to a leggier and less colorful plant.
The size of the container you choose can also impact growth; a larger pot promotes a bigger root system and, ultimately, a larger plant.
Additionally, proper fertilization and pruning practices can contribute to healthy growth and size management.
Keep It Under Control: Tips for Managing Size and Growth
To ensure your Croton plant doesn’t outgrow its space or become unruly, follow these tips:
• Prune your plant regularly to maintain the desired shape and size. This also encourages bushier growth.
• Choose a suitable pot size for your space and plant size expectations. Remember, a smaller pot can limit growth.
• Monitor your plant’s light exposure, as this will significantly impact its overall growth and size. Provide bright, indirect light for optimal growth and vibrancy.
• Be consistent with fertilization, but avoid over-fertilizing, as it can cause rapid, unmanageable growth.
Croton Petra Care

Are you the proud owner of a Croton Petra or considering adding one to your indoor garden?
This popular Croton variety boasts gorgeous, bold colors and deserves some special attention.
In this section, we’ll explore the specific care requirements for Croton Petra plants, highlighting the differences from other Croton varieties and offering tips to ensure your Petra thrives.
So, let’s get started and make sure your Croton Petra steals the spotlight in your home!
Tailored Care: Specific Care Requirements for Croton Petra
Croton Petra plants, like other Croton varieties, are a tropical plant that needs bright, indirect light to maintain their vibrant foliage.
Ensure they receive at least 6 to 8 hours of such light daily.
When it comes to watering, allow the top 1 to 2 inches of soil to dry out between waterings.
Petra plants prefer a well-draining potting mix and appreciate a high humidity
Consider using a pebble tray or a room humidifier to maintain adequate moisture levels.
Standout Traits: Differences from Other Croton Varieties
While the basic care requirements for Croton Petra plants are similar to other Crotons, what sets Petra apart is its stunning appearance.
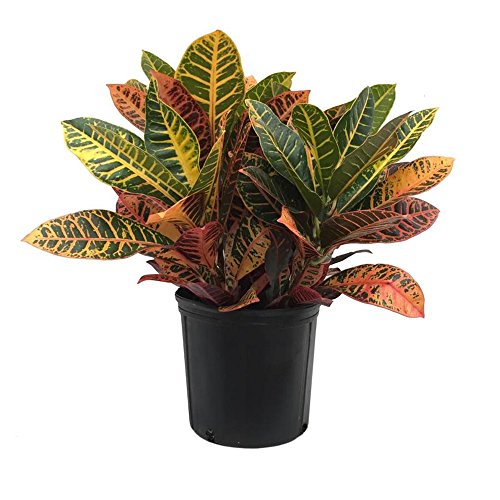
This variety features large, waxy leaves with a prominent midrib and veins, adorned with shades of red, orange, yellow, and green.
The bold and striking color patterns on the Petra’s leaves make it a more visually impactful choice compared to some other Croton varieties.
Expert Advice: Tips for Maintaining Healthy Croton Petra Plants
To keep your Croton Petra healthy and thriving, follow these tips:
Rotate your plant regularly to ensure even light exposure and balanced growth.
Monitor your plant for pests, such as spider mites and mealybugs, and address any infestations promptly.
Fertilize your Croton Petra every 4 to 6 weeks during the growing season with a balanced, water-soluble fertilizer, but reduce it to every 8 weeks during the winter months.
Prune your Petra periodically to encourage bushier growth and maintain its shape. Remove any yellow or damaged leaves to keep the plant looking its best.
Croton Plant Indoor Care – Lighting the Way: The Importance of Light for Croton Plants

In this section, we’ll discuss the crucial role of light in your Croton plant’s life, how to choose the perfect spot for your plant, and tips for ensuring your Croton gets the right amount of light for optimal growth and vibrant foliage.
Rays of Brilliance: Optimal Light Conditions for Croton Plants
To maintain their vivid colors and encourage healthy growth, Croton plants need bright, indirect light.
Direct full sun may scorch their leaves, while insufficient light can lead to dull, green foliage.
Ideally, you should provide your Croton plant enough light with at least 6 hours of indirect sunlight daily.
Placing them near a south or east-facing window is a great way to ensure they receive ample light.
The Perfect Corner: Choosing the Right Spot in Your Home
Finding the perfect spot for your Croton plant is crucial for its happiness.
Take the time to observe your home’s lighting conditions throughout the day. Remember, a spot that receives bright, indirect light for most of the day is best.
Avoid areas with drafts, such as near air vents or drafty windows, as Croton plants are sensitive to temperature fluctuations.
If you’re struggling to find a suitable spot, consider using a grow light to supplement natural light.
Seasonal Shifts: Adjusting Light Exposure Seasonally
As the seasons change, so do the lighting conditions in your home.
Be prepared to adjust your Croton plant’s light exposure accordingly.
During the darker months, you may need to move your plant closer to the window or use a grow light to compensate for reduced sunlight.
Conversely, in the summer months, you might need to protect your Croton from the harsh afternoon sun by moving it away from the window or using sheer curtains to diffuse the light.
Regularly monitoring your plant’s light exposure and adjusting as needed will help keep your Croton plant healthy and vibrant year-round.
Feeding Your Colorful Companion: Fertilizing Croton Plants

Just like us, your Croton plant needs proper nourishment to thrive.
In this section, we’ll explore the world of fertilizing, learn about the best type of fertilizer for Croton plants, and discover the ideal fertilizing schedule to keep your plant healthy and vibrant.
Feeding Finesse: The Best Type of Fertilizer for Croton Plants
To keep your Croton plant thriving, it’s important to provide it with the right nutrients.
A balanced, water-soluble fertilizer with equal parts nitrogen, phosphorus, and potassium (such as a 20-20-20 formula) is ideal.
You can also use a fertilizer specifically designed for houseplants or foliage plants.
Including micronutrients, such as iron, magnesium, and manganese, will ensure your Croton plant has everything it needs for vibrant growth.
Nourishment Nuances: Creating an Ideal Fertilizing Schedule
Fertilizing your Croton plant regularly will help support its growth and maintain its stunning colors.
During the growing season, from early spring to early fall, feed your plant every 4 to 6 weeks.
In the winter months, when growth slows down, reduce fertilizing to once every 8 to 10 weeks.
Always follow the manufacturer’s instructions for the correct dosage and application method.
Feeding Wisely: Fertilizing Precautions and Tips
When fertilizing your Croton plant, keep these precautions and tips in mind:
Never fertilize a dry plant: Water your Croton plant thoroughly before applying fertilizer to prevent root burn.
Dilute fertilizer: Over-fertilizing can harm your plant. If you’re unsure about the strength of the fertilizer, dilute it to half-strength to avoid any issues.
Observe your plant: Keep an eye on your Croton plant’s health and adjust your fertilizing schedule if needed.
Yellowing leaves or leggy growth may indicate a need for more nutrients, while brown leaf tips or slow growth could be a sign of over-fertilizing.
Flush the soil occasionally: Over time, excess salts from fertilizer can build up in the soil. To prevent this, periodically flush the soil with water to remove any buildup.
Quenching Their Thirst: Watering Croton Plants

Proper watering is essential for keeping your Croton plant happy and healthy.
In this section, we’ll dive into the best practices for watering your Croton plant, discuss how to avoid common issues like overwatering and share helpful tips for maintaining the perfect moisture balance.
H2O Harmony: Best Practices for Watering Your Croton Plant
Proper watering is key to maintaining a healthy Croton plant.
These plants prefer consistently moist soil but are sensitive to overwatering.
To strike the right balance, water your Croton plant when the top inch of soil feels dry to the touch.
Use lukewarm water and ensure that it reaches the root zone by watering until excess water drains from the bottom of the pot.
Empty the saucer after watering to prevent the plant from sitting in standing water.
Reading the Leaves: Signs of Overwatering and Underwatering
Keeping an eye on your Croton plant’s leaves can provide valuable clues about its watering needs.
Here are some common signs of overwatering and underwatering:
Overwatering: Yellowing leaves, black or mushy roots, and a musty odor are all signs of overwatering. Root rot can develop in waterlogged soil, so it’s essential to address overwatering issues promptly.
Underwatering: If your Croton plant is underwatered, its leaves may become dry, crispy, and wilted. Prolonged underwatering can lead to leaf drop.
Adjust your watering routine if you notice any of these signs to help your Croton plant recover and thrive.
Water Wisdom: Adjusting Watering Frequency for Seasons and Conditions
Your Croton plant’s watering needs may change depending on the season and your home’s conditions.
In the warmer months, you may need to water your Croton plant more frequently as the soil dries out faster.
Conversely, during the cooler months, the soil retains moisture longer, so you may need to water less often.
Monitor your plant’s soil moisture and adjust your watering schedule accordingly.
Additionally, factors like humidity, pot size, and airflow can affect how quickly the soil dries out, so be prepared to adapt your watering routine to suit your Croton plant’s unique environment.
A Perfect Home: Pots and Soil for Croton Plants

The right pot and soil can make all the difference in your Croton plant’s health and growth.
In this section, we’ll explore the ideal pot and soil types for Croton plants, learn about proper drainage, and discover how to create the perfect environment for your plant’s roots to thrive.
Perfect Pots: Ideal Pot Types and Sizes for Croton Plants
Choosing the right pot for your Croton plant is crucial for its health and growth.
Opt for a container made from materials like ceramic, terracotta, or plastic, which all have their unique benefits.
Terracotta pots are porous, allowing for better airflow and moisture control, while plastic pots retain moisture longer and are lighter to move around.
If you choose a ceramic pot make sure it has a drainage hole. If it doesn’t consider using it as a decorative outer pot.
Both ceramic and terracotta pots are heavy and resist tipping. This can become a problem with lighter plastic pots as your plant continues to grow.
Whichever material you choose, ensure that the pot has drainage holes to prevent waterlogging.
As for size, pick a pot that is 1 to 2 inches larger in diameter than the current root ball to provide enough room for growth.
Soil Savvy: Choosing the Right Soil Mix with Coco Coir and Perlite
A well-draining soil mix is essential for maintaining a healthy Croton plant.
A blend of coco coir and perlite is an excellent choice, as it offers a balance of water retention and drainage.
Coco coir holds and releases water as the plant needs it, while perlite improves aeration and drainage.
You can create your own mix by combining equal parts of coco coir and perlite, and create a high-quality potting soil.
This blend will ensure that your Croton plant’s roots receive adequate moisture, oxygen, and nutrients.
Drainage and Aeration Dynamics: Ensuring Proper Drainage and Aeration
Promoting proper drainage and aeration is key to preventing root rot and keeping your Croton plant healthy.
Here are some tips to achieve this:
Use pots with drainage holes: This allows excess water to escape, preventing waterlogged soil.
Elevate your pot: Use a pot stand, saucer, or tray to lift the pot slightly off the surface, which promotes airflow and aids drainage.
Add a layer of drainage material: Place a layer of pebbles, gravel, or small stones at the bottom of the pot to enhance drainage.
Fluff the soil occasionally: Gently loosen the top layer of soil with a fork or your fingers every few months to prevent compaction and promote aeration.
Avoid overwatering: Always check the soil’s moisture level before watering and adjust your watering routine as needed to prevent soggy conditions.
Time for a Change: Repotting Croton Plants

Is your Croton plant ready for a new home?
In this section, we’ll discuss the signs that it’s time to repot your Croton plant, learn the best techniques for repotting, and share helpful tips for ensuring a smooth transition to a new pot.
Repotting Radar: Signs Your Croton Plant Needs Repotting
Knowing when to repot your Croton plant is crucial for its continued growth and health.
Keep an eye out for these signs that it’s time for a new home:
Root-bound: If you notice roots growing out of the drainage holes or forming a dense mat at the bottom of the pot, it’s time to repot.
Stunted growth: A lack of new growth or slower-than-normal growth can indicate that your Croton plant needs more space to thrive.
Frequent wilting: If your plant wilts even after regular watering, it might be struggling due to limited root space.
Top-heavy or unstable: A Croton plant that becomes top-heavy or unstable in its pot can benefit from a larger container for better support.
Repotting Roadmap: Step-by-Step Repotting Guide
Follow these simple steps to repot your Croton plant successfully:
• Choose a new pot that’s 1 to 2 inches larger in diameter than the current one.
• Fill the new pot with a layer of drainage material, like pebbles or gravel.
• Prepare your soil mix of coco coir, perlite, and high-quality potting soil.
• Carefully remove the Croton plant from its current pot, gently loosening the roots if they’re compacted.
• Place the plant in the new pot, ensuring the top of the root ball is slightly below the rim.
• Fill in around the root ball with your prepared soil mix, gently patting it down to eliminate air pockets.
• Water your newly repotted Croton plant thoroughly and let it drain.
Repotting Recovery: Post-Repotting Care Tips
Help your Croton plant settle into its new home with these post-repotting care tips:
• Place the repotted plant in a bright, indirect light for the first few days to minimize stress.
• Keep an eye on the soil moisture, as newly repotted plants may need more frequent watering initially.
• Hold off on fertilizing for at least a month after repotting to allow your Croton plant to adjust to its new environment.
• Monitor your plant for any signs of stress or health issues, and adjust care as needed to ensure a smooth transition.
Spread the Beauty: Propagation of Croton Plants

Sharing the joy of your Croton plant with friends and family has never been easier!
In this section, we’ll dive into the world of Croton plant propagation, explore different propagation methods, and provide step-by-step guidance on how to create new, vibrant Croton plants from your existing one.
Propagation Pathways: Methods for Propagating Croton Plants
Growing new Croton plants from your existing one is a fun and rewarding process.
There are two common methods for propagating Croton plants:
Stem cuttings: This method involves taking a healthy stem cutting from the parent plant and encouraging it to grow roots.
Air layering: A slightly more advanced technique, air layering involves encouraging root growth on a still-attached stem before cutting it off and planting it separately.
Propagation Playbook: Step-by-Step Guide to Successful Propagation
Here’s a simple guide to propagating Croton plants using stem cuttings:
• Choose a healthy, vigorous stem with at least 3 to 4 leaves.
• Using clean, sharp pruning shears, make a 45-degree cut about 4 to 6 inches from the tip of the stem.
• Remove the lower leaves, leaving only the top two or three.
• Dip the cut end in rooting hormone to encourage faster root development.
• Plant the cutting in a small pot filled with a well-draining soil mix (such as a combination of coco coir, perlite, and potting soil).
• Water the cutting well and place it in a warm, humid environment, like a mini greenhouse or under a plastic bag.
• Keep the soil consistently moist and watch for new growth, which indicates successful rooting.
Croton Cutting Care: Caring for Your New Croton Plant Cuttings
Once your Croton plant cutting has rooted and begun to grow, follow these tips to help it thrive:
Gradually expose your new Croton plant to brighter light, but avoid direct sunlight initially to prevent scorching the young leaves.
Water your Croton cutting regularly, ensuring the soil remains consistently moist but not waterlogged.
Begin fertilizing your new plant with a balanced, diluted liquid fertilizer about a month after rooting.
Monitor your new Croton plant for any signs of pests or disease, and treat promptly to ensure its continued health and growth.
As your new Croton plant grows, follow the same general care guidelines as for your mature Croton plant, including proper light, watering, and fertilizing.
Insect Pests, Diseases, and Treatments for Croton Plants
Even with the best care, Croton plants can sometimes face issues with insect pests and diseases.
In this section, we’ll explore common pests and diseases that can affect your Croton plant and discuss how to treat and prevent these problems to keep your plant healthy and vibrant.
Identifying Common Insect Pests
Some of the most common insect pests that can infest Croton plants include:
Spider mites: Tiny arachnids that create fine webs on the plant and cause leaves to develop yellow spots, curl, and eventually fall off.
Mealybugs: Small, white, cottony insects that cluster on stems and leaves, sucking plant sap and causing leaf drop and stunted growth.
Scale insects: Small, oval-shaped insects that attach themselves to plant stems and leaves, secreting a sticky substance called honeydew and causing leaf drop and poor growth.
Battling Diseases in Croton Plants
While Croton plants are relatively disease-resistant, they can sometimes suffer from issues like:
Root rot: Caused by overwatering and poor drainage, root rot leads to yellowing leaves, wilting, and eventual plant death if not addressed.
Leaf spot: Fungal or bacterial infections causing small, discolored spots on leaves, which can lead to leaf drop if not treated.
Treating and Preventing Insect Pests and Diseases
To protect your Croton plant from pests and diseases, follow these steps:
Maintain proper care: Ensure that your plant receives the right amount of light, water, and nutrients to keep it healthy and resistant to pests and diseases.
Regular inspections: Examine your plant regularly for signs of pests or diseases, and treat promptly to prevent further damage.
Pest control: For insect pests, use insecticidal soap or neem oil, following the product’s directions. Remove heavily infested leaves and dispose of them properly.
Disease treatment: If your Croton plant shows signs of disease, remove affected leaves and improve care conditions.
For fungal infections, apply a fungicide following the product’s directions.
Prevention: To prevent future issues, ensure good air circulation around your plant, avoid overwatering, and keep the area around the plant clean and free of debris.
By staying vigilant and following these tips, you can keep your Croton plant healthy and pest-free, allowing it to continue adding color and beauty to your indoor space.
Croton Plant: Indoor or Outdoor?

The great debate: should your Croton plant live indoors or outdoors?
These versatile plants can thrive in both environments, but there are some key factors to consider before making your decision.
In this section, we’ll discuss the pros and cons of growing Croton plants indoors versus outdoors, as well as provide tips on how to transition your plant between the two settings.
So, let’s dive into the world of Croton plant care and find the perfect home for your vibrant, tropical friend!
Home Sweet Home: Ideal Conditions for Indoor Growth
Growing Croton plants indoors allows you to enjoy their vibrant colors year-round, regardless of your climate.
To thrive indoors, Crotons require bright, indirect light, preferably from a sunny window.
They also need consistent temperatures between 60-80°F and humidity levels above 40%.
Avoid placing your Croton near drafts or air vents, as they are sensitive to temperature fluctuations.
Additionally, use well-draining soil and a pot with drainage holes to prevent root rot from overwatering.
Summer Vacation: How to Transition Croton Plants Outdoors for Summer
If you’d like to give your Croton plant some outdoor time during the warmer months, start by placing it in a sheltered area, like a porch or patio, during the day and bringing it inside at night.
After 3-4 days of this routine, leave your plant outside full-time in the sheltered area.
A few days later, move it to its desired outdoor location with full or dappled sunlight.
This gradual acclimation process helps your Croton plant adjust to its new environment without going into shock.
The Art of Acclimation: The Importance of Hardening Off

Hardening off is a crucial step in transitioning your Croton plant between indoor and outdoor environments.
This process allows your plant to slowly acclimate to the change in light intensity, temperature, and humidity levels, reducing the risk of stress or damage.
Skipping the hardening-off process can cause your Croton plant to lose leaves, experience sunburn, or even suffer from more severe stress-related issues.
By taking the time to properly harden off your Croton plant, you’ll ensure its health and happiness as it moves between its indoor and outdoor homes.
Croton Plant Care: Leaves Falling Off

Oh no! Are the leaves on your Croton plant falling off, leaving you worried and puzzled?
Don’t panic just yet! In this section, we’ll delve into the common reasons behind this issue and provide valuable tips on how to address and prevent leaves from falling off your beloved Croton plant.
By understanding the causes and taking the right steps to care for your plant, you’ll be on your way to restoring its lush, vibrant foliage in no time.
Let’s get to the root of the problem and bring your Croton plant back to its full glory!
Uncovering the Mystery: Common Causes of Leaf Drop
Leaf drop in Croton plants can be attributed to several factors, including:
Inconsistent watering: Overwatering or underwatering can cause stress and leaf drop.
Changes in light: A sudden change in light exposure, such as moving your plant to a darker or brighter location, can result in leaf loss.
Temperature fluctuations: Crotons are sensitive to drafts and temperature changes, which can lead to leaves falling off.
Pest infestations: Insects like spider mites or mealybugs can cause stress and leaf drop.
Problem-Solving: How to Prevent and Address Leaf Drop
To tackle leaf drop in Croton plants, follow these steps:
Check your watering routine: Ensure the top 1-2 inches of soil are dry before watering and avoid overwatering or letting the plant sit in standing water.
Maintain consistent lighting: Place your Croton in a bright, indirect light source and avoid sudden changes in light exposure.
Keep temperatures stable: Avoid placing your Croton near drafts, air vents, or cold windows. Maintain temperatures between 60-80°F.
Inspect for pests: Regularly examine your plant for signs of pests and treat any infestations promptly using insecticidal soap or neem oil.
Turning Over a New Leaf: Signs of Recovery and Healthy Growth
Once you’ve addressed the issues causing leaf drop in your Croton plant, look for signs of recovery and healthy growth.
New leaves sprouting at the tips of the stems or the base of the plant are excellent indicators that your Croton is on the mend.
It may take a few weeks to see significant progress, but with consistent care and attention, your Croton plant should bounce back and regain its vibrant, lush appearance.
Do Croton Plants Like to Be Root Bound?
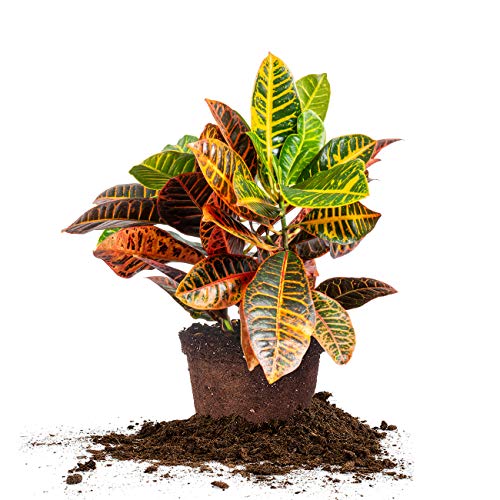
Are you wondering if your Croton plant prefers to be root bound or if it’s time for a bigger pot?
In this section, we’ll discuss the root preferences of Croton plants and provide guidance on when and how to repot your colorful companion.
Understanding your Croton plant’s root system and preferences is crucial for maintaining its overall health and vibrancy.
Let’s explore this topic together and ensure your Croton plant has the ideal home for its roots to flourish!
Getting to the Root of It: Understanding Root-Bound Conditions
A root-bound plant is one where the roots have outgrown the available space in the pot, often forming a tightly packed root mass.
This can limit the plant’s ability to access nutrients and water, potentially causing stress and hindering growth.
Knowing when your Croton plant is root-bound is essential for providing optimal care and maintaining its overall health.
Root Bound or Not? Effects on Croton Plants
Croton plants can tolerate being slightly root-bound, but excessive root growth can lead to issues such as reduced growth, yellowing leaves, or even root rot from poor drainage.
It’s essential to strike a balance between giving your Croton plant enough room to grow and not letting it become too root-bound, which can negatively impact its health and vibrancy.
Root Management 101: Tips for Managing Root Growth

To manage your Croton plant’s root growth effectively, follow these tips:
Inspect the roots: Gently remove your Croton plant from its pot to check for signs of overcrowding, such as a dense root mass or roots circling the pot’s interior.
Repot when necessary: If your Croton plant appears root-bound, repot it into a container that’s 1-2 inches larger in diameter than its current pot, using well-draining soil.
Trim roots: In cases of severe root-binding, carefully trim away some of the outer roots before repotting to encourage healthy growth and better nutrient absorption.
Monitor growth: Keep an eye on your Croton plant’s overall health and growth to determine if it’s time for a bigger pot or if its current living conditions are just right.
Are Croton Plants Toxic to Pets?
Yes. Croton plants (Codiaeum variegatum) should be kept away from cats, dogs, and other pets that may chew on houseplants. The leaves, stems, and sap can cause irritation if eaten or handled.
If a pet chews on a Croton, possible problems can include irritation of the mouth, drooling, vomiting, or digestive upset. The milky sap can also irritate the skin, so I recommend wearing gloves when pruning or taking cuttings.
Place your Croton where curious pets cannot reach it, and clean up any fallen leaves or pieces of stem. If you suspect your pet has eaten part of the plant and develops symptoms, contact your veterinarian.
You can also check the ASPCA Toxic and Non-Toxic Plant List for additional pet-safety information.
Croton Plant Indoor Care FAQs
How do you care for a Croton plant indoors?
Give your Croton plenty of bright light, warm temperatures, and consistent moisture without keeping the growing mix waterlogged. Use a well-draining mix and a container with drainage holes. Crotons also appreciate higher humidity and regular feeding during active growth.
How often should you water a Croton plant?
Instead of watering on a strict schedule, check the growing mix. Water when the top inch begins to feel dry. Water thoroughly until excess water drains from the bottom of the container, and don’t leave the pot sitting in standing water.
How much light does an indoor Croton need?
Crotons need plenty of bright light to maintain their colorful foliage. A bright window can work well indoors. If your Croton doesn’t receive enough natural light, a grow light can help provide the additional light it needs.
Why is my Croton losing its color?
Insufficient light is one of the first things to consider when a Croton’s foliage becomes less colorful. Move the plant to a brighter location if necessary. Remember that leaf color and patterns also vary considerably among Croton varieties.
Why are the leaves falling off my Croton?
Crotons can drop leaves when their growing conditions suddenly change. Temperature changes, drafts, changes in light, overwatering, underwatering, and pests can all contribute to leaf drop. Check the plant’s growing conditions before deciding what needs to be changed.
Do Crotons like humidity?
Yes. Crotons are tropical plants and appreciate higher humidity. Dry indoor air can become more of a concern during winter, so a humidifier can be useful if the air around your plants becomes especially dry.
Can you put a Croton outside during summer?
Yes. You can move an indoor Croton outside when temperatures are warm enough. Acclimate the plant gradually to stronger outdoor light instead of moving it directly from indoor conditions into intense sunlight.
How big do Croton plants get indoors?
Crotons can commonly reach about 3 to 6 feet tall indoors, although size depends on the variety, growing conditions, container size, and pruning. You can prune an established plant to help control its size and encourage bushier growth.
When should you repot a Croton?
Repot when your Croton becomes root-bound or has clearly outgrown its container. Roots growing from the drainage holes, reduced growth, or water running rapidly through a root-filled pot can indicate that it’s time for a larger container.
How do you propagate a Croton plant?
Stem cuttings are one of the easiest ways to propagate Crotons. Take a healthy stem cutting with several leaves, remove the lower leaves, and root the cutting in a moist growing medium. Croton cuttings can also be rooted in water.

Croton Plant Indoor Care Final Thoughts
Crotons are some of the most colorful foliage plants you can grow indoors. Give them plenty of light, consistent moisture, warm temperatures, and a well-draining growing mix, and they can reward you with bright foliage throughout the year.
Once you find a location where your Croton is happy, try not to make unnecessary changes. These plants can respond to sudden changes in light, temperature, or watering by dropping leaves. Keep an eye on the plant, learn how quickly its growing mix dries, and adjust your care as conditions change through the seasons.
Don’t be afraid to prune an established Croton if it becomes too large or leggy. Pruning can help control its size and encourage fuller growth, and the healthy stems you remove give you an opportunity to propagate new plants.
Whether you grow a Croton as a colorful floor plant, keep a smaller one near a bright window, or move it outdoors during warm summer weather, its multicolored foliage can add a tropical splash of color that’s hard to match with an ordinary green houseplant.
Recap of Key Care Tips
Let’s recap some essential care tips for your Croton plant:
- Provide bright, indirect light to maintain vibrant foliage colors.
- Water when the top 1-2 inches of soil are dry, avoiding overwatering.
- Keep temperatures stable, ideally between 60-80°F, and avoid drafts.
- Regularly inspect your plant for pests and treat infestations promptly.
Emphasizing the Beauty and Benefits of Croton Plants

Croton plants are prized for their air-purifying abilities, mood-boosting properties, and stunning, vibrant colors.
By mastering their care requirements, you’ll be rewarded with a thriving, visually captivating plant that enhances your indoor space and overall well-being.
A Flourishing Future: Encouraging Readers to Try Growing Croton Plants Indoors
Now that you’re equipped with the knowledge and tips for successful Croton plant indoor care, we encourage you to try your hand at growing these stunning plants.
Embrace the journey, learn from your experiences, and enjoy the process of nurturing your Croton plant.
With patience, love, and attention, you’ll soon find yourself surrounded by the vivid beauty and uplifting energy of your thriving Croton plant.
You Can Buy Your Own Croton Plant On Amazon
🌿 Indoor Houseplant Growing Guides
Want to fill your home with lush, vibrant greenery? These expert indoor houseplant guides will help you grow everything from exotic blooms to hardy foliage with ease!
- 🌿 Benefits of Keeping Indoor Houseplants (Pillar Guide)
- 🌱 Can You Grow Gladiolus Indoors? 11 Easy Gladioli Growth Tips
- 🍃 Pink Wandering Jew: Easy Nanouk Tradescantia Care
- 🌾 Tī Plant Care Indoors: 7 Proven Tips To Transform Your Space
- 🪴 Rubber Plant Care Indoors: 11 Best Care Tips For Beginners
- 🍀 Ficus Benjamina Indoors: 6 Easy Growth Tips For Beginners
- 🌼 How To Care For Peace Lily Indoors: 13 Easy Care Growth Tips
- 🌹 Bubble Gum Plant Care: 11 Tips And Tricks For Beginners
- 🌺 Hibiscus Plant Care Indoors: 7 Growth Tips For Beginners
- 🍂 Growing Jacob’s Ladder Indoors: Comprehensive Guide
- 🌷 Purple Shamrock Plant Care: 13 Tips And Tricks For Beginners
- 🌿 Creeping Jenny In Pots: 13 Lysimachia nummularia Growth Tips
- 🏡 Vertical Gardening Ideas: Best Small Space Garden Ideas
- 🪴 Chinese Money Plant Care Indoors: 7 Easy Growth Tips
- 🌳 9 Triangle Ficus Care Secrets for a Lush, Healthy Plant
- 🍌 Ice Cream Banana Tree Care: 15 Tip Complete Growth Guide
- 🌱 How to Make a Nerve Plant Thrive: 10 Tips and Tricks
- 🌸 African Violet Care Indoors: 11 Easy Care Tips For Beginners
- 🌺 Alternanthera Party Time Care: 7 Easy Growth Hacks
- 🌼 Geranium Care In Pots: 9 Geranium Growth Tips For Beginners
- 🌿 Purple Velvet Plant Care: 7 Easy Growth Tips And Tricks
- See all articles in our Indoor Houseplants category
 Steve S. is the creator of