This post contains affiliate links. If you buy something from one of our links we may earn a commission. Thanks
Discover how to care for bromeliads with our ultimate guide! Uncover expert tips on planting, light, watering, and more for your tropical paradise.
Caring for Bromeliads indoors involves placing them in bright, indirect light and keeping their central cup filled with distilled water. Use a well-aerated potting mix and ensure the pot has good drainage. Water the soil sparingly and fertilize lightly during the growing season. A consistent care routine will keep your Bromeliad thriving.
Welcome, fellow plant enthusiasts! If you’re looking to transform your space into a lush, tropical haven, you’re in the right spot.
In this ultimate guide, we’ll teach you how to care for bromeliads, those vibrant, eye-catching plants that add a touch of the exotic to any room.
With our easy-to-follow tips and tricks, you’ll be well on your way to nurturing these stunning beauties and creating your very own slice of paradise.
So, grab a cup of tea, sit back, and let’s get started on this exciting botanical journey!
1. How To Care For Bromeliads Introduction

We’re thrilled to have you here as we embark on an exciting adventure into the world of bromeliads.
These stunning, tropical plants are known for their vibrant colors and unique foliage, making them a fabulous addition to any space.
In this introduction, we’ll offer a glimpse into the captivating world of bromeliad care, setting the stage for a fun and informative journey.
Together, we’ll explore everything from planting and propagation to light requirements and pet safety.
So, let’s dive in and discover the secrets to keeping your bromeliads healthy and thriving!
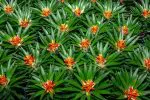
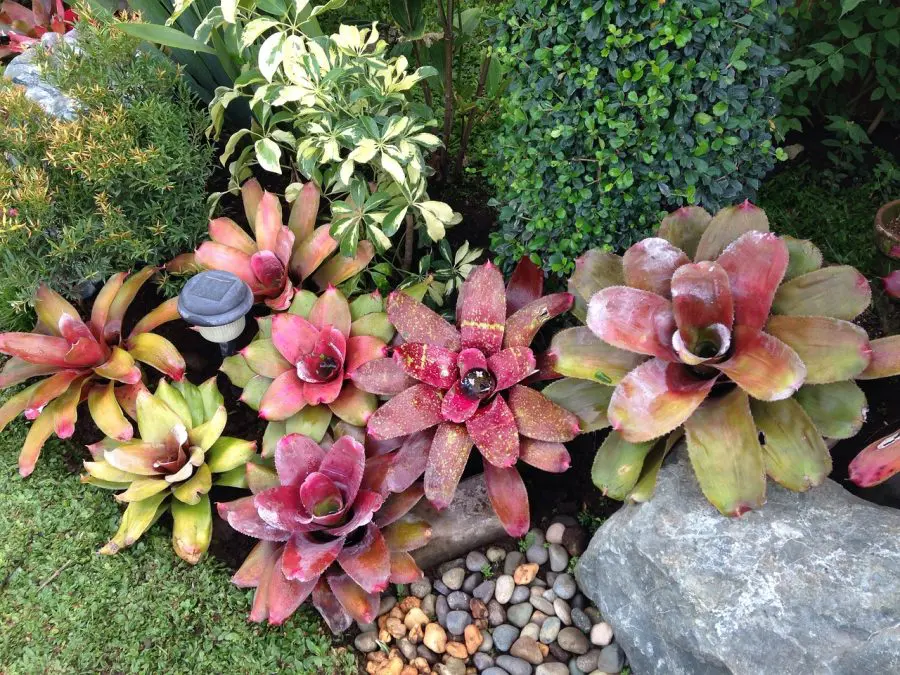
The Beauty and Diversity of Bromeliads
Welcome to the enchanting world of bromeliads! These tropical plants boast incredible diversity, with over 3,000 species that come in various shapes, sizes, and colors.
From the pineapple (yes, it’s a bromeliad!) to the air-purifying Tillandsia, there’s a bromeliad for everyone.
Whether you’re into vibrant, show-stopping blooms or love the unique, architectural foliage, these plants never fail to impress.
The best part? Their easygoing nature makes them perfect for beginners and seasoned plant lovers alike.
The Importance of Proper Care for Bromeliads
Now that we’ve sung the praises of these fabulous plants, let’s talk about how to care for bromeliads and why giving them proper care is so essential.
Just like any other living thing, bromeliads need love and attention to flourish.
By understanding their specific needs and preferences, you’ll be able to provide the right environment for them to thrive.
Plus, well-cared-for bromeliads reward you with stunning displays of color and captivating growth patterns.
So, buckle up and get ready to become the ultimate bromeliad whisperer! Your plants (and your home) will thank you for it.
2. Understanding Bromeliads

Welcome to Chapter 2, where we’ll dive deeper into understanding bromeliads and what makes these tropical treasures so special.
As we get to know these captivating plants, we’ll explore their growth habits, uncover the difference between indoor and air varieties, and learn about their fascinating cousin, Tillandsia.
By gaining a better understanding of bromeliads, you’ll be well-equipped to give them the care they deserve.
So, let’s jump in and immerse ourselves in the colorful, intriguing world of bromeliad plants!
How to Grow Bromeliads
Growing bromeliads is a breeze once you get the hang of it!
These adaptable plants are generally low-maintenance, making them a joy to care for.
To start, find the perfect spot for your bromeliad – one that provides bright, indirect light.
Next, ensure they have well-draining soil and a pot with drainage holes to prevent root rot.
Remember, bromeliads prefer humidity, so misting or using a pebble tray can help maintain the right environment.
With a little attention to their needs, you’ll see your bromeliads grow and thrive in no time!
Are Bromeliads Indoor Plants?
You bet! Bromeliads make fantastic indoor plants due to their versatility and adaptability. Read more: Bromeliad Care Indoors For Beginners.
While they naturally grow in tropical environments, these beauties can easily acclimate to indoor conditions.
Their stunning appearance and ability to purify the air make them ideal additions to any home, office, or indoor space.
Just be sure to provide them with the right light, water, and humidity, and you’ll have a happy bromeliad on your hands.
Are Bromeliads Air Plants?
Not all bromeliads are air plants, but some are! The term “air plant” typically refers to the Tillandsia genus, which is part of the larger bromeliad family.
These unique plants don’t need soil to grow, as they absorb nutrients and moisture through their leaves.
While not all bromeliads have this ability, those that do make for fascinating and low-maintenance plant companions.
Are Tillandsia Bromeliads?

Absolutely! Tillandsia is a genus within the bromeliad family, and it’s home to over 650 different species.
These intriguing plants are also known as air plants, thanks to their ability to grow without soil.
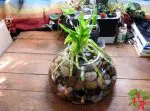
Growing Tillandsia Air Plants
Tillandsia air plants are super easy to care for and make charming additions to your plant collection.
To grow them successfully, provide bright, indirect light and good air circulation.
Instead of traditional watering, mist your Tillandsia plants 2-3 times a week or soak them in water for 20-30 minutes once a week.
Make sure to gently shake off any excess water to prevent rot. With minimal effort, you’ll watch your Tillandsia air plants flourish and brighten up your space.
3. Planting Bromeliads

Alright, plant enthusiasts, it’s time to get our hands dirty (literally!) as we venture into Chapter 3, all about planting bromeliads.
In this section, we’ll cover everything you need to know to give your bromeliads a great start, from choosing the right spot and providing proper lighting to selecting the ideal soil mix.
So, roll up your sleeves, grab your gardening gloves, and let’s dive into the delightful world of planting bromeliads, making sure these tropical beauties feel right at home!
How to Plant Bromeliads
Planting bromeliads is a fun and easy process.
• Start by choosing a well-draining pot with drainage holes to prevent waterlogging.
• Fill the pot with a loose, airy potting mix, ideally one designed for bromeliads or orchids.
• Gently place your bromeliad in the pot, ensuring the base of the plant is slightly above the soil line.
• Press the soil gently around the roots, taking care not to bury the plant too deeply. Voilà! Your bromeliad is now ready to grow and thrive.
Bromeliad Light Requirements
Bromeliad Artificial Light
Bromeliads typically love bright, indirect light. If natural light is scarce, don’t worry!
These plants can adapt to artificial light sources, such as fluorescent or LED grow lights.
Keep them under the light for around 12 hours a day, ensuring the light is not too intense to prevent scorching.
Bromeliad Low Light
Some bromeliad varieties can tolerate low light conditions, but their growth may be slower, and their colors might not be as vibrant.
If your bromeliad is in a low-light area, keep an eye on its health and move it to a brighter spot if you notice any issues.
Best Potting Soil for Bromeliads
Best Soil for Bromeliads
Bromeliads need a light, well-draining soil mix that allows for proper airflow.
A mix designed for orchids or bromeliads is ideal. You can also create your own blend using ingredients like bark, perlite, peat moss, and coconut coir.
The goal is to provide a mix that retains some moisture while allowing excess water to drain quickly.
How Often to Water Bromeliads
Watering bromeliads can be a bit different than other houseplants.
They have a central “tank” or “cup” formed by their leaves that collects water in nature.
Fill this cup with water and allow it to drain out between waterings.
For potted bromeliads, water the soil when it feels dry to the touch, ensuring the pot has proper drainage to prevent root rot.
Best Fertilizer for Bromeliads

Bromeliads are not heavy feeders, so a light application of fertilizer is usually enough.
Use a balanced, water-soluble fertilizer diluted to half the recommended strength.
Apply the fertilizer to the soil or mist it onto the leaves every 4-6 weeks during the growing season.
Avoid over-fertilizing, as it can cause damage to your bromeliad’s delicate roots.
What are some Low Light Bromeliads?
There are several bromeliad varieties that can tolerate low-light conditions better than others.
While they may not grow as quickly or display as vibrant colors as they would in brighter light, these low-light bromeliads can still make great indoor plants:

Neoregelia ‘Fireball’: This small bromeliad boasts deep red leaves that can tolerate lower light conditions, although it may appear greener in low light.
Vriesea splendens (Flaming Sword): Known for its striking patterned leaves and a bright red flower spike, this bromeliad is relatively adaptable to lower light conditions.
Guzmania lingulata: This popular bromeliad has glossy green leaves and a vibrant, long-lasting flower bract. It can survive in lower light but may require more light to encourage blooming.
Aechmea ‘Del Mar’: With its green leaves and pink inflorescence, this bromeliad can adapt to a variety of light conditions, including low light.
Billbergia nutans (Queen’s Tears): This epiphytic bromeliad can handle low light levels better than many other bromeliads, with its slender, green leaves and pendant flower spikes.
Remember that while these bromeliads can tolerate low light conditions, they will generally fare better and display more vibrant colors in brighter, indirect light.
If you notice your bromeliad struggling, try moving it to a location with more light to see if it improves its overall health and appearance.
4. Growing Bromeliads in Pots

Welcome to Chapter 4, where we’ll explore the wonderful world of growing bromeliads in pots!
These versatile tropical plants can easily adapt to life in containers, making them perfect additions to your indoor plant collection.
In this section, we’ll guide you through everything you need to know to successfully grow potted bromeliads, from selecting the right pot size and material to drainage and airflow considerations.
So, let’s get started and learn how to create a thriving, potted paradise with your stunning bromeliads!
How to Grow Bromeliads in Pots
Growing bromeliads in pots are a fantastic way to enjoy these tropical plants indoors.
Start by selecting a well-draining potting mix designed for bromeliads or orchids.
Plant your bromeliad in a pot with drainage holes, ensuring the base of the plant is slightly above the soil line.
Place your potted bromeliad in a spot with bright, indirect light, and maintain the right balance of moisture and humidity.
With a little attention to their needs, your potted bromeliads will flourish and brighten up your living space.
Choosing the Right Pot Size and Material
When it comes to selecting the perfect pot for your bromeliad, size, and material matter.
Bromeliads generally have shallow root systems, so opt for a pot that’s wider than it is deep.
A pot that’s too large may cause the soil to stay wet for too long, leading to root rot.
As for material, plastic, ceramic, or clay pots, all work well.
However, keep in mind that clay pots tend to dry out faster, so you may need to water more frequently if you choose this type of pot.
Drainage and Airflow Considerations
Proper drainage and airflow are crucial for keeping your potted bromeliads happy and healthy.
Ensure your pot has drainage holes to prevent waterlogging and use a well-draining potting mix that allows for adequate air circulation around the roots.
If your bromeliad’s leaves are turning yellow or the roots are soggy, it could be a sign of overwatering or poor drainage.
Keep an eye on your plants and adjust your care routine as needed to ensure they get the perfect balance of moisture and air.
Coco coir and perlite is a good potting mix for bromeliads
Coco coir and perlite can make a great potting mix for bromeliads. This combination offers several benefits that cater to the specific needs of these tropical plants.
Coco coir, which is made from the fibers found in coconut husks, is a popular choice for potting mixes due to its excellent water retention and aeration properties.
It helps to keep the roots moist while also preventing waterlogging, which is essential for bromeliads.
Perlite, on the other hand, is a lightweight volcanic rock that improves drainage and aeration in potting mixes.
Adding perlite to coco coir ensures that the soil remains well-draining and provides the necessary airflow around the bromeliad’s roots, promoting healthy root development.
A mix of coco coir and perlite offers the right balance of moisture retention and drainage, making it suitable for bromeliads.
You may also consider adding some bark to the mix to create an even more well-aerated and well-draining environment, closely mimicking the natural epiphytic growing conditions that many bromeliads prefer.
5. Propagating and Transplanting Bromeliads

Get ready to expand your bromeliad family, because in Chapter 5 we’re talking all about propagating and transplanting these vibrant beauties!
In this section, we’ll walk you through the exciting process of turning one bromeliad into many, covering the ins and outs of propagation through pups and diving into the best methods for transplanting your new plant babies.
So, let’s get started and unlock the secrets to multiplying your bromeliad collection, ensuring a continuous display of lush, tropical foliage in your home!
How to Propagate Bromeliads
Pups and Offsets
Propagating bromeliads using pups, or offsets, is the easiest and most common method.
As the mother plant matures, it produces baby plants around its base.
Once the pups reach about one-third the size of the mother plant or have several roots, they’re ready to be removed.
Gently separate the pup from the mother plant using a clean, sharp knife, or by gently twisting and pulling.
Plant the pup in a well-draining potting mix, and care for it as you would a mature bromeliad.
Seed Propagation
Seed propagation is less common and can be more challenging, but it’s still possible.
To start, collect seeds from a mature bromeliad after it has flowered. Spread the seeds on a well-draining potting mix and lightly mist them with water.
Cover the container with plastic wrap to maintain humidity and place it in a warm, bright location with indirect light.
Keep the seeds moist but not soggy. Germination may take several weeks, and the seedlings will grow slowly. Once they’re large enough to handle, transplant them into individual pots.
How to Transplant Bromeliads
Transplanting Bromeliads
When transplanting a bromeliad, choose a pot that’s slightly larger than its root system, ensuring it has drainage holes.
Prepare a well-draining potting mix, such as a combination of coco coir, perlite, and bark.
Gently remove the bromeliad from its current pot, loosening the soil around the roots.
Place the plant in the new pot and fill it with potting mix, making sure the base of the plant is slightly above the soil line.
When and How to Separate Pups
Separate pups from the mother plant when they’re about one-third the size of the parent or have developed several roots.
Using a clean, sharp knife or by gently twisting and pulling, detach the pup from the mother plant, taking care not to damage the pup’s roots.
Plant the pup in a well-draining potting mix and care for it as you would a mature bromeliad.
Do You Need to Repot Bromeliads And If So, How Often?
Bromeliads typically don’t require frequent repotting, as they have shallow root systems and can happily grow in the same pot for several years.
However, if you notice the potting mix has broken down, the plant is root-bound, or the pot is too small for the growing bromeliad, it’s time to repot.
Generally, repotting every 2-4 years is sufficient for most bromeliads.
When repotting, choose a slightly larger pot and fresh, well-draining potting mix to give your bromeliad the best environment to continue thriving.
6. Bromeliad Care and Maintenance

Welcome to Chapter 6, where we dive into the essentials of bromeliad care and maintenance!
These colorful, captivating plants may look exotic and high-maintenance, but with a little know-how, they’re actually quite easy to care for.
In this section, we’ll discuss everything from watering and fertilizing to managing pests and ensuring your bromeliads are safe for pets.
So, let’s dive in and learn the tips and tricks that will keep your bromeliad collection looking lush, vibrant, and thriving all year round!
Pruning and Grooming
Keeping your bromeliads well-groomed helps maintain their stunning appearance and overall health. Here are a few simple steps to follow:
• Remove Dead Leaves: As your bromeliad matures, some of its lower leaves may turn brown or yellow.
Gently remove these leaves by pulling them away from the base or using clean, sharp pruning shears.
This will encourage new growth and keep your plant looking tidy.
• Trim Flower Spikes: After a bromeliad has finished blooming, the flower spike will eventually wither and die.
Use clean, sharp pruning shears to trim the dead flower spike close to the base of the plant.
This helps direct energy back into the plant, promoting new growth and the formation of pups.
• Maintain the Water Reservoir: Many bromeliads have a central cup, or tank, that collects water.
Periodically flush the cup with clean water to prevent the buildup of debris and bacteria.
You can use a small watering can or a gentle stream of water from the faucet.
Detecting and Addressing Common Pests and Diseases
Bromeliads may occasionally be affected by pests or diseases. Here’s how to detect and address common issues:
• Scale Insects: Scale insects are small, round pests that suck sap from the plant, causing yellowing leaves and stunted growth.
If you notice scale insects, gently scrape them off with a soft brush or your fingernail. You can also treat the affected area with insecticidal soap or neem oil.
• Mealybugs: Mealybugs are small, white, cottony insects that can cause leaf distortion and yellowing.
To remove mealybugs, use a cotton swab dipped in rubbing alcohol to gently wipe them away. For more severe infestations, apply insecticidal soap or neem oil.
• Fungal Diseases: Overwatering and poor air circulation can lead to fungal diseases in bromeliads.
To prevent fungal issues, ensure your potting mix is well-draining, avoid overwatering, and maintain proper air circulation around your plants.
If you spot any signs of fungal disease, such as black or brown spots on leaves, remove the affected parts and consider applying a fungicide specifically labeled for bromeliads.
By regularly grooming and monitoring your bromeliads for pests and diseases, you’ll keep them looking healthy and vibrant.
Are bromeliad pots with a cup better than a regular pot?
 6'' Rand's Aircone Orchid Pot")
Bromeliad pots with a cup, sometimes called aircone pots, are specially designed pots for growing bromeliads and orchids.
These pots have a central cup or reservoir that mimics the natural water-collecting abilities of many bromeliads, allowing them to collect and store water in their central tank, just like they would in their native habitat.
Using a bromeliad pot with a cup can be beneficial for some species of bromeliads, especially those that prefer to have their central tank filled with water.
This design helps maintain consistent moisture and humidity levels around the plant, which can be especially important for species that rely on their central tank to absorb water and nutrients.
However, not all bromeliads require a central cup for successful growth. Some species, such as those in the Tillandsia genus, are better adapted to absorbing moisture and nutrients through their leaves, making the central cup less necessary.
When deciding whether to use a bromeliad pot with a cup or a regular pot, consider the specific needs of your bromeliad species.
If your bromeliad prefers to have a constantly filled central tank, then a pot with a cup might be beneficial.
On the other hand, if your bromeliad thrives with a well-draining potting mix and doesn’t rely heavily on its central tank for water absorption, a regular pot with good drainage should be sufficient.
In summary, a bromeliad pot with a cup can be useful for certain bromeliad species, but it’s not necessary for all types.
Always consider the specific needs of your plant and choose the most suitable pot to ensure its health and growth.
What is a central tank?
A central tank, also known as a water reservoir or cup, is a unique feature of many bromeliads, especially those belonging to the genera Guzmania, Vriesea, and Neoregelia.
This tank is formed by the overlapping arrangement of the plant’s leaves at the base, creating a natural water-holding structure.
In their native habitats, bromeliads with central tanks collect rainwater, organic debris, and even small insects in these reservoirs.
The tank provides a constant source of water and nutrients for the plant, which it absorbs through specialized cells called trichomes on the leaf surfaces.
In addition, the water-filled central tank creates a microhabitat for various organisms, such as insects, frogs, and other small creatures, which contribute to the bromeliad’s nutrient intake as they decompose.
When caring for bromeliads with central tanks, it is essential to keep the tank filled with water, as it is a crucial aspect of the plant’s hydration and nutrition.
However, it’s also important to periodically flush the tank with clean water to prevent the buildup of debris and bacteria that could harm the plant.
7. Bromeliads and Pets

Hey there, fellow bromeliad enthusiasts and pet lovers! In Chapter 7, we’ll be exploring the relationship between our beloved bromeliads and our furry (or feathery) friends.
If you’re a plant aficionado who shares your home with pets, you’ve probably wondered whether your bromeliads could pose any dangers to your animal companions.
Well, wonder no more! In this section, we’ll delve into the safety of bromeliads around pets, discuss potential risks, and offer some tips on creating a harmonious living space for both your plants and your pets.
Let’s get started and ensure a happy, healthy environment for all members of your household!
Are Bromeliads Safe for Cats?
The good news for cat owners is bromeliads are generally considered non-toxic to cats.
The American Society for the Prevention of Cruelty to Animals (ASPCA) lists most bromeliad species as safe for our feline friends.
While ingesting parts of a bromeliad might cause mild gastrointestinal upset in your cat, it’s not likely to result in severe poisoning or long-term health issues.
Tips for Keeping Pets and Bromeliads Safe
Provide a Dedicated Space for Your Plants: To minimize any potential issues between pets and bromeliads, create a dedicated plant space where your pets can’t access the plants.
This could be a separate room, a high shelf, or a hanging planter that’s out of reach of curious paws.
Train Your Pets: Teach your pets, especially cats and dogs, to avoid nibbling on plants.
Training them with verbal commands or using deterrents like citrus or bitter sprays on the plants can help keep both your pets and bromeliads safe.
Monitor Your Pets: Keep an eye on your pets when they’re around your bromeliads, and watch for any signs of them chewing on or ingesting parts of the plant.
If you notice any unusual behavior or symptoms, consult your veterinarian immediately.
Choose Pet-Friendly Bromeliads: While most bromeliads are considered safe for pets, it’s always a good idea to double-check before adding a new plant to your collection.
Research the specific bromeliad species you’re interested in and ensure it’s non-toxic to your pets.
By following these tips, you can create a safe and harmonious environment for both your bromeliads and pets, ensuring they coexist happily in your home.
Bromeliad Care FAQs
If you’re new to the world of bromeliads, you’re in for a treat. These exotic plants are a wonderful addition to any indoor space, offering vibrant colors and easy care requirements.
With their unique structure and captivating flowers, bromeliads can be quite a conversation starter.
However, like any plant, they come with their own set of care needs and questions that you might have.
Let’s dive into some of the most frequently asked questions about taking care of potted bromeliads.
Q: How do you take care of a potted bromeliad?
A: A potted bromeliad needs bright, indirect sunlight and prefers a well-draining potting mix.
Keep the central cup filled with distilled water and water the soil sparingly. Good airflow is also beneficial for the plant.
Q: How often do you water bromeliads?
A: The frequency of watering will depend on the humidity and temperature of your home.
Generally, you should aim to keep the central cup filled with water.
As for the soil, water it when it feels dry to the touch, but avoid waterlogging.
Q: What do you do with a bromeliad flower after it dies?
A: Once the flower has died, you can cut it off to improve the plant’s appearance.
This will also encourage the plant to focus its energy on producing pups, or baby bromeliads, at its base.
Q: How long do potted bromeliads last?
A: The lifespan of a potted bromeliad can vary, but generally, the mother plant will die after flowering.
However, it will usually produce pups before it dies, which can be separated and repotted to continue the lifecycle. With proper care, each generation can last for several years.
8. How To Care For Bromeliads Conclusion

Well, folks, we’ve reached the end of our bromeliad care adventure!
We hope you’ve enjoyed this colorful journey and picked up some valuable tips on how to care for bromeliads.
From understanding their unique features to planting, propagating, and maintaining these exotic beauties, we’ve covered it all.
And let’s not forget about our furry friends – we’ve ensured they can safely coexist with your bromeliad collection.
Now that you’re equipped with all this knowledge, it’s time to apply it and watch your bromeliads flourish!
Remember, caring for these captivating plants can be both fun and rewarding, so embrace the process, and don’t forget to share your experiences with fellow bromeliad enthusiasts. Happy planting!
A recap of how to care for Bromeliads:
• Understanding Bromeliads: Learn about the unique features of bromeliads, including their growth habits and natural habitat.
• Planting Bromeliads: Choose the right potting mix, pot type, and consider light requirements.
• Growing Bromeliads in Pots: Pick the appropriate pot size and material, and ensure proper drainage and airflow.
• Propagating and Transplanting: Learn how to propagate bromeliads through pups or seeds, and understand when and how to transplant or separate them.
• Bromeliad Care and Maintenance: Prune and groom your bromeliads, and be aware of common pests and diseases to keep them healthy.
• Bromeliads and Pets: Make sure your bromeliads are safe for your pets, and follow tips to ensure their coexistence.
Encouragement for Successful Bromeliad Care
• Patience and Persistence: Remember, learning to care for bromeliads takes time and practice. Don’t get discouraged if you face some challenges along the way – it’s all part of the journey.
• Experiment and Learn: Each bromeliad species is unique, and you may need to tweak your care routine to find what works best for your specific plant. Don’t be afraid to experiment and adjust your care techniques.
• Connect with Fellow Enthusiasts: Share your experiences, ask questions, and learn from others in the bromeliad community. Connecting with fellow plant lovers can provide valuable insights and support as you grow your bromeliad collection.
• Enjoy the Process: Embrace the joy of caring for these exotic plants and take pride in their growth and progress. Your dedication and passion for bromeliad care will lead to a thriving, vibrant collection that brightens up your living space.
9. Additional Bromeliad Care Resources
Hey there, bromeliad buddies! We know that you’re eager to learn even more about these stunning plants, and we’re here to help.
In Chapter 9, we’ve compiled a list of some fantastic additional resources that you can explore to expand your bromeliad knowledge.
From books and online articles to videos and community forums, these resources will provide you with in-depth information, helpful tips, and even more inspiration for your bromeliad journey.
So, get ready to dive deeper into the captivating world of bromeliads and become the ultimate plant parent!
Books and Websites on Bromeliad Care
Must-Read Books: Check out books like “Bromeliads for Home, Garden and Greenhouse” by David H. Benzing to expand your bromeliad knowledge.
Informative
Websites: Visit websites such as Bromeliad Society International (www.bsi.org), Bromeliads.info (www.bromeliads.info), and the American Orchid Society (www.aos.org) for valuable information, care tips, and the latest news on bromeliads.
Local and Online Bromeliad Clubs and Societies
Bromeliad Society International (BSI): BSI is a worldwide organization that connects bromeliad enthusiasts, provides a wealth of information, and supports research and conservation efforts. Consider joining BSI to access their resources and network with other bromeliad lovers.
Regional Bromeliad Societies: Look for local or regional bromeliad societies near you. These clubs often host meetings, workshops, and events where you can learn more about bromeliad care, swap plants, and make new friends who share your passion.
Online Forums and Social Media Groups: Join online forums, or Reddit or Facebook groups dedicated to bromeliads.
These platforms are perfect for asking questions, sharing experiences, and learning from fellow bromeliad enthusiasts around the world.