This post contains affiliate links. If you buy something from one of our links we may earn a commission. Thanks
Welcome to our guide on Indoor Ferns Care! If you’re looking to bring some nature into your home, ferns are a great choice for indoor gardening.
Growing ferns indoors is a viable option for adding lush greenery to your living space. Opt for a north-facing window or a spot with indirect light for best results. Keep the soil consistently moist and maintain high humidity around the plant. Regular misting and a well-draining potting mix can further enhance your fern’s health.
They’re easy to care for, look beautiful, and these indoor plants can even help purify the air.
In this post, we’ll share our tips for keeping your indoor ferns happy and healthy. So, grab a cup of jo, and let’s get started!
Introduction To Indoor Ferns Care
Hey there! Are you looking to add a touch of nature to your indoor space? Indoor ferns are a perfect way to do just that.
Not only are they easy to care for, but they also have air-purifying benefits that can help improve the air quality in your home or office.
In this post, we’ll cover everything you need to know about Indoor Ferns Care, including how to choose the right fern for your space, basic care, troubleshooting common issues, propagation, and more.
Let’s dive in!
What Are Indoor Ferns?
Indoor ferns are a popular choice for houseplants due to their unique appearance and ability to thrive in low-light conditions.
These plants feature lacy leaves that come in a variety of shapes and sizes, ranging from delicate to bold.
Not all fern fronds are lacy though and some ferns have more strap-like leaves.
Also while many tropical ferns are kept indoors there are also winter-hardy varieties like sword ferns.
Ferns are a good idea for adding a natural touch to your indoor environment and are easy to care for, making them perfect for beginners.
Why indoor Ferns?
Indoor ferns not only add beauty to your home but also have air-purifying benefits that can help improve your indoor air quality.
They work by removing pollutants and toxins from the air and can also help to increase indoor humidity levels.
Plus, they’re a great way to reduce stress and improve mental health by providing a calming, natural element to your indoor environment.
An Overview Of Indoor Ferns Care
Caring for indoor ferns is relatively easy, but it does require some attention and care.
Some of the key things to consider include light requirements, temperature and humidity needs, watering and fertilization, pruning and grooming, and soil and potting.
We’ll go over all of these topics in detail, as well as provide some tips on how to troubleshoot common issues that can arise.
By following our guide, you’ll be able to keep your indoor ferns healthy and thriving for years to come!
Choosing the Right Fern
Choosing the right fern for your indoor space can be an exciting but daunting task, especially with so many different types to choose from.
The good news is that with a little bit of knowledge, you can easily narrow down your options and find the perfect fern for your home or office.
In this section, we’ll go over some of the key factors to consider when choosing the right fern, including light requirements, space limitations, and personal preference.
So, let’s get started and find the perfect fern for your indoor space!
Factors to consider when choosing indoor ferns:
Before you start shopping for indoor ferns, there are a few factors you should consider to ensure you find the perfect plant for your space.
Some of the key factors include the amount of light your indoor space receives, the size of your space, your personal style preferences, and your level of experience with plant care.
By considering these factors, you’ll be able to narrow down your options and find the perfect fern for your home or office.
Popular fern varieties for indoor use:
When it comes to indoor ferns, there are a variety of different types to choose from, each with its own unique appearance and care requirements.
Some of the most popular indoor fern varieties include the Boston Fern, the Maidenhair Fern, and the Bird’s Nest Fern.
These ferns are known for their ability to thrive in low-light conditions.
We’ll go over each of these varieties in more detail and share some tips for caring for them.
3 Beginner Fern Varieties
Here are 3 fern varieties that are easy to care for and perfect for beginners or anyone who wants to try growing ferns indoors.
Boston Fern (Nephrolepis exaltata):
")
The Boston fern is a classic fern with long, arching fronds that can grow up to 3 feet long.
It’s a popular choice for its attractive appearance, but also for its ability to purify the air, making it a great addition to any indoor space.
Boston ferns are a good choice for beginners because they are relatively easy to care for, can tolerate a wide range of light conditions (although they prefer bright, indirect light), and don’t require a lot of water.
Maidenhair Fern (Adiantum spp.):
")
The Maidenhair fern is a delicate-looking fern with black, wiry stems and small, delicate fronds.
It’s a popular choice for its graceful appearance and is often used in terrariums or as a hanging plant.
Maidenhair ferns are a good choice for beginners because they can tolerate low light and don’t require a lot of water.
However, they do require high humidity, so they may be better suited to bathrooms or other humid areas.
Bird’s Nest Fern (Asplenium nidus):
")
The Bird’s Nest fern is a unique fern with wide, flat fronds that grow in a circular rosette pattern, resembling a bird’s nest.
It’s a popular choice for its unique appearance and low-maintenance requirements.
Bird’s Nest ferns are a good choice for beginners because they can tolerate low light conditions and are relatively easy to care for.
They prefer to be kept consistently moist but can tolerate occasional periods of drought. They also do not require a lot of fertilizer.
Where to buy indoor ferns:
Now that you know what to look for when choosing the right fern for your space, the next step is to find a reputable seller. You can buy live ferns on Amazon.
You can purchase indoor ferns from a variety of sources, including local plant nurseries, garden centers, online retailers, and even grocery stores.
We’ll go over some of the pros and cons of each option, as well as share some tips for ensuring you’re buying a healthy, high-quality plant.
So, let’s get started and find your perfect indoor fern!
Basic Care for Indoor Ferns

Congratulations, you’ve brought home your new indoor fern! Now it’s time to learn the basics of how to care for it.
While ferns are generally easy to care for, there are a few key things you need to keep in mind to ensure your plant stays healthy and happy.
In this section, we’ll go over the basics of indoor fern care, including lighting requirements, watering frequency, and potting needs.
By following our tips, you’ll be able to give your fern the best possible care and enjoy its beauty for years to come.
Light requirements:
One of the most important factors to consider when caring for indoor ferns is lighting.
We’ll go over some tips for finding the right amount of light for your fern and what to do if your fern isn’t getting enough light.
Signs a fern is getting too much or too little light
Signs a fern is getting too much light:
• The fronds are pale or yellowish in color
• The fronds are dry or crispy to the touch
• The tips of the fronds are brown and dry
• The fern is dropping leaves
Signs that a fern is getting too little light:
The fronds are small or stunted in size
The fern is growing slowly or not at all
The fronds are spaced far apart
The fern is stretching or leaning toward the light source
Most ferns prefer bright, indirect light, but they can also thrive in low-light conditions.
However, direct bright light such as sunlight can be harmful to ferns, so it’s important to find the right balance.
If you have a bright south-facing window consider using a sheer curtain in front of your fern plant.
If your fern isn’t getting enough light you can consider using a fluorescent or LED light for supplemental lighting.
Temperature and humidity needs:
Ferns are tropical plants and thrive in warm, humid environments.
To keep your fern happy, you should aim to keep your indoor space between 60-75 degrees Fahrenheit and maintain high levels of humidity of around 50%.
We’ll go over some tips for increasing humidity levels to provide enough humidity in your home or office, as well as how to prevent your fern from becoming too cold or too hot.
Tips for increasing humidity levels for indoor ferns
Ferns thrive in humid environments, and low humidity levels can cause their fronds to dry out and turn brown.
Here are some tips for increasing humidity levels for indoor ferns:
• Grouping: Place several ferns together in the same room. Plants release moisture into the air through a process called transpiration. Grouping ferns together can create a microclimate that’s more humid than the surrounding air.
• Water Trays: Place a tray filled with water near the ferns. As the water evaporates, it increases the humidity levels around the plants.
• Humidifier: Use a humidifier to increase the humidity levels in the room. This is particularly useful during the winter months when indoor heating can dry out the air.
• Misting: Mist the ferns with a spray bottle filled with water. This can help to hydrate the leaves and increase the humidity levels around the plant.
• Pebble Tray: Place a layer of pebbles in a shallow tray and add water until the pebbles are covered. Place the ferns on top of the pebbles, making sure that the pots are not sitting in water. As the water evaporates, it increases the humidity levels around the plants.
Remember, it’s important not to overwater your ferns, as this can lead to root rot. Monitor the soil moisture levels and only water the plants when the top inch of soil feels dry to the touch.
Watering and fertilization:
Another important aspect of indoor fern care is watering and fertilization.
Ferns prefer to be kept consistently moist, but not waterlogged, and benefit from regular fertilization during the growing season.
We’ll go over some tips for how often to water and fertilize your fern, as well as some common mistakes to avoid.
Tips for how often to water and fertilize ferns indoors
Watering and fertilizing are important parts of caring for indoor ferns, but it’s important to do it correctly to avoid overwatering or over-fertilizing, which can harm the plants.
Here are some tips for how often to water and fertilize ferns indoors:
• Watering: Ferns prefer to be kept consistently moist but not waterlogged.
Water the ferns when the top inch of the soil feels dry to the touch.
The frequency of watering will depend on factors such as the size of the plant, the size of the pot, and the humidity levels in the room.
In general, indoor ferns may need to be watered once or twice a week, but this can vary depending on the plant and its growing conditions.
• Fertilizing: Indoor ferns can benefit from regular fertilization during the growing season (spring and summer).
Use a balanced liquid fertilizer diluted to half strength and apply every 2-4 weeks.
Avoid fertilizing during the dormant season (fall and winter) as the ferns are not actively growing and don’t need the extra nutrients.
• It’s important to monitor the ferns closely to determine their specific watering and fertilizing needs.
• Factors such as temperature, humidity, and light levels can all impact how often the plants need to be watered and fertilized.
• When in doubt, it’s better to underwater and under-fertilize than to overwater and over-fertilize.
Pruning and grooming:

To keep your indoor fern looking its best, you’ll need to do some occasional pruning and grooming.
This involves removing dead or damaged fronds and keeping the plant looking neat and tidy.
We’ll go over some tips for how to prune and groom your fern without damaging the plant.
Tips for how to prune and groom your fern
Pruning and grooming are important aspects of caring for indoor ferns. Regular pruning helps to keep the ferns healthy, encourages new growth, and prevents them from becoming too large or unruly.
Here are some tips for how to prune and groom your fern:
Remove dead or yellow fronds: Use a clean, sharp pair of scissors or pruning shears to cut off any fronds that are dead, yellow, or damaged. This will help to keep the plant healthy and prevent the spread of disease.
Trim back overgrown fronds: If the fern has fronds that are becoming too long or overgrown, trim them back to a more manageable length. Cut them back to just above the base of the plant, leaving a small amount of the frond intact.
Groom the plant: Use your hands to gently remove any dust or debris from the fronds. This will help to keep the plant looking healthy and attractive.
Check for pests: While you are grooming the fern, check for any signs of pests such as spider mites, mealybugs, or scale insects. If you notice any pests, treat the fern with an appropriate insecticide or insecticidal soap.
Re-pot as needed: If the fern has outgrown its current pot, re-pot it into a larger container. This will give the plant more room to grow and help to prevent it from becoming root-bound.
Remember to use clean, sharp tools when pruning your fern to avoid damaging the plant. Pruning should be done regularly, but not excessively, to avoid stressing the plant.
Soil and potting:
Finally, it’s important to choose the right soil and potting for your indoor fern. Ferns prefer a loose, well-drained soil mix and need to be repotted periodically to prevent root bound.
We’ll go over some tips for choosing the right soil mix and pot for your fern, as well as how to repot your fern when necessary. Make sure to use a pot with drainage holes.
Tips for choosing the right soil mix and pot for your fern
Choosing the right soil mix and pot is important for the health and growth of indoor ferns. Here are some tips for choosing the right soil mix and pot for your fern:
Soil mix: Ferns prefer well-draining soil that is rich in organic matter. A good soil mix for ferns should contain a mixture of peat moss, perlite or sand, and vermiculite or coconut coir.
Many people use peat moss as a growth medium. Coco coir also works very well and is a more environmentally friendly option.
Benefits of coconut coir over peat moss:
Coconut coir is an excellent alternative to peat moss because it is more sustainable and environmentally friendly.
It also has better water retention and aeration properties, which can improve the overall health of the fern.
Coconut coir is a more sustainable and environmentally friendly alternative to peat moss. It is made from coconut husks which are a renewable resource,
Peat moss is harvested from peat bogs, which are non-renewable resources that take hundreds of years to form.
Coconut coir is pH neutral, while peat moss is very acidic. This can be beneficial for ferns, which prefer slightly acidic soil.
Pot size: Choose a pot that is slightly larger than the root ball of the fern. A pot that is too large can lead to overwatering, while a pot that is too small can cause the roots to become root-bound.
A pot with drainage holes is also important to prevent water from accumulating in the bottom of the pot and causing root rot.
Pot material: Choose a pot made of a porous material, such as terracotta, that allows air and water to circulate through the soil.
Plastic pots can trap moisture and cause the soil to become waterlogged, which can be harmful to ferns.
Troubleshooting Common Issues

While ferns are generally easy to care for, they can still experience some common issues.
In this section, we’ll go over some of the most common problems that indoor ferns can encounter, such as yellowing leaves, pests, and diseases.
We’ll also give you some tips on how to troubleshoot these issues and get your fern back on track to healthy growth.
By learning to recognize and address these common issues, you’ll be better equipped to keep your indoor fern thriving for years to come.
Yellowing fronds:
One of the most common issues indoor ferns can face is yellowing fronds.
This can be caused by a number of factors, including too much or too little light, overwatering, underwatering, or nutrient deficiencies.
We’ll go over some tips for identifying the cause of yellowing fronds and what you can do to address the issue.
Tips for getting rid of yellow fern fronds
Getting rid of yellow fern fronds depends on the underlying cause of the issue.
Here are some tips for identifying the cause and addressing yellowing fronds in indoor ferns:
Check for pests: Yellowing fronds can be a sign of pest infestations, such as spider mites or mealybugs. Inspect the fern for any signs of pests and treat with an appropriate insecticide or insecticidal soap.
Adjust light levels: If the fern is receiving too much or too little light, it can cause yellowing fronds. Move the fern to a location with better lighting conditions or adjust the placement of the plant within the room.
Watering: Overwatering or underwatering can also cause yellowing fronds. Make sure the soil is well-draining and not waterlogged, and water the fern when the top inch of the soil feels dry to the touch. Make sure to avoid letting the plant sit in standing water.
Nutrient deficiencies: Yellowing fronds can also be a sign of nutrient deficiencies. Fertilize the fern with a balanced fertilizer or a fertilizer specifically formulated for ferns to provide the necessary nutrients.
Prune: Remove any yellowing fronds to prevent the spread of disease and encourage new growth.
It is important to identify the underlying cause of yellowing fronds to prevent the issue from worsening. With proper care and attention, ferns can recover from yellowing fronds and thrive.
Brown tips:
Another common issue that indoor ferns can experience is brown tips on the fronds.
This can be caused by dry air, over-fertilization, or too much direct sunlight.
We’ll go over some tips for preventing and treating brown tips, including increasing humidity levels, adjusting fertilization, and moving your fern to a better location.
Tips to avoid brown tips on fronds
Brown tips on fern fronds can be caused by a number of factors, including underwatering, low humidity, over-fertilization, and exposure to dry air or hot drafts.
Here are some tips to avoid brown tips on fern fronds:
Watering: Make sure to water the fern consistently and thoroughly. Allow the top inch of soil to dry out between waterings, but do not let the soil become bone dry. Overwatering can also lead to brown tips, so make sure the soil is well-draining and not waterlogged.
Humidity: Ferns prefer high humidity levels, so make sure to provide a humid environment for the plant. You can do this by placing a tray of water near the plant or by using a humidifier. You can also mist the fronds with water periodically to increase humidity levels.
Fertilization: Avoid over-fertilizing the fern, as this can cause brown tips on the fronds. Use a balanced fertilizer or a fertilizer specifically formulated for ferns, and follow the recommended dosage instructions.
Air circulation: Ferns do not like to be exposed to dry air or hot drafts, so make sure to place the plant in a location with good air circulation but away from drafts from air conditioning units or heaters.
Pruning: If brown tips have already developed on the fronds, prune them back to prevent the spread of the issue and encourage new growth.
By following these tips, you can prevent brown tips on fern fronds and keep your indoor ferns healthy and thriving.
Over or under watering:
Over or underwatering is another common issue that indoor ferns can face. Overwatering can lead to soggy soil and root rot, while underwatering can cause the fronds to wilt and dry out.
We’ll go over some tips for how often to water your fern and how to tell if it needs more or less water, as well as some tips for preventing and treating overwatering or underwatering issues.
Tips for how often to water your fern and tell if it needs more or less water:
• Check the soil moisture: Before watering your fern, check the soil moisture level by sticking your finger about an inch deep into the soil.
If the soil feels dry, it’s time to water the fern.
• Water thoroughly: When you do water your fern, make sure to water it thoroughly so that water reaches the entire root ball.
Allow excess water to drain out of the pot.
• Avoid overwatering: Overwatering can lead to root rot and other issues, so make sure not to water your fern too frequently.
Only water the fern when the soil feels dry to the touch.
• Adjust watering based on environment: The frequency of watering your fern may vary depending on environmental factors such as humidity, temperature, and light.
In general, ferns prefer consistently moist but well-drained soil, so make sure to adjust watering frequency based on the environment.
If you suspect that your fern is experiencing overwatering or underwatering issues, here are some tips for preventing and treating these issues:
• Overwatering: If you notice that the soil is constantly wet and the fern is showing signs of root rot or other issues, it may be due to overwatering.
Allow the soil to dry out before watering again and consider adjusting the frequency of watering.
You may also need to repot the fern in fresh, well-draining soil to prevent further issues.
• Underwatering: If you notice that the fern is wilted, droopy, or the soil is extremely dry, it may be due to underwatering.
Water the fern thoroughly and make sure to adjust the frequency of watering to prevent the issue from recurring.
By following these tips, you can keep your fern healthy and thriving, while preventing issues such as overwatering or underwatering.
Pest infestation and treatment:

Unfortunately, indoor ferns can also be susceptible to pest infestations.
Common pests that can affect ferns include spider mites, mealybugs, and scale insects.
We’ll go over some tips for identifying and treating pest infestations, including natural and chemical treatments.
Pest infestation and treatment:
Indoor ferns can be susceptible to a variety of pests, including spider mites, mealybugs, and scale insects.
Spider mites are tiny pests that can spin webs and cause yellowing or mottled leaves.
Mealybugs are small, white, fuzzy insects that can cluster on the undersides of leaves and cause a sticky substance on the fronds.
Scale insects can be harder to spot, but they can cause yellowing, stunted growth, and a sticky residue on the fronds.
There are several treatment options for indoor ferns that are infested with pests.
For spider mites, you can try washing your fern with a solution of insecticidal soap or using neem oil.
Mealybugs can be treated by dabbing them with a cotton swab dipped in rubbing alcohol or using neem oil.
Scale insects can be removed by scraping them off with a toothbrush or by using a neem oil spray.
To prevent pest infestations, it’s important to keep your fern healthy and free from stress.
Avoid overwatering or underwatering, as this can weaken your fern and make it more susceptible to pests.
You can also introduce beneficial insects, such as ladybugs or lacewings, to your indoor environment to help control pest populations naturally.
Fern Propagation:

One of the great things about indoor ferns is that they are relatively easy to propagate. Propagation is the process of creating new plants from existing ones.
By learning how to propagate your indoor fern, you can expand your collection without having to spend a lot of money on new plants.
In this section, we’ll go over some of the most popular propagation methods for indoor ferns, as well as some tips for success.
How to propagate indoor ferns:
There are several methods for propagating indoor ferns, including spores, division, and plantlets.
Spores are tiny reproductive structures that are produced by ferns, and they can be used to grow new plants.
Division involves separating a mature fern into smaller sections, each with its own roots and fronds.
Plantlets are small offshoots that can be removed from the parent plant and potted on their own.
Steps for successful propagation:
Regardless of which method you choose, there are a few basic steps that you should follow for successful propagation.
First, make sure that you are using a clean, sterile container and planting medium. This will help prevent the spread of disease or pests.
Second, choose a healthy and mature fern to use as your parent plant.
Third, make sure that your fern is well-watered and not stressed before attempting to propagate.
Finally, be patient! It can take several weeks or even months for new ferns to grow from spores or plantlets.
Best time to propagate indoor ferns:
The best time to propagate indoor ferns depends on the method you choose.
Spores can be collected and sown at any time, but they will germinate best in warm and humid conditions.
Division should be done in the spring or early summer when your fern is actively growing.
Plantlets can be removed from the parent plant at any time, but they will root best if done during the growing season.
Regardless of when you choose to propagate, make sure that your fern is healthy and not stressed.
How can you tell when your fern is making spores?
When a fern is producing spores, you will notice small, brown, or black spots on the undersides of its fronds.
These spots are called sori, and they contain the spores that will eventually be released into the air.
As the spores mature, the sori may become more prominent and noticeable.
You can collect the spores by placing a piece of paper or plastic under the frond and gently tapping it.
The spores will fall onto the paper or plastic, and you can then sow them in a container filled with moist planting medium to grow new ferns.
How to Care for Ferns Indoors in Winter
As the winter season approaches, it is important to adjust your indoor fern care routine to ensure your plants stay healthy and vibrant.
The colder temperatures and decreased light can pose a challenge for ferns, but with the right care, you can help them thrive during the winter months.
In this section, we’ll go over some tips and tricks for caring for your indoor ferns during the winter season.
Adjusting light and temperature:
During the winter, the days are shorter and the sunlight is weaker, which means your indoor ferns may not be getting enough light.
Consider moving them to a location with more natural light, such as a south-facing window.
If you don’t have a window that gets enough light, you can supplement with artificial light.
Additionally, ferns prefer temperatures between 60-75°F, so make sure your ferns are not in a location that is too cold or too hot.
Maintaining proper humidity levels:
Winter weather often brings dry indoor air, which can be harmful to ferns.
To keep humidity levels up, consider using a humidifier or placing a tray of water near your ferns. Misting your ferns with water can also help to keep them hydrated.
Reducing watering frequency:
Because ferns grow slower in the winter, they do not need as much water as they do during the warmer months.
Be sure to allow the soil to dry out slightly between waterings, as overwatering can lead to root rot.
Keeping ferns away from drafts:
Cold drafts can be harmful to ferns, so make sure they are not located near doors or windows that are frequently opened.
If you do have a drafty location, consider using a barrier such as a curtain or plant screen to protect your ferns.
How Much Light Do Ferns Need Indoors?
, Live Premium Boston Fern Plants in Hanging Basket Planters, Houseplants Potted in Soil Potting Mix, Outdoor Garden Gift, Beautiful Home Patio Décor, 16-Inches Tall") Ferns are a popular houseplant that can add a touch of nature and greenery to any indoor space.
Ferns are a popular houseplant that can add a touch of nature and greenery to any indoor space.
However, caring for ferns can be challenging, especially when it comes to their light requirements.
In this section, we will discuss how much light indoor ferns need to thrive and provide some tips on how to provide the right amount of light for your ferns.
Types of light for indoor ferns:
Ferns need bright, indirect light to grow well indoors.
They do not do well in direct sunlight, which can burn their leaves.
Fluorescent light, LED light, and natural light filtered through sheer curtains are all good options for providing the right amount of light for your fern.
Assessing your indoor lighting conditions:
The amount of light your fern needs will depend on the species of fern you have and the lighting conditions in your home.
Some ferns prefer low light, while others need more light to thrive.
Assessing the lighting conditions in your home will help you determine the best location for your fern.
Supplementing light with grow lights:
If your fern isn’t getting enough light from natural sources, you can supplement their light with grow lights.
These specialized lights provide the spectrum of light that plants need to grow and thrive.
Place the grow light above the fern and leave it on for 10-12 hours a day to ensure your fern is getting the light it needs.
How to Care for Ferns Outside
If you’re lucky enough to have an outdoor space, incorporating ferns into your garden or patio can add a beautiful touch of greenery.
However, taking care of outdoor ferns requires a different approach than their indoor counterparts.
In this section, we’ll discuss the basics of how to care for ferns outside, including soil and watering needs, as well as how to protect them from weather conditions and pests.
Choosing the right location:
The first step in caring for ferns outside is selecting the perfect spot for them.
Ferns prefer shade or partial shade, and they thrive in moist, well-draining soil.
Preparing the soil:
Ferns require rich, organic soil, so amend your garden bed with compost or other organic matter before planting.
Watering and fertilizing outdoor ferns:
Water your ferns regularly to keep the soil moist but not waterlogged, and fertilize them once a month during the growing season.
Protecting ferns from pests and weather conditions:
Outdoor ferns are susceptible to pests and weather conditions, so be sure to check them regularly for signs of damage and provide protection when necessary.
Preparing the soil
When planting ferns outside, it’s important to choose a location with well-draining soil that is rich in organic matter.
Before planting, work in a generous amount of compost or other organic matter to improve soil structure and fertility.
If the soil is too heavy, consider adding sand or perlite to improve drainage.
Watering and fertilizing outdoor ferns
Ferns prefer consistently moist soil, but they don’t like to be waterlogged.
Water outdoor ferns deeply once a week, or more often in hot, dry weather.
To help retain moisture in the soil, mulch around the base of the plants with a layer of organic matter.
Ferns don’t need a lot of fertilizer, but you can apply a balanced liquid fertilizer once or twice a year in spring and fall.
Protecting ferns from pests and weather conditions
Outdoor ferns can be susceptible to a range of pests and diseases, including slugs, snails, and aphids.
To protect your ferns from pests, regularly inspect your plants and remove any damaged or diseased fronds.
You can also use natural pest control methods such as diatomaceous earth or insecticidal soap.
Additionally, outdoor ferns can be sensitive to extreme weather conditions such as frost or strong winds.
If you live in a cold climate, cover your ferns with mulch or burlap in the winter to protect them from frost damage.
If your area is prone to strong winds, consider planting your ferns in a sheltered location or staking them to provide additional support.
Varieties Of Fern
There are quite a few varieties of fern that can be kept indoors. I will give the common name as well as the scientific name. Here is a list of some of the most popular ferns:
Boston Fern (Nephrolepis exaltata) – A classic indoor fern with arching fronds that can grow up to 3 feet long. They require bright indirect light, moderate to high humidity and consistently moist soil.
Maidenhair Fern (Adiantum spp.) – Known for their delicate, lacy fronds, Maidenhair ferns prefer bright, indirect light, and high humidity to thrive and require consistently moist soil.
Bird’s Nest Fern (Asplenium nidus) – This fern has broad, wavy leaves that grow in a rosette shape. It prefers medium to low light, moderate humidity, and requires consistently moist soil. With its wide, nest-like fronds, this fern is a great statement piece.
Kimberly Queen Fern (Nephrolepis obliterata) – A newer cultivar of the Boston Fern, the Kimberly Queen has compact, upright fronds that require medium to bright indirect light and moist soil. A great option for beginners, this fern has large, upright fronds and is low-maintenance.
Staghorn Fern (Platycerium spp.) – This unique fern has two types of fronds, one that resembles a deer’s antlers and another that grows in a rosette shape. They prefer bright indirect light and require consistent moisture and high humidity. It can be mounted on a wall for a dramatic effect.
Button Fern (Pellaea spp.) – A compact fern with small, rounded fronds that give it a unique texture. The Button Fern is a great option for small spaces. They prefer bright, indirect light, moderate humidity, and slightly dry soil between waterings.
Japanese Painted Fern (Athyrium niponicum var. pictum) – This fern has striking silvery-green fronds with a burgundy midrib making it a great decorative addition. It prefers bright, indirect light, moderate humidity, and consistently moist soil.
Rabbit’s Foot Fern (Davallia fejeensis) – Named for its furry rhizomes that that creep over the pot and resemble rabbit’s feet, this fern prefers bright, indirect light, moderate to high humidity, and consistently moist soil.
Lemon Button Fern (Nephrolepis cordifolia) – With small, bright green fronds, the Lemon Button Fern is easy to care for and thrives in bright, indirect light, moderate humidity with consistently moist soil. With its lemon-scented fronds and compact size, this fern is perfect for small spaces.
Blue Star Fern (Phlebodium aureum) – This fern has unique blue-gray fronds and is a great option for low-light conditions. It requires consistently moist soil and prefers bright, indirect light.
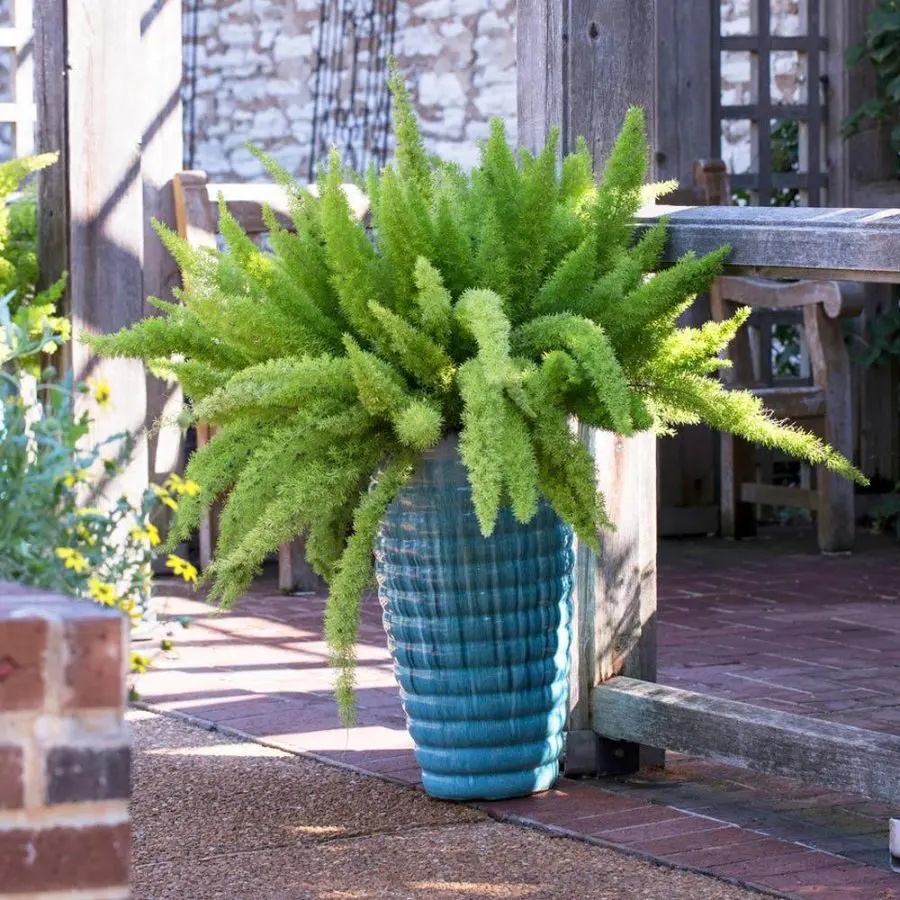
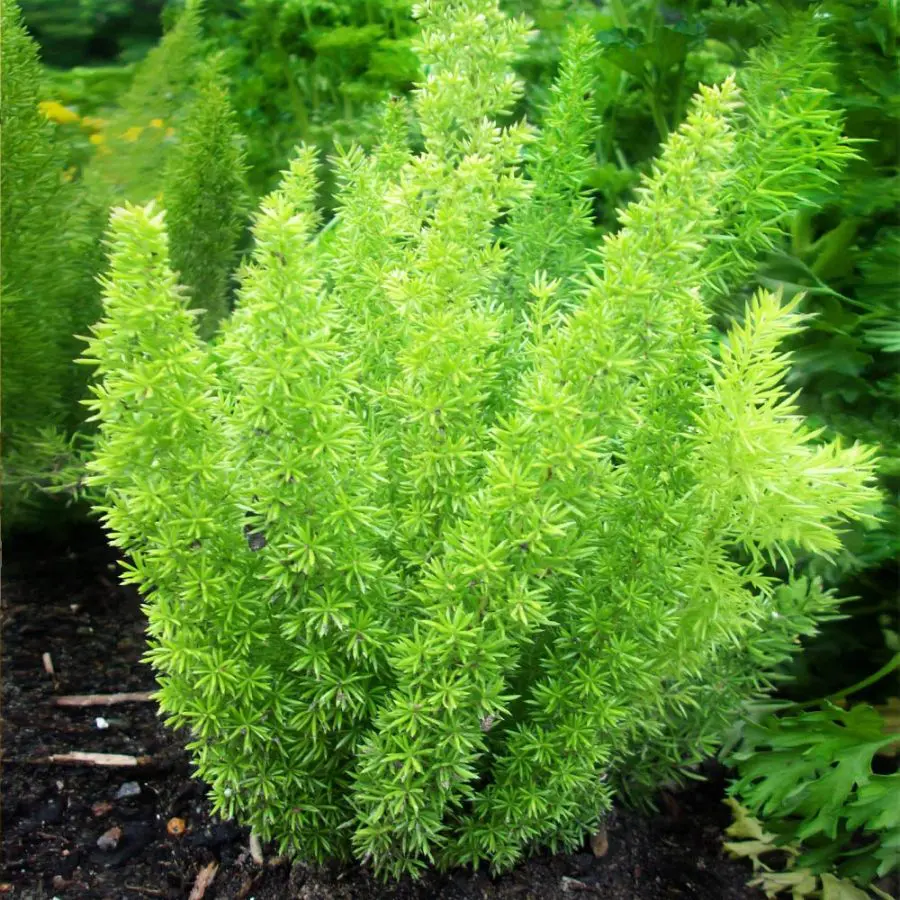
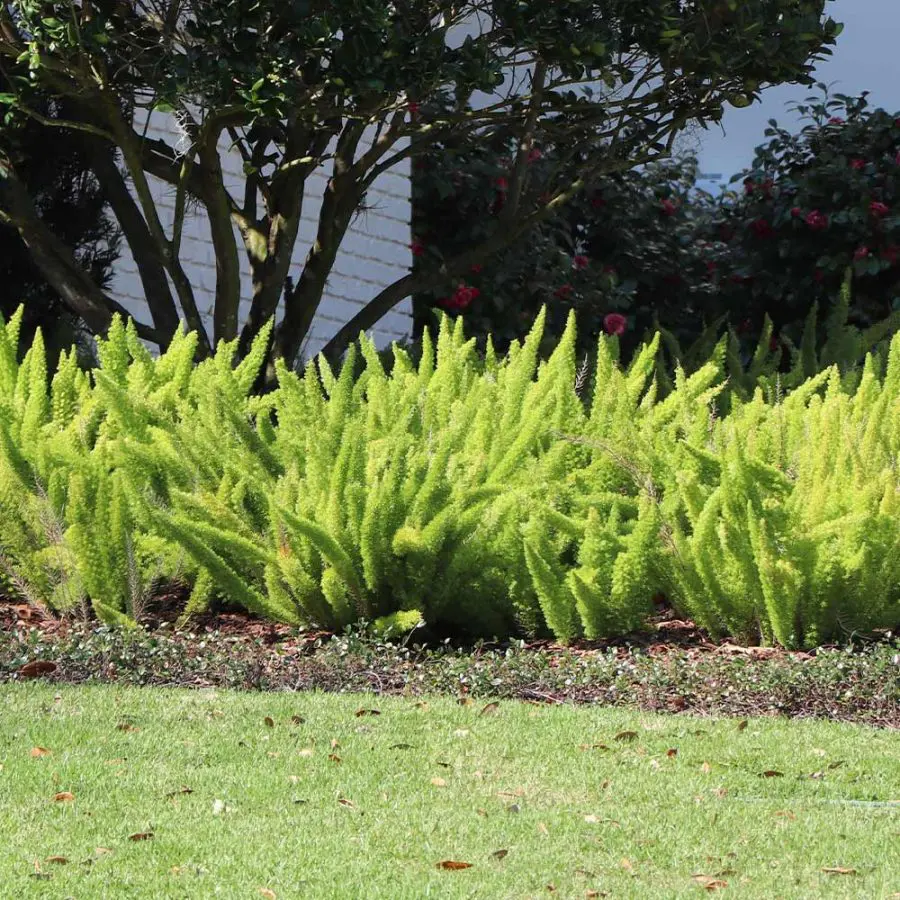
Asparagus Fern or Foxtail Fern: This fern has feathery, emerald green fronds that grow upright and can reach up to 2-3 feet tall. It prefers bright, indirect light and moderate humidity. Asparagus ferns are also relatively low-maintenance and can tolerate dry conditions.
Growing Ferns Indoors FAQs
Ferns have long been a favorite for indoor gardening, adding a tropical flair and rich green tones to any room.
However, there are some common questions about how to best care for these ancient plants when grown indoors.
From light requirements to watering schedules, our FAQs will help guide you through the essentials of indoor fern care.
Q: How do you keep ferns alive indoors?
A: To keep ferns alive indoors, provide indirect sunlight, high humidity, and consistently moist soil. Using a well-draining potting mix and misting the leaves can also contribute to plant health.
Q: Do ferns grow well indoors?
A: Yes, many fern varieties thrive indoors, especially when provided with the right conditions, such as indirect sunlight, high humidity, and consistent moisture.
Q: How often do you water ferns indoors?
A: Watering frequency depends on the specific type of fern and the humidity of the room. Generally, aim to keep the soil consistently moist but not waterlogged.
Q: Do indoor ferns need sunlight?
A: Indoor ferns prefer indirect sunlight, so placing them near a north-facing window or in a spot that receives filtered light is ideal.
Q: How often should ferns be watered?
A: As a general rule, keep the soil moist. This usually means watering every 7-10 days, but it can vary based on the room’s humidity and temperature.
Q: Where is the best place to put ferns indoors?
A: The best place for ferns indoors is an area with indirect sunlight and high humidity, such as a bathroom with a window or near a humidifier.
Indoor Ferns Care Conclusion
Congratulations, you are now equipped with all the essential knowledge to successfully care for your indoor and outdoor ferns!
By following these tips and tricks, your ferns will thrive and add natural beauty to your home or garden.
Remember to consider the specific needs of your ferns, such as light, water, temperature, and soil, and make adjustments accordingly.
With patience and care, you can enjoy the lush greenery of your ferns for years to come. Happy gardening!
Recap of indoor ferns care
In this guide, we’ve covered all the basics of indoor ferns care, including choosing the right fern, providing adequate light and humidity, watering and fertilizing, pruning and grooming, troubleshooting common issues, propagating, caring for ferns in winter, and caring for ferns outdoors.
Benefits of Having Indoor Ferns
Not only do indoor ferns add a touch of greenery and natural beauty to your home, but they also offer a variety of benefits.
Ferns can improve indoor air quality by removing toxins, help regulate humidity levels, and even boosting mood and reducing stress.
Final Tips and Recommendations For Indoor Ferns Care
To keep your indoor ferns thriving, be sure to regularly check the soil moisture levels and adjust your care routine as needed.
Remember that each fern variety may have slightly different care requirements, so do your research and tailor your care routine accordingly.
And don’t forget to enjoy the beauty and benefits of your indoor ferns!
You can buy live ferns on Amazon
Read about Boston Fern Care Indoors
Check out our category on Indoor Ferns for more articles.