
How Do You Grow Lavender From Seed?
If you’ve dreamed of a fragrant, purple windowsill, you’ll love Growing Lavender from Seed Indoors.
In this guide, you’ll learn exactly how to chill (stratify) seeds, set up bright light, and mix a fast-draining coco coir blend so your seedlings don’t sulk.
By the end, you’ll be confidently sowing, transplanting, pruning—and enjoying that soothing lavender scent at home.
Discover the joy of growing lavender from seed indoors with our comprehensive guide. Learn about lavender varieties, care tips, and common issues. Start today! Here’s how:
- Growing Lavender from seed indoors is a rewarding process that requires a few key steps.
- Start by sowing stratified seeds in a seed tray filled with well-draining soil.
- Place the tray in a warm, sunny location, and keep the soil consistently moist.
- After germination, transplant the seedlings into pots and continue to provide ample sunlight.
Imagine the scent of fresh lavender wafting through your home, a calming and fragrant reminder of your own little indoor garden.
Growing lavender from seed indoors isn’t just a hobby, it’s an adventure in creating your personal oasis.
From choosing the right lavender variety to nurturing it from a tiny seed into a full-grown plant, every step is a journey of discovery.
So, let’s embark on this exciting journey together and transform your indoor space into a fragrant lavender haven!
Growing Lavender From Seed Indoors

Welcome to the world of indoor gardening, where we’re about to explore the delightful process of growing lavender from seed indoors.
This isn’t just about adding a splash of purple to your home, it’s about the joy of watching life sprout from a tiny seed, the anticipation of the first buds, and the satisfaction of nurturing growth.
In this post, we’ll guide you through choosing the right lavender variety, understanding the ideal growth conditions, and tackling common plant care issues.
We’ll also delve into propagation techniques and answer some frequently asked questions. So, let’s get started on this green-thumbed journey together!
Brief Overview of Lavender and Its Uses
Lavender, with its enchanting fragrance and beautiful purple blooms, is a favorite among gardeners and non-gardeners alike.
But it’s not just a pretty face! Lavender has a myriad of uses that make it a must-have in any home.
Its aromatic flowers are often used in aromatherapy for their calming and relaxing properties.
They’re also a popular ingredient in perfumes, soaps, and bath products.
In the culinary world, lavender adds a unique flavor to dishes, from savory meals to desserts.
And let’s not forget its role in home decor a lavender bouquet not only looks stunning but also fills your home with a soothing scent.
How Long Does Lavender Take to Grow from Seed
Growing lavender from seed is a test of patience, but the reward is well worth the wait.
On average, lavender seeds take 2 to 4 weeks to germinate, but this can vary depending on the conditions.
Once the seedlings have sprouted, they’ll need another 4 to 6 weeks to grow strong enough for transplanting.
After transplanting, it typically takes a further 3 to 4 months for the plants to mature and start producing those lovely purple flowers.
So, from sowing the seeds to enjoying the blooms, you’re looking at a journey of about 5 to 6 months.
But it can take 3 years for lavender to fully mature. So if you are impatient buy plants instead of growing lavender from seeds.
But remember, good things come to those who wait!
Lavender Plant Care Reference Guide
| Characteristic | Details |
|---|---|
| Common Name | Lavender |
| Botanical Name | Lavandula angustifolia (English Lavender) |
| Native Habitat | Mediterranean region |
| Plant Type | Perennial herb |
| Growth Pattern | Compact, bushy, woody shrub |
| Mature Size | 1–3 ft tall, 2–4 ft wide (depending on variety) |
| Watering | Low; allow soil to dry between waterings |
| Light/Sun Exposure | Full sun; 6–8 hours daily |
| Soil Type | Well-draining, sandy or loamy soil (coco coir + perlite mix works indoors) |
| Soil pH | Slightly alkaline (6.5–7.5) |
| Temperature | 60–75°F indoors; hardy to colder temps outdoors |
| Humidity | Prefers low humidity; avoid damp air |
| Bloom Time & Flower Color | Late spring to summer; purple to violet blooms |
| Potential Problems | Root rot from overwatering, yellowing leaves, pests (aphids, whiteflies) |
| Repotting | Every 2–3 years or when rootbound; choose pots at least 12″ deep |
| Hardiness Zones (USDA) | Zones 5–9 (varies by type) |
Choosing Lavenders to Grow

Ready to dive into the world of lavender? Great! But before we get our hands dirty, let’s take a moment to talk about choosing the right lavender for your indoor garden.
With so many varieties out there, it can be a bit overwhelming to decide which one to grow.
But don’t worry, we’re here to guide you through it. In this section, we’ll explore different types of lavender and their unique characteristics, and discuss the factors you should consider when choosing your lavender seeds.
So, let’s get started and find the perfect lavender for your indoor oasis!
Different Types of Lavender and Their Characteristics
When we talk about lavender, it’s not just one plant we’re referring to. There are actually over 40 species of lavender, each with its own unique characteristics. Let’s take a look at a few popular ones:
English Lavender (Lavandula angustifolia): This is the classic lavender that most people are familiar with. It’s known for its sweet fragrance and is often used in cooking and baking. It also has a long blooming period and is hardy, making it a great choice for beginners.
French Lavender (Lavandula stoechas): French lavender is easily recognizable by its rabbit ear petals. It has a strong, slightly spicy fragrance and is more heat-tolerant than English lavender.
Spanish Lavender (Lavandula latifolia): Spanish lavender has a unique pine-like scent and beautiful, butterfly-like flowers. It’s a robust plant that can tolerate dry conditions.
Factors to Consider When Choosing Lavender to Grow
Now that you’re familiar with some types of lavender, how do you choose which one to grow? Here are a few factors to consider:
Climate and Light: Lavender loves lots of light and a warm climate.
If you live in a place with cold winters, English lavender might be a good choice as it’s more cold-hardy.
If your indoor space gets lots of sunlight, any type of lavender would be happy there.
Purpose: Are you growing lavender for its scent, for cooking, or for its looks?
English lavender is known for its sweet fragrance and culinary use, while French and Spanish lavenders are more ornamental.
Care Level: All lavenders need well-draining soil and plenty of light, but some are more forgiving than others.
If you’re new to gardening, English lavender is a good starting point.
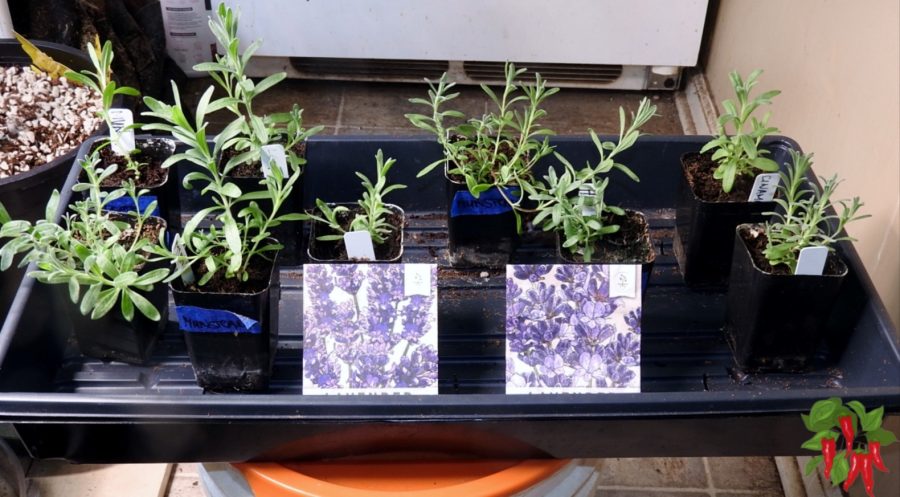
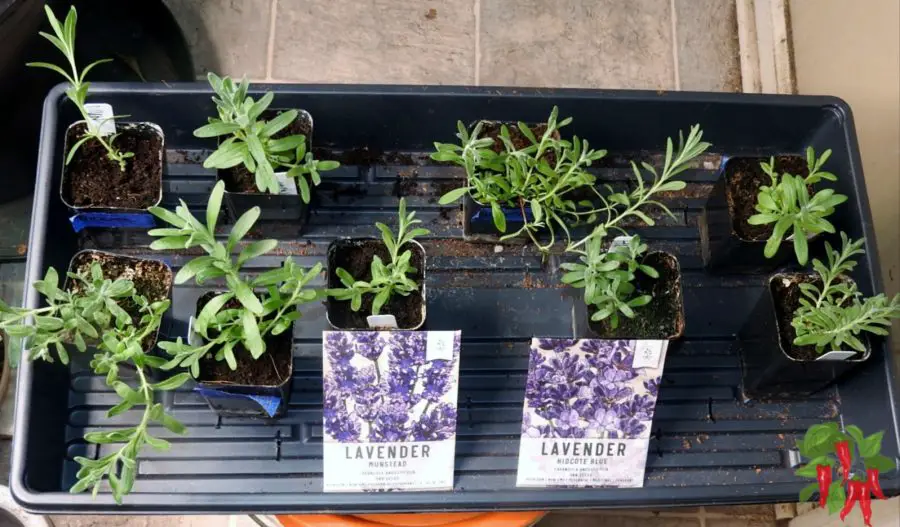
I chose the English lavender varieties Hidcote and Munstead because they are more compact and better for growing indoors.
Remember, the best lavender for you is the one that fits your needs and circumstances. Happy choosing!
How to Grow Lavender From Seeds
Alright, now that we’ve chosen our lavender variety, it’s time to roll up our sleeves and get to the fun part of growing lavender from seed indoors!
If you’ve never grown anything from seed before, you might be feeling a bit nervous.
But don’t worry, we’re here to guide you every step of the way. From creating the ideal conditions for your lavender seeds to sprout to the actual planting process, we’ve got you covered.
We’ll even share some tips on how to speed up germination. So, let’s get started and turn those tiny seeds into beautiful lavender plants!
Ideal Conditions for Growing Lavender
Lavender is a Mediterranean plant, which means it loves lots of light and well-draining soil.
When growing lavender from seed indoors, try to mimic these conditions.
Place your lavender in a sunny spot where it can get at least 6 hours of sunlight each day.
As for the soil, choose a light, well-draining mix – you can even add some sand or perlite to improve drainage.
Lavender also prefers slightly alkaline soil, so adding a bit of lime can be beneficial.
If you are growing indoors I recommend using an LED grow light 10-12 hours a day because lavender really needs and loves a lot of light.
Steps to Plant Lavender
• Fill a pot with your well-draining soil mix (I use and recommend coco coir and perlite) and sprinkle the lavender seeds on top. You don’t need to bury them – just press them lightly into the soil.
• Water the seeds gently. You want the soil to be moist, but not waterlogged.
• Cover the pot with plastic wrap to create a mini greenhouse effect. This helps keep the humidity high, which lavender seeds love.
• Place the pot in a warm, sunny spot and wait for the magic to happen!
Refrigerate Lavender Seeds First
Did you know that lavender seeds benefit from a process called stratification?
This is a fancy term for chilling the seeds, which helps break their dormancy and improves germination.
Before planting, seal your lavender seeds in a plastic bag and pop them in the refrigerator for about 2-4 weeks.
Should I Soak Lavender Seeds Before Planting?
Soaking lavender seeds before planting is a bit of a debated topic. Some gardeners swear by it, while others skip this step.
Soaking can help soften the seed coat and speed up germination, but it’s not a must.
If you decide to soak your seeds, just place them in warm water for about 12-24 hours right before planting.
What is the Fastest Way to Germinate Lavender Seeds?
If you’re eager to see your lavender seeds sprout, here are a few tips to speed up germination:
Stratify your seeds: As mentioned earlier, chilling your seeds in the refrigerator can help break dormancy and speed up germination.
Soak your seeds: This can help soften the seed coat and kickstart the germination process.
Keep the soil warm: Lavender seeds germinate best at temperatures between 70-75°F (21-24°C). You can use a heat mat to maintain a consistent temperature.
Keep the soil moist: Lavender seeds need moisture to germinate, but be careful not to overwater and cause rot.
Remember, patience is key when growing lavender from seed. But with these tips, you’ll hopefully see those little green sprouts sooner!
Potting Mix for Growing Lavender: The Coco Coir and Perlite Advantage

When it comes to growing lavender, particularly indoors, the choice of potting mix can make a significant difference in your plant’s health and growth.
Lavender plants prefer well-draining soil that mimics their native Mediterranean habitat.
This is where a mix of coco coir and perlite comes into play.
Coco coir, derived from the husk of coconuts, is a sustainable and eco-friendly alternative to peat moss.
It has excellent water-holding capacity, which ensures your lavender roots stay hydrated without becoming waterlogged.
Coco coir also promotes healthy root development due to its loose and airy structure, which allows the roots to breathe and grow freely.
On the other hand, perlite, a type of volcanic glass, is known for its excellent drainage properties.
It prevents water from accumulating at the bottom of the pot, which can lead to root rot, a common issue when growing lavender.
Perlite also adds to the lightness of the mix, ensuring it doesn’t compact over time and restrict root growth.
A potting mix made of 75 % coco coir and 25% perlite provides the perfect balance of moisture retention and drainage for lavender plants.
It mimics the dry, rocky conditions of lavender’s natural habitat, helping your indoor plants thrive.
So, when preparing your pot for planting, consider a mix of coco coir and perlite to give your lavender the best start in life. Happy potting!
Transplanting lavender seedlings
Congratulations! If you’ve made it to this stage, it means your lavender seeds have sprouted into tiny seedlings.
But hold on, our journey is far from over. Now comes an exciting and crucial step of transplanting lavender seedlings.
This is when our little plants start to grow into their own and need more room to flourish.
In this section, we’ll guide you through the process of transplanting, from choosing the right pots to caring for your lavender plants post-transplant.
So, let’s continue our gardening adventure and help these seedlings thrive!
Planting Lavender Seeds in Pots
Transplanting your lavender seedlings starts with choosing the right pot.
Seedlings are small and grow slowly so I plant mine in small 2-21/2 square pots of coco.
When roots start growing out the bottom they are ready for a larger pot.
Lavender has a deep root system, so opt for a pot that’s at least 12 inches deep.
Make sure it has good drainage holes as lavender doesn’t like to sit in waterlogged soil.
Fill the pot with a well-draining soil mix, make a small hole in the center, and gently place your seedling in it.
Cover the roots with soil, but make sure the green part of the plant is above the soil surface.
Give your newly transplanted lavender a good drink of water, but be careful not to overwater.
Caring for Lavender Plants
Once your lavender is transplanted, it’s all about providing the right care.
Keep your lavender in a sunny spot where it can get at least 6 hours of sunlight each day.
Water when the top inch of the soil feels dry to the touch, and make sure the water drains out completely.
Lavender is a low-fertility plant, so you don’t need to fertilize often. A light feeding in the spring with a balanced, slow-release fertilizer should be enough.
Pruning and Maintaining Lavender Plants
Pruning is an important part of lavender care. It not only keeps your plant looking neat but also encourages more blooms.
Start pruning when your lavender plant is about one year old. In the spring, trim back about one-third of the plant to encourage bushy growth.
During the blooming season, you can prune lightly to shape the plant and remove spent flowers.
Remember, always use clean, sharp pruning shears to avoid damaging your plant or spreading diseases.
With these care tips, your lavender should thrive and provide you with plenty of fragrant blooms!
Propagating Lavender

Have you ever wished you could have more of your favorite lavender plant? Well, you’re in luck!
Lavender can be easily propagated, which means you can create new plants from the ones you already have.
It’s like magic, but better because it’s real! In this section, we’ll walk you through the process of propagating lavender, from taking cuttings to boosting their growth.
So, if you’re ready to multiply your lavender joy, let’s dive right in!
How to Take Lavender Cuttings
Taking cuttings is a common way to propagate lavender. Here’s how you do it:
• Choose a healthy, mature lavender plant. Look for a non-flowering stem – it will have more energy to put into root development.
• With a clean, sharp pair of gardening shears, cut a 3-4 inch long stem just below a node (where the leaves meet the stem).
• Remove the leaves from the bottom half of the cutting. You should be left with a bare stem at the bottom and some leaves at the top.
Steps to Propagate Lavender from Cuttings
Once you have your cuttings, it’s time to turn them into new plants:
• Dip the cut end of your lavender cutting into a rooting hormone. This step is optional, but it can help speed up root development.
• Prepare a pot with a well-draining soil mix.
• Make a hole in the soil with a pencil or your finger, then place the cutting in the hole.
• Make sure the leafless part of the stem is buried in the soil.
• Water the cutting and place the pot in a sunny spot. Keep the soil moist but not waterlogged.
• In a few weeks, your cutting should start developing roots. You can check by gently tugging on the cutting – if it resists, it means roots have formed.
Steps to Boost Lavender Plants
To help your lavender plants thrive, here are a few tips:
• Provide plenty of light: Lavender loves the sun, so make sure your plants get at least 6 hours of sunlight each day.
• Water correctly: Lavender prefers dry conditions, so let the soil dry out between waterings. Overwatering can lead to root rot.
• Prune regularly: Pruning encourages bushy growth and more blooms. In the spring, trim back about one-third of the plant.
• Feed lightly: Lavender doesn’t need much fertilizer. A light feeding in the spring with a balanced, slow-release fertilizer should be enough.
With these steps, you’ll be on your way to creating a lush lavender garden from just a few cuttings!
Problem-Solving in Growing Lavender
Growing lavender from seed indoors can be a rewarding experience, but like any gardening endeavor, it can come with its own set of challenges.
But don’t worry, that’s all part of the adventure! And remember, every problem is an opportunity in disguise.
In this section, we’ll tackle some common issues you might encounter while growing lavender and provide solutions to help you overcome them.
So, whether you’re dealing with a pest problem or a plant that just won’t bloom, we’ve got you covered.
Let’s turn those green thumb troubles into triumphs!
Common Issues in Growing Lavender
Growing lavender can be a joy, but like all plants, it can sometimes run into problems.
Here are a few common issues you might encounter:
Yellowing Leaves: This is often a sign of overwatering. Remember, lavender likes its soil on the dry side.
Wilted or Drooping Plant: This can be caused by either too much or too little water. Check the soil to determine which it might be.
No Flowers: If your lavender isn’t blooming, it might not be getting enough light. Lavender needs at least 6 hours of sunlight each day to bloom.
Pests: Lavender is generally pest-resistant, but it can sometimes attract aphids, whiteflies, and other pests.
Solutions to These Issues
Now that we’ve identified the problems, let’s look at the solutions:
Yellowing Leaves: Cut back on watering. Allow the top inch of the soil to dry out before watering again.
Wilted or Drooping Plant: If the soil is too dry, water the plant thoroughly. If it’s waterlogged, allow it to dry out before watering again.
No Flowers: Move your lavender to a sunnier spot. If all your indoor spots are low-light, consider using a grow light to supplement.
Pests: If you notice pests on your lavender, try washing them off with a gentle stream of water.
For a heavier infestation, you might need to use an insecticidal soap or neem oil.
Remember, every plant can have its off days. But with a little care and attention, your lavender can bounce back from these common issues. Happy gardening!
Best Lavenders to Grow
 Twin Pack of 500 Seeds Each")
Now that we’ve covered the ins and outs of growing and caring for lavender, let’s talk about the stars of the show, the lavender varieties themselves.
With so many types of lavender out there, you might be wondering which ones are the best to grow indoors.
In this section, we’ll spotlight two standout varieties – Hidcote and Munstead.
We’ll delve into their features, benefits, and why they might just be the perfect fit for your indoor garden.
So, let’s get to know these lavenders a little better, shall we?
Hidcote and Munstead Varieties
 Twin Pack of 500 Seeds Each - Heirloom, Non-GMO & Untreated - Fragrant Flowers to Attract Butterflies & Other Pollinators")
When it comes to indoor lavender, two varieties often stand out, Hidcote and Munstead.
Both are types of English lavender, known for their sweet fragrance and hardiness.
Hidcote: This variety is known for its deep purple flowers and silvery-gray foliage.
It’s a compact plant, making it a great choice for indoor gardening. Hidcote is also highly prized for its strong, sweet fragrance.
Munstead: Named after the garden of famed horticulturist Gertrude Jekyll, Munstead is a robust and versatile lavender.
It has lighter purple flowers and a slightly more compact growth habit than Hidcote.
Features and Benefits of Each Variety
Now, let’s delve into the features and benefits of these two lavenders:
Hidcote: With its deep purple blooms, Hidcote is a showstopper. It’s perfect for adding a splash of color to your indoor garden.
Its compact size makes it suitable for pot cultivation. And let’s not forget its fragrance is strong and sweet. It’s ideal for sachets, potpourri, and other aromatic uses.
Munstead: Munstead is a hardy and adaptable lavender, able to tolerate a range of conditions.
Its compact size makes it ideal for indoor gardening. The flowers, while not as dark as Hidcote, are still a beautiful shade of lavender and carry a delightful scent.
Munstead is also known for its long blooming period, providing color and fragrance for an extended period.
Both Hidcote and Munstead are excellent choices for indoor gardening, offering beauty, fragrance, and a relatively easy care routine.
Whichever you choose, you’re in for a treat!
Growing Lavender from Seed Indoors FAQs
 Twin Pack of 500 Seeds Each")
Throughout our lavender-growing journey, you’ve probably had a few questions pop up. And you’re not alone!
Many indoor gardeners have queries when it comes to growing lavender from seed indoors.
That’s why we’ve dedicated this section to answering some of the most frequently asked questions about this process.
From germination to growth times, we’ve got you covered. So, let’s dive into these FAQs and clear up any lingering lavender mysteries!
Q: How do you germinate lavender seeds indoors?
A: Germinating lavender seeds indoors involves a few key steps.
First, fill a pot with well-draining soil and sprinkle the lavender seeds on top.
Lightly press them into the soil, then water gently.
Cover the pot with plastic wrap to create a mini greenhouse effect, which helps keep the humidity high.
Place the pot in a warm, sunny spot and wait for the seeds to germinate, which usually takes 2 to 4 weeks.
Q: How long does it take to grow lavender from seed indoors?
A: Growing lavender from seed indoors is a bit of a waiting game.
After sowing, the seeds typically germinate in 2 to 3 weeks.
Once the seedlings are strong enough, which usually takes another 4 to 6 weeks, they can be transplanted.
From there, it takes about 3 to 4 months for the plants to mature and start blooming.
So, from sowing to flowering, you’re looking at about 5 to 6 months.
Q: Is lavender easy to grow from seed indoors?
A: Growing lavender from seed indoors can be a bit challenging, but it’s definitely doable.
Lavender seeds can take a while to germinate and the plants need plenty of light to thrive.
However, with patience and the right care, you can successfully grow lavender from seed indoors.
Q: Is it worth growing lavender from seed?
A: Absolutely! Growing lavender from seed can be a rewarding experience.
It allows you to witness the entire life cycle of the plant, from a tiny seed to a beautiful, fragrant plant.
Plus, growing from seed gives you access to a wider variety of lavenders than you might find in plant nurseries.
So, if you’re up for a bit of a gardening challenge, it’s definitely worth a try!
Growing Lavender from Seed Indoors Final Thoughts
 Twin Pack of 500 Seeds Each")
As we reach the end of our lavender-growing journey, it’s time to reflect on what we’ve learned and look forward to the fragrant blooms that await.
Growing lavender from seed indoors might seem like a daunting task at first, but with the right knowledge and a bit of patience, it can be a rewarding and enjoyable experience.
In this final section, we’ll wrap up our discussion, summarizing the key points and offering some final words of encouragement.
So, whether you’re a seasoned gardener or a complete beginner, let’s finish strong and get ready to enjoy the fruits (or should we say, flowers) of our labor!
Summary of how to grow lavender indoors from seeds
In this comprehensive guide, we’ve journeyed through the process of growing lavender from seed indoors.
We started by introducing lavender and its uses, and discussing how long it takes to grow from seed.
We then explored different types of lavender and the factors to consider when choosing a variety to grow.
We delved into the steps of growing lavender from seeds, including creating ideal conditions, planting, and germination techniques.
We discussed transplanting lavender seedlings and how to care for and maintain your plants.
We also covered the exciting process of propagating lavender and how to troubleshoot common issues.
Finally, we highlighted two popular lavender varieties, Hidcote and Munstead, and answered some frequently asked questions about growing lavender.
Encouragement to Start Growing Your Own Lavender
Now that you’re armed with all this knowledge, it’s your turn to start your own lavender-growing journey.
Remember, gardening is not just about the destination (those beautiful lavender blooms), but also about the journey itself.
It’s about the joy of watching life sprout from a tiny seed, the anticipation of the first buds, and the satisfaction of nurturing growth.
So, don’t be afraid to get your hands dirty and start growing your own lavender.
With patience, care, and a bit of green-thumbed love, you’ll soon have your own indoor lavender oasis. Happy gardening!
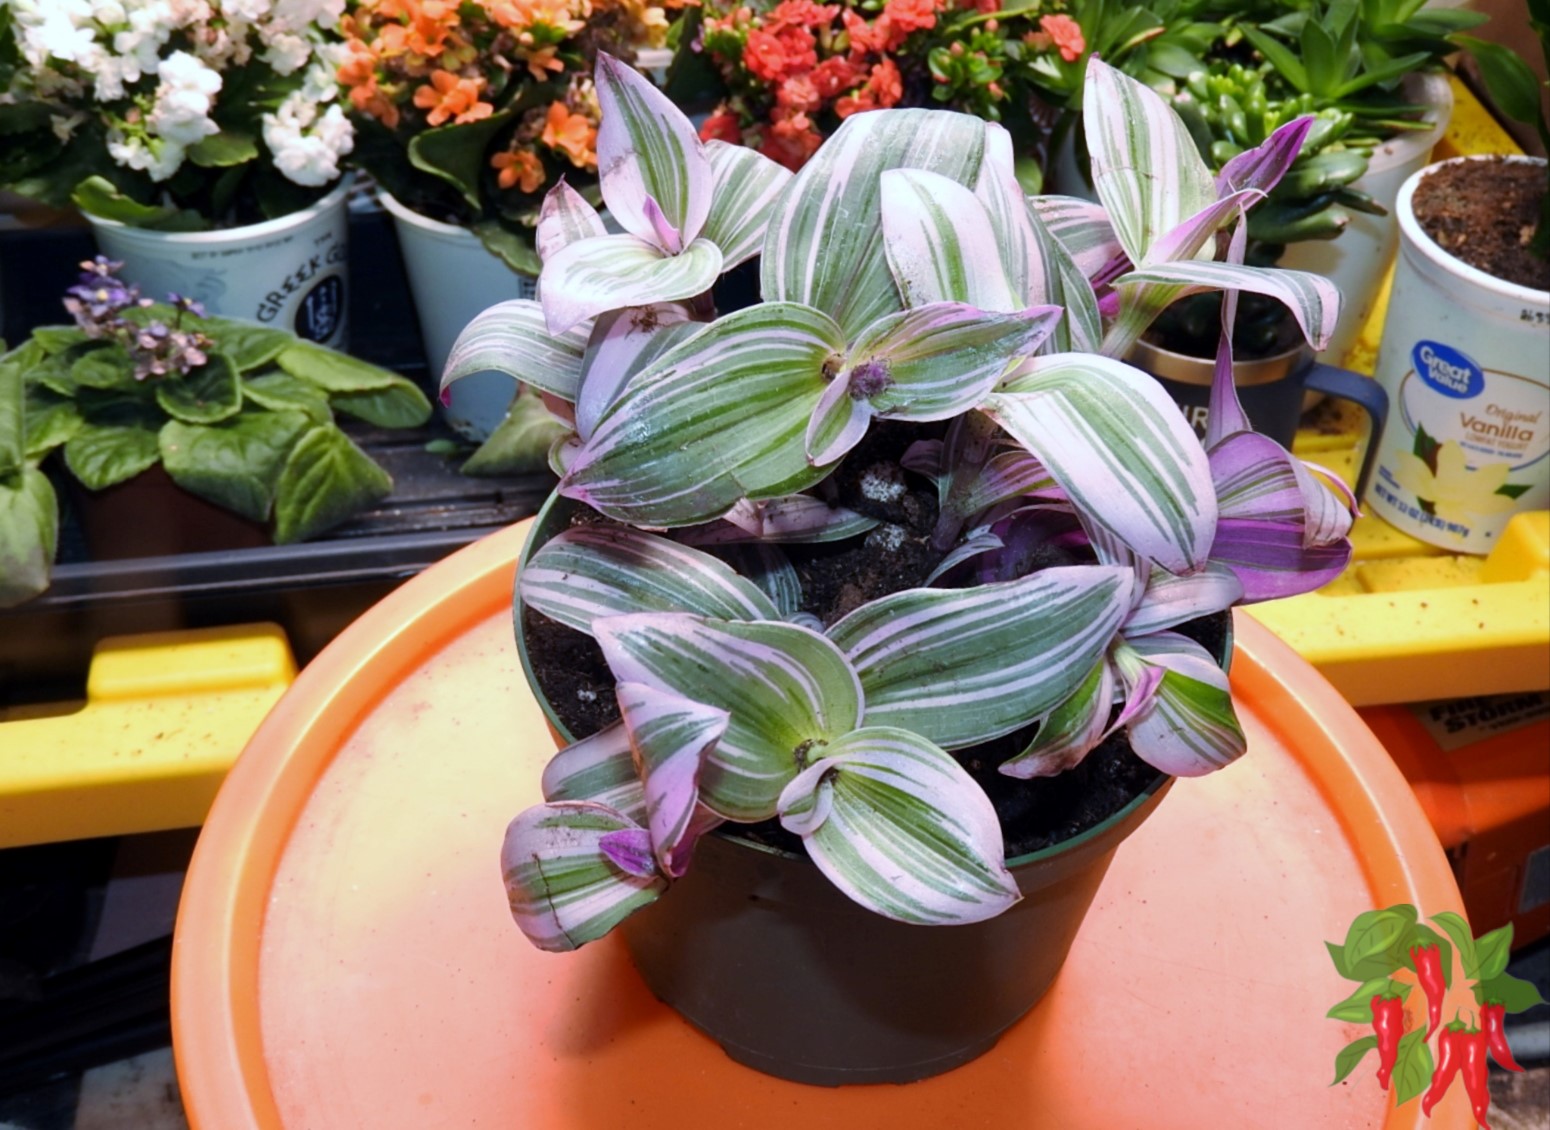
🌿 Indoor Houseplant Growing Guides
Want to fill your home with lush, vibrant greenery? These expert indoor houseplant guides will help you grow everything from exotic blooms to hardy foliage with ease!
- 🌿 Benefits of Keeping Indoor Houseplants (Pillar Guide)
- 🌱 Can You Grow Gladiolus Indoors? 11 Easy Gladioli Growth Tips
- 🍃 Pink Wandering Jew: Easy Nanouk Tradescantia Care
- 🌾 Tī Plant Care Indoors: 7 Proven Tips To Transform Your Space
- 🪴 Rubber Plant Care Indoors: 11 Best Care Tips For Beginners
- 🍀 Ficus Benjamina Indoors: 6 Easy Growth Tips For Beginners
- 🌼 How To Care For Peace Lily Indoors: 13 Easy Care Growth Tips
- 🌹 Bubble Gum Plant Care: 11 Tips And Tricks For Beginners
- 🌺 Hibiscus Plant Care Indoors: 7 Growth Tips For Beginners
- 🍂 Growing Jacob’s Ladder Indoors: Comprehensive Guide
- 🌷 Purple Shamrock Plant Care: 13 Tips And Tricks For Beginners
- 🌿 Creeping Jenny In Pots: 13 Lysimachia nummularia Growth Tips
- 🏡 Vertical Gardening Ideas: Best Small Space Garden Ideas
- 🪴 Chinese Money Plant Care Indoors: 7 Easy Growth Tips
- 🌳 9 Triangle Ficus Care Secrets for a Lush, Healthy Plant
- 🍌 Ice Cream Banana Tree Care: 15 Tip Complete Growth Guide
- 🌱 How to Make a Nerve Plant Thrive: 10 Tips and Tricks
- 🌸 African Violet Care Indoors: 11 Easy Care Tips For Beginners
- 🌺 Alternanthera Party Time Care: 7 Easy Growth Hacks
- 🌼 Geranium Care In Pots: 9 Geranium Growth Tips For Beginners
- 🌿 Purple Velvet Plant Care: 7 Easy Growth Tips And Tricks
- See all articles in our Indoor Houseplants category

 Steve S. is the creator of