This post contains affiliate links. If you buy something from one of our links we may earn a commission. Thanks
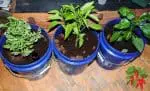
Here is how to build a DIY strawberry tower. Most people use 5-gallon buckets but I used 5-gallon pots instead. I have 20 sites for my Albion strawberries. Building a vertical strawberry garden is a real space saver.
Strawberry Tower Key Takeaways:
- Create a space-saving vertical strawberry garden using three 5-gallon pots or two 5-gallon buckets.
- Cut holes with a 1 3/4 to 2-inch hole saw for planting sites, trim one pot to fit into another, and secure with self-tapping screws.
- Fill with coco coir, and plant strawberries, and maintain moisture by watering from the top or bottom.
- Ideal for growing day-neutral Albion or everbearing Totem strawberry varieties.
How To Build A DIY Strawberry Tower Video
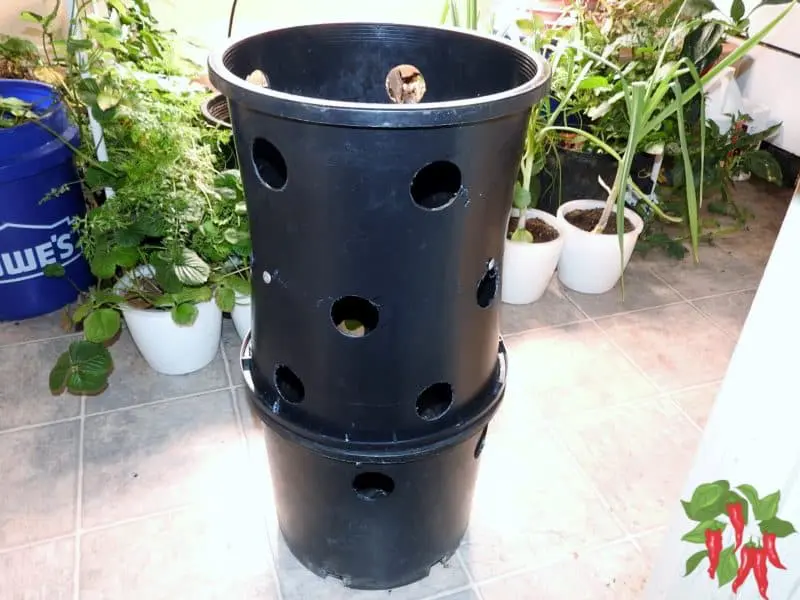
To make a vertical strawberry tower you will need two 5-gallon buckets or three 5-gallon pots. You will also need a hole saw to cut the holes.
I used a 1 3/4 inch hole saw but some people use a 2-inch or larger hole saw. I don’t think the hole needs to be any larger than 2 inches.
Most people use 5-gallon buckets but I didn’t have any spare buckets. So instead of buying more, I decided to use some 5-gallon pots that I am not using for anything.
The hardest part is cutting the buckets or pots. In order for them to fit together. One must be cut shorter than the other. If it isn’t they won’t fit together correctly.
I eyeballed mine and cut the bottoms off the pots. Then I trimmed one pot down so it would just fit inside the other. I trimmed off about 6 inches from one pot.
I used 4 self-tapping screws to secure them together so they would not come apart. I wanted my vertical planter to be taller so I added a third pot.
I did not cut this pot at all and it still has its bottom intact to act as a base for the planter. What I did was place it rim to rim with the other planters.
Then I secured them together with self-tapping screws. The planter was 24 inches tall after this and probably very close to the height 2 buckets would make.
I laid out a grid on the pots with a marker and tried to place the holes 8 inches apart. I staggered the rows. I was able to get 5 holes in each row and there were 4 rows for 20 planting sites.
I only cut one row in the base because I felt additional plants would be too close to the ground. I also wanted to leave space in case I wanted to bottom water my strawberry tower.
Choosing Strawberry Plants For Your Tower
Since I am growing strawberries indoors there are really no growing seasons. So I want to grow a day-neutral strawberry variety than will fruit continuously.
If you are growing indoors you should get a day-neutral variety for extended harvests. Outdoors you can choose a June bearing or an everbearing variety.
I decided to go with Albion strawberry plants for my vertical garden. Previously I grew Totem strawberries but I found their really long runners to be problematic.
This is a popular day-neutral strawberry variety.
The Albion strawberry is a relatively new hybrid plant that checks several important boxes for gardeners. Heat tolerant and everbearing, with large, uniform, and very sweet berries, these plants are a good choice for gardeners with hot summers looking to extend their crop. Keep reading to learn more about Albion strawberry care and how to grow Albion berries in the garden.

Planting In My Vertical Strawberry Tower
I will be filling my tower with coco coir. This is my preferred growing medium to use indoors. I get much better results with it over potting soil.
Coco coir is actually a hydroponic medium and this article talks about how to grow strawberries indoors. hydroponically indoors.
It also weighs half as much and is reusable. It is environmentally friendly because it is made from a renewable resource.
As it is being filled I will place my strawberry plants into the holes and cover the roots as I move up from the bottom to the top. I will place a couple of plants in the open top too.
I wanted to get my vertical strawberry planter built before I received my plants. They should be here in about a week and then I will make a video of planting them.
So I will be updating this shortly and if you are interested you can bookmark this post so you don’t miss it.
Setting Plants In My Vertical Strawberry Tower
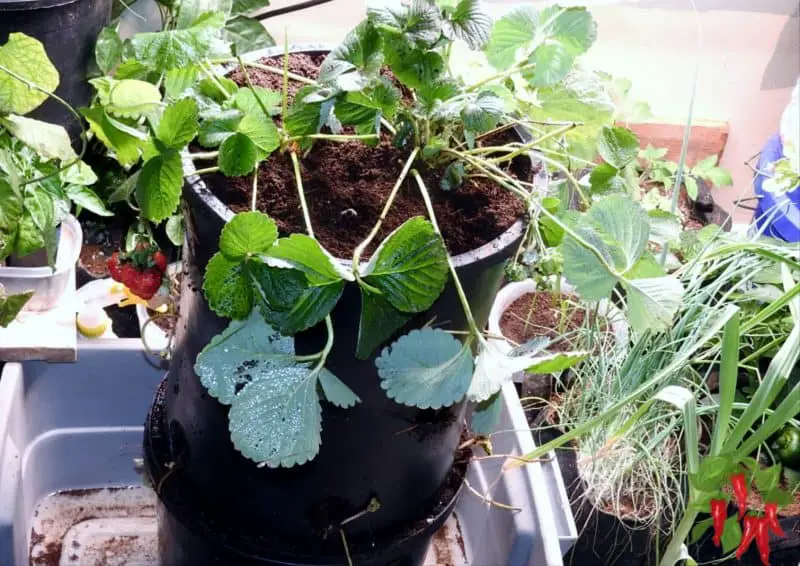
Today I received my Albion strawberry plants and set them in my tower. I went row by row starting at the bottom.
I used coco coir to fill the bottom of the planter up to the level of the first holes. Since I did not want the coco coming out of the bottom planter holes I covered them up with a strip of polyester batting that the coco held in place.
I set the plants through the first row of holes and spread the roots out on top of the coco coir. Then I added another layer of coco coir up to the second row of holes. I continued doing this until I reached the top row of planting sites.
There are 5 holes in each row and there are 4 rows so I will have 20 Albion strawberry plants on the sides of my planter.
When I got to the last row I put the plants in and spread out the roots. But instead of just covering them up with soil I also placed two Totem strawberry plants on top and filled everything in with more coco coir.
So now I have 22 plants in my tower. The totem strawberries were grown in pots and had some berries already on them.
After everything was set in I watered from the top to settle everything in. Now its time to wait for my new plants to start growing.
The Albion strawberries are a day-neutral variety while the Totem strawberries are considered ever-bearing.
The difference is the Albions will bear all year while the Totems bear in June and then again in the fall.
I will update again once the new strawberry plants are growing. I made a video of the planting so you can watch me plant the tower.
My Strawberry Planter Update
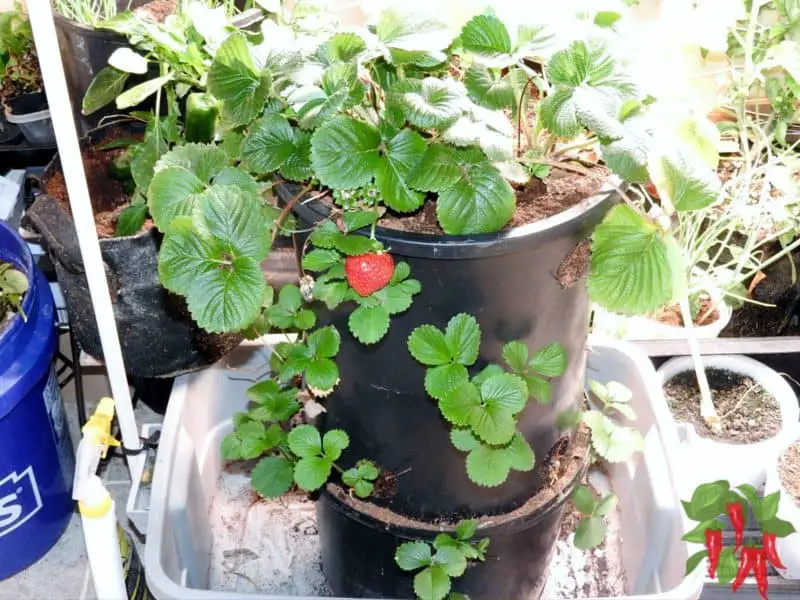
It has been about 3 weeks since I set up my strawberry tower. The plants on top are Totem strawberries and were set from transplants. They have been fruiting for the past week.
The Albion strawberries on the sides are growing but are still too small to begin fruiting. Not all of them made it either.
I lost about 5 plants. I’m not happy about it but it shouldn’t present a problem. Once they start to runner I will be able to set the runners in the blank holes.
The tower is sitting in a 10-gallon tote. Because it is so tall I have been bottom watering and also top watering at intervals.
I will do a video update when they start flowering and producing berries.
Strawberry Tower FAQs
Constructing a DIY Strawberry Tower opens a gateway to compact, efficient gardening.
A myriad of questions may arise as enthusiasts navigate through the stages of setting up, planting, and nurturing their vertical strawberry garden.
Addressing these queries can unveil practical solutions and enrich the understanding of this innovative gardening venture. Let’s dive into some frequently asked questions to unravel more insights into building and maintaining a thriving DIY Strawberry Tower.
Q. What is the ideal material for making the pots in a DIY Strawberry Tower?
A. While 5-gallon buckets are commonly used, 5-gallon pots also work well. The choice between them depends on personal preference and available resources.
Q. Which variety of strawberries is suited for a vertical strawberry garden?
A. Day-neutral varieties like Albion strawberries are ideal for continuous fruiting, especially indoors. If growing outdoors, everbearing or June-bearing varieties could also be considered.
Q. What is the preferred growing medium for a strawberry tower?
A. Coco coir is a recommended growing medium due to its lightweight nature, water retention capacity, and it being a hydroponic medium. It also allows for ease of planting and root spread.
Q. How do I ensure that the plants are adequately watered in a strawberry tower?
A. You can water the plants from the top to settle the coco coir initially.
For ongoing watering, a mix of top and bottom watering is suggested to ensure the moisture level is maintained.
Monitoring the water level in the bottom tray helps in determining the watering schedule.