This post contains affiliate links. If you buy something from one of our links we may earn a commission. Thanks
Discover how to care for spider plants indoors with our easy-to-follow guide! Boost your plant’s health and happiness with expert tips and tricks. Happy growing!
Caring for Spider Plants indoors involves placing them in bright, indirect light and watering them when the top inch of soil feels dry. Use a well-draining potting mix and ensure good air circulation around the plant. Fertilize every 4-6 weeks during the growing season with a balanced liquid fertilizer for best results.
If you’re looking to learn how to care for spider plants indoors, you’ve come to the right place.
These popular houseplants not only bring a touch of natural beauty to your home but are also known for their air-purifying abilities.
In this ultimate guide, we’ll share all the tips and tricks you need to ensure your spider plants thrive indoors, making your home a little greener and brighter.
Let’s get started on your spider plant journey!
How to Care for Spider Plants Indoors: The Ultimate Guide

Are you ready to dive into the world of spider plants and learn how to care for them indoors? You’re in for a treat!
In this comprehensive guide, we’ll explore everything you need to know to keep your spider plants happy and healthy.
From understanding the benefits of these charming houseplants to mastering the art of watering, fertilizing, and even propagating, we’ve got you covered.
So, let’s embark on this exciting journey together and transform your indoor space into a lush, green haven with thriving spider plants!
Getting to Know Spider Plants
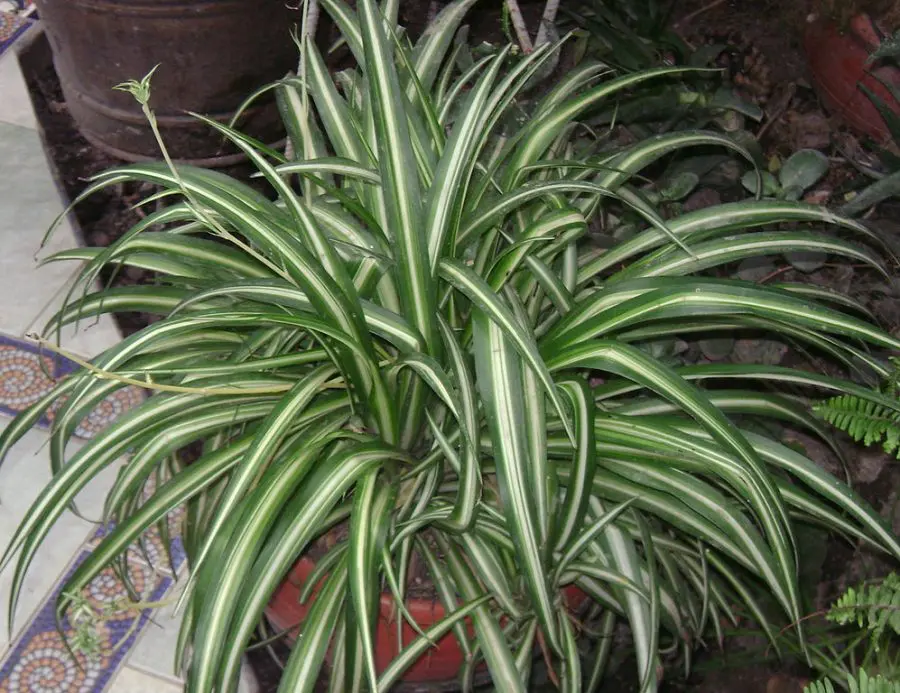
Spider plants, scientifically known as Chlorophytum comosum, are a popular choice among houseplant enthusiasts due to their graceful, arching leaves and cascading “baby” plantlets.
Originating from tropical and southern Africa, these charming plants are known for their adaptability and low-maintenance nature, making them an ideal addition to any indoor space.
A sometimes used common name for them is Airplane Plant. Ribbon Plant and Spider Ivy are also used.
What Is A Spider Plant?
According to Wikipedia:
Chlorophytum comosum, usually called spider plant or common spider plant due to its spider-like look, also known as spider ivy, ribbon plant (a name it shares with Dracaena sanderiana),and hen and chickens is a species of evergreen perennial flowering plant of the family Asparagaceae. It is native to tropical and Southern Africa but has become naturalized in other parts of the world, including Western Australia and Bangladesh.Chlorophytum comosum is easy to grow as a houseplant because of its resilience, but it can be sensitive to the fluoride in tap water, which commonly gives it “burnt tips”. Variegated forms are the most popular.
Chlorophytum comosum grows to about 60 cm (24 in) tall, although as a hanging plant it can descend many feet. It has fleshy, tuberous roots, each about 5–10 cm (2–4 in) long. The long narrow leaves reach a length of 20–45 cm (8–18 in) and are around 6–25 millimetres (0.2–1.0 in) wide.
The Perfect Indoor Companion: Spider Plants

There are several reasons why spider plants make excellent indoor plants. First and foremost, they are hardy and resilient, able to bounce back from occasional neglect or less-than-perfect conditions.
Additionally, spider plants are renowned for their air-purifying abilities, as they help remove toxins like formaldehyde and benzene from the air.
Plus, their attractive foliage and unique growth habit can add a touch of natural beauty and visual interest to your home.
In a hanging basket, long stems hang down and the small plantlets hanging down from them are reminiscent of spiders hence the name Spider Plant.
So, if you’re looking to enhance your indoor environment while also enjoying the benefits of cleaner air, spider plants are the way to go!
Spider Plant Indoor Benefits
In this section, we’re going to delve into the wonderful world of spider plant indoor benefits.
These delightful houseplants offer more than just their good looks; they come with a whole host of perks that can improve your indoor space and overall well-being.
From purifying the air to brightening up your home, spider plants truly are the gift that keeps on giving.
So, let’s jump right in and uncover all the fantastic reasons why these green gems should have a place in your heart and home!
Breathe Easier: Spider Plants’ Air Purification Qualities
Did you know that spider plants are fantastic natural air purifiers?
They work tirelessly to remove common indoor pollutants like formaldehyde, benzene, and xylene, helping you breathe cleaner, fresher air.
In fact, a study by NASA found that spider plants are among the top air-purifying houseplants.
So, by adding these green beauties to your indoor space, you’re not only enhancing its aesthetics but also promoting a healthier environment.
Eye-Catching Foliage: Aesthetic Appeal of Spider Plants
There’s no denying the aesthetic appeal of spider plants. With their graceful, arching leaves and charming “baby” plantlets, they can effortlessly add visual interest to any room.
The variegated varieties, featuring green leaves with white or yellow stripes, are particularly striking and can brighten up even the dullest of spaces.
By incorporating spider plants into your home, you’ll create a lively, vibrant atmosphere that’s sure to impress both you and your guests.
Low-Maintenance Charm: Easy Care for Spider Plants
One of the most endearing qualities of spider plants is their low-maintenance nature.
These hardy plants can tolerate a range of conditions, from less-than-ideal lighting to occasional neglect.
This makes them perfect for busy individuals or those new to the world of houseplants.
Spider plants are also non-toxic, which is great news for pet owners and parents of young children.
So, if you’re seeking a fuss-free, family-friendly houseplant, look no further than the delightful spider plant!
Light

Now that we’ve explored the many benefits of spider plants, let’s talk about one of the most crucial aspects of their care: light.
Just like all living things, spider plants need the right amount of light to grow and thrive.
In this section, we’ll discuss the ideal light conditions for your green friends, and share some helpful tips to ensure they receive the proper amount of sunlight.
So, let’s shed some light on this important topic and set your spider plants up for success!
Striking the Balance: Ideal Light Conditions for Spider Plants
Spider plants are quite adaptable when it comes to lighting conditions, but they’ll truly thrive in bright, indirect light.
Direct sunlight can scorch their delicate leaves, so it’s best to keep them away from harsh, south-facing windows.
On the other hand, low light may cause slow growth and less vibrant foliage. So, aim to find that sweet spot of bright light but also indirect light to keep your spider plant happy and healthy.
If you only have a South-facing window with too much light you can provide indirect sunlight by hanging a sheer curtain to diffuse the direct sunlight.
Let There Be Light: Tips for Providing Adequate Light
To ensure your spider plant receives the optimal amount of light, consider placing it near a north- or east-facing window, where it can bask in gentle sunlight.
Alternatively, if your home lacks sufficient natural light, you can supplement it with a grow light to mimic the sun’s rays.
Just remember to keep the grow light a suitable distance from the plant to avoid burning the leaves and adjust the duration of exposure as needed.
Reading the Leaves: Signs of Too Much or Too Little Light
If your spider plant isn’t getting the right amount of light, it will let you know through its appearance.
Signs of too much direct sunlight include scorched or brown leaf tips, while leaves that become pale or lose their variegation may indicate insufficient light.
If you notice any of these symptoms, adjust your plant’s lighting conditions accordingly.
By keeping a watchful eye on your spider plant’s foliage, you can ensure it gets the perfect amount of light to flourish.
How Often to Water Spider Plant

In this section, we’re going to tackle one of the most common questions about spider plant care: how often should you water them?
Providing the right amount of moisture is crucial for keeping your spider plants healthy and vibrant.
So, let’s dive into the world of watering and learn the ins and outs of keeping your spider plants well-hydrated while avoiding common pitfalls like over- or under-watering.
Let’s quench your thirst for knowledge and help your plants thrive!
Finding the Sweet Spot: General Watering Guidelines
When it comes to watering your spider plants, it’s essential to strike a balance.
They prefer their soil to be consistently moist soil but not soggy soil.
A good rule of thumb is to water your spider plant when the top inch of soil feels dry to the touch.
Depending on your home’s environment, this could be anywhere from once a week to every two weeks.
Be sure to empty any excess water from the saucer to avoid root rot.
Going with the Flow: Factors Affecting Watering Frequency
Several factors can impact how often your spider plant needs water, including light levels, temperature, humidity, and the type of pot and soil you’re using.
Higher light levels, warmer temperatures, and low humidity can cause the soil to dry out more quickly. Dry soil will require more frequent watering.
Conversely, in cooler or more humid environments, the soil may retain moisture longer, so be prepared to adjust your watering schedule accordingly.
Thirsty or Drowning? Signs of Over- or Under-Watering
Your spider plant will give you clues if it’s not receiving the right amount of water.
Overwatered plants may exhibit yellowing leaves, root rot, and a musty smell, while underwatered plants might have brown, crispy leaf tips or wilted foliage.
If you notice any of these signs, adjust your watering habits to better suit your plant’s needs.
By keeping a keen eye on your spider plant’s appearance, you can ensure it stays well-hydrated and healthy.
Why Tap Water Can Be Bad for Spider Plants

Tap water might be readily available and convenient for watering your houseplants, but it can sometimes be detrimental to the health of your spider plants.
In this section, we’ll discuss the reasons why tap water can be harmful and explore alternative water sources that can help your spider plants thrive and avoid potential issues.
The Trouble with Tap Water: Common Contaminants
Tap water can contain several contaminants that negatively affect spider plants, including:
Chlorine: Many municipal water supplies add chlorine to disinfect the water. However, chlorine can cause leaf tip burn in spider plants and hinder their growth.
Fluoride: Fluoride is another common additive in tap water, intended to promote dental health. Unfortunately, spider plants are sensitive to fluoride, which can cause brown leaf tips and discoloration.
Hard water minerals: Tap water often contains minerals like calcium and magnesium, which can cause mineral buildup in the soil, leading to poor water absorption and potential nutrient imbalances.
Better Water Sources: Alternatives to Tap Water
To avoid potential problems caused by tap water, like brown tips and yellow leaves consider these alternatives for watering your spider plants:
Filtered water: A water filtration system can remove many of the contaminants found in tap water, providing a safer option for your spider plants.
Rainwater: Collecting rainwater is an eco-friendly and cost-effective way to provide your spider plants with a natural water source free of additives.
Distilled water: Using distilled water, which has been purified through a process that removes contaminants and minerals, ensures a clean water source for your spider plants.
By understanding the potential issues associated with tap water and opting for alternative water sources, you can protect your spider plants from harm and encourage their healthy growth.
Soil and Pots (Coco Coir)

We’ll be exploring the importance of soil and pots for your spider plants, with a special focus on coco coir.
Choosing the right soil mix and container can make a significant difference in your plant’s health and growth.
So, let’s dig into the world of soil and pots to discover how you can create the perfect environment for your spider plants to thrive, using the unique benefits of coco coir.
Get ready to get your hands dirty and let your plants flourish!
The Perfect Blend: Choosing the Right Soil Mix
Selecting the ideal soil mix for your spider plant is crucial for its overall health and growth.
Spider plants prefer well-drained soil that retains some moisture without becoming waterlogged.
A mix of two parts coco coir and one part perlite or vermiculite is a great combination that provides adequate drainage, aeration, and moisture retention for your spider plant.
Going Coconuts: Benefits of Coco Coir
Coco coir, made from coconut husk fibers, has gained popularity as an eco-friendly alternative to peat moss in potting mixes.
It boasts several benefits for your spider plants, including excellent moisture retention, improved aeration, and resistance to compaction.
Additionally, coco coir is pH-neutral and naturally resistant to pests and fungal growth.
Incorporating coco coir into your spider plant’s soil mix can help create a healthy, well-draining environment that promotes strong root growth and overall plant health.
Picking the Perfect Home: Selecting the Right Pot Size and Material
Choosing the right pot for your spider plant is just as important as the soil mix.
Spider plants prefer snug containers, so opt for a pot that is only slightly larger than the root ball.
As for pot material, both plastic and ceramic pots can work well, provided they have drainage holes to prevent waterlogging.
If you live in a dry climate or tend to forget watering, a great addition to consider is using a self-watering pot or adding a pebble tray which is a saucer with pebbles and water to help maintain consistent moisture levels.
By selecting the right pot size and material, you’ll create a cozy home for your spider plant to thrive in.
Fertilizing

Let’s talk about another essential aspect of spider plant care: fertilizing. Providing your green companions with the right nutrients is key to their growth, health, and overall well-being.
In this section, we’ll discuss the importance of fertilizing, how often to do it, and which fertilizers work best for your spider plants.
So, let’s get ready to feed those hungry plants and watch them flourish!
Feeding Time: Recommended Fertilizers for Spider Plants
To keep your spider plants healthy and vibrant, it’s essential to provide them with the right nutrients.
A balanced, water-soluble fertilizer with a 10-10-10 or 20-20-20 ratio (nitrogen, phosphorus, and potassium) is an excellent choice for spider plants.
Alternatively, you can opt for an organic fertilizer like worm castings, fish emulsion, or seaweed extract, which can also provide essential micronutrients for robust growth.
Nourishing Your Plants: Frequency and Application Process
When it comes to fertilizing your spider plants, moderation is key.
During the growing season (spring and summer), apply fertilizer once every four to six weeks, diluting it to half the recommended strength to avoid over-fertilizing.
In the fall and winter, when growth slows down, you can reduce the frequency to once every two to three months.
Always water your plant thoroughly before applying fertilizer to help prevent root burn and ensure even nutrient distribution.
Striking a Balance: Signs of Over- or Under-Fertilizing
It’s important to keep an eye on your spider plant for signs of over or under-fertilizing.
Symptoms of over-fertilization include yellowing leaves, burned leaf tips, and stunted growth.
On the other hand, under-fertilized plants may display pale or discolored leaves, weak growth, and a lack of “baby” plantlets.
If you notice any of these signs, adjust your fertilizing routine to better suit your plant’s needs.
By providing the right nutrients at the right frequency, you’ll ensure your spider plant grows strong and healthy.
Temperature and Humidity

Now it’s time to explore another essential aspect of spider plant care: temperature and humidity.
As tropical natives, spider plants have specific preferences when it comes to their surrounding climate.
In this section, we’ll discuss the ideal temperature and humidity levels for your spider plants and offer some tips on how to maintain the right conditions and a comfortable environment for them.
So, let’s dive in and learn how to create the perfect atmosphere for your green buddies to thrive!
Comfort Zone: Ideal Temperature Range
Spider plants prefer a comfortable temperature range similar to what most humans enjoy.
Ideally, they should be kept in an environment with temperatures between 65-75°F (18-24°C) during the day and slightly cooler at night, around 55-65°F (13-18°C).
While they can tolerate brief temperature fluctuations, prolonged exposure to extreme heat or cold can cause stress and damage to the plant.
Tropical Vibes: Humidity Requirements
As natives of tropical environments, spider plants appreciate higher humidity levels.
They thrive in relative humidity of around 50-70%, which is slightly higher than the average indoor humidity.
Low humidity can cause brown, crispy leaf tips, while excessively high humidity may promote fungal growth and other issues.
Climate Control: Tips for Maintaining Proper Temperature and Humidity
To maintain the ideal temperature for your spider plant, keep it away from drafts, heating vents, and air conditioning units that may cause sudden temperature changes.
As for humidity, there are several ways to increase it around your plant.
You can place a tray filled with water and pebbles beneath the pot, ensuring the bottom of the pot doesn’t touch the water.
Alternatively, you can use a humidifier, group your plants together, or mist the leaves with water occasionally.
By carefully monitoring and adjusting the temperature and humidity in your spider plant’s environment, you’ll create a happy, healthy home for it to thrive in.
Spider Plant Flowers: Appearance and Blooming Time

Though spider plants are mostly known for their attractive foliage and easy-going nature, they do occasionally produce flowers that add an extra touch of beauty to your indoor garden.
In this section, we’ll explore when spider plants flower and what these delicate blossoms look like.
When Do Spider Plants Flower: Blooming Time
Spider plants typically bloom during the late spring or summer months when they are mature plants, usually after a couple of years of growth.
The blooming period may vary depending on factors such as the plant’s age, growing conditions, and overall health.
Providing proper care and maintaining a suitable environment can encourage your spider plant to produce flowers.
Delicate Beauty: What Spider Plant Flowers Look Like
Spider plant flowers are delicate small white flowers. The star-shaped flowers have a charming, wispy appearance.
They typically come in shades of white or very pale lavender and grow in clusters along long, arching stems called inflorescences.
These flowers are generally about half an inch in size and can add a lovely, subtle touch of elegance to the already visually appealing spider plant.
Once the flowers have bloomed, it is common for the plant to start producing the well-known “spiderettes” or plantlets, which dangle from the stems like little spiders.
These plantlets can be used for propagation, allowing you to expand your collection of spider plants.
By being mindful of your spider plant’s blooming period and understanding the characteristics of its flowers, you can fully appreciate the plant’s beauty and the joy it brings to your indoor space.
Maintenance and Pruning

In this section, we’ll discuss the importance of maintenance and pruning for your spider plants.
Regular upkeep not only helps your plants look their best but also promotes healthy growth and keeps potential problems at bay.
So, let’s learn the proper techniques for pruning, removing dead leaves, and managing those delightful “babies” to ensure your spider plants continue to thrive and add beauty to your indoor space.
Keeping It Green: Regular Care Tasks
Maintaining your spider plant’s health involves several regular care tasks.
First, be sure to keep the leaves dust-free by gently wiping them with a damp cloth or placing the plant under a lukewarm shower.
This helps the leaves better absorb light and keeps the plant looking fresh.
Additionally, rotate your plant every few weeks to ensure even growth, as spider plants tend to grow toward the light source.
When and How to Prune
Pruning your spider plant helps maintain its shape and encourages bushier growth.
The best time to prune is during the active growing season (spring and summer).
Using clean, sharp scissors or pruning shears, remove any yellow, brown, or damaged leaves at the base of the plant.
You can also trim back excessively long leaves to help maintain a balanced appearance.
Be sure to sterilize your cutting tools before and after use to prevent the spread of diseases.
Promoting Healthy Growth
To promote healthy growth, it’s essential to address any potential issues as they arise.
Keep an eye on your spider plant for signs of pests or diseases, and treat them promptly to avoid further problems.
Additionally, ensure your plant receives the right balance of light, water, and nutrients, and maintain proper temperature and humidity levels.
By being proactive with your plant’s care, you’ll create an environment where your spider plant can truly flourish.
Repotting Spider Plants

As your spider plants grow, repotting becomes an essential part of their care.
Giving your green friends more room to spread their roots is key to their continued health and growth.
In this section, we’ll guide you through the process of repotting your spider plants, including when to repot, how to choose the right pot and soil, and tips for making the transition as smooth as possible.
Let’s get ready to help your plants settle into their new, roomier homes!
Time for a Change: Signs That Your Spider Plant Needs Repotting
Knowing when to repot your spider plant is crucial for its well-being.
Some common signs that it’s time for a new home include roots growing out of the drainage holes or visible on the soil surface, a tightly packed root ball, or the plant becoming top-heavy and unstable in its pot.
You might also notice slowed growth or the need for more frequent watering. Typically, spider plants need repotting every two to three years.
Room to Grow: Steps for Successful Repotting
• Choose a new pot: Select a container that’s 1-2 inches larger in diameter than the current one, with drainage holes to prevent waterlogging.
• Prepare the soil: Use a well-draining soil mix, like the one mentioned earlier in the soil and pots section, to encourage healthy root growth.
• Remove the plant: Gently remove the spider plant from its current pot, taking care not to damage the roots. Loosen any tightly bound roots by massaging the root ball.
• Plant and fill: Place the spider plant in the new pot, positioning it at the same soil depth as before. Fill in the gaps with your soil mix, firming it gently around the roots.
• Water and settle: Thoroughly water the newly repotted plant to help settle the soil and establish good contact between the roots and the new soil.
Settling In: Post-Repotting Care
After repotting, give your spider plant some extra attention to help it adjust to its new environment.
Place it in a slightly shaded spot for a week or two to minimize stress, and keep an eye on its watering needs, as the new soil may dry out more quickly.
Hold off on fertilizing for about a month, allowing the roots to establish themselves in the new soil.
With the right care, your spider plant will soon adjust to its new home and continue to thrive.
Spider Plant Propagation

One of the most rewarding aspects of spider plant care is propagation.
Those adorable “babies” that your mature spider plants produce can become new spider plants to share with friends or expand your own indoor jungle.
In this section, we’ll walk you through the simple process of propagating spider plants, including the different methods available, step-by-step instructions, and tips for successful propagation.
Get ready to spread the green love and multiply your spider plant family!
Green Beginnings: Methods of Spider Plant Propagation
There are two main methods for propagating spider plants: water propagation and soil propagation.
Water propagation: This method involves placing the “baby” plantlet in a container filled with water, making sure only the roots are submerged.
The water should be changed every few days to prevent bacterial growth. In a few weeks, the roots will grow longer and stronger, and the plantlet will be ready to transplant into soil.
Soil propagation: To propagate directly in soil, place the plantlet on top of a moist, well-draining soil mix in a small pot, and gently press the base of the plantlet into the soil.
Keep the soil consistently moist but not soggy. In a few weeks, the plantlet will establish roots and begin to grow.
Caring For New Spider Plant Babies
After propagating your spider plant babies, it’s important to provide them with proper care to ensure healthy growth.
• Keep them in a brightly lit spot, but avoid direct sunlight to prevent scorching.
• Maintain consistent moisture in the soil, but be careful not to overwater, as this can lead to root rot.
• After about a month, you can begin to fertilize the young plants with a diluted, balanced fertilizer to support their development.
Growing Strong: When to Transplant Young Plants
Once your spider plant babies have developed a strong root system and are showing signs of new growth, it’s time to transplant them into a larger pot.
This typically occurs around two to three months after propagation. Choose a pot with drainage holes that is slightly larger than the current container, and use a well-draining soil mix.
Transplant the young plants with care, and follow the general spider plant care guidelines to ensure their continued growth and health.
Propagating Spider Plants By Division
Propagation is another fantastic way to grow your collection of spider plants, and one of the methods to do so is by division.
This technique allows you to create new plants by separating the root system of an existing plant.
In this section, we’ll walk you through the process of propagating spider plants by division, ensuring you can multiply your spider plants with ease and confidence.
Identifying When to Divide: Signs Your Spider Plant is Ready
Before dividing your spider plant, it’s essential to determine if it’s mature enough and ready for the process.
Here are a few signs that your spider plant is a good candidate for division:
Overcrowded roots: If you notice that the roots are tightly packed and have little room to grow, it’s a good indication that your spider plant could benefit from division.
Multiple crowns: A mature spider plant will often have more than one crown or growing point, which can be separated during the division process.
Step-by-Step Guide: How to Divide Your Spider Plant
Prepare your work area: Lay out newspapers or a tarp to protect your workspace, and gather the necessary materials, such as a clean, sharp knife or pruning shears, new pots, and fresh potting mix.
Remove the plant from its pot: Gently remove the spider plant from its current pot, taking care not to damage the roots.
Inspect the root system: Examine the roots for any signs of rot or damage, and trim away unhealthy portions with clean, sharp scissors.
Separate the crowns: Carefully tease apart the crowns and the roots, either by hand or with a clean, sharp knife, ensuring each division has a healthy portion of roots and foliage.
Plant the divisions: Fill your new pots with fresh potting mix and plant each division, making sure the roots are well-covered, and the crown is just above the soil line.
Water and care: Water the newly potted divisions thoroughly and place them in a bright, indirectly lit area. Continue to care for the new plants, following the standard spider plant care guidelines.
By understanding the signs of a spider plant ready for division and following the step-by-step process, you can successfully propagate your spider plants and expand your collection while also promoting healthier growth for the original plant.
Pests and Diseases

While spider plants are generally low-maintenance and resistant to many common plant issues, they can still occasionally fall victim to pests and diseases.
We’ll go over the most common problems your spider plant might encounter, along with effective solutions to keep your green companions healthy and pest-free.
By understanding how to prevent and treat these issues, you’ll be well-equipped to tackle any challenges that come your plant’s way.
Unwanted Visitors: Common Spider Plant Pests
Some common pests that may affect your spider plant include spider mites, scale insects, and aphids.
Spider mites are tiny, spider-like creatures that can cause leaves to turn yellow and eventually fall off.
Scale insects appear as small, flat, brownish bumps on leaves.
Aphids are small, soft-bodied insects that suck the sap from the plant, causing yellowing and curling of the leaves.
Not-So-Green Symptoms: Signs of Disease
Diseases that can affect spider plants include root rot and leaf spot diseases.
Root rot is typically caused by overwatering and poor drainage, leading to black, mushy roots and yellowing leaves.
Leaf spot diseases manifest as discolored or necrotic spots on the leaves, often surrounded by a yellow halo. These can be caused by fungal or bacterial infections.
Healthy Habits: Prevention and Treatment Methods
To prevent and treat pests and diseases on your spider plant, follow these steps:
Maintain proper care: Ensuring that your spider plant receives the appropriate amount of water, light, and nutrients is crucial for keeping it healthy and resistant to pests and diseases.
Monitor your plant: Regularly inspect your spider plant for signs of pests or diseases, and address any issues promptly to prevent further damage.
Natural remedies: For mild pest infestations, you can use an insecticidal soap solution to remove the pests.
Neem oil is another natural alternative that can be effective against many common plant pests.
Chemical treatments: For severe infestations or persistent issues, you may need to resort to chemical pesticides or fungicides.
Always follow the manufacturer’s instructions and use these treatments sparingly.
Prune and dispose of: Remove any severely affected leaves or parts of the plant, and dispose of them properly to prevent the spread of pests or diseases to other plants.
By being proactive in your spider plant care and addressing any issues as they arise, you’ll be well on your way to maintaining a happy, healthy plant.
Spider Plant Care in Winter

As the seasons change, so do the needs of your spider plant.
Winter can bring about unique challenges when it comes to indoor plant care, but with a few adjustments, you can ensure your spider plant stays happy and healthy during the colder months.
So let’s discuss the specific winter care requirements for spider plants, covering topics such as watering, lighting, and temperature management.
Let’s make sure your green companion thrives all year round!
Seasonal Shifts: Adjusting Care for the Winter Season
Spider plants, like many indoor plants, enter a period of slower growth during the winter months. This means their care requirements will change slightly:
• Watering: Reduce the frequency of watering, as the plant’s water needs decrease. Be sure to let the soil dry out a bit more between waterings to avoid overwatering.
• Lighting: With shorter days and less sunlight, you may need to provide your spider plant with supplemental lighting, such as a grow light, to ensure it receives enough light to maintain its health.
• Temperature: Spider plants prefer cooler temperatures during winter, ideally between 50-65°F (10-18°C). However, be sure to keep them away from cold drafts, heaters, or other sources of extreme temperature fluctuations.
Winter Wellness: Tips for Maintaining Plant Health During Colder Months
Here are some additional tips to help your spider plant thrive during the winter:
• Increase humidity: Indoor heating can lead to dry air, which may negatively affect your spider plant. You can use a humidifier, place a tray of water near the plant, or group plants together to increase the humidity levels.
• Fertilizing: Hold off on fertilizing your spider plant during the winter months, as the plant’s growth slows down and it requires fewer nutrients.
• Pruning: Regularly remove any dead or yellowing leaves to keep your plant looking its best and to prevent potential issues from arising.
By adjusting your spider plant care routine during the winter months and following these tips, you’ll be able to keep your plant healthy and happy all year long.
Spider Plant Indoor or Outdoor

One of the great aspects of spider plants is their versatility. They can be grown both indoors and outdoors, depending on your preferences and climate.
In this section, we’ll explore the pros and cons of growing spider plants indoors versus outdoors, and help you decide which option is best for your green companion.
We’ll also discuss tips for transitioning your plant between the two environments, ensuring a smooth and stress-free move for your spider plant.
Indoor Haven: Benefits of Keeping Spider Plants Indoors
Growing spider plants indoors offers several advantages:
• Controlled environment: Indoor conditions are generally more stable and can be easily adjusted to suit the needs of your spider plant, such as temperature, humidity, and light.
• Year-round enjoyment: When grown indoors, spider plants provide greenery and air-purifying benefits throughout the year, regardless of the season or weather conditions outside.
• Fewer pests and diseases: Indoor plants are generally less exposed to pests and diseases compared to those grown outdoors, making them easier to maintain and keep healthy.
Outdoor Adventures: Considerations for Outdoor Placement
Spider plants can also be grown outdoors, but there are some important factors to consider:
• Climate: Spider plants are sensitive to cold temperatures and should only be placed outdoors in regions with mild climates or during the warmer months.
They prefer temperatures between 65-75°F (18-24°C) and should be brought inside if temperatures drop below 50°F (10°C).
• Light conditions: When grown outdoors, spider plants should be placed in a location that receives bright, indirect light.
Direct sunlight can cause leaf scorching, so it’s important to provide partial shade during the hottest parts of the day.
• Pests and diseases: Outdoor plants may be more susceptible to pests and diseases, so it’s essential to regularly monitor your spider plant for any signs of trouble and treat any issues as soon as possible.
Ultimately, whether you choose to grow your spider plant indoors or outdoors will depend on your preferences, climate, and available space.
Just be sure to provide the proper care and conditions, and your spider plant will thrive in either environment.
Spider Plants Outside in Summer

As the warm summer months approach, you might be considering moving your spider plant outside to enjoy the sunshine and fresh air.
Transitioning your spider plant outdoors for the summer can offer several benefits, such as increased growth and a more vibrant appearance.
We’ll discuss the steps to safely move your spider plant outside, as well as tips for caring for your plant during the summer months.
Remember these are tropical plants but with the right precautions and care, your spider plant will flourish and add a touch of lush greenery to your outdoor space.
Smooth Moves: Transitioning Your Spider Plant Outdoors
To help your spider plant adjust to its new outdoor environment, follow these steps:
• Gradual exposure: Begin by placing your spider plant in a shaded outdoor location for a few hours each day, gradually increasing the time spent outside over the course of a week.
This will help the plant acclimate to outdoor conditions and prevent shock.
• Light conditions: Once your spider plant is accustomed to being outdoors, find a suitable location for it that receives bright, indirect light.
Avoid areas with direct sunlight, as it can cause leaf scorching.
• Monitor closely: Keep a close eye on your spider plant during the first few weeks outside, checking for any signs of stress, such as wilting or discolored leaves.
Address any issues as they arise to ensure a successful transition.
Sunny Days: Summer Care Tips
During the summer months, your spider plant will require some special care:
• Watering: As the temperatures rise, your spider plant may require more frequent watering.
Monitor the soil moisture closely and water when the top inch of soil feels dry to the touch.
• Fertilizing: Summer is the prime growing season for spider plants, so it’s important to provide them with proper nutrients.
Fertilize your plant every 4-6 weeks using a balanced, water-soluble fertilizer, following the package instructions.
• Pest control: Outdoor plants are more susceptible to pests, so regularly inspect your spider plant for any signs of infestation and treat it accordingly.
By following these steps and providing proper care during the summer months, your spider plant will enjoy its time outside and reward you with lush, healthy growth.
How to Make Spider Plant Bushier

If you’re looking to create a fuller, bushier appearance for your spider plant, you’re in luck!
These adaptable plants respond well to a few simple care techniques that can encourage a more dense and attractive growth habit.
In this section, we’ll share some tips and tricks to help you transform your spider plant into a lush, vibrant focal point in your indoor or outdoor space.
With just a little extra attention, your spider plant will quickly become the envy of all your plant-loving friends!
Pruning Techniques for a Fuller Appearance
To create a bushier spider plant, try these pruning methods:
• Pinch back: Regularly pinch back the tips of your spider plant’s leaves to encourage branching and new growth. Focus on pinching back the longer leaves to maintain a balanced and full appearance.
• Remove unhealthy leaves: Make sure to remove any yellowing, dead, or damaged leaves promptly. This not only keeps your plant looking its best but also allows more energy to be directed towards new, healthy growth.
• Trim back long runners: If your spider plant has long runners or offshoots, consider trimming them back to encourage the plant to produce more foliage and maintain a compact shape.
Encouraging Dense Growth
In addition to pruning, take these steps to promote a bushier spider plant:
Provide adequate light: Ensure your spider plant receives bright, indirect light to promote healthy and vigorous growth. Insufficient light can lead to leggy, sparse growth.
• Fertilize regularly: Feed your spider plant with a balanced, water-soluble fertilizer every 4-6 weeks during the growing season to support robust foliage production.
• Maintain proper watering: Consistent watering is crucial for encouraging dense growth. Allow the top inch of soil to dry out between waterings and avoid both over- and under-watering.
By implementing these pruning techniques and care tips, you’ll be well on your way to creating a fuller, bushier spider plant that adds a touch of lush greenery to your space.
Baby Spider Plants

There’s something undeniably adorable about spider plant babies, also known as plantlets or pups.
These little offshoots dangle from the mother plant, creating a unique and eye-catching display.
But these mini-me’s aren’t just cute—they’re also an excellent way to propagate and grow even more spider plants!
In this section, we’ll guide you through the process of nurturing and caring for spider plant babies, from their initial appearance on the parent plant to the moment they’re ready to strike out on their own.
Before you know it, you’ll have a whole family of happy, healthy spider plants to enjoy and share with friends.
Little Wonders: Identifying Spider Plant Babies
Spider plant babies are easy to spot, and here’s what to look for:
Tiny plantlets: Spider plant babies appear as small, miniature versions of the parent plant, complete with leaves and roots, growing on long, thin stems called runners or stolons.
Location: You’ll typically find spider plant babies dangling from the mother plant, often in clusters, creating a cascading effect. These offshoots usually emerge from the base of the parent plant or along the runners.
Nurturing New Life: Caring for and Propagating Spider Plant Babies
To care for and propagate your spider plant babies, follow these steps:
Wait for the right time: Allow the spider plant babies to mature on the parent plant until they have developed a few leaves and visible roots. This ensures they have a better chance of successful propagation.
Detach the baby: Once the baby plants are mature, gently remove them from the parent plant by either pinching or cutting the connecting runner, being careful not to damage the baby or its roots.
Propagation methods: You have two main options for propagating spider plant babies:
Soil propagation: Plant the baby directly into a small pot filled with well-drained soil. Keep the soil moist and place the pot in a location with bright, indirect light.
Water propagation: Place the baby’s roots in a container filled with water, ensuring that the leaves are not submerged. Change the water every few days to keep it fresh. Once the roots have grown longer, you can transplant the baby into a pot with soil.
Monitor growth: Keep an eye on your newly propagated spider plant baby, ensuring it receives proper light, water, and care. In time, it will grow into a healthy, mature spider plant.
By following these steps, you’ll be well-equipped to care for and propagate your spider plant babies, expanding your collection or sharing the joy of these charming plants with others.
How to Grow Spider Plants in Water

Growing spider plants in water is a fun and easy way to enjoy these versatile houseplants without the need for soil.
This method, known as hydroponics, can lead to healthy, vibrant spider plants with a unique and eye-catching appearance.
In this section, we’ll guide you through the process of growing spider plants in water, from selecting the right container to providing the essential nutrients and care your plant needs to thrive.
With just a little attention and some simple tools, you’ll soon have a stunning, soil-free spider plant that’s sure to spark conversation and brighten up your space.
Taking the Plunge: Preparing Your Spider Plant for Water Propagation
Before growing your spider plant in water, you’ll need to prepare it properly:
• Choose a healthy plant: Select a healthy spider plant baby with a few leaves and visible roots, or remove a healthy, well-rooted cutting from a mature spider plant.
• Clean the roots: Gently rinse the roots under lukewarm water to remove any soil or debris.
Tips for Successful Water Growth
To successfully grow your spider plant in water, follow these guidelines:
• Choose a suitable container: Select a transparent container, such as a glass jar or vase, that’s large enough to accommodate the roots without overcrowding.
Ensure the container has a narrow opening to support the plant and prevent the leaves from being submerged.
• Fill with water: Fill the container with filtered or distilled water, ensuring the roots are fully submerged but the leaves remain above the waterline.
• Provide nutrients: Add a hydroponic fertilizer or a small amount of liquid houseplant fertilizer to the water, following the manufacturer’s instructions for dilution rates.
This will provide the essential nutrients your spider plant needs to thrive in water.
Light and location: Place your water-grown spider plant in a location with bright, indirect light.
Avoid direct sunlight, which can overheat the water and harm the plant.
Change the water: Refresh the water every 1-2 weeks or whenever it appears cloudy, and add fresh fertilizer each time you change the water.
Making the Move: Transitioning Water-Grown Plants to Soil
To transition your water-grown spider plant to soil follow these steps:
• Choose a well-draining potting mix: Select a potting mix designed for houseplants, ideally one that’s lightweight and well-draining.
• Select the right pot: Pick a pot with drainage holes that’s slightly larger than the root system of your water-grown spider plant.
• Transplant gently: Carefully remove the spider plant from the water, and place it in the new pot, spreading the roots gently in the potting mix.
Fill the pot with soil, ensuring the plant is at the same depth it was in the water.
Water and care: Water the newly transplanted spider plant thoroughly, allowing excess water to drain away.
Continue to care for the plant as you would for a soil-grown spider plant.
By following these steps, you can successfully grow spider plants in water or even transition them back to soil if you choose.
Water-grown spider plants offer a unique and low-maintenance option for enjoying these popular houseplants.
Spider Plant FAQs
Spider plants are well-known for their adaptability and ease of care, making them an excellent choice for both newbie and seasoned plant owners.
These plants are not only attractive but also effective at purifying indoor air. However, even the most low-maintenance plants have specific needs and occasional issues that need addressing.
Whether you’re concerned about brown tips, curious about propagation, or wondering about the best watering techniques, this FAQ section aims to answer your questions about spider plant care.
Q: Should I cut the brown tips off my spider plant?
A: Yes, you can trim the brown tips off your spider plant to improve its appearance.
Use clean, sharp scissors to make the cut, being careful not to damage the healthy part of the leaf.
Q: How do you take care of indoor spider plants?
A: For indoor spider plants, place them in bright, indirect light and water them when the top inch of soil feels dry.
Use a well-draining potting mix, and fertilize every 4-6 weeks during the growing season.
Q: Should I cut the babies off my spider plant?
A: You can cut the “babies” or “pups” off the spider plant for propagation.
Make sure to use clean, sharp scissors and cut the pup away from the parent plant, leaving a bit of the stem attached.
Q: Does Spider plant need direct sunlight?
A: No, spider plants prefer bright, indirect light over direct sunlight, which can scorch their leaves.
Q: Should spider plants be watered from the top or bottom?
A: Either method works, but watering from the top is generally easier and ensures even soil moisture.
If you choose bottom-watering, let the plant sit in water for about 20-30 minutes before removing it.
Q: Where is the best place to put a spider plant?
A: The best place for a spider plant is an area with bright, indirect light, such as near a north or east-facing window.
They are also tolerant of lower light conditions but may grow less vigorously.
Understanding the specific needs of your spider plant can go a long way in ensuring its health and longevity.
By following these guidelines and addressing any concerns, you’ll be well on your way to becoming a spider plant expert.
How to Care for Spider Plants Indoors Final Thoughts

As we’ve explored in this comprehensive guide, caring for spider plants indoors is a rewarding and enjoyable experience.
From their air-purifying abilities to their charming plant babies, spider plants bring a touch of nature and a host of benefits to any indoor space.
With the tips and techniques we’ve shared, you’re now well-equipped to provide the best care for your spider plants, ensuring they thrive and grow beautifully for years to come.
Whether you’re a seasoned indoor gardener or just starting your plant journey, spider plants are a delightful and low-maintenance choice that’s sure to brighten your home and your life.
Recap of Main Points Of How to Care for Spider Plants Indoors
In this guide, we’ve covered various aspects of spider plant care, including:
• Benefits of keeping spider plants indoors
• Lighting requirements
• Watering frequency
• Soil and pots (coco coir)
• Fertilizing
• Temperature and humidity
• Maintenance and pruning
• Repotting
• Propagation
• Pests and diseases
• Winter care
• Indoor vs. outdoor placement
• Outdoor care in summer
• Encouraging bushier growth
• Spider plant babies
• Growing spider plants in water
Rooting for You: Encouragement for Successful Spider Plant Care
With all the information provided in this guide, you now have the knowledge and tools to care for your spider plants with confidence.
As you nurture your plants and watch them grow, remember that patience and attentiveness are key.
Don’t be afraid to experiment and learn from your experiences, as every plant is unique.
By applying the tips and techniques discussed in this guide, you’ll be well on your way to enjoying a lush, vibrant, and healthy spider plant collection in your indoor space. Happy planting!
Learn more about the 20 Benefits Of Keeping Indoor Plants For Improved Lifestyle