
If you’re looking for a delicious and nutritious way to spice up your meals, you should consider learning how to grow anise microgreens.
How To Grow Anise Microgreens
To grow Anise Microgreens, begin with quality seeds (Pimpinella Anisum) and well-draining soil like coconut coir in 1020 seed propagation trays.
Sow seeds densely, cover lightly with soil, and maintain moisture without over-watering. Provide 4-6 hours of sunlight daily or use an LED grow light.
Harvest when 2-3 inches tall, usually in about 4 weeks from sowing. Enjoy fresh or store in a breathable container in the fridge for up to a week.
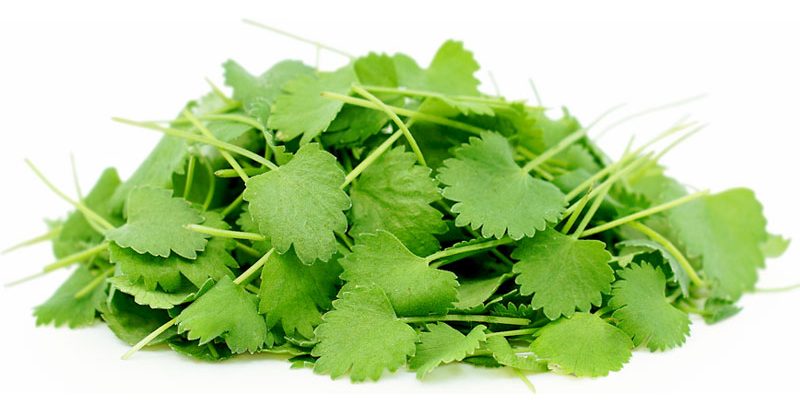
What Is Anise?
Anise is a spice that is used in many different cuisines around the world, including Mediterranean, Indian, and Chinese cuisine.
It has a wonderfully fragrant flavor with a mild licorice flavor. If you like the taste of licorice you will love anise.
You can also try growing fennel microgreens which also have anise-like flavor if you are looking for different types of microgreens
This is not one of the varieties of microgreens you are likely to find at your local grocery store so you will want to learn how to grow microgreens for yourself.
It is also high in nutrients, providing plenty of antioxidants, vitamins, and minerals. In this blog post, we will teach you how to grow anise microgreens in your own home garden.

Anise (Pimpinella anisum), also called aniseed or rarely anix is a flowering plant in the family Apiaceae native to Eurasia.
The flavor and aroma of its seeds have similarities with some other spices and herbs, such as star anise, fennel, licorice, and tarragon. It is widely cultivated and used to flavor food, candy, and alcoholic drinks, especially around the Mediterranean. https://en.wikipedia.org/wiki/Anise
How To Grow Anise Microgreens in 7 Easy Steps

Growing anise microgreens at home is easier than you might think. With the right supplies and a few simple steps, you can produce a healthy, flavorful crop of these fragrant greens in your own kitchen or balcony garden.
Best of all even a complete beginner can learn how to grow them in just 7 simple steps, So let’s do it!
1. Get Your Trays
I recommend using 1020 seed propagation trays. You will want one with drainage holes and one without. You can use recycled food containers for a growing tray if they are a shallow tray and if they are thoroughly cleaned.
2. Prepare your soil:
Make sure you have well-draining soil. I prefer to use coconut coir as a growing medium. You can use potting soil but you might want to lighten it up by adding extra perlite.
3. Plant the seeds:

Anise goes by several names you want to make sure you get Pimpinella Anisum and not star anise which is a tree or Anise hyssop which is a different plant. You will want organic seeds that are also non-GMO.
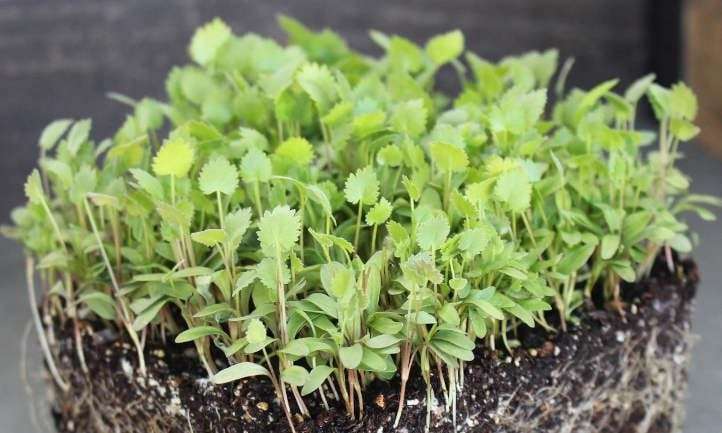
Anise microgreens seeds will germinate slowly and can take up to a couple of weeks and should be planted with a thin layer of soil over them.
Sow the seeds evenly over the soil surface and press them into the soil with your hands or use a small spoon to do this.
Sow heavily enough that the seeds are almost touching because the germination rate can be low and you want a full tray.
Don’t use a humidity dome use a misting bottle instead. Misting domes cut off air circulation and can do more harm than good.
4. Water regularly:
Start out by bottom watering your tray. Keep the soil moist but not soggy. Don’t use too much water because wet soil can lead to mold and fungal diseases.
Use a misting spray bottle aimed at the soil level and mist your plants lightly every day instead.
Don’t use cold water instead use warm water to mist your micro greens. Once the germination process is complete it’s time to get your baby plants some light.
5. Give them some sunlight:
Anise needs about 4–6 hours of direct sunlight per day for optimal growth. Put them in a south-facing window.
If you live in most of the United States during the winter months you will have limited sun exposure. So consider using an LED grow light. An LED will give you the best light for your tiny greens and it will cost less to run.
")
Garpsen Grow Light, 6000K Full Spectrum Plant Lights for Indoor Growing with Auto Timer
6. Harvest Time:
Anise microgreens are delicious and nutritious, making them a great addition to almost any dish. However, it can take a few weeks for the seeds to fully germinate, and another 2 weeks for the microgreens to be ready for harvest. Start harvesting after the cotyledon stage.
When the leaves are about 2-3 inches tall, they are ready to be harvested. It is important to monitor your plants closely during this time, checking in on them every couple of days.
Start harvesting when the first true leaves have unfolded. This is the best time to harvest these tender greens. Use scissors or a sharp knife to cut the microgreens off at the soil line.
Once their frilly green leaves have appeared, you may get a slightly different flavor from them.
With anise, it’s best to pick them when they’re young and tender. This allows them to have an intense flavor that adds great depth and richness even when used as a small garnish.
Knowing when to harvest your anise microgreens is key to enjoying their full potential.
7. Enjoy your anise microgreens:
Use your freshly harvested anise microgreens in salads, sandwiches, and other dishes for a nutritious and flavorful addition to any meal. They make a great garnish too.
Now that you know how to grow anise microgreens, it’s time to get growing. With the right preparation and care, you can enjoy this delicious spice in your home garden all year round.
How To Store Anise Microgreens
Ideally, you want to use anise microgreens right after harvesting them for maximum freshness and flavor.
But you can keep them in your refrigerator for about a week. Place them in a plastic bag with holes or a container that does not close tightly.
Place a paper towel inside to absorb moisture and maintain humidity. Here is more information on how to store microgreens.
Anise Health Benefits
Disclaimer: I am not a physician and don’t play one on TV either. The material on this site is not a substitute for professional medical advice, diagnosis, or treatment. Always seek a physician’s advice before using any information you find on this website to treat or prevent any condition.
Anise seed is a powerful plant that is rich in many nutrients and boasts a wide array of health benefits. It has anti-fungal, antibacterial and anti-inflammatory properties and may fight stomach ulcers, keep blood sugar levels in check and reduce symptoms of depression and menopause. https://www.healthline.com/nutrition/anise
According to the same article: One tablespoon (7 grams) of anise seed provides approximately:
Calories: 23
Protein: 1 gram
Fat: 1 gram
Carbs: 3 grams
Fiber: 1 gram
Iron: 13% of the Reference Daily Intake (RDI)
Manganese: 7% of the RDI
Calcium: 4% of the RDI
Magnesium: 3% of the RDI
Phosphorus: 3% of the RDI
Potassium: 3% of the RDI
Copper: 3% of the RDI
Anise Microgreens FAQs
As you dive into the cultivation of Anise microgreens, certain questions may arise to ensure you’re on the right track to obtaining a flavorful and healthy harvest.
Our FAQ section is crafted to alleviate any uncertainties you may have, covering a spectrum of common queries.
Whether it’s understanding the nutritional punch these greens pack, or knowing the right time to snip them off for your dishes, we have got your concerns addressed below.
Q. What are the nutritional benefits of Anise microgreens?
A. Anise microgreens are nutrient-dense, offering antioxidants, vitamins, and minerals. A tablespoon of anise seeds provides calories, protein, and a good amount of Iron, Manganese, and other minerals which contribute to a balanced diet.
Q. How should Anise microgreens be stored to maintain freshness?
A. Store Anise microgreens in a refrigerated, breathable container or a plastic bag with holes, alongside a paper towel to absorb excess moisture. This arrangement keeps them fresh for about a week.
Q. When is the ideal time to harvest Anise microgreens?
A. The ideal time to harvest Anise microgreens is when they reach a height of 2-3 inches, which typically occurs around 4 weeks from sowing.
Harvesting at the cotyledon stage or when the first true leaves have unfolded ensures an intense flavor.
Q. Can Anise microgreens be grown indoors throughout the year?
A. Yes, Anise microgreens can be grown indoors all year round. They require 4-6 hours of direct sunlight daily, which can be supplemented with an LED grow light during the winter months or in low-light conditions.
Final Thoughts
In conclusion, anise microgreens are a great addition to any dish or salad and will provide a boost of flavor and nutrition.
They’re easy to grow in your home garden with some sunshine and water and only take a few weeks to reach full maturity. So why not grow your own microgreens?
Plus, they have powerful medicinal properties that can help keep you healthy. So why not give anise microgreens a try today?
🌱 More Microgreens Growing Guides
Want to grow fresh, nutritious microgreens and baby greens at home? These expert guides will help you master every step, from seed to harvest.
- 🌿 How to Grow Microgreens at Home
- 🥬 Grow Microgreens Indoors in Trays
- 🌻 Sunflower Microgreens Guide
- 🍃 Sprouts vs. Microgreens
- 💧 How Much to Eat Per Day?
- 🥗 How to Store Microgreens
- 🧪 Best Soil for Microgreens
- 🥦 Broccoli Microgreens
- 🌶️ Radish Microgreens
- 🍀 Clover Microgreens
- 🌾 Wheatgrass Microgreens
- 🌰 Popcorn Microgreens
- 🍽️ Can You Eat Microgreens Daily?
- 🔁 Do Microgreens Regrow?
- 🥬 Kale Microgreens
- 🍃 Spinach Microgreens
- 🌱 Cabbage Microgreens
- 🌿 Mustard Microgreens
- See all microgreen articles in our Growing Microgreens category
- 🥬 Growing Baby Greens Indoors: Easy Quick Salad Greens

 Steve S. is the creator of