This post contains affiliate links. If you buy something from one of our links we may earn a commission. Thanks
Learn how to grow bell peppers from seeds. Our comprehensive guide simplifies each step, making the journey to fresh homegrown peppers a joy!
To grow Bell Peppers from seeds, start by planting seeds indoors 8-10 weeks before the last frost. Use coco coir or a seed-starting mix and place seeds about 1/4-inch deep in trays or pots. Keep the soil warm (80-90°F) and moist. Transplant seedlings to larger pots or the garden when they have at least two sets of true leaves.
Ready to explore the exciting journey of nurturing your own fresh, crunchy, and colorful bell peppers? Perfect, you’re in the right place!
In this guide, we’re going to demystify the process of how to grow bell pepper from seeds.
From seedling to harvest, we’ve got you covered. So, let’s pop on those gardening gloves and get started!
Introduction: How To Grow Bell Pepper From Seeds

Ah, the wonderful world of bell peppers! From vibrant colors to diverse sizes and shapes, bell peppers offer so much variety. In this section, we’re taking the first steps in our journey of growing bell peppers from seeds.
We’ll talk about bell pepper varieties, the importance of starting seeds indoors, the ins and outs of seed germination, and how to successfully transplant your little green babies into pots.
So, are you ready to become a bell pepper expert? Let’s dive in!
Here is a quick video I made showing the early life of a bell pepper from seed to young pepper seedling.
Getting to Know Bell Peppers
Welcome to the world of bell peppers, scientifically known as Capsicum annuum.
This botanical name might sound a bit fancy, but it simply classifies our star of the day, the bell pepper, along with other popular hot peppers like jalapenos and cayennes. They’re a versatile bunch!
Different Varieties of Bell Peppers: Colors, Shapes, and Sizes. Sweet bell peppers come in an array of colors – green, red, yellow, orange, and even purple or chocolate!
Did you know that the color variation represents different stages of the same pepper’s maturity?
Green bell peppers are the youngest sweet peppers, and as they mature, they change colors, getting sweeter along the way.
Bell peppers come in different sizes and shapes too, but they’re mostly recognized by their characteristic ‘bell’ shape.
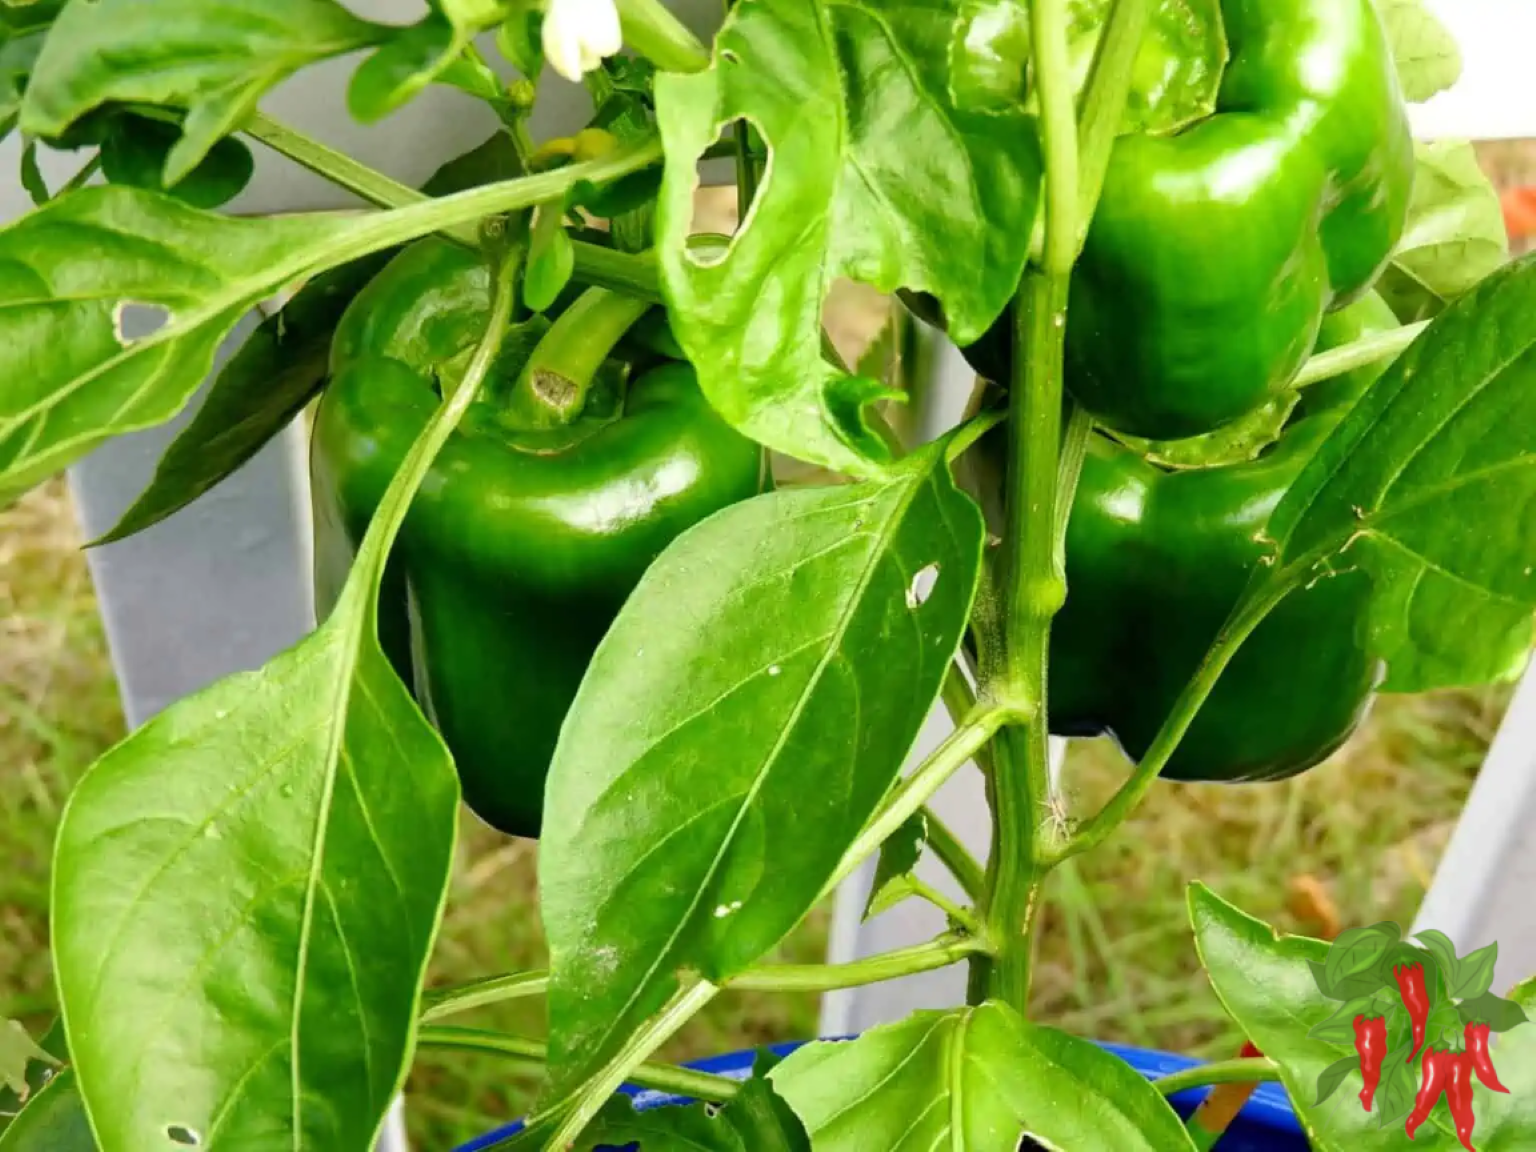
Green Vs Red Peppers

Green and red bell peppers are indeed the same fruit, just at different stages of maturity.
When bell peppers first start growing, they appear as small, green fruits.
As they continue to mature, they transition to their more recognizable colors, such as red, yellow, orange, or even purple, depending on the variety.
Green bell peppers are harvested earlier in the ripening process, while red bell peppers are allowed to fully mature and develop their vibrant red color.
The main difference lies in the taste and sweetness. Green bell peppers have a slightly bitter or grassy flavor, while red bell peppers are sweeter and have a more pronounced fruity taste.
While some people prefer the milder flavor of green bell peppers for cooking or adding crunch to salads, others enjoy the sweeter taste of red bell peppers.
Both varieties offer their unique qualities and can be used interchangeably in various recipes, depending on your preference.
So, whether you choose green or red bell peppers, you’re still enjoying the same delicious and versatile fruit!
The Journey Begins: Germinating Bell Pepper Seeds

The Importance of Starting Seeds Indoors

Starting bell pepper seeds indoors is like giving your little future plants a head start.
This helps them to develop in a controlled environment, safe from unpredictable weather or pests.
Make sure you are using fresh viable seeds for the best germination rates. You’re setting the stage for successful pepper plants!
Correct Depth for Sowing Seeds
Planting depth matters, friends. For bell pepper seeds, aim for about 1/4 inch deep in the soil.
This gives them just enough coverage to stay warm and secure without being buried too deep.
Optimal Conditions for Seed Germination
Bell pepper seeds appreciate warmth and moisture for germination. Aim for a soil temperature around 70-85°F (20-30°C) and keep the soil slightly moist but not waterlogged.
If the temperatures are cool consider using a seedling heat mat and using seed trays to hold your bell pepper seedlings.
Patience is key here – germination can take anywhere from 7 to 21 days.
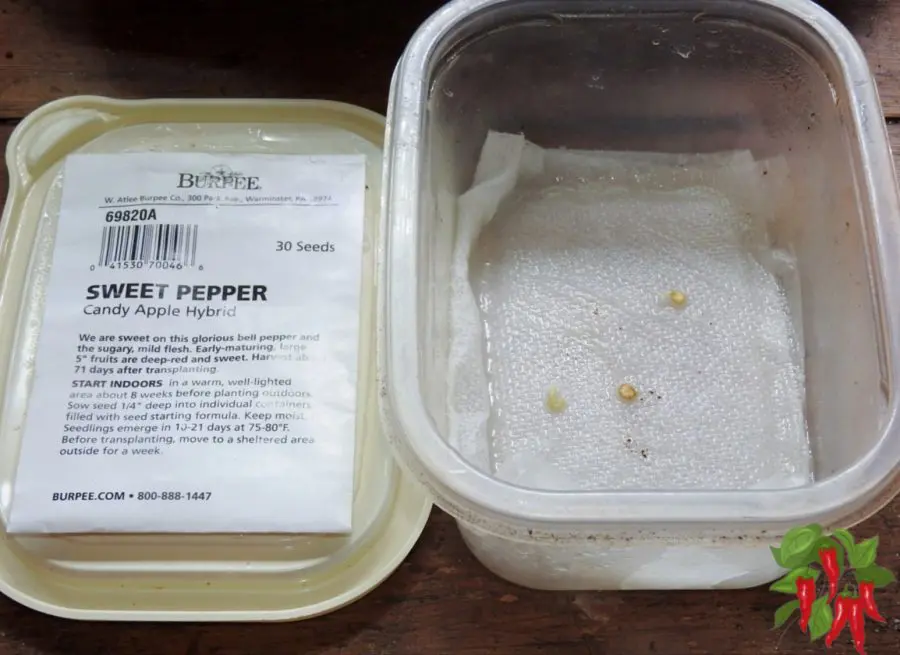
An Alternative Method: Paper Towel Seed Germination
The Step-by-Step Process
The best way to germinate pepper seeds involves using paper towels, plastic bags, and your seeds, this method is a handy way to kickstart your pepper seeds journey.
Place your seeds on a moist paper towel, fold it, slide it into a plastic bag, and place it in a warm spot.
Check regularly for germination. Personally, I think it’s a good idea to use a small plastic container with a lid and place the moistened paper towel inside it.
I place mine in a warm spot like on top of my heated aquarium. That is how I germinate my pepper seeds and almost all seeds as it provides ideal conditions for sprouting.
Advantages and Disadvantages
The paper towel method has pros and cons. On the plus side, you can easily monitor your seeds’ progress.
However, the downside is the delicate process of transferring germinated seeds without damaging the tiny roots.
Generally, it is recommended to sow pepper seeds 8-10 weeks before the last frost date.
They can be slow to germinate and they grow slowly in their early stages of growth.
Transplanting Pepper Plants into Pots
 Single Package of 100 Seeds - Heirloom, Non-GMO & Untreated")
When to Transplant Pepper Plants
So, your seeds have sprouted, and they’ve got a few leaves? It’s time for their big move!
Usually, when your seedlings are about 6-8 weeks old and have at least 2 sets of true leaves, they’re ready for transplanting.
Careful Handling During Transplanting
Handle with care! These baby plants are still delicate.
When you move your seedlings, be sure to hold them by their leaves, not their stems, to avoid causing damage.
Some people like to transplant into peat pots but I prefer regular small pots.
I generally use 2×2 inch plastic pots and then transplant them into 3×3 plastic containers filled with coco coir as they grow.
They can be transplanted outside from these containers but since I grow my peppers indoors I transplant them again into larger containers eventually they are grown and harvested in 2-3 gallon pots.
Preparing the Soil in Pots
As for soil, a well-draining mix is what we’re aiming for. The potting mix should be fertile and loose, allowing roots to spread out easily.
A combination of coco coir and perlite works great. Now, your baby peppers are ready to thrive in their new home!
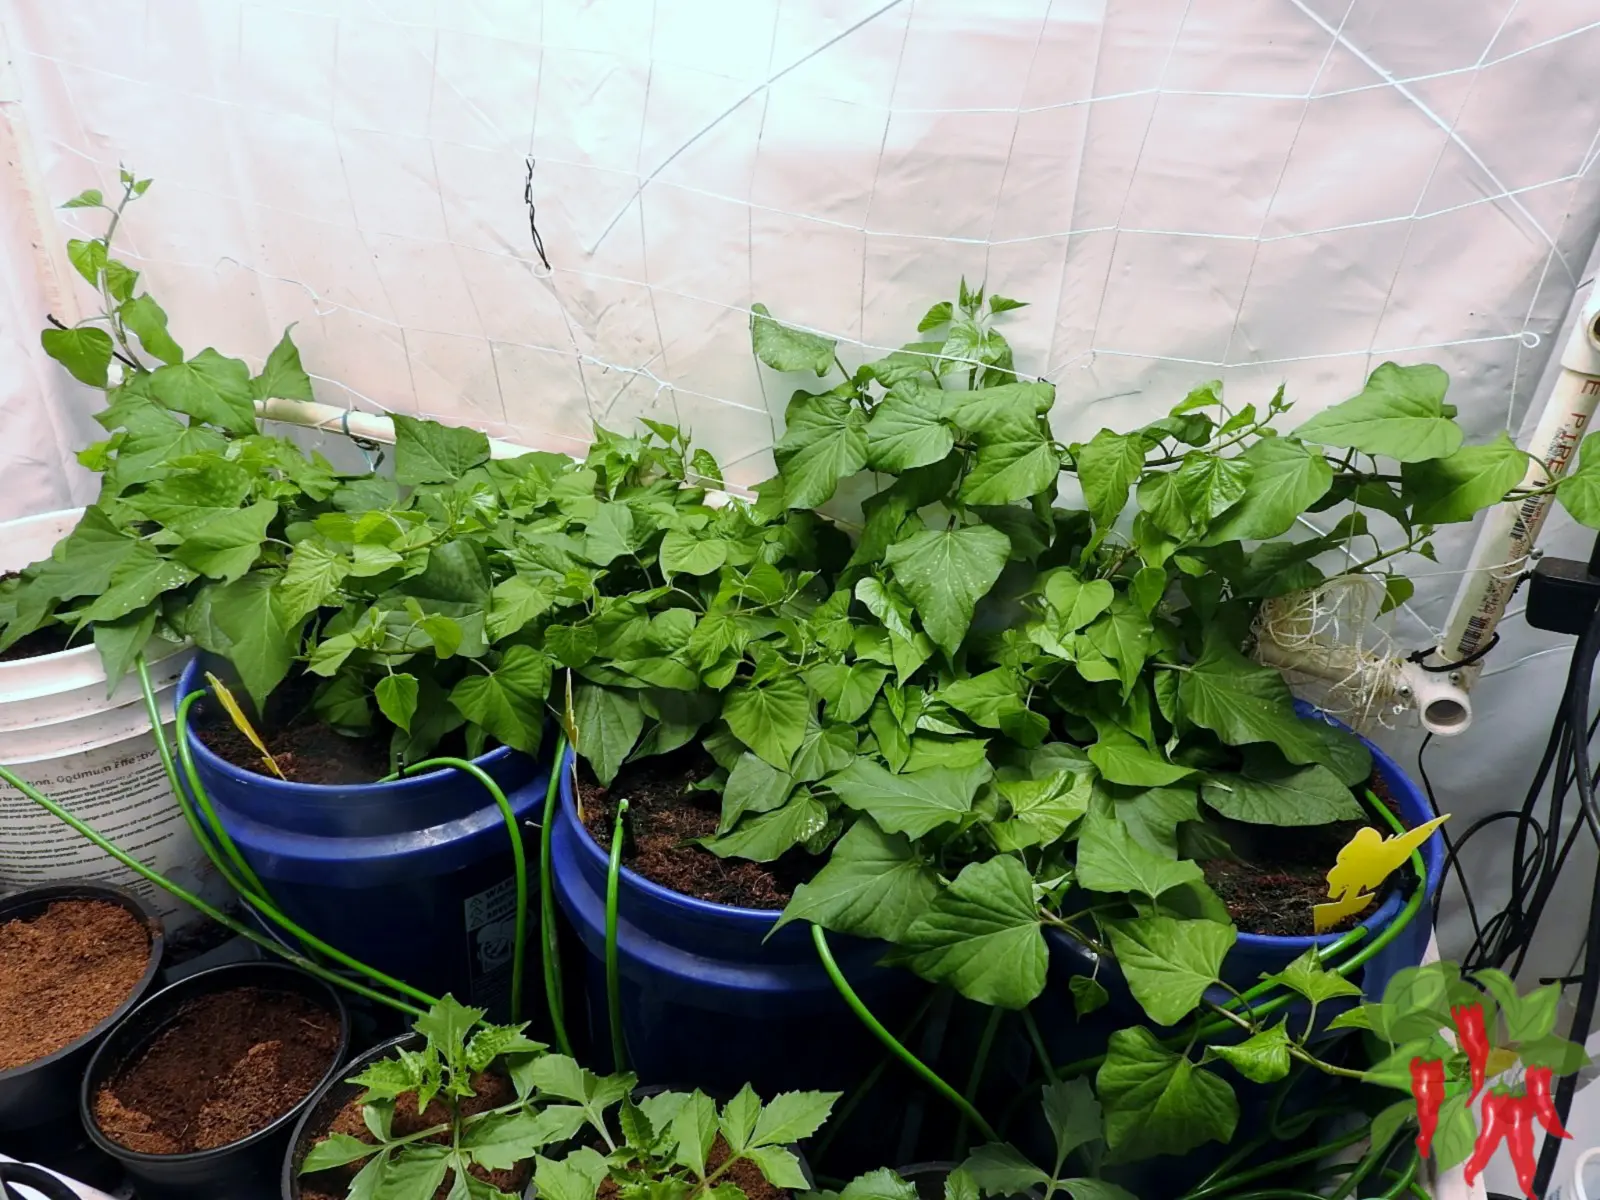
How To Grow Bell Peppers Indoors
Indoor gardening opens up new realms of possibility, doesn’t it?
Especially when it comes to growing bell peppers! You may be asking yourself if it’s really feasible to grow bell peppers inside your home.
Well, we’re here to tell you it absolutely is. I do it all the time and so can you.
This section is all about the ins and outs of raising bell peppers indoors.
We’ll cover the benefits, and factors to consider, and even guide you on choosing the best pepper varieties for indoor growth.
So, whether you’re working with a sunny windowsill or a dedicated indoor garden, let’s discover how you can turn your indoor space into a thriving pepper paradise!
Indoor Bell Pepper Cultivation: A Viable Option?
Benefits of Growing Bell Peppers Indoors
You can grow bell peppers indoors, and it comes with several perks!
Indoor gardening shields your plants from harsh outdoor conditions and pests.
Plus, it’s a fantastic way to keep your green thumb active year-round, no matter the weather outside.
Outdoors peppers are grown as annuals as they cant handle cold temperatures well and freezing will kill them.
But indoors since peppers are actually perennial plants you can harvest from the same plant for years assuming they stay healthy.
Factors to Consider for Indoor Growth
Indoor bell pepper cultivation is rewarding, but it does come with its considerations.
You’ll need to provide the right light levels (either through a sunny window or grow lights), ensure good air circulation, and maintain optimal temperature and humidity.
Don’t worry, though; it sounds more complex than it is!
Choosing the Best Pepper Varieties for Indoor Growth
Not all bell pepper varieties are created equal when it comes to indoor cultivation.
Some are better suited for indoor conditions. Dwarf or mini bell pepper varieties are a fantastic choice due to their compact size and bountiful yields.
Examples include “Mini Bell Red” or “Yum Yum Gold” varieties. They bring color, taste, and gardening success right into your home!
There are bush varieties of bell peppers but most peppers are a manageable size for indoor cultivation.
If they get too large you can always prune them back.
How To Care For Bell Pepper Plants
Let’s dive into the heart of our bell pepper journey, taking care of your plants.
You see, growing bell peppers isn’t just about planting seeds and waiting for peppers to appear.
It’s about understanding their needs and ensuring they are met, just like caring for a pet or a loved one.
In this section, we’ll explore everything from the optimal size for your bell pepper plants to their light, water, and temperature needs.
We’ll also discuss the importance of selecting the right soil, pot size, and fertilizer to keep your bell peppers happy and healthy.
Ready to become the best bell pepper caretaker there ever was? Let’s get started!
Size Matters: Understanding Bell Pepper Plant Size
Bell pepper plants typically reach a height of 1-3 feet, with some varieties even reaching up to 5 feet.
Knowing this helps you plan your space, and remember, it’s not just about the height, bell peppers need room to branch out too!
Let There Be Light: Bell Pepper Light Requirements
Bell peppers love full sun and require at least 6-8 hours of direct sunlight each day for optimal growth.
Whether it’s near a sunny window or under a grow light, make sure your plants get the light they need!
Thirsty Plants: Watering Bell Pepper Plants
Bell peppers enjoy a good drink, but it’s crucial not to overwater.
Aim for a deep watering that reaches the roots, and then let the soil partially dry out before the next watering.
From the Ground Up: Bell Pepper Soil Requirements
Coco coir and perlite are fantastic for bell pepper soil! They provide excellent drainage and allow for good root growth.
Regularly mix in some compost or organic matter to keep the soil nutrient-rich.
Room to Grow: Bell Pepper Pot Size
The right pot size is crucial. Start with a pot of about 10-12 inches in diameter and upgrade as your plant grows.
Bell peppers need space for their roots to spread out. I like to use 2 and 3-gallon fabric pots.
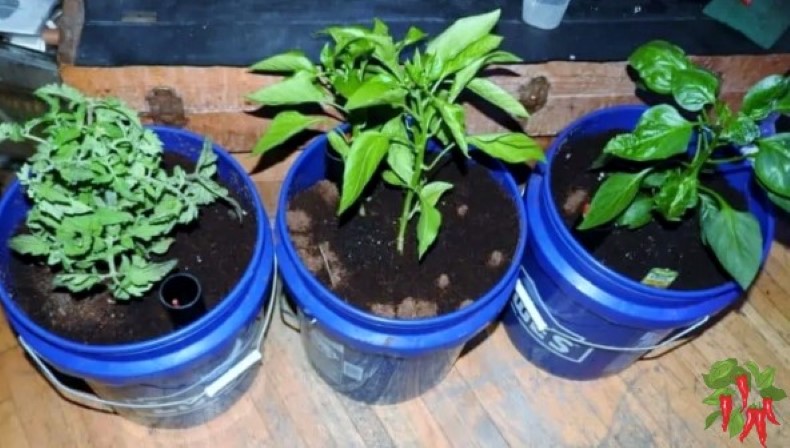
5-gallon buckets also make great pepper containers.
Food for Growth: Fertilizing Bell Peppers
Fertilizer is key to lush, productive pepper plants.
Use a balanced vegetable fertilizer and follow the schedule suggested on the package for the best results.
Too much nitrogen will result in leafy growth at the expense of fruit. I like to use a bloom formula once flowering begins.
I also have noticed peppers have a high appetite for magnesium. I use Calmag regularly in coco coir.
You can also use Epsom Salts which have magnesium and add some sulfur too.
Feeling Hot, Hot, Hot: Bell Pepper Growing Temperature
Bell peppers prefer warm temperatures, ideally between 70-85°F during the day, and slightly cooler nighttime temperatures.
Be mindful of temperature variations, as extreme heat or cold can stress your plants.
Humidity and Bell Pepper Plants
Bell peppers like a moderate level of humidity. Keep an eye on your indoor humidity levels, and if it’s too dry, consider using a humidity tray or a small humidifier near your plants.
Bell pepper maintenance
")
Now that we’ve covered the basics of bell pepper care, let’s talk about maintenance.
Just like a car needs regular tune-ups to run smoothly, your bell pepper plants also need a bit of ongoing attention to thrive.
But don’t worry, it’s nothing too demanding! In this section, we’ll delve into some general maintenance tips, explore how to maintain healthy growth, and discuss ways to prevent and tackle common diseases.
Ready to become a bell pepper maintenance whiz? Let’s do this!
The Essentials: General Maintenance Tips
General maintenance for bell peppers includes regular watering, feeding, and pruning.
Don’t forget to rotate your pots for even growth if they’re indoors, and inspect your plants often for any signs of pests or disease.
Pruning bell pepper plants
Moving on to an exciting chapter in your bell pepper journey – pruning!
It may seem a little intimidating, like giving your plants a haircut, but trust me, it’s for their own good.
Proper pruning can result in bigger, healthier, and more productive plants.
In this section, we’ll dive into why pruning matters, and more importantly, when and how to prune your bell pepper plants.
So, take a deep breath, grab your shears, and let’s get into it!
A Little Goes a Long Way: The Benefits of Pruning
Pruning is like a wellness routine for your bell peppers. Here are the major benefits:
Improved Air Circulation: Pruning helps open up the plant’s interior, allowing better air circulation, and reducing the risk of diseases.
Better Light Penetration: Cutting back some branches allows sunlight to reach deeper into the plant, benefiting lower leaves and fruits.
Greater Yield: Pruning can redirect the plant’s energy from excessive leaf production to developing fruits, leading to a bountiful harvest.
B. Perfect Timing: When and How to Prune Bell Pepper Plants
The timing and method of pruning can significantly influence your bell peppers’ health and yield.
When to Prune: It’s generally best to prune when the plant is young and about 1 foot tall.
At this stage, the plant has enough foliage to recover from the stress of pruning but isn’t too mature that pruning would significantly interfere with fruit production.
How to Prune:
Tools: Start with a pair of clean, sharp pruning shears. Dirty or dull shears can damage plants and spread disease.
Method: Locate the main “Y” of the plant, where it branches off into two main stems.
Trim off the growing tip above this “Y” to encourage the plant to grow two primary stems.
This should help the plant focus more on fruit production.
Maintenance Pruning: As your plant continues to grow, keep an eye out for overcrowded areas, weak or dead branches, or suckers, small shoots that grow from the plant’s base.
Regularly removing these can help maintain the plant’s health and productivity.
Remember, pruning should be a gentle and gradual process. It’s easier to cut more later if needed than to deal with the consequences of over-pruning.
Repotting pepper plants

In our gardening adventure, it’s now time to explore the art of repotting pepper plants.
Just like us, plants too outgrow their homes, and when they do, they need a new one.
Repotting doesn’t have to be a daunting task. It’s more like moving your pepper plant into a larger apartment with a better view.
This section will guide you on how to recognize when it’s time to repot your bell peppers, how to choose the right container size and tips for doing it right.
Ready to roll up your sleeves and get your hands dirty? Let’s dive in!
Room to Grow: Container Size for Bell Peppers
Bell pepper plants need ample space for root growth to support their top-heavy fruiting habit.
A container that is too small can stunt growth, while a container that’s too large may lead to waterlogged soil.
A good starting point is a container that is 10 to 12 inches in diameter and depth.
This should provide enough room for the roots to grow freely and support the plant as it matures.
Timing is Everything: When to Repot
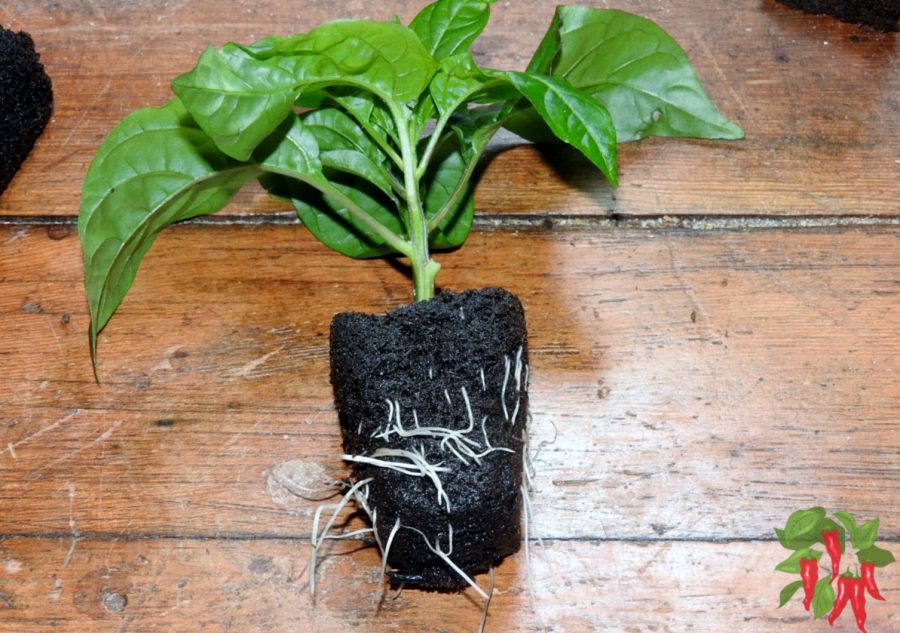
Knowing when to repot your bell pepper plants is crucial for their continued health and productivity.
A key sign your plant is ready for a new home is when you see roots growing out of the drainage holes at the bottom of the pot.
Additionally, if your plant seems to dry out quickly or becomes top-heavy, it’s a good indication that it’s outgrown its current pot.
Bigger Home, Bigger Harvest: Choosing the Right Container Size
As you’ve likely noticed, bell pepper plants can live for many years, especially when grown indoors.
Over time, they’ll eventually need repotting into a larger container. When that time comes, aim to increase the container size by 2-4 inches in diameter.
This gradual increase allows the roots to expand slowly without overwhelming them with too much space.
Also, always ensure that your chosen container has good drainage to prevent waterlogging.
Remember, repotting is a chance for your bell pepper plants to thrive and grow even more.
So, take it as a milestone in your pepper-growing journey!
Propagating pepper plants
Ready to multiply your bell pepper bounty? Great, because it’s time to delve into the exciting world of propagating pepper plants.
In this section, we’ll explore the different methods you can use to propagate your bell peppers, from stem cuttings to seeds, and we’ll guide you through each step.
Plus, we’ll share some best practices to ensure your success. It’s like creating clones of your favorite plant – more peppers, more fun! Let’s get started, shall we?
More Peppers, Please: Methods of Propagating Bell Peppers
There are two primary ways to propagate bell peppers: stem cuttings and seeds.
Using stem cuttings is like creating a clone of your pepper plant – you’re essentially creating a new plant with the same genetic makeup.
Seed propagation, on the other hand, is a bit like a mystery box, as the new plant will combine traits from two parent plants.
Clone Your Favorites: Stem Cuttings Step by Step
Select a Healthy Stem: Look for a healthy, mature stem from your bell pepper plant that has no fruit or flowers.
Make Your Cut: Cut a 4-6 inch piece of the stem at a 45-degree angle to increase the cutting’s surface area.
Remove Lower Leaves: Strip off the lower leaves, leaving only a couple at the top.
Rooting Hormone: Dip the cut end of the stem into a rooting hormone. This isn’t strictly necessary but can help stimulate root growth.
Plant the Cutting: Insert the cutting into a pot filled with a lightweight potting mix. Keep it moist and in a warm, well-lit area.
Patience is Key: Wait a few weeks for the cutting to establish roots before transplanting.
From Tiny Seeds, Mighty Peppers Grow: Seeds Step by Step
Collect Seeds: You can use seeds from a ripe bell pepper or buy them.
If you are going to save seeds you want a standard variety. Many peppers are hybrids and won’t reproduce true from seeds.
Prepare Your Seeds: Soak your seeds in warm water for about 2-3 hours to help speed up germination.
Plant Your Seeds: Plant the seeds in a well-draining seed-starting mix. I use straight coco coir for this. Place them about 1/4 inch deep and cover lightly with soil.
Provide Warmth and Light: Keep your seed tray in a warm, well-lit location.
Watch Them Grow: In about 2 weeks, you should start to see tiny seedlings.
A Green Thumb’s Guide: Best Practices for Successful Propagation
Whether you’re propagating by stem cuttings or seeds, there are a few key points to remember for success.
First, always start with healthy plant material, be it stems or seeds. If propagating from seeds, opt for fresh seeds, as they have higher germination rates.
Lastly, patience is key. Propagation isn’t an overnight process, but with time and care, you’ll soon have new bell pepper plants to nurture and enjoy.
Bell pepper plant problems
With the journey of growing bell peppers, a few bumps on the road are to be expected.
But don’t let that dampen your spirit! Most bell pepper problems are easily fixable, and the satisfaction of finding a solution and watching your peppers flourish is truly priceless.
In this section, we’ll delve into some of the common issues that might arise while growing bell peppers and how to tackle them effectively.
Buckle up, and let’s troubleshoot some pepper problems together!
Pepper Plant Pests: The Unwanted Visitors
It’s a fact of life that plants can attract pests. But the good news is, with a bit of vigilance, we can keep these unwelcome guests at bay.
Here’s a rundown of the common pests that might pester your bell peppers and how to show them the door.
Aphids: These tiny bugs are typically found on the undersides of leaves. They can cause leaves to yellow and curl, and in severe cases, stunt plant growth.
A strong blast of water can often dislodge aphids, but if the infestation persists, insecticidal soap or neem oil can be used as effective organic solutions.
Spider Mites: If you see fine webbing and tiny specks moving around, you’ve got spider mites. These pests can cause leaves to turn yellow and drop off.
Regular misting can deter them, but for an infestation, consider a miticide or an organic solution like neem oil.
Cutworms: These nocturnal caterpillars are notorious for cutting down young plants at the base. They can be physically removed and relocated if you spot them.
To prevent cutworm attacks, you can use plant collars. They probably won’t be a problem indoors unless you somehow brought them in.
Remember, early detection is key to preventing these pests from causing significant damage to your bell pepper plants.
Pepper Plant Diseases: Prevention and Cure
While pests can be a nuisance, diseases can be a bit more challenging to handle.
However, with a bit of knowledge and some preemptive measures, you can ensure your bell peppers remain healthy and vibrant.
Bacterial Spot: This disease presents as small, raised spots on the leaves and fruit. The best defense against bacterial spot is to use disease-free seeds and rotate your crops.
If you notice symptoms, you can use a copper-based fungicide for control.
Blossom End Rot: This condition is often caused by irregular watering and calcium deficiency, leading to black, rotten spots on the fruit’s bottom.
Ensure your bell peppers have consistent watering and consider a calcium supplement if necessary.
Fusarium Wilt: This soil-borne disease causes the plant to wilt and die. Crop rotation and the use of disease-resistant varieties can be effective preventive measures.
Armed with these tips, you can confidently manage any pest or disease that comes your way, ensuring your bell peppers grow strong and healthy.
FAQ

Ever had that moment in the middle of a bell pepper care session when a random question pops into your head? You’re not alone!
We all have queries that come up from time to time when tending to our vibrant plants. This section, aptly titled “FAQ,” is where we’ll address some of the most common questions asked by fellow bell pepper enthusiasts.
From watering frequency to sunlight requirements, no topic is too trivial or complex.
So, if you’ve been seeking answers, buckle up! We’re about to delve into a treasure trove of bell pepper wisdom.
Q: Can bell peppers be grown indoors?
A: Yes, indeed! Bell peppers can successfully be grown indoors. They just require a bit of extra care and attention.
Make sure they have access to plenty of sunlight, preferably from a south-facing window, and keep them in a warm room.
Q: Can you grow peppers indoors all year?
A: Yes, you can. Bell peppers are perennial plants and can live for several years when taken care of properly.
This means with the right conditions, you can grow and harvest them all year round indoors!
Q: Do bell peppers need direct sunlight?
A: Bell peppers love the sun! They need at least 6-8 hours of sunlight each day for optimal growth.
If you’re growing them indoors and can’t provide this much natural light, you might want to consider using a grow light.
Q: Do peppers grow better in pots or ground?
A: Both can work well for bell peppers. The key is to provide the right growing conditions.
Pots offer better control over the soil and water conditions, which can be particularly helpful if you’re dealing with less-than-ideal ground soil.
Q: Are bell peppers easy to grow?
A: With the right care and attention, bell peppers can be quite straightforward to grow.
They do need a warm, sunny environment and consistent watering, but if you can provide that, you’re well on the way to a healthy crop.
Q: Do bell peppers come back every year?
A: Bell peppers are typically grown as annuals, which means they complete their life cycle in one year.
However, if they’re protected from frost and freezing temperatures, bell peppers are technically perennials and can produce for several years.
Conclusion: How To Grow Bell Pepper From Seeds
Well, we’ve had quite the journey, haven’t we? From sowing tiny seeds to reaping beautiful, vibrant bell peppers we’ve covered it all!
It’s amazing to think that all this knowledge about growing bell peppers started with the phrase “how to grow bell pepper from seeds”.
As you venture into your bell pepper growing journey, remember that patience and attentiveness are your best friends.
Yes, there might be a few bumps on the road, but with this comprehensive guide, you’re well-equipped to tackle any challenge.
So, here’s to fresh, homegrown bell peppers and the joy they’ll bring to your kitchen and your meals!
How To Grow Bell Pepper From Seeds Recap
Let’s hit the rewind button for a moment, shall we? We started with the basics, understanding what bell peppers are and their wide range of varieties.
Then, we dove into the magic of germination, revealing the importance of starting seeds indoors, the correct depth for sowing seeds, and the conditions that would give your seeds the best start.
We also discussed alternative germination methods, such as the paper towel method, highlighting the step-by-step process, and the pros and cons of this approach.
Once our seeds transformed into seedlings, we learned about the delicate art of transplanting them into pots, and how to prepare the soil to welcome our young plants.
As we moved on, we explored how to grow bell peppers indoors, covering factors such as light requirements, watering practices, soil composition, and pot size.
Not forgetting, the role of temperature and humidity in creating the perfect growing conditions.
To keep our plants thriving, we addressed maintenance practices, pest, and disease prevention, and the importance of pruning.
Then, we walked through the process of repotting, when it’s necessary, and how to select the right container size.
Next, we looked at propagation methods for bell peppers. Stem cuttings and seeds each have their own set of steps to follow, and we covered the best practices for successful propagation.
And, we tackled common pepper plant problems, giving you insights into managing pests and diseases.
Finally, we answered your frequently asked questions and wrapped everything up with this recap and a few final thoughts.
Encouragement For The Bell Pepper Growing Journey
Growing bell peppers from seeds may seem like a daunting task, especially if it’s your first time. But guess what? You’ve got this!
Remember, every gardener started somewhere. With this guide in hand, you’re not only ready to start but to succeed.
So, go ahead, and embark on your bell pepper growing journey.
Picture the satisfaction of seeing those vibrant bell peppers growing from seeds you’ve planted and nurtured.
Whether you’re doing this for the love of gardening, for fresh ingredients in your meals, or simply for the fun of it, enjoy the process.
Every step, from germination to harvest, brings its own joys and rewards. Happy gardening!
Read more: Apartment Kitchen Garden