This post contains affiliate links. If you buy something from one of our links we may earn a commission. Thanks
Learn how to grow Clivia in pots with our comprehensive guide, and bring a burst of stunning color to your indoor garden. It’s easier than you think!
Growing Clivia in pots requires well-drained soil and partial shade for optimal growth. These plants prefer to be slightly root-bound and should be watered when the soil feels dry to the touch. Fertilize with a balanced, liquid fertilizer during the growing season and reduce watering in winter.
Are you looking for a gorgeous addition to your indoor garden? Well, you’re in the right place!
In this guide, we’ll walk you through how to grow Clivia in pots, so you can enjoy their stunning, vibrant blooms right in your own home.
With a little care and attention, you’ll soon have a thriving Clivia plant that will bring a touch of natural beauty to any space.
So, let’s dive in and discover the secrets to growing Clivia in pots!
Introduction: How to Grow Clivia in Pots

Today, we’re exploring the wonderful world of Clivia plants and learning how to grow them in pots.
These eye-catching blooms are sure to add a pop of color and charm to your indoor space.
In this comprehensive guide, we’ll cover everything from choosing the right pot and soil mix, to watering, fertilizing, and troubleshooting common Clivia house plant problems.
So, let’s get started and uncover the secrets to cultivating a thriving Clivia plant in the comfort of your home.
A Glimpse at the World of Clivia Plants – What Is Clivia?
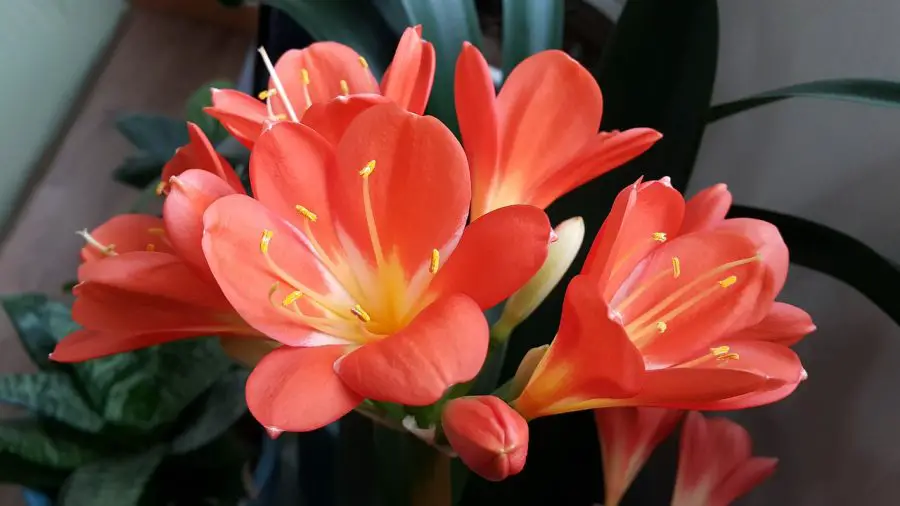
Clivia, a genus of flowering plants native to South Africa, is known for its stunning bell-shaped yellow flowers that come in vibrant shades of yellow, orange, and red.
Belonging to the Amaryllidaceae family, these herbaceous or evergreen perennial plants have dark green strap-like leaves and are commonly called Natal Lily or Bush Lily.
In their natural habitat, they are found under the shade of trees in tropical forests growing in high organic matter soil or leaf mold with good drainage.
Clivia is a small genus and there are only 6 Clivia species: C. caulescens, C. gardenii, C. miniata, C. mirabilis, C. nobilis, and C. robusta
Clivia miniata is the most widely cultivated species of clivia, with various cultivars available to suit different preferences.
Advantages of Cultivating Clivia in Pots
• Space-Saving Solution: Growing Clivia in pots is an excellent choice for indoor plants.
They are perfect for those with limited space or for those who want to add a touch of nature to their indoor environment.
Potted Clivias can fit comfortably on windowsills, shelves, or tabletops, making them ideal for apartment dwellers or those with smaller homes.
• Control Over Growing Conditions: When you grow Clivia in pots, you have better control over the plant’s growing conditions, such as the potting mix, watering, and temperature.
This control enables you to create an optimal environment for your Clivia plant, which can lead to healthier growth and more vibrant blooms.
• Easy Mobility: Growing Clivia in pots allows you to move the plant around with ease.
This mobility is helpful when you need to adjust the light exposure, temperature, or humidity levels for your plant.
Plus, you can easily showcase your Clivia in different parts of your home to enhance your décor or to share its beauty with guests.
• Simplified Pest and Disease Management: Potted plants generally have fewer issues with pests and diseases, as they are not exposed to the same environmental factors as outdoor plants.
In addition, if a problem arises, it’s easier to isolate and treat a potted plant without affecting other plants in your collection.
How to grow Clivia indoors

Ready to transform your indoor space with the captivating beauty of Clivia plants?
You’re in luck because growing Clivia indoors is a rewarding and enjoyable experience that’s perfect for both seasoned and novice gardeners.
In this section, we’ll guide you through the essential steps for how to grow Clivia in pots.
From temperature and humidity requirements to light conditions and more, we’ve got you covered. So, let’s embark on this exciting journey together and learn the ins and outs of nurturing Clivia plants in your cozy indoor haven.
Embracing the Indoor Advantages
Growing Clivia indoors offers numerous benefits that make it an ideal choice for plant enthusiasts.
First, it allows you to enjoy the beauty of Clivia flowers all year round, regardless of the outdoor weather conditions.
Second, it enables you to create a personalized indoor oasis that enhances your home’s atmosphere and provides a sense of calm and relaxation.
Finally, growing Clivia indoors can improve your indoor air quality, as plants are known to help purify the air by removing pollutants and releasing oxygen.
Understanding Clivia Plant Size
Clivia plants typically grow to a height of about 1.5 to 2 feet and have a similar spread, making them a compact and manageable addition to your indoor garden.
Their size allows them to fit comfortably in various indoor spaces without becoming too overwhelming.
However, it’s essential to provide enough room for your Clivia to grow and thrive, so be sure to choose an adequately sized pot and place it in a suitable location.
Finding the Ideal Temperature and Humidity
Clivia plants prefer moderate temperatures and humidity levels for optimal growth.
They thrive in temperatures ranging from 60-75°F (15-24°C) during the day and slightly cooler temperatures at night.
Avoid exposing your Clivia to temperatures below 50°F (10°C) or above 90°F (32°C), as extreme temperatures can cause stress and affect the plant’s overall health.
Maintaining a moderate humidity level around your Clivia is also crucial. Aim for a humidity level of 40-60% to keep your plant happy.
You can increase humidity around your Clivia by placing a tray of water with pebbles near the plant, using a humidifier, or occasionally misting the leaves with water.
Meeting Clivia Light Requirements
Clivia plants require bright indirect bright light to grow well and produce stunning blooms.
Place your Clivia near a bright window with filtered light, such as an east or west-facing window, but avoid direct sunlight, as it can scorch the leaves.
If you don’t have access to sufficient natural light, you can also use artificial light sources like fluorescent lights or LED grow lights to provide the necessary light for your Clivia plant.
Clivia potting mix: Soil and pots

Now that you’re familiar with the basics of growing Clivia indoors, it’s time to dive into the world of potting mixes and pots!
Choosing the right potting mix and pot is crucial for your Clivia plant’s health and growth.
In this section, we’ll discuss the benefits of using coco coir and perlite in your potting mix and guide you in selecting the perfect pot for your Clivia.
So, let’s get our hands dirty and create the ideal foundation for your beautiful Clivia plant to flourish in its new home!
Using Coco Coir As Your Potting Mix
Clivia plants require well-drained soil to thrive. Coco coir is better able to meet these needs than potting soils.
Coco coir, a natural byproduct of coconut husks, is an excellent ingredient to include in your Clivia potting mix.
It offers numerous benefits that make it a fantastic choice for your plant:
• Improved Aeration: Coco coir is a lightweight material that provides excellent aeration for your Clivia’s roots, allowing them to breathe and grow healthily.
• Enhanced Moisture Retention: It has impressive water-holding capacity, ensuring that your Clivia receives adequate moisture without becoming waterlogged. This feature helps prevent issues like root rot and fungal growth.
• Eco-Friendly Choice: As a renewable and sustainable resource, coco coir is an environmentally friendly alternative to peat moss, which can take centuries to regenerate.
To create an ideal Clivia potting mix, combine equal parts of coco coir and perlite to create a well-draining potting soil.
The perlite helps improve drainage and aeration,
Coco coir does not provide essential nutrients for your plant’s growth so it is important to fertilize it before and during use.
For best results, you can add a slow-release fertilizer to it before potting up your Clivia.
Picking the Perfect Pot for Your Clivia
Selecting the right pot for your Clivia is crucial for ensuring healthy growth and development. Here are some factors to consider when choosing a pot:
Drainage: Choose a pot with drainage holes to prevent waterlogging and root rot.
Proper drainage is essential for maintaining healthy root systems and preventing excess moisture buildup.
Size: Clivia plants need enough space for their roots to grow and spread, so select a pot that is slightly larger than the current root ball.
A pot that is too small can restrict root growth, while a pot that is too large can hold excess moisture and cause root rot.
Material: Pots can be made from various materials, including plastic, terracotta, or ceramic. Each material has its pros and cons.
For example, plastic pots are lightweight and affordable, but they may not provide as much insulation as other materials.
Terracotta pots are breathable and provide excellent insulation, but they can be heavy and may break more easily.
Ceramic pots are attractive and insulating but can also be heavy and more expensive.
Consider your personal preferences, budget, and home décor when selecting the right material for your Clivia pot.
Watering Clivia

Watering your Clivia plant may seem like a simple task, but it plays a crucial role in keeping your plant healthy and vibrant.
In this section, we’ll discuss the proper watering techniques for Clivia plants to ensure they receive just the right amount of moisture they need to thrive.
So, let’s dive in and learn the art of watering your Clivia, so it can continue to grace your indoor space with its stunning blooms and lush foliage.
Determining the Watering Frequency
Clivia plants require a balanced watering routine to ensure they receive adequate moisture. They prefer growing in moist soil without becoming waterlogged.
Here are some guidelines to help you determine how often to water your Clivia:
Watering Schedule: During the growing season (early spring and summer), water your Clivia plant when the top 1-2 inches of soil feel dry to the touch.
This usually means watering every 7-10 days, depending on the humidity and temperature in your home.
Adjusting for Seasons: In fall and winter, reduce the watering frequency to allow your Clivia to enter a rest period.
Water just enough to keep the soil from completely drying out, typically every 2-3 weeks.
Climate Considerations: Be aware of your indoor environment, as factors like heating and air conditioning can affect the soil’s moisture levels.
Adjust your watering schedule accordingly to ensure your Clivia receives the right amount of water.
Recognizing Signs of Over-watering or Under-watering
It’s essential to monitor your Clivia plant for signs of over-watering or under-watering to maintain its health and vitality.
Here’s what to look for:
Over-watering Symptoms: If your Clivia is receiving too much water, you may notice yellowing leaves, root rot, or a mushy, soft stem.
To remedy this issue, reduce the watering frequency and ensure your pot has proper drainage. In severe cases, you may need to repot your Clivia in fresh, well-draining soil.
Under-watering Symptoms: When your Clivia is not receiving enough water, its leaves may become wrinkled, wilted, or develop brown tips.
To address this issue, increase your watering frequency, ensuring the soil is consistently moist but not waterlogged.
Regularly check the soil moisture to maintain a healthy balance for your Clivia.
Fertilizing Clivia

Nourishing your Clivia plant with the right fertilizer is like serving it a gourmet meal that boosts its growth, health, and flowering potential.
In this section, we’ll explore the best fertilizers for Clivia plants and discuss how to feed your beloved plant to ensure it rewards you with gorgeous, vibrant blooms.
Let’s get started on this flavorful journey to provide your Clivia with the essential nutrients it needs to flourish and shine!
Choosing the Best Fertilizer for Clivias
Selecting the right fertilizer is essential to support your Clivia plant’s growth and flowering potential.
Here’s what to consider when choosing a fertilizer for your Clivia:
Balanced Fertilizer: Look for a balanced, slow-release fertilizer with equal amounts of nitrogen (N), phosphorus (P), and potassium (K). A 10-10-10 or 14-14-14 formulation works well for Clivia plants.
Choose a fertilizer that also provides essential trace elements.
Organic Options: If you prefer organic fertilizers, consider using well-composted materials like worm castings, fish emulsion, bone meal, and seaweed extract.
These options provide essential nutrients while promoting healthy soil microorganisms.
The Art of Applying Fertilizer
Knowing when and how to apply fertilizer is crucial to support your Clivia’s health and flowering potential.
Follow these guidelines for a successful fertilizing routine:
Fertilizing Schedule: Apply fertilizer to your Clivia plant every 4-6 weeks during the growing season (spring and summer).
This will provide the necessary nutrients for healthy growth and flowering.
Rest Period: In the fall and winter months, reduce or eliminate fertilizer application to allow your Clivia to enter its rest period.
Over-fertilizing during this time can lead to excessive foliage growth at the expense of blooms.
Application Method: Follow the fertilizer package instructions for the correct application rates and methods.
Generally, you’ll want to mix the fertilizer with water and apply it to the soil, avoiding the leaves to prevent burning.
Always water your Clivia plant thoroughly before and after applying fertilizer to help distribute the nutrients evenly and prevent root burn.
Clivia propagation

Unleashing your inner plant propagator is both rewarding and exciting, especially when it comes to Clivia plants.
In this section, we’ll guide you through the process of Clivia propagation, allowing you to multiply your collection and share these stunning plants with friends and family.
Whether you’re a seasoned plant enthusiast or a beginner, we’re here to help you every step of the way as you embark on this fulfilling journey to create new life from your beloved Clivia plant.
Growing Clivia from Seed: A Rewarding Adventure
Starting Clivia plants from seeds can be an incredibly rewarding process, allowing you to witness the miracle of life firsthand.
Here’s how to grow Clivia from seed:
Harvesting Seeds: After your Clivia plant has finished flowering, wait for the berries to ripen and turn red. Collect the clivia seeds by gently squeezing the berries and removing the fleshy seeds inside.
Preparing Seeds: Clean the seeds by removing any pulp residue, then soak them in water for about 24 hours.
Buying Clivia Seeds
If your plant is not ready to make seeds you can buy Clivia seeds online at Amazon.

Sowing Seeds: Fill a seed tray or small pots with a well-draining potting mix, such as a mix of coco coir and perlite.
Place the seeds on top of the soil, gently pressing them down, but not covering them completely.
Germination: Cover the tray or pots with a clear plastic lid or bag to maintain high humidity.
Place them in a warm, bright location, avoiding direct sunlight. Keep the soil consistently moist, but not waterlogged. Germination usually takes 4-8 weeks.
Growing Seedlings: Once the seedlings have developed a few sets of leaves, carefully transplant them into individual pots.
Continue to care for them as you would a mature Clivia plant. Propagating with seed-grown plants is much slower than division.
Propagating Clivia through Offsets: A Faster Approach
For a quicker propagation method, you can divide and separate offsets, or “pups,” that form around the base of the mother plant.
Follow these steps to propagate Clivia through offsets:
• Removing Offsets: Carefully remove the Clivia plant from its pot and gently separate the offsets from the mother plant, making sure to include some roots with each offset.
• Potting Offsets: Plant each offset into a small pot filled with a well-draining potting mix, such as a coco coir and perlite blend.
• Establishing New Plants: Water the newly potted offsets and place them in a warm, bright location, avoiding direct sunlight.
Maintain consistent moisture in the soil and provide proper care as you would for a mature Clivia plant.
• Patience Pays Off: Offsets usually take 2-3 years to reach flowering size, but you’ll be rewarded with beautiful blooms and the satisfaction of knowing you propagated your Clivia plants yourself!
Maintenance and pruning

When it comes to keeping your Clivia plant happy and healthy, regular maintenance and pruning are essential.
In this section, we’ll share helpful tips and techniques to ensure your Clivia thrives, maintaining its vibrant beauty and luscious foliage.
With a little attention and care, your Clivia will reward you with stunning blooms and an attractive appearance, making it a delightful addition to your indoor garden.
So, let’s dive into the world of Clivia maintenance and pruning to keep your plant looking its best!
Pruning Clivia: The When and How
Keeping your Clivia plant well-pruned is essential for its health and appearance.
Here’s a quick guide on when and how to prune your Clivia:
Timing: The best time to prune your Clivia plant is after it has finished flowering, typically in late spring or early summer.
This helps maintain the plant’s shape and encourages future blooms.
Removing Spent Blooms: Gently cut off the flower stalks at the base. Remove the flower stem with a sharp knife or pruning shears once the flowers have faded.
This will redirect the plant’s energy towards new growth and future blooms.
Trimming Leaves: If you notice any yellowing, damaged, or diseased leaves, trim them off at the base using clean, sharp scissors or pruning shears.
This will help maintain a tidy appearance and prevent the spread of diseases.
Maintaining a Healthy Clivia Plant
A well-cared-for Clivia plant will reward you with stunning blooms and lush foliage.
Follow these tips to maintain a healthy plant:
• Light and Temperature: Provide your Clivia with bright, indirect light and maintain a consistent temperature between 60-75°F (16-24°C) during the growing season.
• Watering and Fertilizing: Water your Clivia plant regularly during the growing season, allowing the top inch of soil to dry out between waterings.
Apply a balanced, slow-release fertilizer every 4-6 weeks during spring and summer to support healthy growth.
• Rest Period: Give your Clivia a rest period during fall and winter by reducing watering and fertilizer application, and maintaining cooler temperatures around 50-55°F (10-13°C).
• Pest Control: Keep an eye out for common pests like mealybugs, scale insects, and spider mites.
Treat any infestations promptly with insecticidal soap, neem oil, or other appropriate treatments.
By following these maintenance and pruning guidelines, you’ll be well on your way to keeping your Clivia plant healthy, vibrant, and ready to bloom for years to come!
Repotting Clivia

Just like us, Clivia plants occasionally need a change of scenery and a little extra room to grow.
That’s where repotting comes into play! In this section, we’ll guide you through the process of repotting your Clivia plant, ensuring it has a fresh and spacious environment to continue thriving.
Don’t worry, even if you’re new to the world of repotting, we’re here to make it a stress-free and enjoyable experience.
Let’s get your Clivia plant settled into its new home and ready to flourish!
Identifying the Right Time to Repot
Knowing when to repot your Clivia plant is crucial for its continued growth and well-being.
Here are some indicators that it’s time for a change:
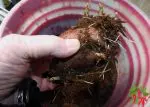
Root-bound: If you notice thick fleshy roots starting to circle around the surface of the soil or emerging from the drainage holes, it’s a sign that your Clivia is becoming root-bound and needs a larger pot.
Slow Growth: If your Clivia plant’s growth seems to have slowed down or become stagnant, despite receiving proper care, it might be time to repot.
Repot Every 2-3 Years: As a general rule, it’s a good idea to repot your Clivia plant every 2-3 years to refresh the potting mix and provide more space for growth.
Steps to Repot Clivia: A Simple Guide
Follow these easy steps to repot your Clivia plant and give it the space it needs:
• Choose a New Pot: Select a new pot that is one size larger than the current one, with drainage holes to prevent waterlogging. Ensure the pot is clean and free from any debris.
• Prepare the Potting Mix: Create a well-draining potting mix by combining coco coir and perlite in a 2:1 ratio. This will provide your Clivia with the right balance of moisture retention and drainage.
• Remove the Plant: Carefully remove the Clivia plant from its current pot, supporting the base to minimize root damage.
Gently shake off any loose soil from the root system.
• Place the Plant: Add a layer of the potting mix at the bottom of the new pot, and position your Clivia plant so that the top of the root ball sits just below the pot’s rim.
Fill in the remaining space with the potting mix, gently pressing it down to eliminate air pockets.
• Water Thoroughly: Water the newly repotted Clivia plant generously to help settle the soil around the roots.
Place your plant in a shady spot for a few days to recover and then place the plant in its usual spot with bright, indirect light and continue to care for it as usual.
By following these steps, you’ll successfully repot your Clivia plant, providing it with a fresh environment to flourish and grow!
Pests and diseases

While Clivia plants can bring a touch of natural beauty to your indoor space, they can sometimes fall victim to pests and diseases.
But don’t worry, we’ve got you covered! In this section, we’ll discuss common Clivia plant problems, as well as effective solutions to keep your prized plant in tip-top shape.
Armed with this knowledge, you’ll be well-equipped to tackle any pesky issues that come your way and ensure your Clivia plant remains healthy and vibrant.
Let’s delve into the world of Clivia plant care and learn how to keep those unwanted pests and diseases at bay!
Unwanted Guests: Common Pests and Diseases Affecting Clivia
Despite our best efforts, Clivia plants can sometimes encounter issues.
Here’s a list of the most common pests and diseases that can affect your Clivia:
• Scale Insects: These small, oval-shaped pests can cause yellowing leaves and a decline in plant health. They usually appear on the underside of leaves and can be brown or white in color.
• Mealybugs: Resembling tiny, white cottony masses, mealybugs can weaken your Clivia by sucking out its sap, leading to stunted growth and leaf drop.
• Rot: Overwatering can cause root rot or crown rot in Clivia plants. Symptoms include yellowing leaves, wilting, and a foul smell from the base of the plant.
Tackling Trouble: Prevention and Treatment Methods
Scale Insects and Mealybugs:
Prevention: Keep your Clivia plant healthy by providing proper care, as strong plants are less susceptible to pests.
Treatment: Remove scale insects and mealybugs manually using a soft cloth or cotton swab dipped in rubbing alcohol.
For severe infestations, consider using a suitable insecticidal soap or neem oil spray.
Root Rot:
Prevention: Ensure you’re watering your Clivia plant correctly, allowing the soil to dry out between waterings.
Use a well-draining potting mix and a pot with drainage holes to minimize the risk of overwatering.
Treatment: If you suspect rot, remove the affected plant from its pot and trim away any rotten roots or crown tissue.
Repot the plant into fresh, well-draining soil and monitor it closely to ensure recovery.
By staying vigilant and following these prevention and treatment methods, you’ll be able to keep your Clivia plant healthy, pest-free, and thriving!
Clivia rest period

Believe it or not, even Clivia plants need a break sometimes!
In this section, we’ll explore the importance of giving your Clivia plant a rest period, which helps it gather strength and energy for the upcoming flowering season.
With a little understanding and patience, you’ll soon discover the benefits of allowing your Clivia plant some downtime.
So, let’s dive into the fascinating world of Clivia rest periods and learn how to encourage a stunning display of blooms in the future!
Time to Relax: Importance of the Rest Period
Giving your Clivia plant a rest period is crucial for several reasons:
Energy Conservation: During the rest period, your plant conserves energy that will be used later for flowering and overall growth.
Blooming Boost: Allowing your Clivia to rest can improve the chances of a more abundant and vibrant bloom during the flowering season.
Plant Health: A rest period mimics the natural growth cycle of Clivia plants in the wild, which contributes to the overall well-being and longevity of the plant.
Catching Some Z’s: How to Provide a Rest Period for Clivia
Follow these simple steps to ensure your Clivia plant gets the rest it needs:
Timing: The ideal rest period for Clivia plants is from late autumn to late winter, which is typically when they experience reduced growth.
Watering: During this time, significantly reduce the frequency of watering, allowing the soil to dry out almost completely between waterings.
Temperature: Maintain a cooler temperature for your Clivia plant during the rest period, ideally between 46-50°F (8-10°C).
Fertilizing: Refrain from fertilizing your Clivia during the rest period, as this is a time for it to conserve energy, not to grow.
By following these guidelines and providing a rest period for your Clivia plant, you’ll be rewarded with a healthy, happy plant that’s ready to put on a show-stopping display of blooms when the time comes!
Encouraging Clivia to bloom

We all want to see our Clivia plants flourish with vibrant, colorful blooms!
In this section, we’ll share some valuable tips and tricks to help you encourage your Clivia to put on a stunning floral display.
With a bit of patience and the right care, you’ll soon enjoy the fruits of your labor as your Clivia plant bursts into bloom.
So, let’s dive in and learn how to create the perfect conditions for your Clivia plant to show off its true beauty!
Blooming Basics: Factors Affecting Clivia Blooming
Several factors can impact the blooming of your Clivia plant.
Understanding these factors can help you create the ideal environment for a spectacular flower show:
Rest Period: As mentioned earlier, providing your Clivia with a rest period is essential for encouraging blooming.
Light Requirements: Clivia plants need bright, indirect light to bloom. Too little light can prevent flowering, while too much direct sunlight can cause leaf burn.
Age: Young Clivia plants may take several years before they begin blooming. Patience is key as your plant matures.
Bloom Booster: Tips to Promote Clivia Blooming
With these tips, you can increase the chances of your Clivia plant producing beautiful blooms:
• Proper Rest Period: Ensure your Clivia has a proper rest period by reducing water and maintaining cooler temperatures during late autumn to late winter.
• Appropriate Lighting: Place your Clivia plant in a location that receives bright, indirect light, such as an east or west-facing window.
• Balanced Fertilization: Once the rest period is over, use a balanced fertilizer to provide essential nutrients that support blooming. Be careful not to over-fertilize, as this can lead to excessive leaf growth at the expense of flowers.
• Pot Size: Clivia plants prefer to be slightly root-bound, which can encourage blooming. Avoid repotting your plant too often or into a pot that is too large.
By considering these factors and following these tips, you’ll create the perfect environment for your Clivia plant to bloom beautifully, bringing a burst of color to your indoor garden!
The Trick To Induce Flowering
To encourage your Clivia to produce flowers, it’s essential to give them a “chill time” in a cool room and a dry location where temperatures range from 40 to 55°F for a minimum of 25 days or up to 60 days. Some plant enthusiasts even extend this dormancy period to 12 weeks. This winter rest period, featuring cool and dry conditions, is crucial for stimulating the development of flower tissue in Clivias. By providing your plant with this much-needed downtime, you’ll increase the chances of a vibrant and stunning bloom display!
Clivia flowering season

Clivia enthusiasts rejoice because it’s time to explore the magical Clivia flowering season!
There’s nothing quite like witnessing the vibrant colors and intricate blooms of a Clivia plant during its peak flowering time.
In this section, we’ll discuss when to expect these stunning and beautiful flowers and how different factors might impact the flowering season.
So, get ready to mark your calendars and anticipate the arrival of your Clivia’s spectacular show of blossoms!
Blooming Time: When to Expect Clivia Flowers
Each Clivia species has its own unique flowering period.
Generally, you can expect to see flowers during these times:
Clivia miniata, Clivia nobilis, and Clivia caulescens: These species typically bloom in late winter and spring. However, Clivia miniata can sometimes produce out-of-season flowers, depending on the climate.
Clivia gardenii and Clivia robusta: These species usually flower in autumn.
Keep in mind that hybrids and cultivars might have different flowering patterns, influenced by their parent species and the climate in which they grow.
Flowering Duration: How Long Clivia Flowers Last
Clivia flowers are not only stunning but also long-lasting!
In ideal conditions, you can expect Clivia blooms to last for several weeks, bringing ongoing beauty and color to your indoor garden.
To enjoy the longest possible flowering period, ensure you’re providing your Clivia with proper care, such as maintaining the right temperature, humidity, and light levels.
By doing so, you’ll maximize the time your Clivia plant graces you with its breathtaking blossoms.
Clivia plant problems
As much as we adore our Clivia plants, it’s essential to acknowledge that they might face a few challenges along the way.
In this section, we’ll delve into common Clivia plant problems and offer helpful tips for identifying and resolving these issues.
Don’t worry – with the right knowledge and care, you can tackle any obstacles your Clivia may encounter and ensure your beloved plant continues to thrive and dazzle with its striking foliage and flowers!
Tackling Common Clivia Problems: Tips and Solutions
Yellowing leaves: Yellow leaves may be a sign of over-watering or poor drainage. Check the moisture level of the soil and ensure your pot has adequate drainage.
Cut back on watering and allow the soil to dry out slightly between waterings.
Wilted leaves: This could be a result of under-watering or insufficient humidity. Monitor the soil moisture and water your Clivia when the top inch of the soil is dry.
You can also maintain humidity levels by placing a tray of water near the plant or using a humidifier.
No blooms: If your Clivia isn’t flowering, it might need a rest period with cooler temperatures and less water during winter months.
Ensure you’re providing your plant with the necessary dormancy period to stimulate flower tissue growth.
Brown leaf tips: This issue could be caused by low humidity, over-fertilization, or excessive salts in the soil. Increase humidity around the plant and make sure you’re not over-fertilizing.
You can also flush the soil with water to remove excess salts.
By keeping an eye on your Clivia plant and addressing common problems promptly, you’ll help your plant stay healthy, happy, and ready to show off its stunning foliage and blooms.
Growing Clivia FAQs
When it comes to growing Clivia, this vibrant and eye-catching plant has specific needs that differ from other houseplants.
Getting the soil mix right, understanding its pot requirements, and knowing when and how to water is critical for the plant’s well-being.
Below are some frequently asked questions that delve into the finer details of Clivia’s care.
What is the best potting mix for Clivia?
The best potting mix for clivia is a well-draining soil that retains some moisture. I prefer coco coir and perlite but a mix of potting soil, perlite, and sand is generally effective.
Do Clivias grow well in pots?
Yes, Clivias actually prefer to be a bit root-bound and grow well in pots. Just ensure the pot has adequate drainage holes.
How do I get my Clivia to bloom?
To encourage blooming, reduce watering in the winter and keep the plant in cooler temperatures, around 50-55°F (10-13°C).
Resume regular watering and gradually warm up the environment when buds appear.
How often do you water Clivia?
Water your Clivia when the top inch of soil feels dry to the touch. It’s better to err on the side of underwatering than to overwater this plant.
How To Grow Clivia In Pots Final Thoughts

As we wrap up our comprehensive guide on how to grow Clivia in pots, we hope you feel inspired and well-equipped to take on the rewarding journey of nurturing these stunning plants.
Remember, with the right care, attention, and love, your Clivia will reward you with vibrant, long-lasting flowers that will brighten up your indoor space.
So, roll up your sleeves, and let’s get started on this exciting adventure of cultivating Clivia plants together! Happy growing!
Key Points to Remember for How To Grow Clivia In Pots
• Choose the right indoor location, considering temperature, humidity, and light requirements.
• Use a well-draining potting mix, like coco coir and perlite.
• Monitor watering, ensuring the soil doesn’t stay too wet or too dry.
• Fertilize with a balanced, slow-release fertilizer.
• Propagate through seeds or offsets.
• Maintain and prune as needed for a healthy plant.
• Repot when necessary to accommodate growth.
• Watch out for pests and diseases, and apply treatments as needed.
• Provide a rest period during winter months to encourage blooming.
• Understand the Clivia flowering season and enjoy the stunning blooms.
You’ve Got This: Growing Clivia with Confidence
Now that you’ve learned the essentials of how to grow Clivia in pots, it’s time to put your newfound knowledge into action.
With patience, dedication, and consistent care, you’ll soon find yourself admiring the vibrant, colorful flowers of your very own Clivia plant.
Remember, every plant parent faces challenges along the way, but by applying the tips shared in this guide, you’ll be well on your way to nurturing a thriving Clivia that will brighten up your home for years to come.
Happy growing, and best of luck on your Clivia journey!
Read more: 20 Benefits Of Keeping Indoor Plants For Improved Lifestyle