
Have you recently brought home a Norfolk Island Pine and want to keep it thriving? Our guide to Norfolk Island Pine care indoors gives you simple, expert tips to grow a healthy, vibrant tree that adds natural beauty to your living space.
You’ll discover the secrets to thriving Norfolk Island Pine care indoors with our comprehensive guide, packed with expert tips and advice for a happy, healthy tree! Here’s a few quick care tips:
- To grow Norfolk Island Pine indoors, place the plant in a location with bright, indirect light.
- Keep the soil consistently moist but not waterlogged.
- Maintain indoor temperatures between 65-75°F and provide humidity through misting or a humidity tray.
- Fertilize every 6-8 weeks with a balanced liquid fertilizer.
Have you recently welcomed a beautiful Norfolk Island Pine into your home and want to ensure it thrives?
Our comprehensive guide to Norfolk Island Pine Care indoors will help you master the art of nurturing this majestic tree.
With easy-to-follow tips and expert advice, you’ll know how to care for a Norfolk Island Pine and soon transform your space into a lush, green haven while keeping your Norfolk Island Pine happy and healthy!
Introduction To Norfolk Island Pine Care Indoors

Northfolk Island Pine Live Plant 3 feet Tall Tropical Plant Cold Hardy NO Shipping to California
Are you ready to embark on an exciting journey with your new Norfolk Island Pine?
This amazing tree deserves all the love and attention it can get, and we’re here to help you every step of the way!
In this guide, we’ll cover everything from its unique benefits and growth rates to the essential aspects of care such as lighting, watering, and temperature management.
With our expert advice, you’ll be well-equipped to create the perfect indoor oasis for your Norfolk Island Pine, ensuring its happiness and your satisfaction!
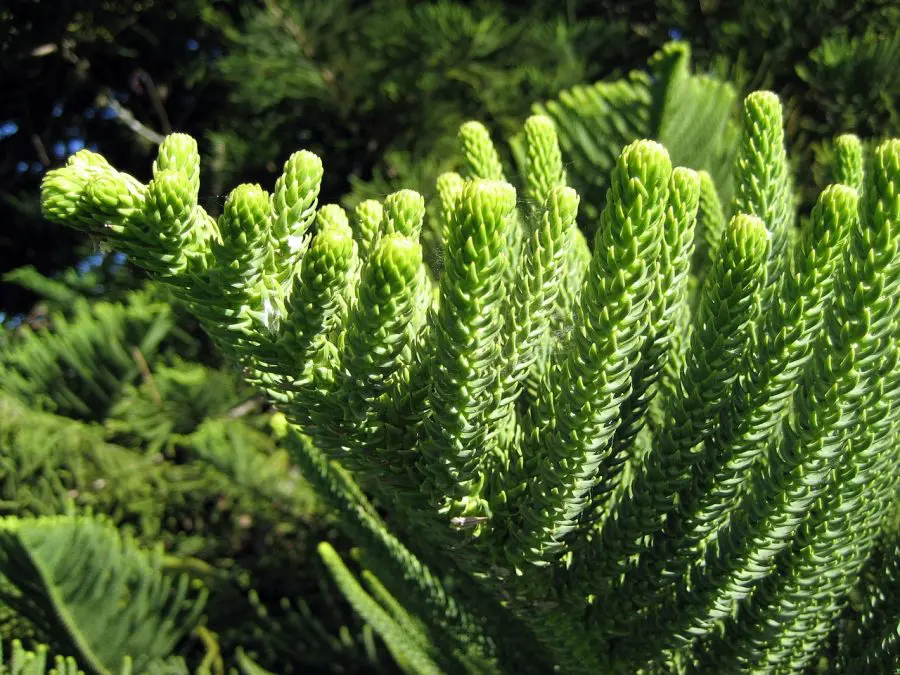
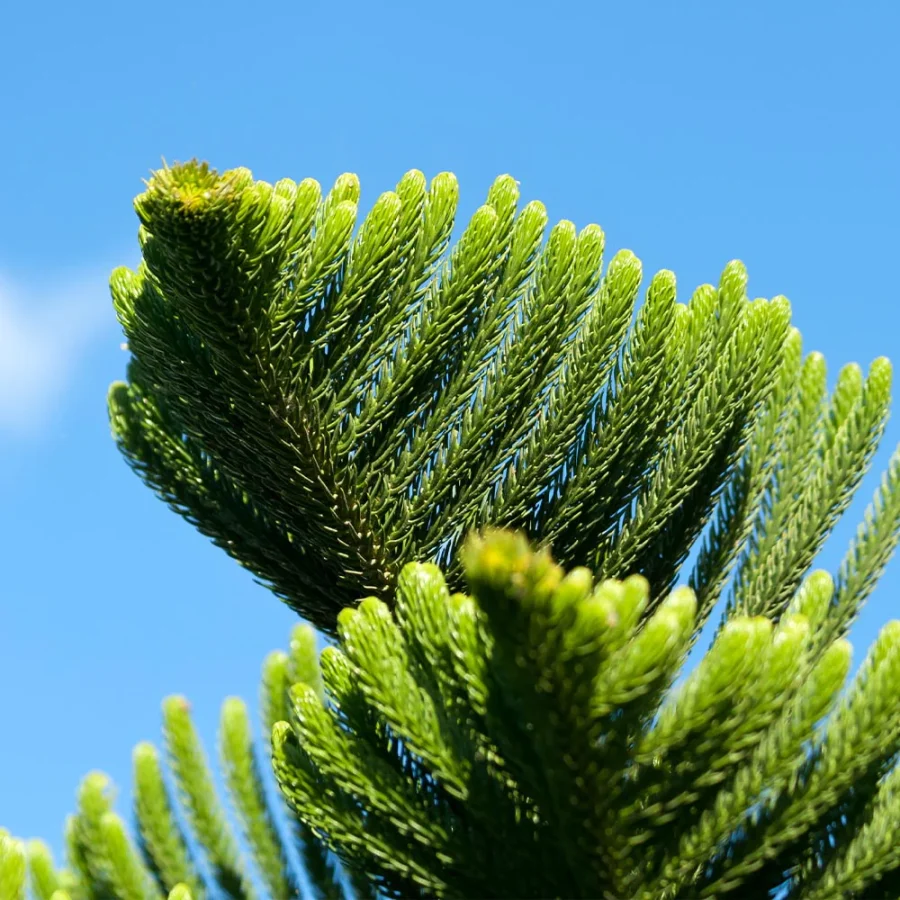
Getting to Know Norfolk Island Pine (Araucaria heterophylla)
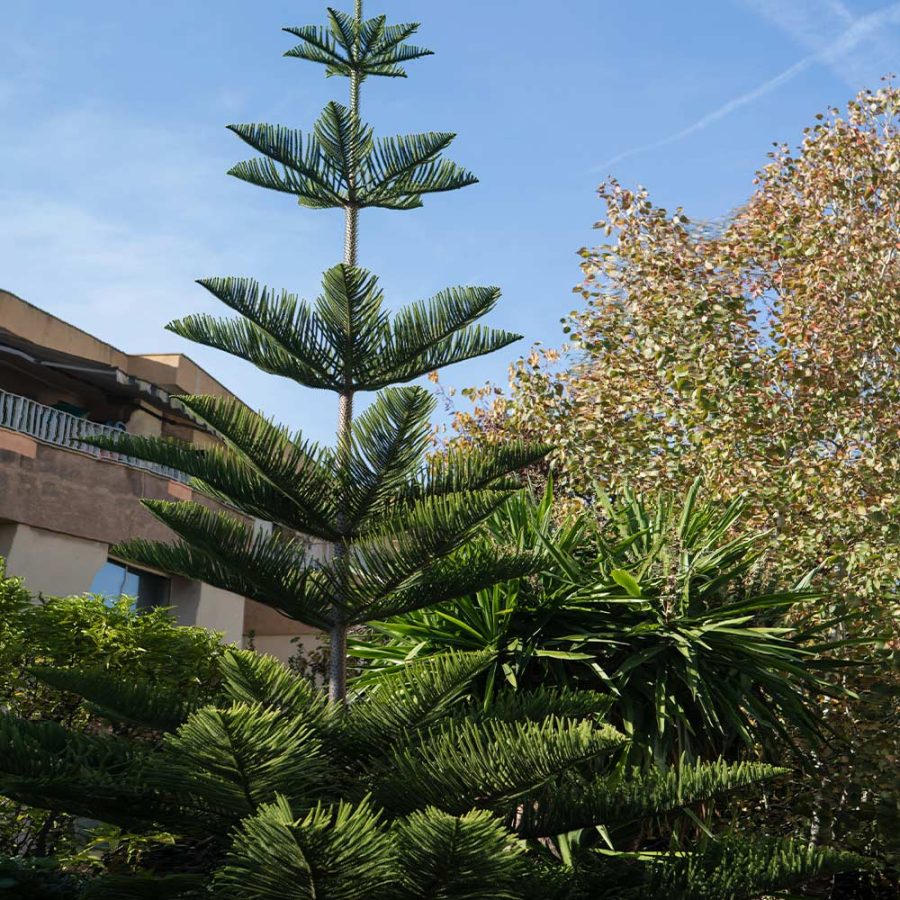
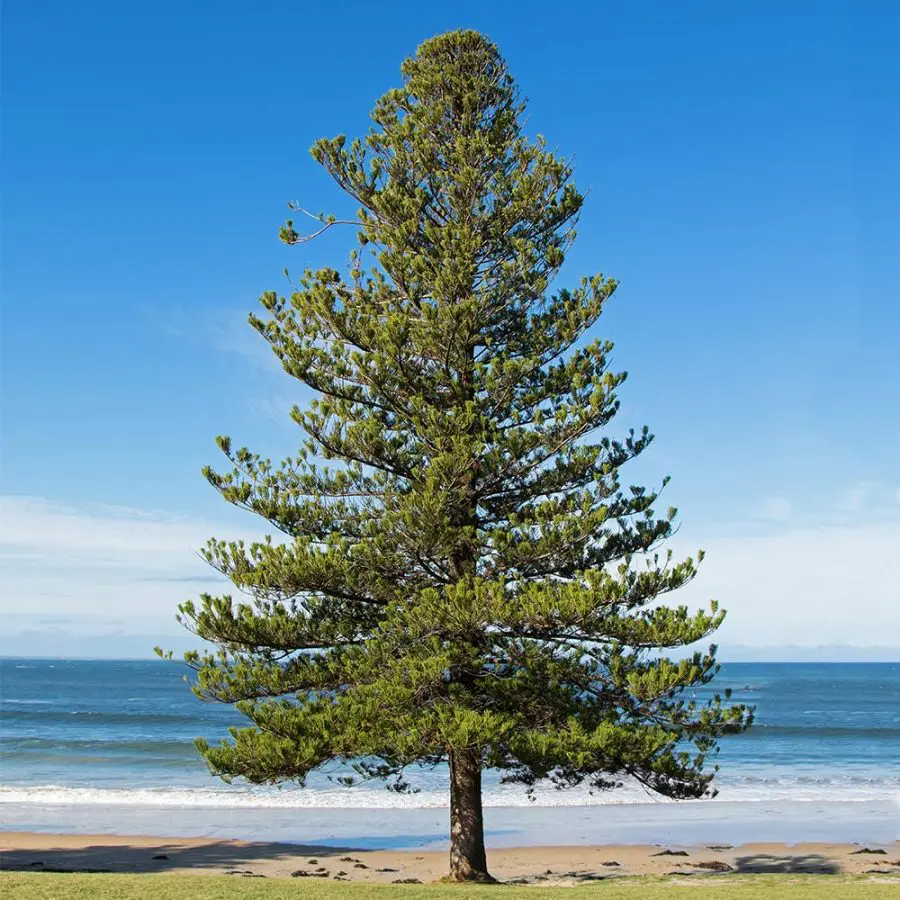
Norfolk Island Pine, or Araucaria heterophylla, is a stunning tree native to Norfolk Island located in the Pacific Ocean East of Australia.
This evergreen conifer isn’t a true pine, but it certainly steals the show with its unique symmetrical shape, lush foliage, and ability to thrive indoors.
As a popular houseplant, it adds a touch of elegance and a tropical feel to any space.
The Significance of Proper Indoor Care
Taking care of your Norfolk Island Pine indoors is vital to maintaining its health and beauty.
Proper care ensures that it will continue to grow and thrive, providing you with the joy and satisfaction of watching it flourish.
By understanding and catering to its specific needs, you’ll be able to create a harmonious environment for your tree, guaranteeing its happiness and longevity within your home.
Norfolk Island Pine Benefits
Are you curious about what makes Norfolk Island Pine such a beloved houseplant? Well, wonder no more! Beyond its striking appearance and tropical vibes, this beautiful tree brings a host of benefits to your home.
From air purification to its symbolic meaning, Norfolk Island Pine is more than just a pretty addition to your indoor garden. Let’s delve into these remarkable benefits and discover why this tree is truly a gem in the world of houseplants!
Aesthetic Appeal
One of the main attractions of the Norfolk Island Pine is its stunning aesthetic appeal. With its lush, soft needles and symmetrical, tiered branches, this tree makes a visually captivating statement in any room.
Its tropical charm brings a touch of nature and warmth to your indoor space, making it an eye-catching centerpiece or a gorgeous addition to your collection of houseplants.
Air Purification
Did you know that Norfolk Island Pine also helps purify the air in your home?
This fantastic tree is known for its ability to absorb harmful pollutants and releases fresh oxygen, making your living environment cleaner and healthier.
With a Norfolk Island Pine in your space, you can breathe a little easier knowing that it’s working hard to improve the air quality around you.
Symbolic Meaning: The Living Christmas Tree
The Norfolk Island Pine’s unique shape and evergreen foliage have earned it a special place in many hearts as a living Christmas tree.
Its symmetrical branches and natural, pyramid-like form make it the perfect alternative to traditional Christmas trees, especially for those who appreciate a more sustainable and eco-friendly option.
As a bonus, you can enjoy its beauty all year long and make it a cherished part of your holiday traditions!
Norfolk Island Pine For Sale
Are you looking to add a stunning and low-maintenance houseplant to your home? Norfolk Island Pine is not only an attractive addition, but it’s also easy to care for indoors!
Caring for a Norfolk Island Pine is quite simple, and with the proper attention to factors such as light, water, and temperature, you can enjoy a thriving plant.
But did you know that this beautiful tree can also serve as a living Christmas tree and has air-purifying properties? Moreover, it can adapt well to indoor environments, making it a perfect choice for many homes.
Imagine having a vibrant, lush Norfolk Island Pine in your living space, adding a touch of nature and charm to your home decor.
It’s not only an eye-catching focal point, but it also contributes to cleaner air and brings a sense of calm to your surroundings.
Learning how to properly care for this plant will ensure its health and longevity, allowing you to enjoy its beauty for years to come.
To get started on your journey with your Norfolk Island Pine, dive into our comprehensive guide that covers everything from proper lighting conditions and watering techniques to winter care and pet safety.
By following these expert tips, you’ll be well on your way to having a happy, healthy, and stunning Norfolk Island Pine in your home.
So, why wait? Begin your adventure with this magnificent plant today!
| Mature Height: | 5-8 ft. (Indoors) |
| Mature Width: | 2-5 ft. (Indoors) |
| Sunlight: | Partial Sun |
| Growth Rate: | Slow |
| Botanical Name: | Araucaria heterophylla |
| Does Not Ship To: | AZ |
| Grows Well In Zones: | 4-11 patio / 9-11 outdoors |
| Your Growing Zone: | 8 |
Get your own Norfolk Island Pine Tree today
Norfolk Island Pine Growth Rate Indoors
You might be wondering how quickly your Norfolk Island Pine will grow once it’s settled into its new indoor environment.
While its growth rate may vary depending on factors such as light, temperature, and care, understanding what to expect can help you plan and nurture your tree’s development.
So, let’s dive into the fascinating world of Norfolk Island Pine’s growth indoors and learn how to encourage its healthy progression in your cozy indoor sanctuary!
Factors Affecting Growth Rate
Several factors can impact the growth rate of your Norfolk Island Pine indoors. Light, temperature, and proper care are among the key elements to consider.
Ensuring that your tree receives adequate sunlight, stays within the ideal temperature range, and is consistently watered and fertilized will significantly influence its growth rate.
By paying close attention to these factors, you’ll be well on your way to fostering a healthy and thriving Norfolk Island Pine.
Typical Growth Rate Range
While the growth rate of a Norfolk Island Pine may vary depending on its environment and care, you can typically expect an indoor tree to grow at a rate of about 6 to 12 inches per year.
However, remember that patience is essential, as it may take time for your tree to acclimate to its new surroundings and reach its full growth potential.
By providing the right conditions and care, you’ll be rewarded with a stunning, majestic tree that continues to grow and enhance your indoor space.
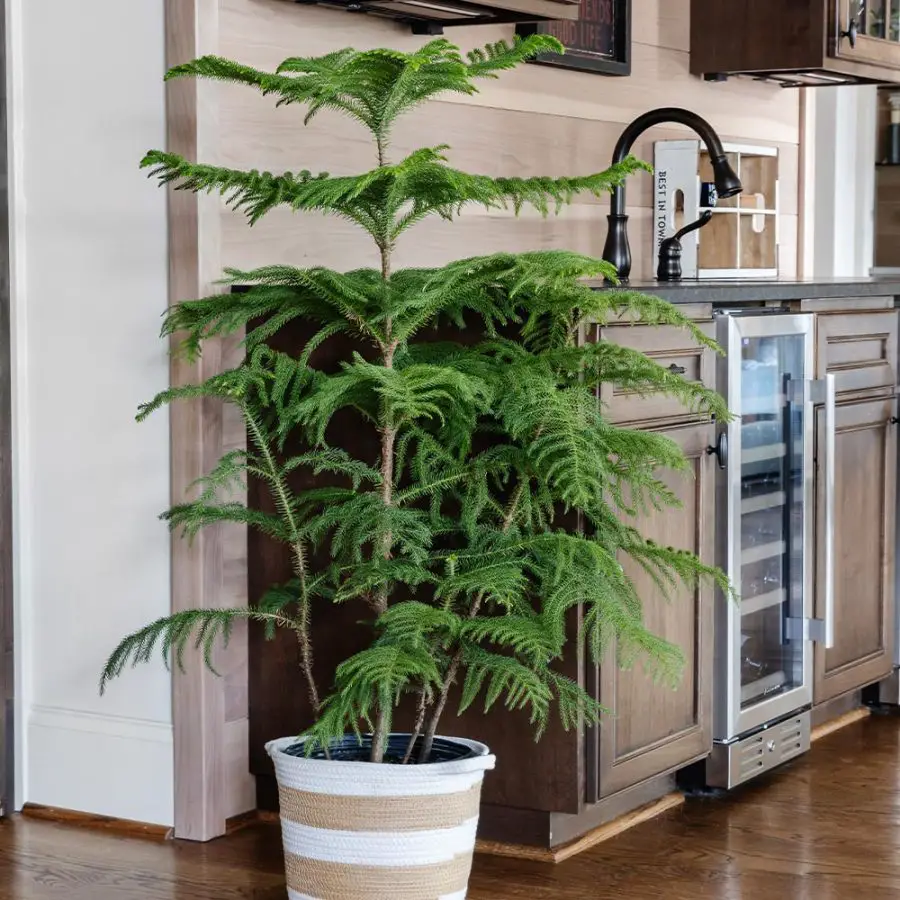
Norfolk Island Pine Indoor Height
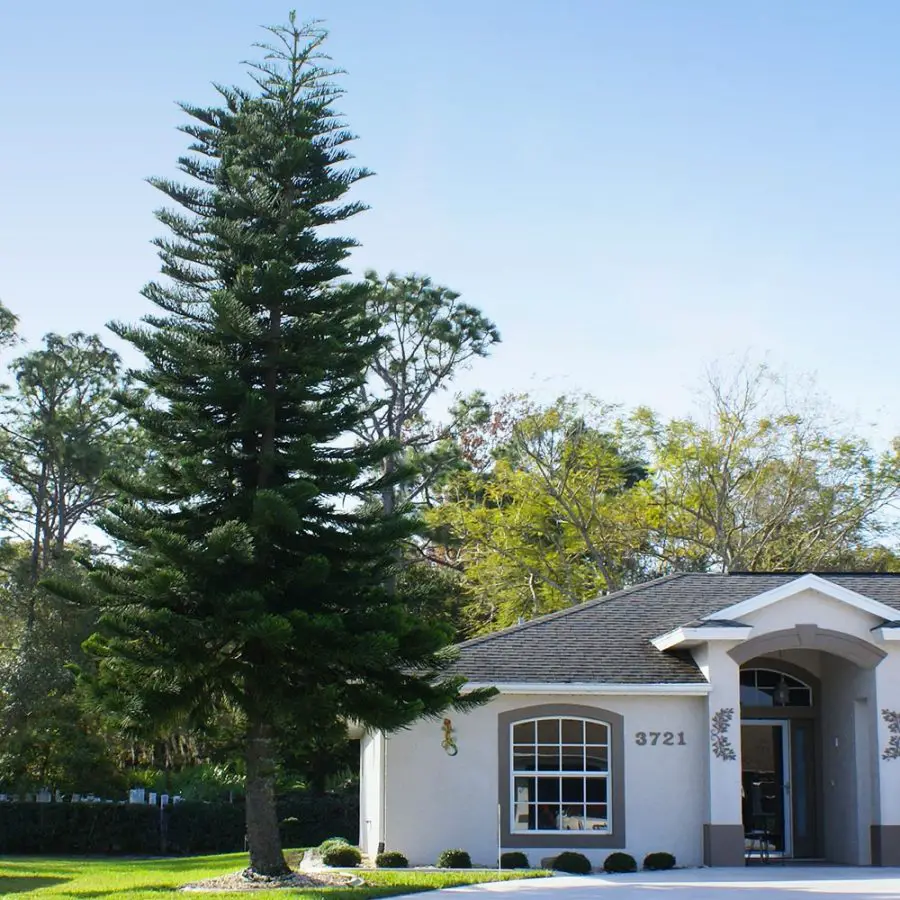
If you’re curious about how tall your Norfolk Island Pine can grow indoors, you’re in for a pleasant surprise!
This adaptable tree can reach impressive heights, even within the confines of your home.
As you nurture your tree, it’s essential to understand its potential size and how it may impact your indoor space.
So, let’s explore the heights your Norfolk Island Pine can reach indoors and how to accommodate its impressive stature!
Expected Heights for Indoor Plants
When it comes to indoor growth, your Norfolk Island Pine can reach a considerable size.
Though it may not achieve the towering heights it does outdoors, you can still expect your tree to grow anywhere from 3 to 8 feet tall indoors.
As a result, it can make a striking statement piece in your home, providing a beautiful focal point and a touch of nature in your living space.
Norfolk Island Pine Size Indoors: 5-8 Feet
So, you’re wondering how large your Norfolk Island Pine can grow within the cozy confines of your home?
While these trees can reach towering heights outdoors, they tend to stay within a more manageable range of 5-8 feet when grown indoors.
In this section, we’ll discuss how to accommodate and care for your Norfolk Island Pine as it grows, so it flourishes in your indoor space and enhances your home with its stunning presence!
Guidelines for Managing Size Indoors
When it comes to managing the size of your Norfolk Island Pine indoors, there are a few essential guidelines to follow.
First, ensure that your tree receives adequate sunlight, as this will promote healthy growth.
Next, keep an eye on the pot size, as a larger pot may encourage more growth, while a smaller pot can help limit the overall size.
Lastly, make sure your tree is in an area with enough space to accommodate its potential height and width, so it can grow comfortably without becoming cramped.
Ways to Maintain Desired Size
If you want to maintain your Norfolk Island Pine at a specific size, there are a couple of strategies you can employ.
Regular pruning can help control the tree’s height and shape, while still allowing it to grow in a healthy manner.
Additionally, monitoring and adjusting the tree’s care routine, such as watering and fertilizing, can help you achieve the desired size.
Remember to be gentle with these adjustments to ensure your tree remains happy and healthy while reaching the size that works best for your indoor space.
Norfolk Island Pine Light Requirements
Are you wondering about the light requirements for your beautiful Norfolk Island Pine?
Providing the right amount of light is essential to keep your tree happy, healthy, and growing steadily.
As you embark on your journey to care for this stunning indoor plant, understanding its light preferences will make all the difference in its overall well-being.
In this section, we’ll delve into the ideal lighting conditions for your Norfolk Island Pine and how to ensure it gets the light it needs to thrive in your home!
Ideal Light Conditions for Indoor Growth
Your Norfolk Island Pine will thrive in bright, indirect light, which is crucial for its health and growth.
While it can tolerate lower light conditions, it may result in slower growth or even cause the tree to become leggy.
To ensure your tree remains healthy and vigorous, aim to provide it with plenty of indirect sunlight, preferably in an east or west-facing window.
How to Provide Adequate Lighting
To give your Norfolk Island Pine the lighting it craves, place it near a large window that receives plenty of bright, filtered light throughout the day.
If you don’t have a suitable window, consider using a sheer curtain to soften direct sunlight or using a supplemental grow light to mimic natural light.
Be sure to rotate your tree every few weeks to promote even growth and prevent it from leaning toward the light source.
By paying attention to its lighting needs, you’ll be well on your way to helping your Norfolk Island Pine flourish indoors!
Norfolk Island Pine Watering
Finding the perfect balance when it comes to watering your Norfolk Island Pine can make a world of difference in its overall health and happiness.
Too little or too much water can lead to various problems, so understanding the right watering techniques is essential.
In this section, we’ll dive into the proper watering methods to ensure your Norfolk Island Pine stays well-hydrated and thrives in its indoor environment, gracing your home with its lush, evergreen foliage!
Water Requirements for Indoor Plants
Norfolk Island Pines prefer to be kept consistently moist but not overly wet.
Over-watering can lead to root rot, while under-watering can cause the tree to dry out and drop its needles.
Generally, these plants require watering every 1-2 weeks, depending on the humidity, temperature, and light conditions in your home.
It’s essential to keep an eye on the soil moisture and adjust your watering schedule accordingly to meet your tree’s needs.
Tips for Proper Watering Techniques
To master the art of watering your Norfolk Island Pine, follow these helpful tips:
Check the Soil: Before watering, stick your finger about an inch into the soil. If it feels dry, it’s time to water. If it’s still moist, wait a few more days and check again.
Water Deeply: When watering, ensure you’re giving your tree a thorough soak, allowing the water to reach the root system. Make sure the water drains out of the bottom of the pot to prevent standing water.
Use Well-Draining Soil: A well-draining soil mix, such as a combination of coco coir and perlite, will help prevent over-watering and keep your tree’s roots healthy.
Adjust Watering Schedule: Be mindful of seasonal changes, as your Norfolk Island Pine may require more frequent watering during warmer months and less during colder months.
By following these guidelines and paying close attention to your tree’s needs, you’ll become a pro at keeping your Norfolk Island Pine perfectly hydrated!
Norfolk Island Pine Fertilizer
Feeding your Norfolk Island Pine with the right nutrients is essential for its growth and well-being.
Choosing the right fertilizer and knowing when and how to apply it can make all the difference in your tree’s overall health.
In this section, we’ll discuss the best fertilizers to use for your indoor Norfolk Island Pine, as well as tips on when and how to apply them to ensure your tree stays lush, vibrant, and full of life all year round!
Types of Fertilizers to Use
Selecting the right fertilizer for your Norfolk Island Pine is crucial for its growth and overall health. Here are a few options to consider:
Balanced Fertilizer: A balanced, slow-release granular fertilizer with equal parts nitrogen, phosphorus, and potassium (N-P-K) is a great choice for these indoor trees.
Look for a formula with an N-P-K ratio of 10-10-10 or 14-14-14.
Liquid Fertilizer:
A water-soluble liquid fertilizer can be another suitable option, especially if you prefer to have more control over the frequency of feeding your tree.
Frequency and Application Guidelines
To ensure your Norfolk Island Pine gets the nutrients it needs without overfeeding, follow these guidelines:
Fertilizing Frequency: Fertilize your tree every 2-3 months during the growing season (spring and summer) and reduce the frequency to once every 3-4 months during fall and winter.
Application Rate: Follow the package instructions for the specific fertilizer you’re using, as application rates may vary. Be careful not to over-fertilize, as this can cause damage to the roots and foliage.
Water Before Fertilizing: Water your tree thoroughly before applying fertilizer to prevent the fertilizer from burning the roots.
Monitor Tree’s Health: Keep an eye on your tree’s overall health and adjust the fertilizer schedule as needed. Yellowing leaves or a lack of new growth may indicate a need for additional nutrients.
By using the appropriate fertilizers and following these guidelines, you’ll be able to provide your Norfolk Island Pine with the essential nutrients it needs to thrive indoors!
Using Slow-Release Fertilizer Plant Spikes
Slow-release fertilizer plant spikes are a convenient and low-maintenance option for feeding your Norfolk Island Pine.
They provide a consistent supply of nutrients over an extended period, promoting healthy growth. Here’s how to use them:
Choosing Plant Spikes: Select slow-release fertilizer plant spikes that have a balanced N-P-K ratio, such as 10-10-10 or 14-14-14, to ensure your tree receives all the essential nutrients.
Spike Placement: Gently push the fertilizer spikes into the soil around your Norfolk Island Pine, making sure to space them evenly. The number of spikes required will depend on the pot size and the tree’s root system. Follow the package instructions for guidance on the appropriate number of spikes.
Watering: Water your tree as usual, ensuring that the soil remains consistently moist but not overly wet. The water will help release the nutrients from the spikes into the soil, allowing your tree to absorb them through its roots.
Replacement: Slow-release fertilizer spikes typically last for 2-3 months before they need replacing. Keep track of when you last inserted the spikes and replace them as needed to ensure continuous nutrient supply.
By using slow-release fertilizer plant spikes, you can simplify the process of feeding your indoor Norfolk Island Pine, allowing it to grow and flourish with minimal effort on your part.
The use of tree spikes will take the guesswork out of fertilizing. Here is what I recommend for 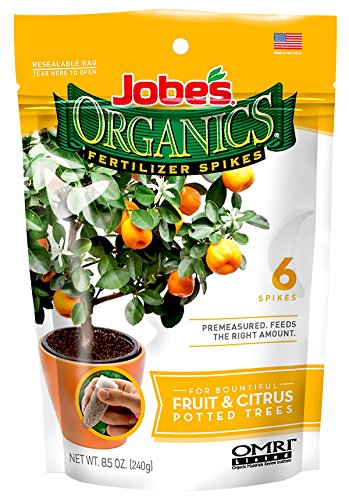 fertilizing your Norfolk Pine.
I recommend using Jobes Organics fertilizer spikes.
They are easy to use and last for 2-3 months.
They are designed for container-grown citrus.
Using 2 spikes for a 12-inch pot or 3 for an 18-inch pot takes the guesswork out of fertilizing.
They provide a 3-5-5 fertilizer blend along with micronutrients and beneficial bacteria.
Norfolk Island Pine Soil: Coco Coir and Perlite
Choosing the right soil mix is essential for the health and well-being of your Norfolk Island Pine, and a combination of coco coir and perlite can do wonders for its indoor growth.
In this section, we’ll explore the benefits of this soil mixture, why it works so well for Norfolk Island Pines, and how you can create the perfect blend to support your tree’s needs.
Get ready to give your indoor Norfolk Island Pine a solid foundation with this fantastic soil mix!
Canna Coco Is What I Use And Recommend
All coco coir is not created equally. Some cheaper brands contain high levels of salt making them unsuitable for growing plants.
Canna coco is prebuffered and very low in salts.
It also has consistently high quality and I have tried other brands but it still remains the best quality coco coir on the market.
It is available as coco bricks or loose and ready-to-use.
")


Coco has unique properties and requires a fertilizer made for coco for best results. Canna started the coco revolution and Coco A & B is still the best.
The Coco Coir Advantage: Boosting Plant Health and Happiness
Using coco coir for your plants comes with a host of advantages that can help your indoor garden thrive.
It’s superb water retention and drainage capabilities ensure that your plants receive the right amount of moisture without the risk of overwatering.
The excellent aeration provided by coco coir promotes strong root growth, ultimately leading to healthier, more vigorous plants.
Plus, its natural resistance to pests and diseases means you’ll be creating a safer environment for your green friends.
Coco Coir in Context: Limitations and Considerations
While coco coir is a fantastic growing medium, there are a few things to keep in mind before making the switch.
One potential limitation is that coco coir can sometimes contain high levels of salt, which could harm your plants.
To avoid this issue, it’s important to thoroughly rinse and buffer your coco coir before use.
Additionally, coco coir doesn’t provide essential nutrients for plant growth, so you’ll need to supplement with a balanced fertilizer to ensure your plants receive the necessary nutrients.
Benefits of Using Coco Coir and Perlite
Coco coir and perlite offer numerous advantages for your Norfolk Island Pine’s indoor growth.
Coco coir, derived from coconut husks, provides excellent water retention and aeration, ensuring that the roots receive the necessary moisture and oxygen.
Perlite, a natural volcanic material, adds even more aeration and drainage capabilities to the mix, preventing root rot and promoting healthy root development.
Mixing and Preparing the Soil
To create the ideal soil mix for your Norfolk Island Pine, you’ll want to combine equal parts of coco coir and perlite.
Start by moistening the coco coir with water, ensuring it is damp but not soaking wet. Next, mix in the perlite until you achieve a uniform consistency.
This blend will provide the perfect balance of moisture retention, drainage, and aeration for your indoor tree.
Why It’s Better Than Potting Soil
While traditional potting soil may work for many plants, the unique blend of coco coir and perlite is better suited for Norfolk Island Pines.
Potting soil tends to retain more water, which can lead to root rot and other issues.
In contrast, the coco coir and perlite mix offers superior drainage and aeration, promoting healthier root growth and preventing common problems associated with overly moist soil.
Plus, it’s a more sustainable and eco-friendly option, making it a win-win for both your tree and the environment!
Indoor Temperature and Humidity
Caring for a Norfolk Island Pine indoors means paying attention to temperature and humidity levels to keep your tree thriving.
In this section, we’ll discuss the ideal temperature and humidity ranges that cater to your tree’s needs and offer tips to maintain these conditions.
By creating the right environment, you’ll enjoy a healthy and happy Norfolk Island Pine in your indoor space.
Ideal temperature range:
Norfolk Island Pines prefer temperatures between 55 and 70 degrees Fahrenheit. This range creates a comfortable environment that mimics their natural habitat.
Tips for maintaining proper temperature: Keep your tree away from drafts, cold windows, or heat sources like radiators.
Use a digital thermometer to monitor room temperature, and adjust your heating or cooling system accordingly.
Ideal Humidity:
Importance of humidity for indoor plants: Maintaining a humidity level of around 50% is essential for the health of your Norfolk Island Pine.
This ensures the tree gets the moisture it needs to prevent leaf browning or wilting.
How to maintain appropriate humidity levels:
Use a hygrometer to measure humidity levels in your space.
To increase humidity, try misting the tree’s leaves, placing a tray of water near the plant, or using a humidifier.
Be sure to check the humidity levels regularly and make adjustments as needed.
Norfolk Island Pine Pot Size
Choosing the right pot size for your Norfolk Island Pine can make all the difference in its health and happiness.
In this section, we’ll guide you through the process of selecting the perfect pot to accommodate your tree’s growth and ensure it thrives in your indoor space.
So, let’s dive into finding that ideal container to showcase your majestic pine!
Understanding Your Norfolk Island Pine’s Growth Rate
Observing your pine’s overall health and vigor: Regularly monitor your Norfolk Island Pine’s growth by checking its foliage, bark, and roots.
A healthy pine will have vibrant green needles and a sturdy trunk.
Recognizing signs of rapid or stunted growth: Rapid growth may cause the tree to outgrow its pot, while stunted growth can indicate a lack of nutrients or other issues. Be on the lookout for these signs to address any potential problems.
Factors to Consider When Choosing a Pot Size
Estimating future growth and space requirements: Consider your pine’s current size and anticipated growth rate to choose a pot that will accommodate its needs for the next few years.
Considering drainage and stability needs: Opt for a pot with ample drainage holes and a sturdy base to prevent root rot and ensure the tree remains upright.
As your tree gets taller a lightweight plastic pot can tip over. Consider using ceramic or terra cotta pots as your tree grows taller.
Balancing aesthetics with practical concerns: While the appearance of the pot is important, prioritize the plant’s health and growth needs when making your decision.
Types of Pots Suitable for Indoor Pines
Comparing materials, such as ceramic, plastic, and terracotta: Each material has unique properties that can affect temperature, moisture retention, and durability. Evaluate which material best suits your pine’s needs and your personal preferences.
Evaluating the advantages and disadvantages of each option: For example, ceramic pots are heavy and stable but can be more expensive. In contrast, plastic pots are lightweight and affordable but may not provide the best insulation. Also as your tree grows taller they are prone to tipping.
Tips for selecting a pot that complements your living space: Choose a pot that matches your interior design style and color scheme while also providing adequate space for your Norfolk Island Pine to thrive.
Signs Your Pine Needs a Bigger Home
Identifying root-bound or overcrowded conditions: If roots are visible through the drainage holes or circling the soil’s surface, it may be time to move your pine to a larger pot.
Detecting changes in watering needs or plant health: A root-bound plant may require more frequent watering, and you may notice a decline in overall health or growth.
Evaluating the overall size and appearance of the tree: If your pine appears top-heavy or disproportionate to its pot, consider upgrading to a larger container.
Repotting Norfolk Island Pine
As your beloved Norfolk Island Pine grows, repotting becomes an essential step in its journey to thrive.
In this section, we’ll explore the reasons behind repotting, how to recognize when your plant needs a bigger home, and the best practices to ensure a smooth transition.
Join us as we unveil the secrets to successfully repotting your Norfolk Island Pine, keeping it healthy and happy for years to come!
Recognizing the Signs for Repotting
Outgrown pot: Look for roots peeking out of the drainage holes or circling the surface of the soil.
Slower growth: If your Norfolk Island Pine’s growth rate has slowed down, it might be due to limited space or depleted nutrients.
Watering issues: If the water drains too quickly or the plant dries out faster than usual, it’s time to repot.
Repotting Your Norfolk Island Pine
• Choose the right time: Repot during the early spring or summer when the plant is actively growing.
• Select a new pot: Opt for a pot that’s 1-2 inches larger in diameter than the current one, ensuring proper drainage holes.
• Prepare the pot: Add a layer of fresh soil mix to the bottom of the new pot.
• Gently remove the plant: Carefully remove your Norfolk Island Pine from its current pot, trying not to disturb the root system too much.
• Place in the new pot: Position your plant in the center of the new pot and fill in the gaps with fresh soil mix, patting down gently.
• Water and care: Water the plant thoroughly after repotting, and maintain proper care practices for a healthy and happy Norfolk Island Pine.
Steps for a Successful Repotting Process
Preparing your new pot and potting mix: Ensure the new pot has proper drainage and fill it partially with a well-draining potting mix.
Carefully removing the pine from its old container: Gently loosen the roots and soil around the edges of the pot before lifting the tree out.
Ensuring a smooth transition and proper settling in the new pot: Place the pine in the new pot, filling in with additional potting mix and gently pressing down to eliminate air pockets.
Tips for Minimizing Stress During Pot Transitions
Choosing the right time and conditions for repotting: Aim to repot during a period of mild weather and avoid repotting during periods of extreme heat or cold.
Monitoring and adjusting care routines as needed: Keep an eye on your pine’s watering, light, and nutrient needs, adjusting as necessary to support its transition to the new pot.
Providing extra support and attention during the adjustment period: Offer your pine a little extra TLC, such as misting the foliage, during the first few weeks after repotting to help it acclimate to its new home.
Norfolk Island Pine Pruning
Are you wondering how to keep your Norfolk Island Pine looking its best? Well, you’ve come to the right place!
In this section, we’ll dive into the ins and outs of pruning your beloved pine to maintain its shape, promote healthy growth, and ensure it remains a stunning focal point in your indoor space.
So, grab your pruning shears, and let’s get started on this exciting journey towards a well-groomed and happy Norfolk Island Pine!
When and Why to Prune
Seasonal timing: Prune during late winter or early spring for the best results.
Promote healthy growth: Pruning helps remove dead or damaged branches, encouraging new growth.
Maintain shape and size: Regular pruning keeps your Norfolk Island Pine looking neat and prevents it from becoming too large.
Proper Pruning Techniques
• Use clean, sharp tools: This helps prevent the spread of diseases and ensures clean cuts.
• Make cuts at an angle: Angle your cuts away from the main stem to avoid causing damage.
• Remove dead or damaged branches: Focus on cutting back branches that are yellow, brown, or broken.
• Avoid over-pruning: Take care not to remove too many branches, as this can stress the plant and stunt its growth.
Norfolk Island Pine Propagation
Are you looking to share the beauty of your Norfolk Island Pine with friends and family? This section is for you!
We’ll walk you through the steps of propagating your beloved tree, making it easy to spread the greenery around.
Dive in to learn the ins and outs of propagation, from choosing the right cutting to nurturing a new sapling. Let’s get growing!
Methods for Propagating Norfolk Island Pine
Cutting Technique: To successfully propagate your Norfolk Island Pine, choose a healthy and vigorous branch that has new growth.
Cut a 4-6 inch section with a sharp, sterile pair of pruning shears, making sure to include at least one node.
This technique requires careful handling of the cutting, as well as an understanding of how to promote healthy root development.
Air Layering: This alternative method involves stimulating root growth on the parent plant before taking a cutting.
Carefully remove a ring of bark from a healthy branch, wrap the exposed area with moist sphagnum moss, and secure it with plastic wrap.
Once roots have formed, the new plant can be removed and potted. This method is often preferred when working with larger branches or when a cutting may struggle to root.
Norfolk Island pine Seeds
Seeds: Although much slower Norfolk Island pine can be propagated from seeds.
 Seeds, Green")
Generic Norfolk Island Pine Tree (Araucaria heterophylla) Seeds, Green
Tips for Successful Propagation
Preparing the Cutting: After taking your cutting, carefully remove any lower leaves and dip the cut end in a rooting hormone.
This encourages faster and stronger root development. Place the cutting in a small pot filled with a well-draining soil mix, such as a blend of perlite and peat moss, and water it thoroughly.
Rooting Environment: To encourage successful root development, maintain a consistently moist (but not soggy) soil, and provide a warm environment with indirect sunlight.
You can also use a humidity dome or a plastic bag to create a humid environment around the cutting, which helps prevent the plant from losing too much moisture.
Monitor the cutting regularly and provide gentle care to help it establish a healthy root system.
Norfolk Pine Problems- Troubleshooting Common Issues
Caring for your Norfolk Island Pine can be a breeze, but sometimes things don’t go as planned. In our troubleshooting section, we’ll address common issues you might face and provide guidance on how to overcome them.
From yellowing leaves to leggy growth, we’ve got your back with helpful tips and solutions to keep your indoor pine thriving and looking its best.
Yellowing Leaves: Solving Nutrient and Water Imbalance
Identifying the causes of yellowing leaves: Yellowing leaves can result from overwatering, underwatering, or nutrient deficiencies.
To determine the cause, check the soil moisture and the plant’s recent care routine.
Adjusting your watering and fertilizing routine: To improve leaf color and health, allow the top 1-2 inches of soil to dry between waterings.
If a nutrient deficiency is the cause, apply a balanced, slow-release fertilizer according to package instructions.
Drooping Branches: Strengthening Your Plant
Reasons behind drooping branches: Insufficient light and a weak root system can cause branches to droop.
Ensure the plant receives bright, indirect light and has well-draining soil to promote strong root growth.
Techniques for supporting branches: Stake or gently tie drooping branches to a support structure to provide stability.
Encourage a stronger structure by rotating the plant periodically for even light exposure and pruning weak or overly long branches.
Stunted Growth: Encouraging Healthy Development
Identifying factors that contribute to stunted growth: Inadequate light, improper watering, and lack of nutrients can lead to stunted growth.
Assess the plant’s care routine to pinpoint potential issues.
Tips for optimizing plant care:
• Provide bright, indirect light for at least 6-8 hours daily.
• Water the plant consistently, allowing the top 1-2 inches of soil to dry between waterings.
• Fertilize with a balanced, slow-release fertilizer according to package instructions to promote healthy, vigorous growth.
Pests and Diseases
Caring for your Norfolk Island Pine is not only about providing the perfect environment, but it’s also about keeping a keen eye out for potential problems.
In this section, we’ll be tackling common pests and diseases that can affect your beloved indoor tree.
Don’t worry, we’ll share tips on how to identify, prevent, and treat these issues to ensure your Norfolk Island Pine stays healthy and happy.
So, let’s dive in and become the ultimate guardian of our green friends!
Insect Pests
These tiny pests can cause significant damage to your Norfolk Island Pine if left unchecked.
To identify them, keep an eye out for discolored leaves, a sticky residue called honeydew, or the presence of ants attracted to the honeydew.
To treat these infestations, use insecticidal soap or neem oil, applying it thoroughly on the affected areas.
Make sure to monitor your plant closely for any signs of recurrence.
Aphids:
Tiny, pear-shaped insects that come in various colors and feed on plant sap, causing leaves to curl, yellow, or wilt.
Aphids are small, sap-sucking insects that can infest a wide variety of plants, including the Norfolk Island Pine.
They are usually green, black, or yellow and can be found on the underside of leaves or on tender stems.
Aphids reproduce rapidly and can quickly cause damage to your plant by extracting its nutrient-rich sap.
This can lead to stunted growth, curled leaves, and a weakened plant overall.
Additionally, aphids secrete a sticky substance called honeydew, which can attract ants and promote the growth of sooty mold on your plant.
To control aphids, you can use insecticidal soap or neem oil, or release beneficial insects like ladybugs and lacewings that feed on them.
Mealybugs: Cottony Pests
Mealybugs are small, soft-bodied insects covered in a white, cottony substance. They suck plant sap, causing leaves to curl, yellow, and eventually drop.
To control mealybugs, dab them with a cotton swab dipped in rubbing alcohol or spray the plant with insecticidal soap or neem oil, making sure to cover all infested areas.
Scale Insects: Stubborn Armor
Scale insects are small, round or oval-shaped pests with a protective shell-like covering.
They feed on plant sap, leading to yellowing leaves, stunted growth, and leaf drop.
To treat scale infestations, remove the insects manually with a soft brush or toothpick, or apply horticultural oil or insecticidal soap to the affected areas.
Spider Mites: Microscopic Marauders
Spider mites are tiny, spider-like creatures that feed on plant sap, causing stippling or yellowing of leaves and fine webbing on the plant.
To manage spider mite infestations, spray the plant with water to dislodge the mites, and apply insecticidal soap or neem oil, ensuring thorough coverage.
Keep humidity levels up, as mites thrive in dry conditions.
Whiteflies: Flying Frustrations
Whiteflies are small, white-winged insects that feed on plant sap, causing leaves to yellow and curl.
They often congregate on the undersides of leaves and fly off when disturbed.
To control whiteflies, use yellow sticky traps to catch the adults and apply insecticidal soap or neem oil to treat the nymphs on the leaves.
Regularly check your plant for infestations and act promptly to prevent their spread.
Diseases
Root Rot: A Silent Killer
Root rot is a common problem caused by overwatering, leading to the decay of roots.
Signs include yellowing leaves, wilting, and a foul smell emanating from the soil.
To address root rot, remove the plant from its pot, trim off the affected roots, and repot the plant using fresh soil.
Ensure proper drainage and avoid overwatering to prevent future occurrences.
Leaf-Spot Disease: Unwanted Blemishes
This fungal disease appears as dark spots on leaves, often surrounded by a yellow halo.
To treat leaf-spot disease, remove the affected leaves, increase air circulation, and avoid getting the foliage wet when watering.
Applying a fungicide can also help in controlling the disease.
Botrytis (Grey Mould): Unwelcome Fungi
Grey mold, or botrytis, manifests as a fuzzy grey growth on leaves, stems, or flowers.
To tackle this issue, remove the affected parts, increase air circulation, and reduce humidity levels. You can also apply a suitable fungicide to prevent further spread.
Powdery Mildew: A Dusty Nuisance
Powdery mildew appears as white, powdery spots on leaves and stems.
To treat this fungal disease, remove the affected leaves, ensure proper air circulation, and apply a fungicide specifically designed for powdery mildew.
Be vigilant and act quickly to prevent the disease from spreading to other parts of the plant.
A popular home remedy is to spray plants with a baking soda solution.
Baking soda for powdery mildew
To make a spray that sticks to your plants and kills powdery mildew, mix 1 tablespoon each of baking soda, ultra-fine horticultural oil and chemical-free, non-detergent dishwashing liquid per 1 gallon of water. The soap helps the solution stick to the leaves. https://www.weekand.com/home-garden/article/use-baking-soda-treatment-powdery-mildew-lemon-trees-18057687.php
Norfolk Pine Care Outdoors
 Seeds, Green")
Are you considering giving your Norfolk Island Pine some fresh air and sunshine outdoors? Great idea!
In this section, we’ll discuss how to care for your Norfolk Island Pine when it’s outside, soaking up the natural elements.
From choosing the right spot to ensuring it gets the right amount of water and nutrients, we’ve got you covered with essential tips and advice to keep your tree happy and healthy in the great outdoors.
So, let’s dive in and explore the world of outdoor Norfolk Island Pine care together!
Guidelines for Outdoor Care
Taking care of a Norfolk Island Pine outdoors requires attention to several factors that ensure the plant’s well-being.
Be mindful of its location, sunlight exposure, water needs, and potential changes in temperature.
USDA Hardiness Zones
Norfolk Island Pines thrive in USDA hardiness zones 10 and 11. If you live within these zones, your pine can enjoy a comfortable outdoor life year-round.
However, if your area experiences frost or temperatures below 35°F, it’s best to bring the plant indoors during the colder months.
Differences Between Indoor and Outdoor Care
While there are similarities in caring for Norfolk Island Pines both indoors and outdoors, there are key differences to consider.
Outdoor plants may require more frequent watering due to increased sun exposure and evaporation.
Additionally, outdoor plants may need more attention when it comes to pest control and protection from extreme weather conditions.
Norfolk Island Pine Outdoors Temperature
Caring for your Norfolk Island Pine outdoors comes with its own set of unique challenges and rewards.
In this section, we’ll discuss the importance of temperature and how it can influence your pine’s overall health and growth.
We’ll delve into the ideal temperature range for outdoor planting and share some helpful tips to protect your tree from harsh weather conditions.
Get ready to expand your knowledge and make the most of your Norfolk Island Pine’s outdoor life!
Ideal Outdoor Temperature Range
The Norfolk Island Pine thrives in an outdoor environment with a temperature range between 55 and 70 degrees Fahrenheit.
Within this range, the tree can maintain healthy growth and display its full beauty.
Adapting to Changing Temperatures
One of the challenges of keeping a Norfolk Island Pine outdoors is dealing with fluctuating temperatures. Here are some tips to help your tree adapt:
Gradual Acclimation: When transitioning your tree from indoors to outdoors, expose it to the new environment gradually.
This will help it adjust to temperature changes without undergoing stress.
Shelter from Extreme Weather: During extreme temperature fluctuations, it’s essential to protect your tree by moving it to a sheltered area or using coverings like frost blankets.
Monitoring: Regularly check the weather forecast and adjust your tree’s care accordingly. If a sudden cold spell or heatwave is expected, take precautions to protect your tree from potential damage.
Winter Care for Norfolk Island Pine
 Seeds, Green")
Caring for your Norfolk Island Pine during the winter months can be a bit different than the rest of the year, but with a little extra attention, your plant will continue to thrive.
In this section, we’ll discuss some of the best practices to keep your Norfolk Island Pine healthy and happy during the colder months, including adjusting your watering schedule, managing indoor humidity, and providing the right amount of light to ensure your pine remains a stunning addition to your home.
Adjusting Care Routines During Colder Months
During the winter months, your Norfolk Island Pine will require some changes to its care routine to accommodate the different conditions.
Here’s what you should keep in mind:
Watering: Reduce the frequency of watering, as the plant’s growth tends to slow down during this time.
Be sure to check the soil’s moisture before watering and avoid overwatering.
Fertilizing: Hold off on fertilizing your pine during winter, as it won’t need the extra nutrients during this period of slowed growth.
Temperature: Make sure your plant is not exposed to drafts or extreme temperature fluctuations, which can stress it and cause damage.
Ensuring the Plant’s Health During Winter
To keep your Norfolk Island Pine healthy throughout the winter, consider the following tips:
Adequate Lighting: Ensure your plant is still receiving ample bright, indirect light during the shorter winter days.
If natural light is limited, consider supplementing with a grow light.
Humidity Management: With indoor heating systems often reducing humidity levels, it’s important to maintain sufficient humidity around your plant.
You can use a humidifier, place a tray of water near the plant, or mist it regularly to help achieve this.
Inspecting for Pests and Diseases: Regularly check your Norfolk Island Pine for any signs of pests or diseases, as early detection and treatment will help maintain the plant’s overall health.
By following these guidelines and making necessary adjustments, your Norfolk Island Pine will continue to flourish even during the winter months.
Using Norfolk Island Pine as a Living Christmas Tree
Have you ever thought of adding a unique twist to your holiday decorations? Look no further!
In this section, we’ll discuss how the beautiful Norfolk Island Pine can double as a living Christmas tree, bringing a touch of green and an eco-friendly vibe to your festivities.
We’ll share tips on decorating your pine safely and maintaining its health throughout the holiday season.
So, let’s dive in and explore how you can create a magical, sustainable Christmas with your very own Norfolk Island Pine!
Decorating Tips and Considerations
It’s essential to decorate your Norfolk Island Pine with care, ensuring you don’t harm the plant in the process.
Opt for lightweight ornaments that won’t weigh down the branches and use gentle ribbon or twine to secure them.
Avoid using hot lights, as they can cause damage to the foliage.
Instead, choose LED lights that emit low heat and are energy-efficient.
Always keep an eye on the plant while it’s decorated, making sure it stays healthy and happy during the holiday season.
Post-Holiday Care for Your Plant
Once the festivities are over, it’s important to give your Norfolk Island Pine some extra attention to help it recover.
Gradually remove the decorations, being careful not to damage the branches.
Relocate your plant to a well-lit area, away from drafts or heat sources, and resume its regular care routine.
Ensure it receives adequate water, light, and humidity to help it bounce back and continue thriving throughout the rest of the year.
Safe Practices for Homes with Pets and Children
Taking care of a Norfolk Island Pine indoors brings joy to your living space, but it’s also important to consider the safety of your pets and children.
In this section, we’ll discuss some essential precautions to ensure your home remains a happy and secure environment for your loved ones.
We’ll share some helpful tips on how to position your plant, choose pet-friendly alternatives, and educate your little ones about the importance of respecting and caring for our green companions.
Potential Risks Associated with Norfolk Island Pine
Toxicity concerns for pets and children: Although Norfolk Island Pine is not considered highly toxic, ingestion of its needles, bark, or sap may cause mild irritation or discomfort for pets and young children.
Be aware of these potential issues and supervise pets and children around the plant.
Physical hazards, such as falling branches: As the plant grows taller, there is a possibility that its branches or the tree itself might become unstable and fall.
Regularly check the branches for stability and ensure the plant is well-supported to prevent any accidents. Use a heavy pot to prevent tipping.
Tips for Keeping Your Home Safe for Pets and Children
Positioning the plant in a secure, out-of-reach location: Place your Norfolk Island Pine in an area where pets and children cannot easily access it. This could include a room that is off-limits to pets, or using a tall plant stand to keep it out of reach.
Regularly checking the plant’s stability: Ensure that your plant is securely positioned in its pot and that the pot itself is stable.
A well-balanced plant is less likely to tip over or lose branches, reducing potential hazards for pets and children.
Educating children on respecting and not touching the plant: Teach your children the importance of not touching or ingesting any part of the plant.
Explain that the needles can be sharp and that ingesting any part of the plant could cause discomfort.
Monitoring pet interactions with the plant: Keep an eye on your pets when they are near the Norfolk Island Pine.
If you notice your pet showing interest in the plant, consider moving the plant to a more secure location or using a pet deterrent spray to discourage them from approaching the plant.
By addressing these additional concerns, you will be able to create a safe and nurturing environment for their Norfolk Island Pine, as well as their pets and children.
FAQ
Q: Do Norfolk pines do well indoors?
A: Yes, Norfolk pines can thrive indoors when provided with proper care. They are well-suited for indoor environments, making them a popular choice for houseplants.
Q: How often do you water indoor Norfolk Pine?
A: Watering frequency for a Norfolk Pine depends on factors like pot size, humidity, and temperature.
Generally, you should water your Norfolk Pine when the top inch of the soil feels dry to the touch. This can vary from once a week to every two weeks, depending on the specific conditions.
Q: Should I mist my Norfolk Pine?
A: Misting your Norfolk Pine can be helpful in maintaining humidity levels, especially during dry seasons or when indoor heating is used.
Misting can be done once or twice a week, but it is not a substitute for proper watering.
Q: How much light does an indoor Norfolk Pine need?
A: Norfolk Pines do best in bright, indirect light. A south or east-facing window that receives plenty of natural light is ideal.
If necessary, supplement natural light with artificial light sources, like fluorescent or LED grow lights. Be sure to protect your tree from direct sunlight, as it can scorch the foliage.
Norfolk Island Pine Care Indoors Final Thoughts
As we wrap up our discussion on Norfolk Island Pine Care indoors, it’s clear that with the right attention and care, these lovely plants can be a stunning addition to your home.
We’ve covered essential topics like light requirements, watering, temperature, humidity, and pest control, among others.
By following these guidelines, you’ll be well on your way to nurturing a healthy and happy Norfolk Island Pine.
So, let’s embark on this exciting journey together and witness your indoor oasis flourish with the beauty of these majestic trees!
Importance of Proper Indoor Care for Norfolk Island Pine
Ensuring your Norfolk Island Pine’s well-being: Providing the right care is crucial for your indoor plant’s overall health and longevity.
By meeting its specific needs, you’ll be rewarded with a strong, vibrant tree that can bring joy and beauty to your home for years to come.
Tips for Maintaining a Healthy, Thriving Plant
Mastering the basics: From watering and lighting to soil and pest management, it’s essential to be well-versed in your Norfolk Island Pine’s requirements.
By following the guidelines we’ve discussed throughout this guide, you’ll learn how to care for a Norfolk Island Pine and create a comfortable environment for your plant, enabling it to grow and flourish to its full potential.
Remember, consistency and attention to detail are key factors in maintaining your plant’s health and happiness.
🌿 Indoor Houseplant Growing Guides
Want to fill your home with lush, vibrant greenery? These expert indoor houseplant guides will help you grow everything from exotic blooms to hardy foliage with ease!
- 🌿 Benefits of Keeping Indoor Houseplants (Pillar Guide)
- 🌱 Can You Grow Gladiolus Indoors? 11 Easy Gladioli Growth Tips
- 🍃 Pink Wandering Jew: Easy Nanouk Tradescantia Care
- 🌾 Tī Plant Care Indoors: 7 Proven Tips To Transform Your Space
- 🪴 Rubber Plant Care Indoors: 11 Best Care Tips For Beginners
- 🍀 Ficus Benjamina Indoors: 6 Easy Growth Tips For Beginners
- 🌼 How To Care For Peace Lily Indoors: 13 Easy Care Growth Tips
- 🌹 Bubble Gum Plant Care: 11 Tips And Tricks For Beginners
- 🌺 Hibiscus Plant Care Indoors: 7 Growth Tips For Beginners
- 🍂 Growing Jacob’s Ladder Indoors: Comprehensive Guide
- 🌷 Purple Shamrock Plant Care: 13 Tips And Tricks For Beginners
- 🌿 Creeping Jenny In Pots: 13 Lysimachia nummularia Growth Tips
- 🏡 Vertical Gardening Ideas: Best Small Space Garden Ideas
- 🪴 Chinese Money Plant Care Indoors: 7 Easy Growth Tips
- 🌳 9 Triangle Ficus Care Secrets for a Lush, Healthy Plant
- 🍌 Ice Cream Banana Tree Care: 15 Tip Complete Growth Guide
- 🌱 How to Make a Nerve Plant Thrive: 10 Tips and Tricks
- 🌸 African Violet Care Indoors: 11 Easy Care Tips For Beginners
- 🌺 Alternanthera Party Time Care: 7 Easy Growth Hacks
- 🌼 Geranium Care In Pots: 9 Geranium Growth Tips For Beginners
- 🌿 Purple Velvet Plant Care: 7 Easy Growth Tips And Tricks
- See all articles in our Indoor Houseplants category

 Steve S. is the creator of