This post contains affiliate links. If you buy something from one of our links we may earn a commission. Thanks
Bubble bucket hydroponics can supercharge the growth of your vegetables. It is easy and cheap to set up too. But what is a bubble bucket you ask?
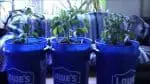
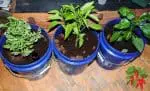
Bubble bucket hydroponics is a simplified form of DWC (deep water culture) All you need is a 5 gallon bucket a net pot and an air pump to set it up. It works best with large plants like tomatoes. The roots are suspended from a net pot into a bucket of water with airstones in it. Water is not recirculated between buckets like in DWC.
How Does Bubble Bucket Hydroponics Work?
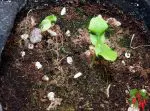
Bubble bucket hydroponics works by suspending roots in a nutrient solution. There is no soil in this system. Plants are started in an inert medium like rockwool or root plugs.
Here is some general information on deep water culture https://en.wikipedia.org/wiki/Deep_water_culture
Once they have some roots showing they are placed in a net pot and it is filled in around the plant with hydroton or perlite.
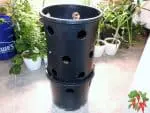
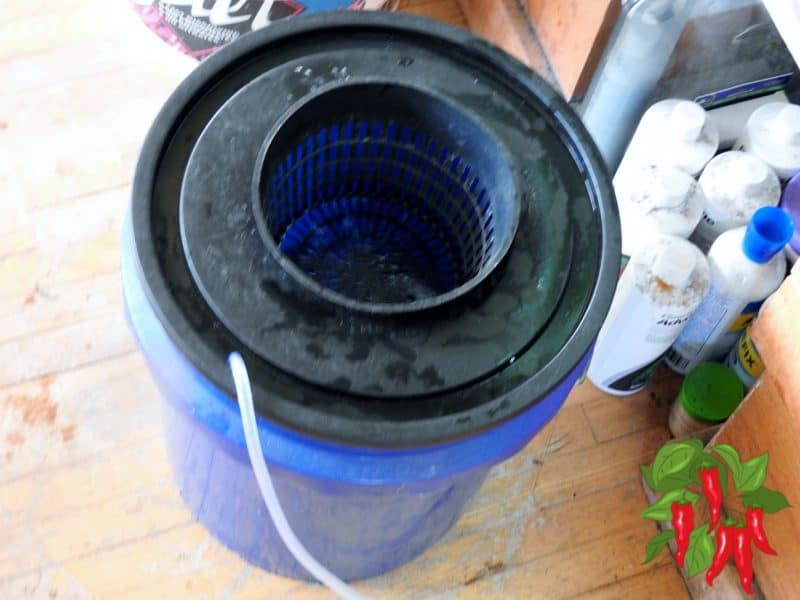
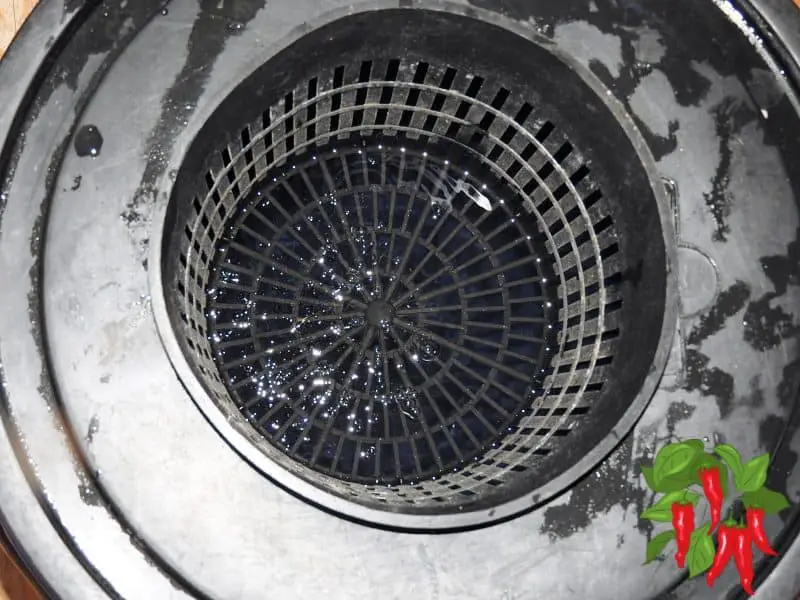
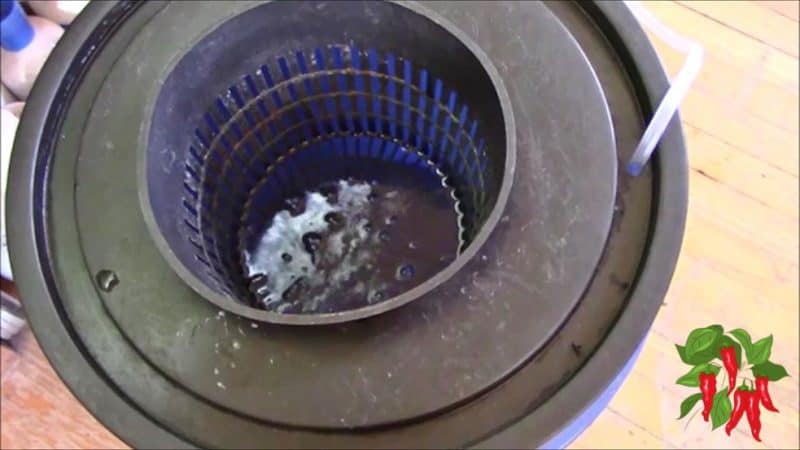
The bubble bucket is usually a 5 gallon bucket but it can be larger or smaller. The lid has a hole cut in it that holds the filled net pot.
When starting a bubble bucket the water level should be even with or slightly below the bottom of the net pot. It is allowed to drop several inches so the plant develops several inches of air roots. Once that point is reached the level is maintained.
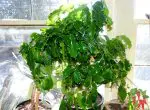
The growth rate in bubble bucket hydroponics is very fast. It is faster than any other growth method and even rivals aeroponics. Plants grown this way will mature faster than soil grown plants. Usually, harvests will be 1-2 weeks earlier and yield will be much higher too.
This is because everything the plant needs is in the nutrient solution and the plant does not need to spend energy searching through the soil for nutrients. This system needs to use hydroponic nutrients which are readily available for plant uptake.
Do not be tempted to use organic nutrients in your bubble bucket because they are not as available and may cause unwanted bacterial growth.
DWC Vs Bubble Bucket Hydroponic System
Bubble buckets are a simple form of DWC. Most DWC systems use multiple buckets and use an external reservoir.
They usually recirculate nutrients with a pump and this type of system is called RDWC with the R standing for recirculating. They work very well but are not the best choice if you are growing vegetables in an apartment.
The reason is that they have many connection points to drain and return the water. So they are prone to leaking. No one wants to find a puddle in their apartment. They also need to be broken down and cleaned after each grow which is labor intensive and messy.
By contrast, all that is needed for bubble buckets is to scrub them out which is much simpler to do. There are also no places where a bubble bucket can leak which is very important for us,
Another advantage of bubble buckets over DWC is that they are separate units. In a DWC system, water is circulated through the reservoir to each bucket and then back again. If a plant becomes sick it can spread to all the plants in the system.
How Do You Make A Bubble Bucket With Hydroponics?
Building a bubble bucket is a very simple and inexpensive DIY project as you can see from the video above.
Bubble Bucket Materials List
- You will need a 5 gallon bucket and lid preferably dark in color.
- You need a 6 inch net pot.
- A small air pump.
- Some hydroton or pebbles.
- A plant started in a rockwool cube or sponge plug.
- Water and hydroponic nutrients
Building Your Bubble Bucket Step By Step
Step 1 The first step is to find or buy a 5 gallon bucket. It should be black or dark in color. If it isn’t paint it black or wrap it in tin foil or black plastic. We don’t want any light to get inside the bucket.
Step 2 You need a 6 inch net pot. If you don’t have one you can drill holes in a similar sized pot. You can also buy a lid with a built in net pot and they come with different sized pots. It does not need to be over 6 inches.
Step 3 Turn your pot upside down. Trace around the outside. You don’t want to cut along this line or your net pot will fall through. Instead, try to trace the 2nd line about 1/8 to 1/4 inch inside it.
Use a razor knife to cut it out. You can smooth it out with a deburring tool if needed. Make sure your pot fits in the hole or skip all this by buying a bucket lid with a 6 inch net pot built in.
Step 4 Drill a 1/4 inch hole near the edge of the lid.
Step 5 Feed the airline tubing through the hole and attach your airstone to it. Plug in the pump and make sure you have bubbles.
Step 6 Put your net pot into the lid and fill your bucket with water up to the bottom of your net pot.
Step 7 Put your started plant into the net pot and backfill all around it with hydroton or whatever inert media you are using.
Bubble Bucket Grow Guide A Few Bubble Bucket Tips
You will fill your bucket with a water and nutrient mix up to the bottom of your net pot. You want to add nutrients to the water. You only want to use hydroponic nutrients. You don’t want any organics in the reservoir because they can cause unwanted bacterial growth.
Once your bubble bucket is set up you will want to let the water level drop naturally until it is a few inches below the net pot. These roots above the waterline will become air roots helping to supply oxygen and the lower water roots will provide nutrients.
Watch Your Water Temperature
Try to maintain a constant water level in your bucket. It is best to keep the reservoir cool. Water holds more oxygen at lower temperatures. 68 degrees is considered the ideal temperature.
You can go a bit lower but temperatures above 72 are problematic. You can add ice cubes if your reservoir starts getting warm. Commercial growers use chillers to maintain temperature but they are expensive and not practical for a small vegetable grower.
All hydroponic systems are subject to Pythium root rot when water temperatures exceed 72 degrees. Adding ice cubes works temporarily but using calcium hypochlorite is a much better solution to the problem. It will help maintain a sterile reservoir.
Keeping Your Reservoir Healthy In Warmer Temperatures
You can use Pool Shock which is calcium hypochlorite used in swimming pools to keep bad bacteria away. Do not use regular bleach it’s not the same.
Add 28 grams of calcium hypochlorite 60-65% in a gallon of water. This is a stock solution that yo7u will use at 1 ml per gallon. You will add it every 3 days. This will keep bad things from growing in your reservoir.
Feeding Plants In Bubble Bucket Hydroponics
It is important to use the right nutrients in bubble buckets. You don’t want to use any organic nutrients for 2 reasons.
First, they are not readily available to your plants which will slow growth down. Second, they promote the growth of bacteria which can cause problems and possibly even kill your plants.
Because your plant’s roots are in water and are being fed constantly you need to be careful not to overfeed. Whatever nutrient brand you use you should start at half what the manufacturer recommends.
Ideally, you should invest in a TDS meter and A pH meter so you can monitor your nutrient levels. Without them, you are just guessing.
I aim for about 300 ppms for small plants like seedlings. I would go about 600 ppms for medium size plants and about 800 ppms for fruiting plants.
Watch your plants. They will tell you if they are getting what they need. With nutrients, less is usually more.
Want An Easier Hydroponic System?
An even simpler system is the Hempy Bucket which is very similar but does not use airstones. What Is A Hempy Bucket? [Best Easy Hydro System For Beginners] (indoorvegetablegrower.com)
Another simple way to grow is the Kratky method which is a type of DWC that does not need airstones. Kratky Lettuce Easily Grow Lettuce With A Kratky Method Hydroponic System DIY (indoorvegetablegrower.com)