This post contains affiliate links. If you buy something from one of our links we may earn a commission. Thanks
Discover the benefits of composting for indoor gardens. Learn how to reduce waste, enrich your plants, and create a sustainable indoor oasis with our simple guide.
Composting for Indoor Gardens
Key Takeaways:
- Composting for indoor gardens is an eco-friendly practice that turns organic waste into valuable compost for houseplants.
- It reduces landfill waste, enriches soil, and promotes healthier plant growth.
- With simple steps like using a countertop bin or worm composter, you can easily start composting indoors and contribute to a greener planet.
Composting for indoor gardens is a fantastic way to bring sustainability into your home.
By recycling kitchen scraps and plant trimmings, you can create nutrient-rich soil that boosts the health of your indoor plants.
Join us as we explore the ins and outs of indoor composting and how it can transform your green space.
Composting for Indoor Gardens Introduction
Composting for indoor gardens is a sustainable practice that turns organic waste into nutrient-rich soil.
It’s a simple way to reduce household waste and enhance the health of indoor plants.
By composting kitchen scraps and plant trimmings, you can create a natural fertilizer that nourishes your garden and helps conserve resources.
This guide will explore the basics of indoor composting, its benefits, and how you can get started in your own home.
Understanding Indoor Composting
Indoor composting is a process of breaking down organic waste, like food scraps and plant trimmings, into nutrient-rich soil within the confines of your home.
Unlike outdoor composting, which requires a larger space and is subject to outdoor conditions, indoor composting is designed for smaller spaces and controlled environments.
Advantages of Indoor Composting:
- Waste Reduction: Indoor composting helps reduce household waste by recycling organic materials that would otherwise end up in landfills.
- Nutrient-Rich Soil: The compost produced is rich in nutrients, making it an excellent natural fertilizer for your indoor plants.
- Convenience: Indoor composting systems are compact and can be maintained easily, making them ideal for urban dwellers or those with limited outdoor space.
- Year-Round Composting: Unlike outdoor composting, which can be affected by weather conditions, indoor composting can be done throughout the year.
By understanding the basics of indoor composting and its benefits, you can start turning your organic waste into valuable resources for your indoor garden.
Selecting the Right Composting Method
When it comes to indoor composting, there are two main methods to consider: vermicomposting and traditional composting. Each has its unique benefits and requirements.
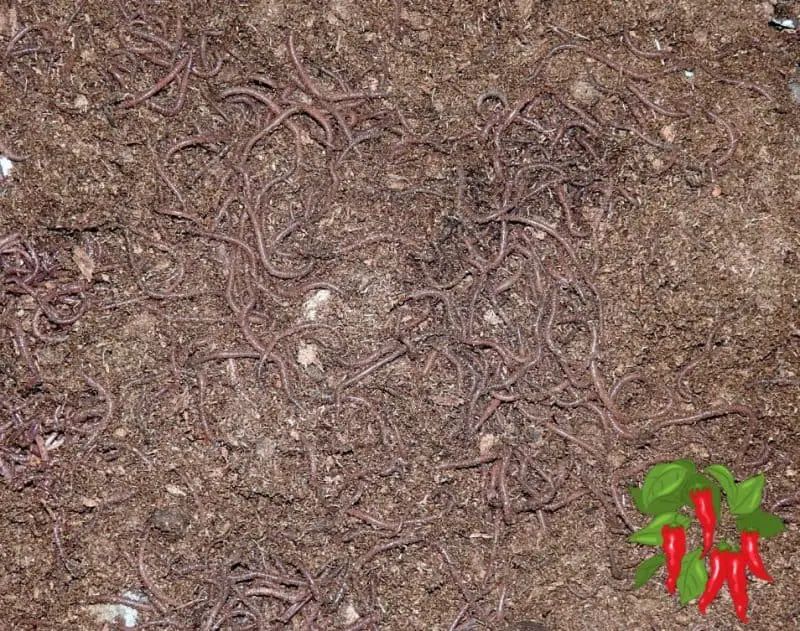
Vermicomposting:
- Method: Uses red worms (Eisenia fetida) to break down organic waste into nutrient-rich worm castings.
- Space: Ideal for small spaces as it requires a compact bin.
- Speed: Faster decomposition process compared to traditional composting.
- Odor: Generally odorless if maintained properly.
Traditional Composting:
- Method: Relies on aerobic bacteria and fungi to decompose organic matter.
- Space: Requires a bit more space than vermicomposting but can still be done indoors with a suitable bin.
- Speed: Slower decomposition process compared to vermicomposting.
- Odor: May produce a mild odor during the decomposition process.
Bokashi Composting: An Effective Indoor Composting Method
 Bag Of Dry Bokashi Bran – by SCD Probiotics")
Bokashi composting is a unique and efficient way to compost indoors, especially for those with limited space.
This method uses a special blend of microorganisms to ferment organic waste, including meat and dairy, which are typically not suitable for traditional composting.
Understanding Bokashi Composting
Bokashi composting involves layering kitchen scraps with a bran-based material inoculated with beneficial microbes.
The process is anaerobic, meaning it occurs without oxygen, and it’s done in a sealed container to prevent odors and pests.
Setting Up a Bokashi Bin
To start Bokashi composting, you’ll need a Bokashi bin, which is usually a bucket with a tight-fitting lid and a spigot at the bottom to drain the liquid byproduct, known as Bokashi tea.
This nutrient-rich tea can be diluted and used as a fertilizer for plants.
The Fermentation Process
Once your bin is set up, add your kitchen scraps and sprinkle a layer of Bokashi bran on top.
Press down to remove air pockets and seal the bin. Continue this process until the bin is full, then let it sit for about two weeks to ferment.
Using Bokashi Compost
After the fermentation period, the contents of the bin can be buried in a garden or added to a traditional compost pile to complete the decomposition process.
The resulting compost is rich in nutrients and beneficial microbes, making it an excellent amendment for soil.
Choosing the Best Option:
- Consider the space available in your home. Vermicomposting is more compact and suitable for smaller spaces.
- Think about the speed of decomposition you prefer. Vermicomposting provides quicker results.
- Assess your comfort level with maintaining a worm bin versus a traditional compost bin.
By understanding the differences between these methods, you can choose the best indoor composting option that fits your space, lifestyle, and gardening needs.
Setting Up Your Indoor Composting System
Setting up an indoor composting system is straightforward. Here are step-by-step instructions for three popular types of systems: a worm bin, a composter in a tote, and a countertop composter.
Worm Bin:
- Choose a Container: Select a dark, opaque bin about 12-18 inches deep. Worm bins can be purchased or made from plastic containers.
- Bedding: Add bedding material like shredded newspaper, cardboard, or coconut coir to the bottom of the bin.
- Add Worms: Introduce red wigglers (Eisenia fetida) to the bin. You’ll need about 1 pound of worms for every square foot of surface area.
- Feeding: Start by adding small amounts of kitchen scraps to the bin. Avoid overfeeding and foods like meat and dairy.
- Maintenance: Keep the bedding moist and turn it occasionally to provide aeration.
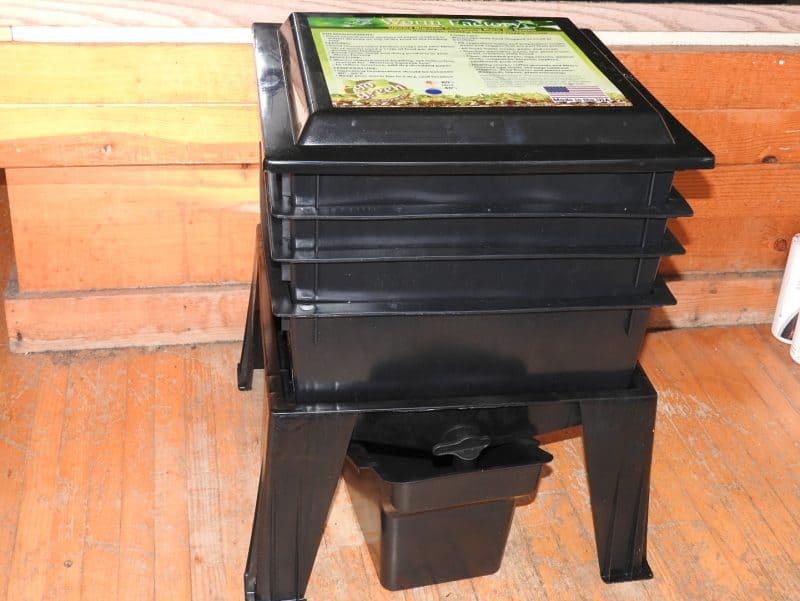
This is my Worm Factory 360 shown above and it works great. It is compact less than 2 feet square so it fits easily in my small apartment. It is totally odorless too!
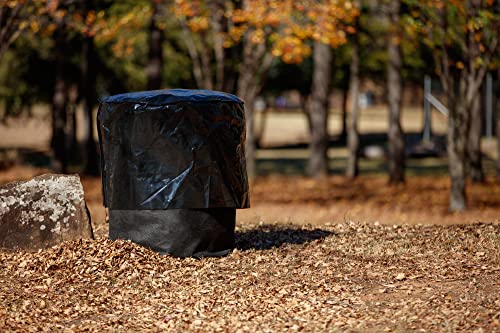
Composter in a Tote:
Here is a video that explains how to compost in a tote.
- Select a Tote: Choose a large plastic tote with a lid. Make sure it’s clean and has no chemicals.
- Drill Holes: Drill small holes in the bottom and sides of the tote for aeration and drainage.
- Add Bedding: Fill the bottom with a layer of bedding material such as shredded paper or straw.
- Add Scraps: Place your kitchen scraps on top of the bedding. Cover them with another layer of bedding.
- Location: Place the tote in a shaded area, away from direct sunlight.
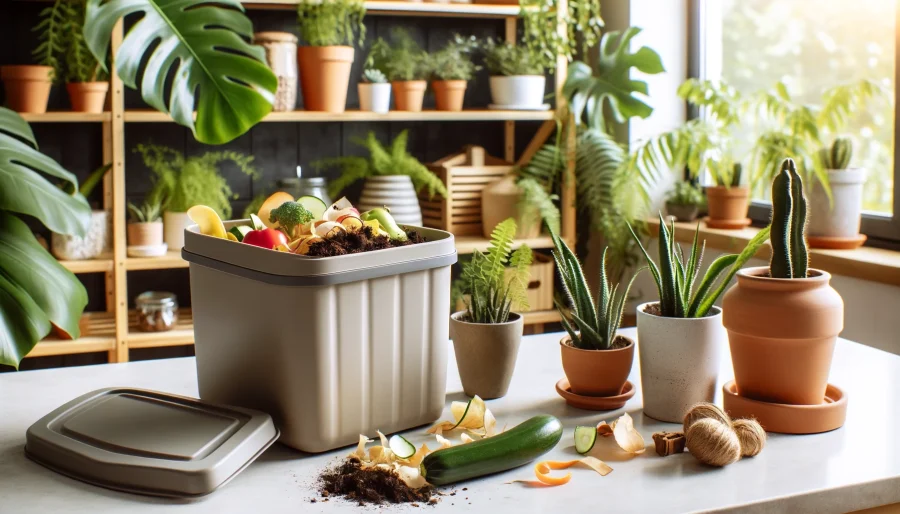
Countertop Composter:
")
- Choose a Composter: Select a small compost bin designed for countertop use. Look for one with a charcoal filter to control odors.
- Add Scraps: Start adding your kitchen scraps to the bin. It’s best to chop them into smaller pieces for faster decomposition.
- Empty Regularly: Depending on the size, you’ll need to empty your countertop composter into a larger bin or outdoor compost pile regularly.
For each system, it’s important to maintain a balance between green (nitrogen-rich) and brown (carbon-rich) materials to ensure proper decomposition and minimize odors.
This is not neccessary for worm composters though.
Lomi Composter – Waste Food Digester

The Lomi Composter is a waste food digester designed to reduce your organic kitchen waste by 80%. It is basically an advanced countertop composter.
It has three modes: Eco-Express, Lomi-Approved, and Grow. The Grow mode is particularly interesting for gardeners as it transforms food waste into nutrient-rich plant food for organic gardens.
The setup is simple, and the activated carbon filters effectively absorb smells.
Lomi can compost a variety of materials, including meat and dairy, and the end result is a dry, fibrous material that can be used as compost.
It’s an eco-friendly option that not only reduces food waste but also produces nutrient-rich fertilizer for your garden. However, it’s important to note that it’s a bit pricey when compared to alternatives.
What to Compost and What to Avoid
When it comes to indoor composting, it’s important to know what materials are suitable for composting and which ones to avoid.
Materials to Compost:
- Fruit and Vegetable Scraps: Apple cores, banana peels, carrot tops, etc.
- Coffee Grounds and Tea Bags: Rich in nitrogen, they’re great for composting.
- Eggshells: Crushed eggshells add calcium to the compost.
- Plant Trimmings: Dead leaves, flowers, and small plant clippings.
Materials to Avoid:
- Meat and Dairy Products: These can create odors and attract pests.
- Oily Foods: Grease and oil can disrupt the composting process.
- Diseased Plants: Avoid composting plants with diseases or pests.
- Citrus Peels: In large quantities, they can be too acidic for worms.
By following these guidelines, you can create a healthy and odor-free compost for your indoor garden.
Maintaining Your Indoor Compost
Proper maintenance is key to a successful indoor composting system. Here are some tips to keep your compost healthy and productive:
Moisture Levels:
- Compost should be moist but not soggy. Aim for the consistency of a wrung-out sponge.
- If the compost is too dry, add water or moist materials like fruit scraps. If it’s too wet, add dry materials like shredded paper.
Aeration:
- Regularly turn or mix the compost to introduce air and prevent odors.
- Aerating helps speed up the decomposition process and ensures an even breakdown of materials.
Temperature Control:
- Ideal temperatures for indoor composting range from 55°F to 77°F (13°C to 25°C).
- Keep your compost bin away from extreme heat or cold to maintain a consistent temperature.
Monitoring for Pests and Odors:
- If you notice pests or unpleasant smells, adjust your composting practices.
- Add more brown materials to reduce moisture or cover food scraps with a layer of soil or paper.
Harvesting Compost:
- Once the compost is dark, crumbly, and has an earthy smell, it’s ready to use.
- Harvest the compost by removing it from the bin and using it to enrich your indoor plants or garden.
Harvesting Worm Castings and Separating Worms
Harvesting worm castings, also known as vermicompost, is an important step in maintaining a healthy worm bin and providing your plants with nutrient-rich fertilizer.
Why Use a Composter with Trays:

- A worm composter with trays, such as the Worm Factory 360, makes harvesting castings easier.
- As worms finish composting in one tray, they move up to the next, leaving behind their castings.
- This separation allows for easy collection of castings without disturbing the worms.
Harvesting Process:
Harvesting in a tray system is relatively easy because the worms have already left the tray and moved up.
If you use a tote the process is harder. You will need to spread the contents out and remove the worms by sifting the compost.
You also can create shallow piles and to avoid the light the worms will move to the bottom.
Here is how to harvest worm castings from a tray system:
- Wait for the Worms to Move Up: Once the bottom tray is full and the worms have moved to the upper trays, it’s time to harvest.
- Remove the Tray: Carefully lift the tray with the finished compost.
- Collect the Castings: Gently sift through the compost to separate any remaining worms and return them to the bin.
- Use the Castings: Worm castings can be used as a potent fertilizer for your indoor and outdoor plants.
Benefits of Worm Castings:
- They are rich in nutrients and beneficial microorganisms.
- They improve soil structure and water retention.
- They are an eco-friendly alternative to chemical fertilizers.
By using a tray-based worm composter and following these steps, you can efficiently harvest worm castings and continue to provide your plants with a natural and sustainable source of nutrients.
By following these maintenance tips, you can ensure a thriving indoor composting system that benefits both your plants and the environment.
Using Your Indoor Compost
Once your indoor compost is ready, it’s time to put it to good use in your houseplants, balcony gardens, or other indoor gardening projects.
For Houseplants:
- Top Dressing: Sprinkle a thin layer of compost on top of the soil in your houseplant pots. This will slowly release nutrients into the soil.
- Repotting: When repotting plants, mix compost with your potting soil to provide a nutrient boost.
- Tea: Make compost tea by steeping compost in water for a few days, then use the liquid to water your plants for a quick nutrient infusion.
For Balcony Gardens:
- Soil Amendment: Mix compost into the soil of your balcony garden containers to improve soil structure and fertility.
- Mulching: Use compost as mulch on top of the soil to retain moisture and suppress weeds.
- Water your plants with compost tea.
Other Indoor Gardening Projects:
- Seed Starting: Use a mixture of compost and seed starting mix to give your seeds a healthy start.
- Hydroponics: Some hydroponic systems can use well strained compost tea as a nutrient solution for growing plants without soil.
Using compost in your indoor gardening projects not only provides your plants with essential nutrients but also contributes to a more sustainable and eco-friendly gardening practice.
Troubleshooting Common Issues
Indoor composting is generally straightforward, but you may encounter a few common issues.
Here are some solutions to keep your compost healthy and odor-free:
Odors:
- Cause: Usually a result of too much moisture or not enough air circulation.
- Solution: Add more brown materials (like shredded paper or dried leaves) to balance moisture levels, and turn the compost regularly to aerate it.
Pests:
- Cause: Fruit flies and other pests are attracted to exposed food scraps.
- Solution: Bury food scraps under a layer of brown materials, and ensure your compost bin has a tight-fitting lid.
Slow Decomposition:
- Cause: Lack of moisture, air, or a balance of materials.
- Solution: Ensure your compost is moist (like a wrung-out sponge), turn it regularly, and maintain a balance of green and brown materials.
Mold:
- Cause: A natural part of the composting process, but excessive mold may indicate too much moisture.
- Solution: Increase air circulation by turning the compost more frequently and add more brown materials to absorb excess moisture.
By addressing these common issues promptly, you can maintain a healthy and efficient indoor composting system.
Composting for Indoor Gardens: FAQs
Composting indoors can be a simple and effective way to reduce waste and create nutrient-rich soil for your plants.
Here are some frequently asked questions to help you get started with indoor composting.
Q: What can you compost indoors?
A: You can compost green matter like vegetable waste, plants, and coffee grounds, as well as brown matter such as dead leaves, wood chips, and coffee filters.
Avoid composting cooked food, dairy products, or meat in your indoor composter as they can attract pests or produce odors.
Q: How do I control odors in my indoor compost bin?
A: To control odors, ensure that your compost bin is properly aerated and not too moist.
Add more brown matter (like shredded paper or dead leaves) to absorb excess moisture and balance the compost.
If you’re using a worm bin, avoid overfeeding the worms.
Regularly turn the compost to aerate it and prevent anaerobic conditions that can lead to bad smells.
Q: How often should I turn my indoor compost?
A: For aerobic composting, turn your compost once a week to ensure proper aeration and speed up the decomposition process.
In vermicomposting, the worms naturally aerate the compost as they move through it, so manual turning is not necessary.
Q: How long does it take for compost to be ready?
A: The time it takes for compost to be ready can vary depending on the method and conditions.
Aerobic composting typically takes two to four months, while vermicomposting can take three to four months.
The compost is ready when it looks like soil and has a pleasant, earthy smell.
Q: Can I compost indoors without worms?
A: Yes, you can compost indoors without worms using a small bin and aerobic composting methods.
This method relies on the presence of air and microorganisms to break down organic matter.
It’s important to balance green and brown materials and turn the compost regularly to ensure proper aeration and prevent odors.
Q: Can I compost meat and dairy products with Bokashi composting?
A: Yes, Bokashi composting is one of the few methods that allow you to compost meat and dairy products safely.
The fermentation process used in Bokashi composting breaks down these materials effectively without attracting pests or causing bad odors.
Q: How long does it take for Bokashi compost to be ready for use in the garden?
A: The Bokashi fermentation process typically takes about two weeks.
After that, the fermented material should be buried in the soil or added to a traditional compost pile, where it will take an additional few weeks to fully break down and become usable compost.
Composting for Indoor Gardens: Conclusion
The Benefits of Indoor Composting
Indoor composting is a simple and effective way to reduce waste and create nutrient-rich soil for your indoor garden.
By understanding the basics of composting, selecting the right method, and maintaining your compost system, you can turn kitchen scraps and plant trimmings into valuable compost.
Read more: Eco-Friendly Gardening
Learn more about organic fertilizers
Taking the First Step
Whether you choose vermicomposting, traditional composting, or another method, indoor composting is a step towards a more sustainable and eco-friendly lifestyle.
Start your own indoor composting system today and witness the benefits it brings to your plants and the environment.
Exploring Further
For more information on indoor composting, check out the resources mentioned in this post and explore additional guides and articles to enhance your composting journey.
Resources Section
For those interested in delving deeper into indoor composting, here are some valuable resources, articles, and guides that cover various aspects of the process.
Whether you’re a beginner or looking to expand your knowledge, these resources provide comprehensive information to help you successfully compost indoors.
Articles:
- Indoor Composting 101 (EPA): A detailed guide on how to create and maintain an indoor worm composting bin. Read more
- Vermicomposting: Composting with Worms (Oregon State University Extension Service): Provides information on using worms for composting, including setting up a worm bin and maintaining it. Read more
- Composting at Home (Penn State Extension): Provides a range of resources on composting at home, including indoor composting. Read more
- Composting for the Homeowner (University of Illinois Extension): Offers information on different composting methods and how to troubleshoot common composting problems. Read more
Books:
- Worms Eat My Garbage by Mary Appelhof: A classic book on vermicomposting that covers the basics of worm composting and how to set up and maintain a worm bin. Available on Amazon

- The Rodale Book of Composting by Grace Gershuny and Deborah L. Martin: Offers comprehensive information on various composting methods, including indoor composting. Available on Amazon
")
These resources can help you better understand indoor composting and guide you through the process of reducing waste and creating nutrient-rich soil for your plants.