This post contains affiliate links. If you buy something from one of our links we may earn a commission. Thanks
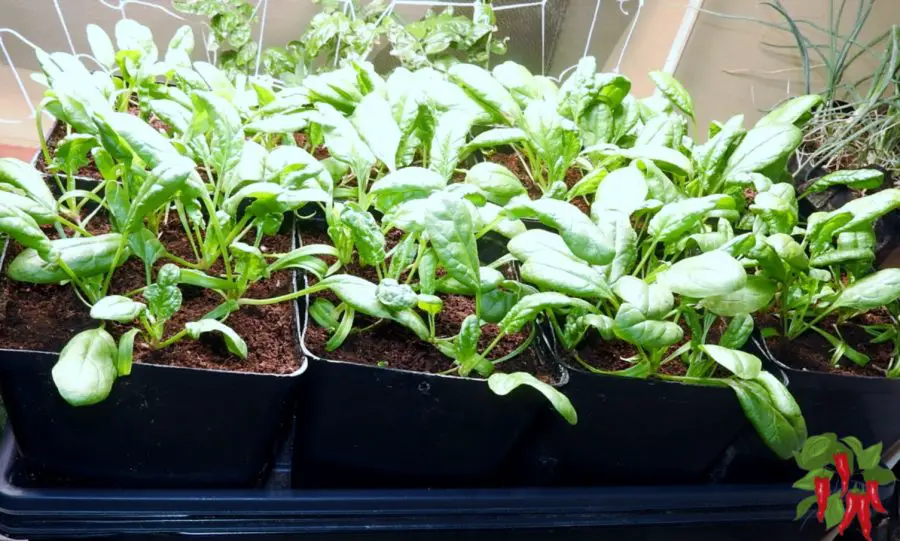 Growing baby greens in containers indoors is a fantastic way to enjoy fresh, healthy greens all year round, even when the weather outside is less than ideal.
Growing baby greens in containers indoors is a simple and rewarding process that allows you to have fresh, nutritious greens year-round.
The key steps include choosing a well-lit location, selecting appropriate containers, preparing the soil, sowing seeds, and providing adequate water, light, and nutrients.
Regularly monitor for pests and diseases, and harvest when the leaves are young and tender.
Whether you live in a small apartment or a big house, you can easily start your own indoor baby green garden with just a few simple steps with container gardens.
In this article, we’re going to walk you through 10 easy steps to help you get started.
We’ll cover everything from choosing the right location and selecting the right seeds, watering and fertilizing, pest and disease control, and harvesting.
By the end of this guide, you’ll be well on your way to growing your own delicious and nutritious baby greens indoors. So let’s get started!
10 Easy Steps For Growing Baby Greens In Containers
Are you tired of having to rely on grocery stores for greens that just don’t quite have that fresh taste you’re looking for?
Well, have you ever considered growing your own baby greens indoors?
It’s easier than you might think and the benefits are endless! Not only will you have a constant supply of fresh leafy greens, but you’ll also know exactly where your food is coming from and can be sure it’s free of any harmful chemicals.
And the best part is that you can do it all year round, no matter the weather outside. There is no growing season indoors!
In this guide, we’re going to take you through 10 easy steps to help you get started with growing your own indoor baby green garden.
We’ll cover everything from choosing the perfect location in your home to selecting the right seeds, providing the right amount of light and water, and even how to harvest and store your greens in a few short weeks.
By the end of this guide, you’ll have all the knowledge you need to start growing your own delicious and nutritious baby greens right in the comfort of your own home. So, let’s get growing!
Step 1: Choose a location
When it comes to choosing the perfect location for your indoor baby green garden, the most important thing to consider is light.
Baby greens need bright, indirect light to thrive, so a sunny windowsill or a spot with a grow light is a good choice.
However, be sure to avoid too much direct sunlight, as this can scorch the leaves and cause them to turn yellow.
Another important factor to consider is temperature. Baby greens are generally a cool-weather crop and prefer temperatures between 60-70°F.
Provide good airflow and ventilation for your plants but it’s best to avoid placing your garden near a drafty window or a heat source like a radiator.
If you have limited space indoors, don’t worry! You can still grow baby greens successfully.
You can use a sunny window, hanging planters, or even a hydroponic system. With a little creativity, you can make it work!
Step 2: Choose The Right Containers
You need to choose the right containers for your greens. If you are growing a single plant in each container a half-gallon pot that is about 4 or 5 inches square and also as deep will be more than enough.
If you want to grow multiple plants in a container you will want to use a larger wider pot.
I am not a big fan of clay pots. They are heavy and break and wick moisture from the soil.
Plastic pots are a better alternative, are reusable, cheap, and work well.
") But fabric pots are also a good choice for growing multiple baby green plants because they are wider.
But fabric pots are also a good choice for growing multiple baby green plants because they are wider. 
Baby greens don’t need deep soil to grow well because they are smaller plants. If you want you can grow leafy vegetables in garden beds using storage totes.
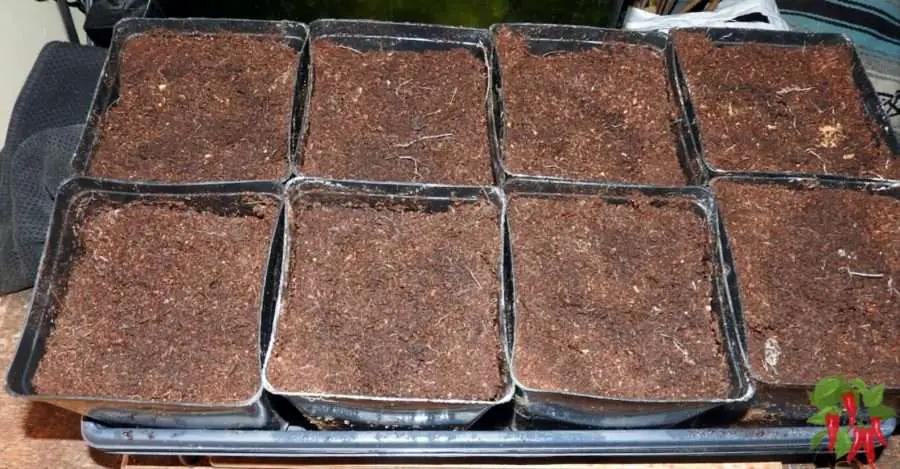
Step 3: Prepare the soil
When it comes to growing baby greens indoors, soil choice is important. Baby greens prefer well-draining, nutrient-rich soil.
A good quality potting mix or a mix of peat moss, vermiculite, and perlite is suitable for growing baby greens.
If you are using a container or a hydroponic system, you can also use a soilless medium such as coco coir or Rockwool.
I prefer using coco coir and I don’t add anything to it. I don’t use Rockwool because it is expensive, can’t be reused, and can hold too much water if you’re not careful using it.
To ensure that your soil is suitable for growing baby greens, you can amend it with compost or worm castings. This will add important nutrients like nitrogen, phosphorus, and potassium to the soil.
It can also be a good idea to mix in a slow-release fertilizer according to the package instructions.
Also, make sure to check the pH level of the soil, baby greens prefer slightly acidic soil with a pH of around 6.0.
Coco coir has a suitable pH and so do most good potting mixes but most fertilizers are acidic and can cause the pH to drop over time.
If the pH level is not in the right range, you can use a pH testing kit to check it. You can adjust it with a pH up or pH down solution.
By following these tips, you can make sure that your soil is perfect for growing healthy, delicious baby greens.
Decide if you are going to use a shallow container like a seed flat to start your seeds and transplant your seedlings or if you will sow seeds directly into your containers
Step 4: Select the right seeds
When it comes to selecting the right seeds for your indoor baby green garden, you have a wide variety of options to choose from.
Some popular varieties of baby greens include arugula, lettuce, mizuna, mustard, spinach, and chard.
Each variety has its own unique flavor and growing requirements, so it’s important to choose the right seeds for your location and growing conditions.
When choosing the right seeds, consider the maturity time of the greens you select, some greens take longer to mature than others.
Also, keep in mind the amount of light and temperature that are available in your growing area.
For example, arugula and mustard greens can tolerate more heat and less light than lettuce.
If you want to grow lettuce plants you will get a faster harvest from leaf lettuce than head lettuce. You will get a larger crop of baby salad greens from leaf lettuce too.
You can also consider the taste of the greens, if you are looking for a spicy taste, arugula is a great option, or if you prefer a mild taste, swiss chard and lettuce seeds is a great option.
Another important factor to consider is crop rotation, if you are reusing potting mix it’s good to grow different types of greens in it to reduce the risk of pests and diseases.
Oriental vegetables like bok choy are often overlooked as baby greens. They are fast-growing and taste really good with a sweet mild cabbage-like taste.
By following these tips, you can choose the right seeds for your indoor baby green garden and enjoy a bountiful harvest of fresh, delicious greens all year round.
Step 5: Sow the seeds
Sowing the seeds is an important step in starting your indoor baby green garden. The key is to pay attention to spacing and depth when planting your seeds.
When sowing the seeds, it’s best to follow the package instructions for spacing and depth as different seeds have different requirements.
Generally, baby greens seeds should be planted shallowly, about 1/8 inch deep, and spaced about an inch apart in flats for later transplanting.
If you are sowing seeds in individual containers for a single plant use a small pinch of seeds in the center and thin out to the strongest plant.
You can gently push them into the soil with your fingers but the easiest way is to cover them with a thin layer of soil.
It’s also important to keep the soil moist but not waterlogged, you can use a spray bottle to mist the soil with water or you can use a watering can with a fine nozzle.
Once the seeds are planted, it’s a good idea to use a plastic dome to create a mini greenhouse effect and to keep the soil moist. This will help the seeds germinate and grow successfully.
After the seeds have germinated, remove the plastic cover and place the container in a sunny location but avoiding direct sunlight. Keep the soil moist and wait for the greens to grow.
By following these tips, you can ensure that your seeds germinate and grow successfully, leading to a bountiful harvest of fresh baby greens.
Step 6: Watering and fertilizing
Watering and fertilizing are crucial steps in keeping your indoor baby green garden healthy and productive.
Baby greens prefer evenly moist soil, so it’s important to water regularly, keeping the soil consistently moist but not waterlogged.
A good way to check if the soil needs watering is to stick your finger into the soil, if the top inch of soil feels dry, it’s time to water.
You can use a watering can with a fine nozzle or a spray bottle to water the soil to avoid disturbing the seeds or seedlings.
When it comes to fertilizing, baby greens prefer slightly acidic soil with a pH of around 6.0.
You can use a slow-release fertilizer at planting time, or a liquid fertilizer every 2-3 weeks.
Be sure to follow the package instructions for the amount of fertilizer to use.
It’s also important to keep an eye on the pH level of the soil, using a pH testing kit, if the pH level is not in the right range, you can use a pH-adjusting solution.
By following these tips, you can ensure that your indoor baby green garden receives the right amount of water and nutrients, leading to healthy and productive plants.
Step 7: Lighting
Light is essential for the growth and development of baby greens. Baby greens need bright, indirect light to thrive, so it’s important to provide the right amount of light for indoor growing.
A sunny windowsill would be ideal. However, be sure to avoid too much direct sunlight on young seedlings, as this can scorch the leaves and cause them to turn yellow.
If you don’t have a sunny windowsill, you can use grow lights to provide the necessary light for your baby greens.
LED grow lights or fluorescent lights are good options for indoor growing. They mimic natural sunlight and provide the necessary light spectrum for plant growth.
An LED grow light is more efficient and will use less electricity.
It’s important to keep in mind that different types of greens have different lighting requirements, for example, lettuce and spinach require less light than arugula or mustard greens.
So, it’s best to check the specific lighting requirements of the greens you are growing.
By providing the right amount of light, you can ensure that your indoor baby green garden grows healthy and strong.
Step 8: Temperature and humidity
Temperature and humidity are important factors to consider when growing baby greens indoors.
Baby greens prefer soil temperatures between 60-70°F, so it’s best to avoid placing your garden near a drafty window or a heat source like a radiator.
In terms of humidity, baby greens prefer a moderate level of humidity, around 40-60%. If the humidity is too low, you can use a humidifier to increase the humidity level or you can mist the plants.
It’s rare but if the humidity is too high, you can use a dehumidifier to reduce the humidity level.
It’s also important to keep an eye on the temperature and humidity level, using a thermometer and hygrometer. This will help you to maintain the right conditions for indoor growing.
By maintaining the right temperature and humidity levels, you can ensure that your indoor baby green garden grows healthy and strong.
Step 9: Pest and disease control
Pest and disease control is an important aspect of indoor gardening, especially when growing baby greens.
Some common pests that affect baby greens include aphids, spider mites, and whiteflies.
Diseases that may affect baby greens include damping off, powdery mildew, and rust. These are often the result of overwatering or poor airflow.
To prevent pests and diseases, it’s important to practice good hygiene in your indoor garden. Keep the area clean, remove any dead leaves or debris, and avoid overcrowding your plants.
Another effective prevention method is crop rotation, this helps to break the life cycle of pests and diseases and it’s good to grow different types of greens in the same area.
If you notice any signs of pests or diseases, it’s important to take action immediately.
You can use insecticidal soap or neem oil to control pests and for diseases, you can use a fungicide according to the package instructions.
By following these tips, you can prevent and treat pest and disease issues in your indoor baby green garden, ensuring a healthy and productive harvest.
Step 10: Harvesting
Harvesting is the final and most rewarding step in growing baby greens indoors. The timing of harvest depends on the variety of greens you are growing and personal preference.
Some greens, such as arugula, can be harvested as soon as they are big enough to eat, while others like lettuce, can be harvested when the leaves are full-sized.
There are two different ways to harvest your baby greens. The first way involves harvesting mature plants all at once.
The second way is to only remove larger leaves. I think this is the best way to harvest.
When harvesting, it’s important to use a sharp pair of scissors or a knife to cut the leaves, cutting just above the soil level. With this method, most plants will not grow back.
It’s also important to harvest in the morning when the leaves are at their most flavorful and nutritious.
If you just remove the outer leaves your baby greens will produce for a longer time,
After harvesting, it’s important to preserve and store the greens properly to ensure they stay fresh and delicious.
You can store the greens in a plastic bag or container with a damp paper towel to keep the greens fresh.
Be sure to remove any damaged or yellowing leaves before storing them.
You can also preserve the greens by blanching and freezing them, this is a great option if you want to have fresh greens all year round.
By following these tips, you can ensure that your indoor baby green garden is productive and you can enjoy the fresh greens that you’ve grown.
Growing Baby Greens FAQs
You may have some questions about growing baby greens indoors, and that’s completely understandable.
It’s a process that involves several steps, from choosing the right location to harvesting your greens.
Below are some commonly asked questions and their answers to help you get started on your indoor gardening journey.
Q. What type of soil is best for growing baby greens indoors?
A. A well-draining, nutrient-rich soil is ideal for growing baby greens. You can use a quality potting mix or create your own blend of peat moss, vermiculite, and perlite.
Q. How much light do baby greens need?
A. Baby greens require bright, indirect light for optimal growth. A sunny windowsill or a spot with a grow light can provide the necessary light conditions.
Q. How often should I water my indoor baby greens?
A. Keep the soil consistently moist but not waterlogged. A good rule of thumb is to water when the top inch of soil feels dry to the touch.
Q. When is the best time to harvest baby greens?
A. The best time to harvest depends on the variety of greens you are growing. Generally, you can start harvesting when the leaves are young and tender, usually a few weeks after planting.
Final Thoughts
Congratulations! You have now learned the 10 easy steps for starting an indoor baby green garden.
To recap, these steps include choosing a location, preparing the soil, selecting the right seeds, sowing the seeds, providing the right amount of light, watering and fertilizing, maintaining the right temperature and humidity, controlling pests and diseases, harvesting, and preserving and storing your greens.
By following these steps, you can start your own indoor baby green garden and enjoy fresh, nutritious greens all year round.
Not only will you have a constant supply of healthy greens, but you’ll also know exactly where your food is coming from and can be sure it’s free of any harmful chemicals.
So, don’t wait any longer, start your own indoor baby green garden today and enjoy the taste and benefits of fresh greens grown in the comfort of your own home. Happy gardening!