This post contains affiliate links. If you buy something from one of our links we may earn a commission. Thanks
Would you like to know how to grow mustard microgreens? It’s actually very easy and can be done in just seven simple steps.
To grow Mustard Microgreens, start by selecting good-quality, organic seeds. Prepare a shallow container with well-draining soil, sprinkle the seeds evenly, and lightly press them into the soil.
Ensure they receive ample sunlight or use a grow light. Water lightly to keep the soil moist but not soggy.
In 7-14 days, when they reach 2-3 inches in height, harvest your mustard microgreens and enjoy them fresh in salads, sandwiches, or as garnishes.
We will walk you through each step so that you can successfully grow your own mustard microgreens at home.
We’ll also provide some tips on how to care for them and make sure they are healthy and thriving. So what are you waiting for? Let’s get started!
How To Grow Mustard Microgreens 7 Easy Steps
Just follow this step-by-step guide and you will be enjoying your own mustard microgreens in no time. It takes only 2 weeks from planting to harvest.
Step 1: Choose Good-Quality Seeds
The first step in growing mustard microgreens is to choose good-quality seeds. Look for organic, non-GMO seeds with high germination rates. You can purchase these online or at local gardening stores.
Start with choosing the right variety of mustard microgreens. You can use any type of regular mustard seeds, but some varieties are better than others.
Look for a variety that grows quickly and is known to be hearty and easy to manage. Some varieties to try are mizuna mustard, red garnet mustard, and oriental mustard seed.
Step 2: Prepare Your Containers
Next, you’ll need to prepare your containers for planting. You will need to choose a soil mix for your babies. You can use a potting mix but coconut coir will give better results and better germination rates.
You can use shallow trays, food containers, or flats. Make sure to fill them with a quality potting mix and allow the soil to settle before planting.
Make sure food containers are clean and don’t have any chemical residue on them if you are using recycled trays.
I like to use a 1020 growing tray for my microgreens. I add my growing medium to a tray with drainage holes to allow any excess water to drain off.
I actually like to bottom water my trays before seeding them. To do this I place my tray with the growing medium and drainage holes inside a solid second tray with about an inch of warm water in it.
I like to add warm, not hot water to my watering tray to raise my soil temperature before seeding.
Fill your container with the planting medium and level it off with a spoon or other flat-edged tool.
This will ensure that the seeds are evenly spread when they are planted.
Step 3: Plant The Seeds
Once you’ve chosen your seeds and prepared the container, it’s time to plant! Sprinkle the mustard seeds over the soil surface of the soil or potting mix, making sure they are close together.
Don’t soak your seeds before planting it makes it harder to sow them evenly. Some mucilaginous seed will become a gooey mess that is impossible to sow.
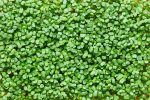
You want a full tray with good germination and growth. Cover the seeds with a light layer of your growing media or simply push them into the soil.
I don’t like to use the dome method. I feel it leads to damping off. Plants grow best with good air circulation.
I do place an empty tray on top of freshly sown seeds but I take it off as soon as they start to germinate.
If your growing area gets cold using a heat mat will work wonders for your germination rates.
Step 4: Watering and Fertilizing
Mustard microgreens don’t need much water or fertilizer during the growing process.
You want to bottom water your tray before you plant the seeds. This is the best way to water because seeds won’t get moved around or uncovered by top watering.
After that moisten the planting medium lightly using a fine mist spray bottle. But make sure that there isn’t too much water in the tray as this can cause damping off which is a phenomenon associated with seedlings being too wet.
Water with cool water or water at room temperature. Using cold water can shock your plants.
Mustard microgreens don’t need any fertilizer because the seed itself provides everything the young plant needs.
But if you want to grow them out into baby greens they should be fertilized lightly.
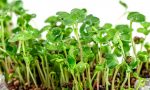
Step 5: Place in a Sunny Location
Mustard microgreens need to receive plenty of sunlight during the day if they are to thrive.
Either place them on a sunny windowsill so they can get at least six hours of direct sunlight per day or set up a grow light system on a timer and give them 12-16 hours of light each day. . Keep them in a fairly warm spot too.
If you live in the northern United States and want to grow microgreens during the winter months you will need to use supplemental lighting.
There just is not enough natural light at this time of year. Here is a good LED grow light for growing microgreens.

Step 6: Harvest Time For Your Mustard Microgreens
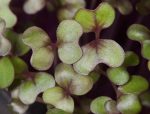
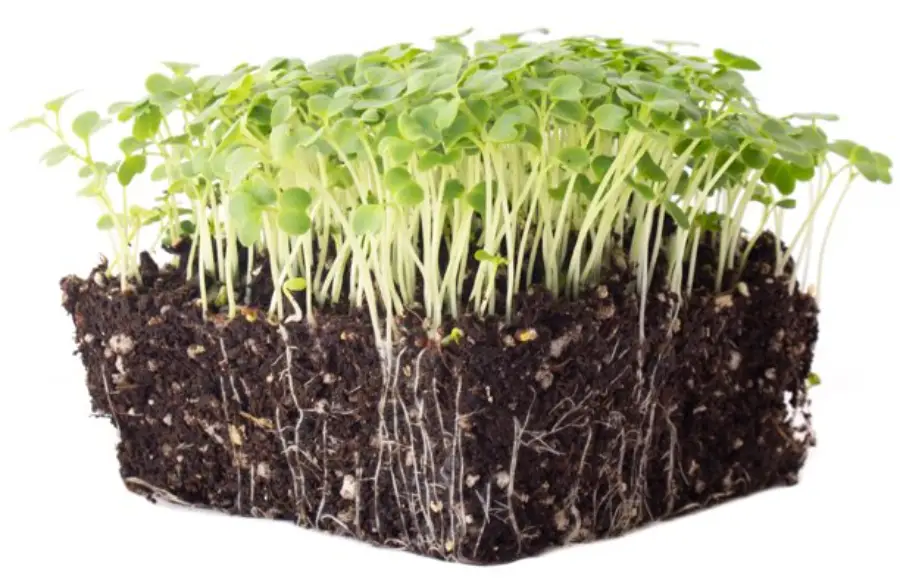
When to harvest mustard microgreens? When your mustard microgreens have reached 2-3 inches in height, it’s time to harvest!
Use scissors or a sharp knife to snip it off when the first true leaves start to appear. Mustard microgreens have a pretty, short harvest window.
Typically you can harvest mustard microgreens as early as 5 days but they can go 14 days without losing any quality. Baby greens can take about 2 more weeks to be ready.
If you want to extend your harvest you can let them get bigger and remove individual leaves instead. If you want to do this you will not need to plant as heavily. You will be growing baby greens at some point and not microgreens.
I like to seed heavily and then thin the plants out. The thinings will give you microgreens and in a week or two, you can start harvesting baby greens.
Step 7: Enjoy Eating Your Mustard Microgreens
Want to know how to eat mustard microgreens? Once harvested, your mustard microgreens are ready to eat. Enjoy them in salads, sandwiches, or as a garnish for other dishes. They can also be stored in the fridge for up to a week.
These seven steps will help you to easily and successfully grow your own mustard microgreens at home. With a little patience and care, you’ll soon have an ongoing supply of nutritious greens to enjoy all winter long! Happy growing!
Caring for Mustard Microgreens
Mustard microgreens are quite resilient, but you still need to provide them with the right conditions.
Here are some tips you can follow to ensure that they remain healthy and thrive:
• The first thing is to make sure to water them regularly so the soil or potting mix is lightly moist. Give them just enough water. Too much water can lead to damping off as mentioned previously. Don’t let the tray dry out completely either, as this could cause the leaves to wilt and die.
• Microgreens don’t need to be fertilized but if you want to grow them out as baby greens you will want to regularly fertilize your baby mustard greens with a diluted liquid fertilizer. This will help them to grow strong and healthy and grow new leaves.
• Finally, harvest the baby greens when they reach 4-6 inches in length as this is when they are at their most nutritious! Remove single leaves to extend harvest or you can snip them off at the soil line but they won’t grow back if you do that.
We hope that these steps have been helpful in teaching you how to grow mustard microgreens 7 easy steps for beginners. Growing your own mustard microgreens can be a great way to get fresh, nutrient-packed greens right from your home or garden. Enjoy the process and good luck!
Mustard Microgreens FAQs
Growing your own mustard microgreens can be a delightful and rewarding venture. As you embark on this green journey, you may encounter a variety of questions regarding the process, from the germination stage to the point of savory harvest.
Our Frequently Asked Questions (FAQs) section is curated to provide you with a well-rounded understanding and to address common inquiries that might sprout along your microgreen cultivation journey.
From understanding what mustard microgreens really are, to their nutritional benefits, and tips on how to cultivate them successfully indoors, we’ve got you covered. Dive into our FAQ section below to nurture your curiosity and ensure a bountiful microgreen garden.
Q. What Are Mustard Microgreens?
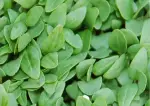
Mustard microgreens are small, edible leaves of the mustard plant. They are members of the brassica family which includes broccoli, cabbage, cauliflower, and many other popular vegetables.
They can be harvested in 5-14 days. They have an intense flavor and health benefits that make them a great addition to recipes.
Mustard microgreens are easy to grow at home and can be harvested in just a few weeks. This article provides seven easy steps for growing your own mustard microgreens from seed.
Q. What are mustard greens?
Disclaimer: I am not a physician and don’t play one on TV either. The material on this site is not a substitute for professional medical advice, diagnosis, or treatment. Always seek a physician’s advice before using any information you find on this website to treat or prevent any condition.
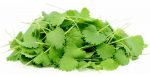
Mustard greens are dark green leafy vegetables that are rich in vitamins and minerals.
They contain high amounts of vitamins A, C, K, and folate as well as calcium, iron, magnesium, manganese, phosphorus, potassium, and zinc.
Mustard greens can be eaten fresh or cooked and provide a delicious flavor to salads or side dishes.
Additionally, they are known for their anti-inflammatory properties and may help reduce the risk of certain diseases like cancer.
Mustard is also a popular condiment made from ground mustard seeds, usually mixed with vinegar and other spices. You would need mature plants for this so I don’t recommend trying to make your own.
Q. How do you eat mustard microgreens?
Mustard microgreens can be eaten raw or cooked and make a great addition to salads, sandwiches, or other dishes.
Raw mustard microgreens have an intense spicy flavor while cooked mustard microgreens are milder.
To cook, simply sauté with a bit of oil and garlic or add to soups, stews, or stir-fries.
Mustard microgreens can also be dried and used as an herb in place of fresh herbs for added flavor. You can even add them to smoothies for extra nutrition!
You can also make mustard sprouts with a jar if you don’t want to grow them out in trays and soil.
Overall, mustard microgreens are easy to grow and require minimal effort. With their health benefits and unique flavor, these little greens are sure to be a hit in any kitchen.
Q. How do you store mustard greens?
Mustard greens should be stored in the refrigerator in a container or a plastic bag with holes and a paper towel inside to absorb excess moisture.
They will keep fresh for up to five days when stored properly. If you need to store them for longer, they can also be blanched and frozen for up to 6 months. When ready to use, simply defrost in the refrigerator overnight and enjoy.
Here is more info on how to store microgreens.
Q. How long do mustard greens take to grow?
Mustard microgreens usually take about 7-14 days from seed planting until harvest. The exact timeline will depend on the variety of mustard greens, temperature, light level, and moisture levels.
During this time, make sure to water regularly and keep an eye on their growth. Once your mustard microgreens have reached 2-3 inches in height, you’re ready to harvest them.
Q. How many types of mustard greens are there?
There are a number of different types of mustard greens available, including red mustard greens, green cabbage, tatsoi, mizuna, and more.
Each type of mustard green has its own unique flavor and texture. Experiment with a few different varieties to find the one that best suits your taste buds.
Final Thoughts
In conclusion, growing mustard microgreens at home is a great way to get fresh greens all winter long. With just seven easy steps, you’ll have an ongoing supply of nutritious and delicious greens in no time. So what are you waiting for? Get started on your own mustard microgreens today.
We hope that these steps have been helpful in teaching you how to grow mustard microgreens in 7 easy steps for beginners.
Growing your own mustard microgreens can be a great way to get fresh, nutrient-packed greens right from your home or garden. Enjoy the process and good luck!