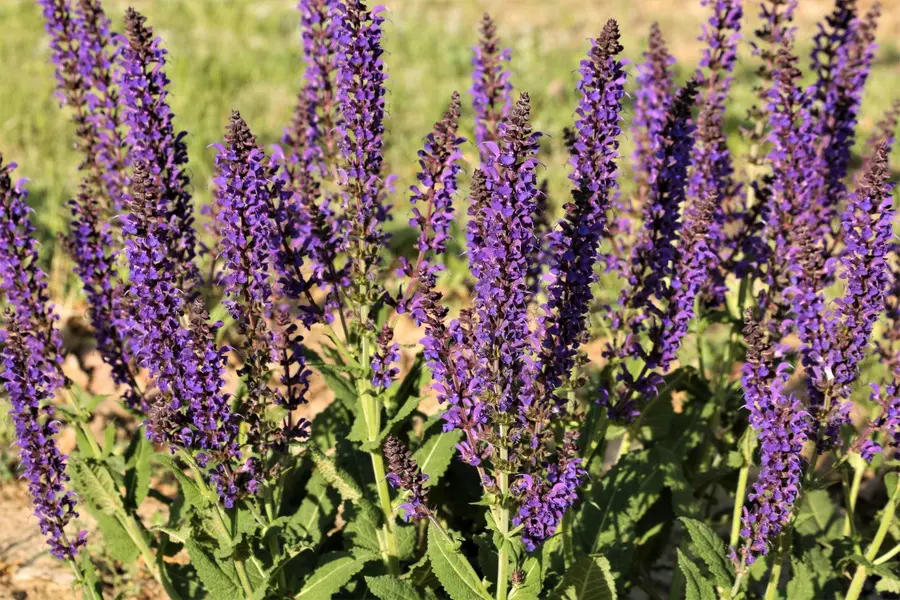
Growing Salvias in pots is an easy way to bring long-lasting color to a sunny patio, balcony, deck, or entryway. Their flower spikes come in shades of red, purple, blue, pink, and white, and many varieties are excellent plants for attracting bees, butterflies, and hummingbirds.
Containers also give you more control over drainage, growing mix, and placement. Choose a Salvia that fits your climate and container size, give it plenty of sun, and you can enjoy flowers through much of the growing season.
What You’ll Learn
- Which Salvia varieties work well in containers
- How large a pot your Salvia needs
- How much sunlight Salvias need for good flowering
- How to water and fertilize potted Salvias
- How to keep plants blooming with pruning and deadheading
- How to overwinter perennial and tender Salvias
- How to propagate Salvias from seeds, cuttings, and division
Quick Answer
Salvias grow very well in pots when you give them plenty of sunlight, good drainage, and enough room for their roots. Use a container with drainage holes and a fast-draining growing mix. Water when the upper layer begins to dry, feed lightly during active growth, and remove spent flowers to encourage additional blooms.
Growing Salvias in Pots at a Glance
| Growing Need | Potted Salvia Preference |
|---|---|
| Light | Full sun for best flowering; some varieties tolerate partial shade |
| Water | Water when the upper inch of growing mix begins to dry; don’t leave roots waterlogged |
| Growing Mix | Loose, well-draining mix; coco coir and perlite work well |
| Container | Large enough for the mature variety and equipped with drainage holes |
| Fertilizer | Feed lightly during active growth; avoid excessive fertilizer |
| Pruning | Deadhead spent flowers and trim as needed to encourage bushier growth |
| Bloom Season | Generally spring through fall, depending on species and climate |
| Winter Care | Depends on species; protect container roots from hard freezes and overwinter tender types where needed |
An Introduction To Growing Salvias In Pots
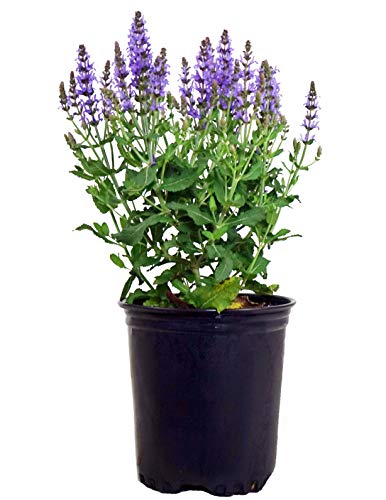
Welcome to your personal guide on Growing Salvias in Pots! Salvias, with their captivating colors and aromatic allure, can enliven any space, indoors or out.
This blog post is your trusty companion on this journey.
We’ll cover everything from choosing the right types of Salvias for your pots, understanding their needs for optimal growth, tackling common issues, and providing year-round care.
We’ve even compiled a handy FAQ section to address those burning questions you might have.
So, whether you’re a seasoned gardener or just starting out, there’s something here for everyone.
Let’s dive into the world of Salvias together!
A Whirlwind Tour of Salvias
Let’s kick things off with a brief overview of the stars of our show – Salvias!
These delightful members of the mint family are known for their eye-catching colors, ranging from fiery reds to calming blues, and their aromatic foliage.
With over 900 species to their name, Salvias offer a fascinating diversity that can leave any plant enthusiast spellbound.
The Magic of Growing Salvias in Pots
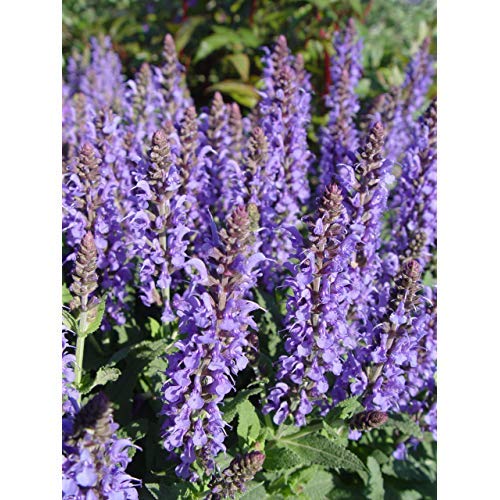
Now, let’s talk about why growing Salvias in pots is such a brilliant idea.
• Firstly, it allows you to bring their vibrant beauty to any space – your balcony, patio, or even your indoor area.
• Secondly, pots offer better control over soil conditions and moisture levels, ensuring your Salvias have the perfect environment to thrive.
• Plus, with pots, you can easily move your Salvias around to chase the sun or protect them from harsh weather conditions.
A Tale of Two Types: Perennial and Annual Salvias
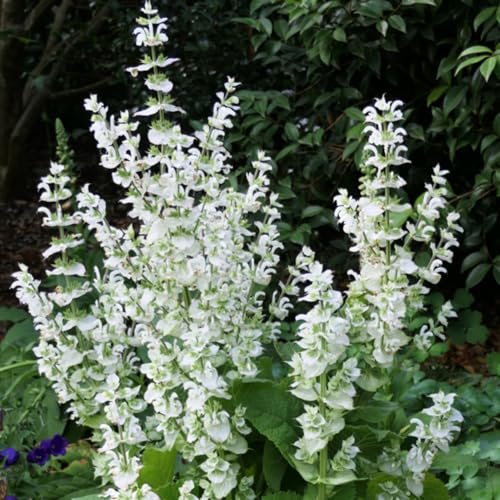
As we delve deeper into the world of Salvias, it’s important to distinguish between two main types: perennial and annual Salvias.
Perennial Salvias are hardy plants that return year after year, providing a constant source of beauty in your pot garden.
On the other hand, annual Salvias have a one-year life cycle but make up for their brevity with an explosion of vibrant blooms.
Both types have their unique charms, and choosing between them would depend on your personal preferences and gardening goals.
Stay tuned as we explore both types in more detail in the coming sections.
Choosing the Best Salvias for Pots
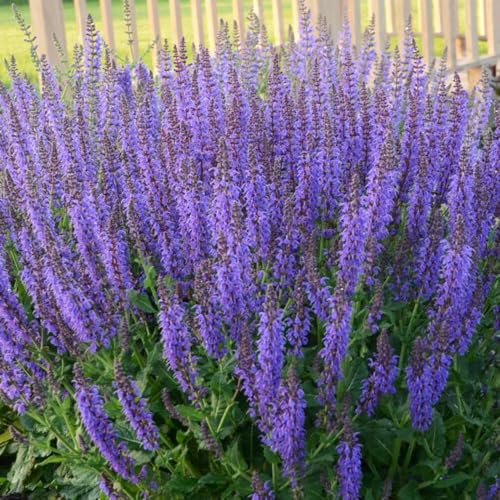
Ready to welcome Salvias into your gardening space but unsure where to start?
No worries, choosing the best Salvias for pots can be an exciting adventure rather than a daunting task!
This section will serve as your compass, guiding you through the colorful maze of Salvia varieties.
We’ll dive into the characteristics of different Salvias, from the fiery reds to the soothing blues, and from the hardy perennials to the vibrant annuals.
By the end of this section, you’ll have a clearer vision of which Salvias will make the perfect fit for your potting aspirations. So, let’s set off on this journey of discovery together!
The Colorful Palette of Salvias: From Blue to Red and Beyond

Our first stop on this journey is a tour through the diverse world of Salvias.
One of the most captivating aspects of these plants is their vibrant color palette.
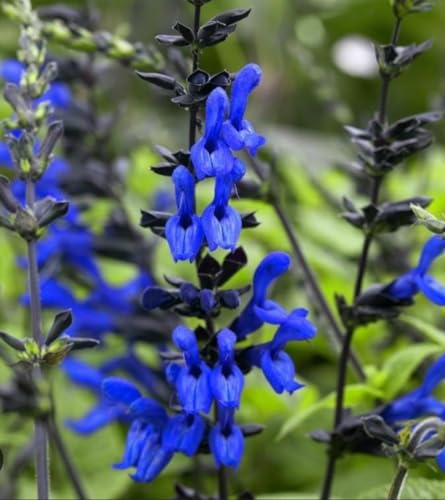
Blue Salvias, for example, bring a soothing touch of coolness to your garden with their various shades of azure, from soft sky-blue to a deep, near-purple navy.
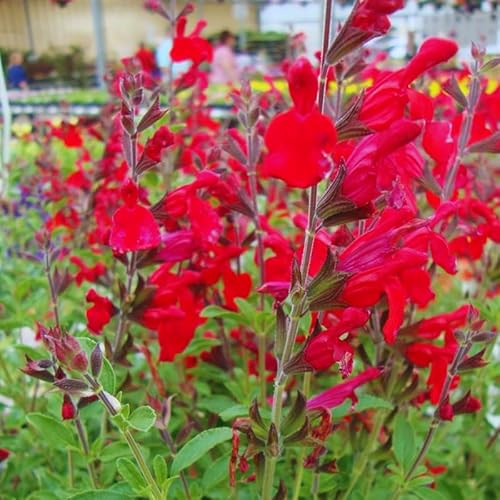
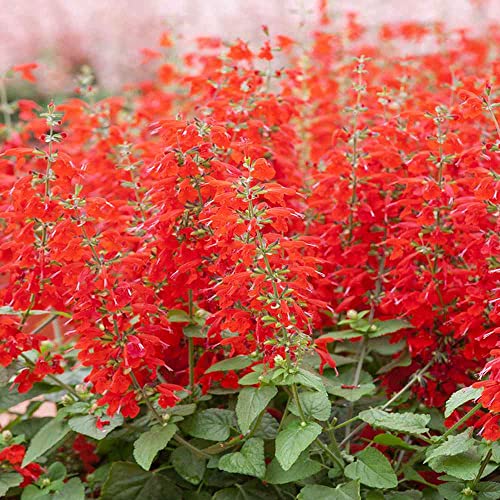
Meanwhile, red Salvias are the firecrackers of the bunch, exploding with bold, vibrant hues that demand attention.
But don’t forget about the other members of the rainbow! There are also pink, white, and even multicolored Salvias that can add an extra splash of variety to your potted garden.
Spotlight on Shrubby Salvias and Salvia Officinalis

Now let’s shift our focus onto a couple of particular Salvia varieties.
Shrubby Salvias, as their name suggests, have a bushier growth habit that can add a lovely touch of structure and volume to your pot.
They’re also quite hardy, making them a great choice for beginners.
Then there’s the renowned Salvia officinalis, better known as sage.
This Salvia is not only beautiful but also a popular culinary herb, making it a practical addition to your potted garden.
Salvia Plant Care Reference Guide
| Characteristic | Details |
|---|---|
| Common Name | Salvia |
| Botanical Name | Salvia spp. |
| Native Habitat | Various regions worldwide, especially the Americas and Mediterranean |
| Plant Type | Herbaceous perennial or annual |
| Growth Pattern | Bushy, upright |
| Mature Size | 1 to 4 feet tall and wide (varies by species) |
| Watering | Moderate; allow top inch of soil to dry between waterings |
| Light/Sun Exposure | Full sun to partial shade |
| Soil Type | Well-draining, sandy or loamy |
| Soil pH | Slightly acidic to neutral (6.0–7.0) |
| Temperature | 60–80°F ideal; some hardy down to 20s°F |
| Humidity | Average; prefers good air circulation |
| Bloom Time & Flower Color | Spring to fall; blue, purple, red, pink, white |
| Potential Problems | Powdery mildew, root rot, aphids, spider mites |
| Repotting | Every 1–2 years or when rootbound |
| Hardiness Zones (USDA) | Zones 5–11, depending on species |
The Art of Selecting Salvias: Hardiness Zones and Sun Exposure

Choosing the right Salvias for your pots isn’t just about color and form.
You’ll also need to consider practical factors like your hardiness zone and sun exposure.
Different Salvias thrive in different climate zones, so it’s important to select varieties that are well-suited to your local conditions.
Additionally, while Salvias generally love the sun (most require full sun exposure to truly flourish), some types can tolerate partial shade.
Remember, a well-chosen Salvia is not just beautiful, but also happy and thriving in its new pot home!
Starting Salvias from Seeds

Fancy the idea of growing your Salvias right from the seed?
There’s a certain magic in watching a tiny seed sprout into a vibrant, blooming plant, and with Salvias, that journey is especially rewarding.
In this section, we’ll guide you through the process of starting your Salvias from seeds.
We’ll cover everything from choosing the right seeds to providing the perfect conditions for germination.
Whether you’re a seasoned gardener or a newcomer to the plant world, we’re here to make the process feel less like a chore and more like a delightful adventure.
So, let’s get ready to sow some seeds of beauty!
The Springtime Symphony: Sowing Seeds in Early Spring
Let’s start with the ‘when’ of sowing your Salvia seeds. Early spring is usually the best time to start this process.
The warming soil and longer daylight hours make a perfect environment for your seeds to germinate and grow.
Start by preparing a seed tray or small pots with a good-quality potting mix such as 75% coco coir and 25% perlite.
Lightly sprinkle your Salvia seeds over the surface and cover them with a thin layer of soil.
Keep the soil moist but not waterlogged, and place the tray in a warm, bright spot.
With a little patience, you’ll soon see the first signs of your future Salvia plants!
Creating the Perfect Home: Sun and Soil for New Plants
Once your seeds have sprouted, it’s time to think about the conditions your new Salvia plants will need to thrive.
These plants are sun-lovers, so aim to provide a sunny spot where they can bask in at least six hours of sunlight a day.
As for the soil, well-drained is the key phrase here. Salvias don’t like their roots to be waterlogged, so whether you’re planting in a pot or garden bed, ensure the soil or compost has good drainage.
Addressing Potential Problems: Root Rot and Fungal Diseases
While Salvias are generally robust, they can still fall prey to certain problems, such as root rot and fungal diseases.
Root rot often arises from overwatering or poorly drained soil, while fungal diseases can strike when the plant’s foliage is frequently wet or air circulation is poor.
But don’t worry! By following the correct care guidelines and monitoring your plants regularly, you can mitigate these issues and keep your Salvias healthy and vibrant.
We’ll delve into these topics more in the FAQ section, so stay tuned!
The Benefits of Coco Coir and Perlite: Boosting Your Seed Starting and Potting Mix

In the world of gardening, the right growing medium can make all the difference, and coco coir and perlite have both proven to be great allies for starting seeds and making an ideal potting mix.
Coco coir, made from the husk of coconuts, is an eco-friendly alternative to peat moss.
It has excellent water-holding capacity, meaning it can keep your seeds moist but not overly wet.
Moreover, it’s naturally resistant to bacterial and fungal growth, offering your seeds a safe, clean starting environment.
On the other hand, perlite, those tiny white particles you often see in potting mix, is a type of volcanic glass.
It’s prized for its ability to improve aeration and drainage in the soil.
When you mix perlite into your coco coir, you’re ensuring that your seeds, and later your Salvia plants, have access to the right balance of water and air.
Together, coco coir and perlite can create a light, fluffy, and nutrient-rich environment that’s perfect for starting seeds and growing vibrant, healthy Salvias in pots.
So whether you’re sowing new seeds or repotting established plants, consider adding these two ingredients to your gardening toolkit!
Pot Selection and Preparation

Let’s take a moment to appreciate the unsung heroes of container gardening, the pots.
When it comes to growing Salvias in pots, the type of pot you choose and how you prepare it can significantly impact your plants’ health and happiness.
In this section, we’ll guide you through the process of choosing the perfect pot for your Salvias and preparing it to ensure your plants have the best home possible.
From material considerations to size selection, and drainage improvement to the initial setup, we’re here to guide you through each step.
Ready to become a pot-selection pro? Let’s dive in!
Space, Size, and Drainage: The Key Pillars of Potted Salvia Success
Let’s start with the basics with ensuring your Salvias have room to grow and breathe.
Larger pots are the way to go here. They not only provide enough space for the root ball but also help in maintaining consistent soil temperatures.
Plus, they store more moisture, which is a boon during the hot summer months.
But remember, a good size pot is nothing without good drainage.
Why is drainage so important? Well, Salvias, like many plants, don’t appreciate wet feet.
Too much water can lead to root rot, a common plant disease that can quickly turn fatal.
Drainage Holes: Your Pot’s Lifeline
Let’s talk a bit more about drainage. And that’s where drainage holes come into play.
These are essentially your pot’s lifeline, ensuring excess water doesn’t stick around longer than welcome.
A pot with proper drainage holes reduces the risk of water logging and creates a healthier environment for your Salvias to thrive.
So when you’re out pot shopping, make sure to choose ones with sufficient drainage holes at the bottom.
Improving Drainage Without Adding Rocks
You don’t need to add a layer of rocks or small stones to the bottom of a Salvia container. The most important drainage features are holes in the bottom of the pot and a growing mix that allows excess water to move through freely.
Instead, fill the container with a well-draining mix such as coco coir combined with perlite. This gives the roots a good balance of moisture and air without creating a saturated layer above stones in the bottom of the container.
You can add a thin layer of organic mulch to the surface of larger outdoor containers during hot weather. Mulch can slow moisture loss, but keep it away from the base of the stems and don’t apply such a thick layer that the growing mix stays constantly wet.
Ideal Soil and Fertilizer for Salvias
Roll up your sleeves, because it’s time to get down and dirty with soils and fertilizers! Growing Salvias in pots is not just about the right pot or the perfect Salvia variety, it’s also about what goes inside the pot.
Providing your Salvias with an optimal soil mix and the right nutrients can make a world of difference in their growth and bloom.
In this section, we’ll dig into the ideal soil composition and fertilization strategy for your potted Salvias.
Spoiler alert: a mix of coco coir and perlite is the superstar of this show.
So, are you ready to give your Salvias the nutrient-rich, well-draining soil they deserve? Let’s get started!
The Scoop on Soil:
Choosing the right soil for your Salvias is like picking out the perfect house for your family.
It needs to be comfortable, and stable, and provide all the necessities for healthy living.
Well-draining soil is key for Salvias as they despise wet feet. This is where the coco coir and perlite mix shines!
It ensures excess water is whisked away, preventing root rot and waterlogging.
Additionally, Salvias thrive in rich soil, which coco coir offers by retaining moisture and nutrients.
Also, keep an eye on the pH levels. Salvias prefer slightly acidic to neutral soil (pH 5.5 – 6.5). So, get your soil right, and you’ve won half the battle.
Feeding Your Salvias:
While Salvias are not the most demanding plants when it comes to fertilization, they do appreciate a nice meal.
A balanced slow-release fertilizer applied at the beginning of the growing season should suffice for potted Salvias.
But remember, too much of a good thing can be harmful.
Over-fertilizing can lead to tender, sappy growth that’s more susceptible to pests and diseases.
So, go easy on the feed and let your Salvias bloom in their own time.
Outsmarting Common Problems:
Growing Salvias in pots is generally a smooth sail, but sometimes, issues like powdery mildew and black spot can surface.
Don’t worry though, we’ve got some tips for you. Good air circulation can prevent these fungal diseases, so avoid overcrowding your pots.
Also, watering your Salvias in the morning will give the leaves enough time to dry out during the day, reducing the chances of fungal infections.
Remember, prevention is better than cure, so keep these practices in mind to ensure your Salvias stay happy and healthy.
Caring for Salvias in Pots

Great! Now that you’ve planted your Salvias in pots with the perfect soil and given them a good start with the right fertilizer, it’s time to dive into the day-to-day care they require.
After all, even the best-planted garden needs consistent care to thrive.
In this section, we’ll discuss watering schedules, when and how to deadhead your Salvias, and how to keep them looking their best.
So, sit back, grab a cup of tea, and let’s explore the essentials of caring for your potted Salvias.
Watering Wisdom for Salvias
We all know water is a vital ingredient for any plant’s growth, but it’s important to get the balance right.
Salvias, like other plants, don’t enjoy sitting in waterlogged soil. In fact, too much water can lead to root rot, a common issue for many potted plants.
Water your Salvias when the top inch of soil feels dry to the touch, aiming to keep the soil moist but not saturated.
Remember, it’s always better to underwater than overwater when it comes to these beautiful bloomers!
The Breath of Life: Air Circulation
Now, let’s talk about air circulation. It might not be the first thing that springs to mind when you think about plant care, but it’s crucial for keeping your Salvias healthy.
A good flow of air around your plants can help prevent many common fungal diseases, such as powdery mildew, which can be a real issue for Salvias.
To encourage good air circulation, ensure your plants aren’t overcrowded, and consider placing your pots in a breezy location if possible.
The Art of Deadheading Salvias

Last but certainly not least, we’re going to touch on the topic of deadheading.
For the uninitiated, deadheading is the process of removing spent flowers from your plants.
It’s a simple task but one that can make a huge difference to the health and appearance of your Salvias.
Deadheading encourages your Salvias to produce more flowers, extending their blooming season.
Additionally, it helps prevent diseases by removing potential breeding grounds for pests and fungi.
So, take a few minutes every week to check over your plants and snip off any faded blooms. Trust us, your Salvias will thank you for it!
Managing Salvias in Different Seasons

Diving into the world of Growing Salvias in Pots also means embracing their seasonal needs.
As we transition from spring to summer, and then autumn to winter, our lovely Salvias require slightly different types of care.
Whether it’s preparing for a burst of growth or helping them hibernate safely during the colder months, understanding these seasonal shifts is the key to year-round success.
So, buckle up, and let’s embark on this seasonal journey together, ensuring your Salvias thrive in every season!
Embracing the Summer Growth Spurt
As we transition from early to late summer, your Salvias are in their prime, showcasing new growth and vibrant blooms.
This is the best time to give your potted Salvias a slight prune to promote fuller and more robust growth.
Remember, pruning is not just about shaping your plant but also encouraging healthier and stronger development.
Make sure you keep an eye on the weather, though. If it gets too hot, provide some partial shade to prevent wilting.
The Autumn Retreat: Preparing for the First Frosts
When late autumn rolls around, the first frosts are not far behind. It’s essential to prepare your Salvias for this colder period.
If you have perennial Salvias, they’ll handle the cold better, but the annual and tender varieties may need to be brought indoors or protected.
Start by reducing watering and stop fertilizing to allow your plants to slow their growth and harden off in preparation for winter.
Extra TLC for Tender Varieties
If you’re growing tender varieties or tender perennial Salvias, they’ll need a bit more attention as the temperature drops.
These varieties aren’t as winter-hardy and may not survive the cold without some help.
Consider moving them to a sheltered location, like a sunny windowsill indoors, where they can enjoy the warmth.
Also, it’s a good idea to keep an eye out for signs of stress, like wilting or discolored leaves.
With a little extra care, these beauties can continue to thrive despite the chill.
Winter Care for Salvias in Pots
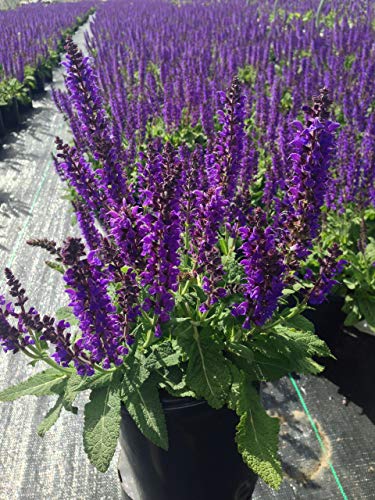
As the leaves fall and winter starts to make its chilly presence known, it’s time to focus on how to care for your potted Salvias during this season.
In this section, we’ll walk you through the key steps and considerations to ensure your Salvias get through the colder months unscathed.
Whether it’s protecting the roots from freezing, moving your pots to a warmer spot, or understanding when to water and when to hold back, we’ve got you covered.
Remember, winter care doesn’t mean your Salvias have to hibernate completely, but rather it’s a time for them to rest and rejuvenate for the next growing season.
Let’s get your Salvias winter-ready!
Guarding Against the Cold:
Let’s face it, Salvias aren’t fans of the cold. But don’t worry, there are ways to help them weather those winter months.
One lifesaver is mulch, a layer of organic material spread around your plants to keep those roots snug and warm.
Not only does it act like a blanket, it also helps maintain soil moisture and adds nutrients back into the soil.
Now, isn’t that a handy tool in your gardening kit?
Indoor Care for Salvias:
When Jack Frost starts knocking at the door, it’s time to bring your potted Salvias indoors.
But remember, a sudden shift in the environment could stress your plants, so it’s essential to do it gradually and choose a spot that gets plenty of light.
We’ll delve into the specifics of indoor Salvia care, from watering to maintaining humidity levels, ensuring your Salvias feel right at home indoors.
Winter Care for Salvia Cuttings:
Have you ever thought about propagating your Salvias? Winter is a great time to do it!
We’ll guide you through the process of taking cuttings and caring for them during the colder months.
With our tips, you’ll have a bunch of healthy new Salvia plants ready to bloom when spring arrives.
Isn’t that a lovely prospect to look forward to during the long winter nights?
Growing Salvias Indoors
Well, we’ve talked about bringing your potted Salvias indoors for the winter, but did you know you can actually grow these vibrant beauties indoors year-round?
That’s right! Growing Salvias Indoors is our next stop on this journey.
Don’t have a garden? Living in an apartment with limited outdoor space? Not a problem!
We’ll explore how you can cultivate these colorful gems right in your living room or sunny kitchen window.
From selecting the best varieties for indoor growth to maintaining the perfect conditions, we’ve got all your indoor Salvia needs covered.
So, grab your favorite pot, and let’s bring a splash of color indoors!
The Sun’s Embrace: Nourishing Indoor Salvias
You might think your indoor Salvias are safe from the whims of the weather, but they still crave that sunny delight.
Indeed, sufficient sunlight is the soul of these plants. So, the trick is to find the sunniest window in your home.
Let’s dive into the specifics of lighting requirements for indoor Salvias, their love for sunbathing, and how you can recreate the magic of the sun, even indoors.
The Indoor Salvia’s Guide: Watering and Placement
Now, how do you keep your indoor Salvias looking as fresh as a daisy?
The secret lies in the perfect balance of watering and placement.
Remember, even though they’re indoors, Salvias still need care similar to their outdoor siblings.
We’ll discuss how to create a home for your pots that ensures they’re happy, healthy, and blooming bright.
From finding the ideal spot in your home to watering without making your Salvias feel like they’re in a rainforest, we’ve got some insider tips for you!
Repotting Salvias: When and How

Thinking about repotting your Salvias? Well, you’re in luck! We’ve got you covered with all the details.
Repotting can seem a bit daunting, but with a little guidance, you’ll be a pro in no time.
Let’s delve into why, when, and how to give your Salvias a new home.
Recognizing the Need for Repotting
It’s important to know when your Salvias are ready for a pot upgrade.
If the plant seems crowded, water drains out too quickly, or roots are peeking out of the drainage holes, it’s time to consider repotting.
Best Time for Repotting
The ideal time for repotting is in the early spring before the growing season kicks in.
This gives the plant ample time to adjust to its new home and focus on growth.
This is also a good time to propagate and divide your existing plant if you want to make more.
Choosing the Right Pot
When it comes to choosing a new pot, size matters. You’ll want something 1-2 inches larger in diameter than the current pot.
Also, ensure it has good drainage to prevent waterlogged soil.
The Repotting Process

Here are the steps for repotting Salvias:
1. Gather Your Supplies
You’ll need a new pot (1-2 inches larger in diameter than the current one), fresh potting mix, a trowel, and some water.
2. Prepare the New Pot
Add some fresh potting mix to the bottom of the new pot, leaving enough space for the root ball of your Salvia.
3. Remove the Salvia from the Current Pot
Carefully tip the plant sideways, grip it by the base, and ease it out. If it’s stuck, tap the sides of the pot to loosen it.
4. Inspect and Tease the Roots
Check the roots for any signs of disease or pests. If the roots are densely packed or circling the root ball (a sign of root-bound), gently tease them apart with your fingers.
5. Place the Salvia in the New Pot
Center the plant in the new pot. The top of the root ball should be just below the rim of the pot. Adjust the amount of soil underneath if necessary.
6. Fill in with Potting Mix
Add fresh potting mix around the sides, pressing lightly to remove any air pockets, but be careful not to compact the soil too much. Leave some space at the top for watering.
7. Water the Salvia
Water the plant thoroughly until water comes out of the drainage holes. This helps the plant settle in and the soil to fill in any remaining air gaps.
8. Place in a Suitable Location
Put the repotted Salvia in a shaded spot for a few days to help it recover from the stress of repotting.
9. Aftercare
Refrain from fertilizing for about a month after repotting to avoid burning the roots. Monitor the plant for any signs of stress and water as necessary.
There you have it, a step-by-step guide to repotting your Salvias. Happy gardening!
Salvia Propagation: Growing New Plants from Your Existing Ones

It’s a wonderful thing, isn’t it? The idea of creating new life from something that already exists.
Propagating Salvias is not only rewarding but also a great way to expand your garden without having to purchase new plants.
Let’s walk through the three primary methods of Salvia propagation: stem cuttings, division, and growing from seeds.
Propagation by Stem Cuttings
• Selecting the Right Stem: Look for a healthy, mature stem on your Salvia plant and cut a 4 to 6-inch section just below a node (the point where leaves meet the stem). Ensure your chosen stem has at least two nodes.
• Preparing the Cutting: Remove the leaves from the bottom half of the cutting to prevent moisture loss.
• Rooting the Cutting: Dip the cut end in rooting hormone, then plant it in a pot with a mix of coco coir and perlite. Make sure the node is under the soil as that’s where the roots will grow from.
• Caring for the Cutting: Keep the pot in a warm, bright spot but out of direct sunlight. Make sure the soil stays moist but not soggy. Roots should start to form within a few weeks.
Propagation by Division
• Choosing the Right Time: Division is best done in early spring before new growth begins.
A great time for division is when you need to repot your Salvia anyway.
• Preparing the Plant: Water the plant well a day before you plan to divide it. This helps the plant recover from the shock more easily.
• Dividing the Plant: Gently remove the plant from its pot and separate it into two or more sections. Each section should have an equal amount of roots and shoots.
• Replanting: Plant each division in its own pot filled with a mix of coco coir and perlite. Water well and place in a bright, warm location.
Propagation from Seeds
Preparing the Seeds: Some Salvia seeds benefit from a process called stratification.
This involves storing them in a moist medium inside a refrigerator to mimic winter conditions and encourage germination.
Check the seed packet or do a bit of research to see if your seeds require stratification.
Sowing the Seeds: Plant the seeds in a tray or pot filled with a mix of coco coir and perlite.
Cover them lightly with the same medium, as Salvia seeds need light to germinate.
Caring for the Seedlings: Keep the medium moist but not soggy, and place the tray in a warm, bright location.
Once the seedlings have developed a couple of sets of true leaves, they can be transplanted into individual pots.
Remember, patience is key when propagating plants. It can take a few weeks for cuttings and seeds to grow roots, and even longer for them to become established plants.
But the reward of seeing those new plants flourish is well worth the wait!
Pest and Disease Management in Salvias
Pests and diseases can be a gardener’s worst nightmare, right?
But don’t let that deter you from your love for growing Salvias in pots!
Armed with the right knowledge, you can tackle these challenges head-on.
Let’s discuss how to identify, prevent, and manage common issues you might encounter.
Identifying Common Pests
Salvias, like any other plants, can attract certain pests. Aphids, whiteflies, and spider mites are common culprits.
Look out for telltale signs like yellowing leaves, tiny webs, or clusters of small insects on the undersides of leaves.
Natural Pest Management
Before reaching for chemical pesticides, consider natural solutions.
Ladybugs and lacewings are natural predators of many pests and can be a great addition to your garden.
Insecticidal soaps, neem oil, or a strong blast of water can also help keep pest populations under control.
Recognizing Common Diseases
Diseases such as powdery mildew and root rot can also plague your Salvias.
Powdery mildew appears as a white, powdery coating on leaves and stems, while root rot may cause wilting or browning of the plant.
Preventing and Treating Diseases
Healthy plants are your best defense against disease.
Ensure good air circulation, avoid overwatering, and clean up any fallen debris to reduce the chance of disease.
If you do spot a problem, remove affected leaves and treat the plant with a fungicide if necessary.
Regular Check-ups
Routine inspection of your Salvias is the key to early pest and disease detection.
The sooner you spot a problem, the easier it is to manage. So, put on your detective hat and keep an eye on your potted pals!
Growing Salvias in Pots FAQs
Do Salvias grow well in pots?
Yes. Salvias can grow very well in pots when you provide good drainage, plenty of sunlight, and enough room for the roots to grow. Containers also make it easy to move your plants when needed and give you more control over soil and moisture.
Do Salvias prefer full sun or partial shade?
Most Salvias prefer full sun and produce their best growth and flowering with plenty of direct sunlight. Some varieties can tolerate partial shade, especially in areas with very hot summer weather.
How often should you water Salvias in pots?
Water your potted Salvias when the top inch of the growing mix feels dry. Containers can dry out quickly during warm summer weather, so check them regularly. Water thoroughly, but don’t leave the roots sitting in waterlogged soil.
What is the best potting mix for Salvias?
Salvias need a well-draining growing mix. I like using coco coir and perlite because the combination provides good moisture retention while still allowing plenty of drainage and air around the roots.
Should you deadhead Salvias growing in pots?
Yes. Removing spent flowers keeps your potted Salvias looking better and can encourage additional blooms. Regular deadheading and occasional pruning can also help maintain fuller, bushier plants.
When should you repot a Salvia?
Repot when your Salvia becomes crowded, roots begin growing through the drainage holes, or water starts passing through the container unusually quickly. Early spring is a good time to move the plant into a slightly larger pot with fresh growing mix.
How do you prepare potted Salvias for winter?
Winter care depends on the type of Salvia you’re growing and your climate. Hardy perennial Salvias can tolerate colder conditions, while tender varieties may need protection or can be moved indoors. Reduce watering and stop fertilizing as growth slows going into winter.
Growing Salvias In Pots: Final Thoughts

Growing Salvias in pots is a great way to bring colorful flowers to a patio, balcony, deck, or other sunny growing space. With so many varieties available, you can choose Salvias that fit your container size, climate, and the colors you want in your garden.
Give your Salvias plenty of sunlight, a well-draining growing mix, and a container with good drainage. Check the soil regularly during warm weather, water when the top inch begins to dry, and deadhead spent flowers to encourage continued blooming.
Once you’ve grown a few Salvias in containers, you can also experiment with starting them from seed, taking cuttings, dividing established plants, or trying different annual and perennial varieties. Find the Salvias that perform best in your conditions, and you can enjoy pots filled with colorful blooms throughout the growing season.
🌼 Backyard Gardening Guides
- 🏡 Backyard Gardening Ideas (Pillar Guide)
- 🌳 Red Tip Photinia Privacy Hedge
- 🌸 Planting Dahlia Seeds
- 🪴 Best Soil for Dahlias in Pots
- 🫐 Growing Blueberries in Pots
- 🌿 Cold Hardy Tea Plant
- 🧄 Growing Goji Berries in Pots
- 🌱 How to Grow Creeping Thyme
- 🌺 Growing Balloon Flowers from Seed
- 🌼 Growing Penstemon in Pots
- 🐝 Growing Echinacea in Pots
- 🪻 Plant Creeping Phlox
- 🌞 Care for Verbena in Pots
- 🌾 Growing Poppies in Pots
- 🌷 Dahlia Care in Pots
- See all articles in our Backyard Gardening category
 Steve S. is the creator of