This post contains affiliate links. If you buy something from one of our links we may earn a commission. Thanks
Discover the fun and rewarding process of growing potatoes in a 5-gallon bucket with our step-by-step guide on Red Norland potatoes, nutrients, and harvest tips!
Growing potatoes in a 5-gallon bucket is a practical way to save space and still yield a significant crop. Drill drainage holes in the bottom, fill it with well-drained soil mixed with compost up to 4 inches, and plant 1 whole seed potato. Keep the soil moist and add more soil as the plants grow. Harvest once the foliage dies back.
Are you looking to grow your own food but short on space? Growing Potatoes In A 5-Gallon Bucket might just be the perfect solution for you!
This method is not only space-saving but also surprisingly easy and enjoyable.
In this blog post, we’ll walk you through a step-by-step guide on how to grow Red Norland potatoes using double 5-gallon buckets, coco coir, and Jack’s 3-2-1 formula.
So, let’s dig in and get our hands dirty with this fun and rewarding gardening project!
Growing Potatoes In A 5-Gallon Bucket
Have you ever thought about growing your own potatoes but felt overwhelmed by the idea? Well, it’s time to change that!
We’ll take you on a journey through the process of growing potatoes in a 5-gallon bucket.
You’ll learn about the best potato variety for this method, how to set up the perfect bucket system, choosing the right growing medium, and using the ideal nutrients.
We’ll also cover the actual growing method and share updates on the progress, leading up to the exciting harvest.
So, grab your gardening gloves, and let’s embark on this spud-tastic adventure together!
Get Your Red Norland Seed Potatoes
Last year I used grocery store potatoes so I don’t know what variety I grew. This year I am using certified seed potatoes.
You can use store-bought potatoes but know they are treated with sprout inhibitors and can take a long time to sprout.
 I ordered my Red Norland seed potatoes from Amazon.
They arrived in great shape and were growing sprouts within a few days.
I have far more than I need and so I will be planting some outside too.
If you can’t plant them all you can always eat them. Just break off any sprouts before you do. Also don’t eat green potatoes they are poisonous.
You can also probably find seed potatoes at local garden centers if you don’t want to buy them online.
According to Wikipedia:
Red Norland is a red, early-maturing potato. Smaller tubers (B and C size) are commonly sold as “baby reds” and this variety is often served boiled or in potato salads. The progenitor variety, ‘Norland’, was released by the North Dakota Agricultural College in 1957. Since the release of ‘Norland’, other darker red skinned variants were selected, most notably ‘Red Norland’ and ‘Dark Red Norland’

The Joys of Home Gardening
Growing your own food has numerous benefits that can make a significant difference in your daily life.
Not only does home gardening allow you to eat fresh and organic produce, but it also promotes a healthy lifestyle, fosters a connection to nature, and offers a sense of accomplishment.
Plus, gardening is an excellent way to reduce stress and get some exercise while growing indoors or enjoying gardening outdoors.
The Perks Of Growing Potatoes In A 5-Gallon Bucket
Using 5-gallon buckets to grow organic potatoes is a game-changer, especially for those with limited space.
No outdoor garden space? No problem. Container gardening will come to the rescue with fresh potatoes. You can grow many other crops in plastic buckets.
This method is convenient, cost-effective, and easy to maintain.
They take up little space and another good thing is there is no weeding to be done.
Consider that bad weather outside will not affect you because indoors you control the climate.
The buckets are portable, allowing you to move them around to maximize sunlight exposure, and they can even be used on balconies or patios.
Additionally, growing potatoes in a 5-gallon bucket minimizes the risk of soil-borne diseases and pests, ensuring a healthy harvest.
A Glimpse Into How To Grow Potatoes In A 5-Gallon Bucket
Throughout this blog post, we’ll cover various aspects of how to grow potatoes in a 5-gallon bucket.
You’ll learn about selecting the ideal potato variety, setting up the bucket system, choosing the right growing medium, and providing the necessary nutrients.
We’ll also delve into the actual growing method and share updates as the potatoes progress, all the way to the moment of harvest.
Get ready to embrace the exciting world of bucket-grown potatoes!
My Potato Variety – Red Norland
Now, let’s talk about the star of our 5-gallon bucket gardening show – the Red Norland potato!
Choosing the right potato variety is crucial for a successful harvest, and Red Norland potatoes are a fantastic choice for our bucket-growing adventure.
In this section, we’ll dive into the characteristics of this delightful spud, discuss why it’s a great fit for our project, and share some expectations for the yield we can look forward to.
This is by no means the only potato variety you can grow in a bucket. There are lots of potato varieties but I happen to like red potatoes.
But I am thinking about trying Yukon Gold next.
So, let’s get to know our soon-to-be delicious Red Norland potatoes!
Meet the Red Norland Potato
Red Norland potatoes are a versatile and popular variety, known for their smooth red skin, shallow eyes, and creamy white flesh.
They have a delightful texture and a delicious, subtly sweet flavor, making them perfect for various dishes like potato salad, mashed potatoes, or even baked potatoes.
Why Red Norland is the Chosen One
So, why did we pick Red Norland potatoes for our 5-gallon bucket-growing project?
There are a few reasons! First, they’re an early-season variety, which means they mature relatively quickly – usually in about 70 to 90 days.
This is great for those of us who are impatient to enjoy our homegrown potatoes!
Second, Red Norland potatoes have a reputation for being resilient and adaptive, making them well-suited for different growing environments, including our buckets.
The Bounty of the Bucket
What kind of yield can we expect from growing potatoes in a 5-gallon bucket of Red Norland potatoes?
While the exact yield can vary depending on factors like sunlight, nutrients, and growing conditions, a single bucket has the potential to produce anywhere from 5 to 10 pounds of potatoes.
That’s a lot of tasty spuds from such a small space! And you don’t have to wait for mature potatoes at harvest time.
You can dig through the top few inches of soil for new potatoes. Baby potatoes are a real delicacy and are often not available at the grocery store.
Keep in mind that the key to a bountiful harvest is proper care and attention throughout the growing process, so we’ll be sure to cover all the necessary steps to maximize our potato potential.
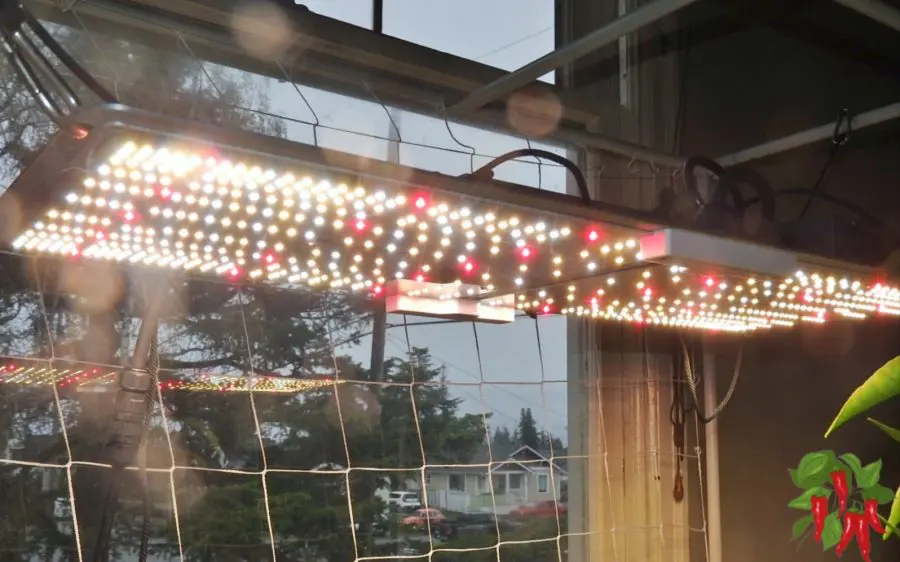
My LED Grow Light: Full Spectrum 200W Spider Farmer SF2000
Potatoes are members of the nightshade family along with tomatoes. And just like tomatoes, potato plants are high-light plants that need plenty of full sun to grow their best.
You Can Get Your Spider Farmer SF2000 On Amazon
Introducing the Spider Farmer SF2000

For those of us who may not have the luxury of ample sunlight for our 5-gallon bucket potato garden, using an LED grow light can be a game-changer.
In our case, we’ve opted for the full spectrum 200W Spider Farmer SF2000, a high-quality and efficient grow light that can help ensure our Red Norland potatoes get the light they need to thrive.
I personally think trying to use a window for growing potatoes in a 5-gallon bucket is a bad idea.
These plants get large, won’t fit on a windowsill, and will block getting light indoors from your window.
You are better off with a grow light and choosing a more convenient space for your plant.
But if you have a balcony that gets 6 hours of sunlight during the summer you don’t need a light.
If you want to grow year-round indoors there is no getting around using a grow light.
There isn’t enough light to grow much of anything indoors during the short days of winter.
Benefits of Full Spectrum Lighting
The Spider Farmer SF2000 provides full spectrum lighting, which means it closely mimics the natural sunlight our potatoes would receive outdoors.
Full spectrum lighting is ideal for plant growth because it covers all the essential wavelengths of light needed for various stages of development, from vegetative growth to flowering and fruiting.
This type of lighting is particularly beneficial for our potatoes, ensuring they grow healthy and strong.
My light covers a 3 x 4-foot area for light-loving plants and I can grow low-light plants like lettuce or herbs on the edges so I get about a 4 x 6 footprint in total.
Optimizing Light Exposure with the SF2000
To get the most out of our Spider Farmer SF2000 LED grow light, we’ll need to consider factors like the height of the light above the plants, the duration of light exposure, and the intensity of the light.
For our Red Norland potatoes, we’ll start by hanging the light about 24-30 inches above the plants and adjusting it as they grow taller.
We’ll also aim for a light exposure of about 12-14 hours per day, ensuring our spuds get the light they need without causing unnecessary stress.
By carefully monitoring and adjusting our grow light setup, we’ll be well on our way to an abundant potato harvest!
Running the SF2000 on a Timer
To make our grow light system even more efficient and ensure our Red Norland potatoes receive consistent and optimal light exposure, we’ll run our Spider Farmer SF2000 on a timer.
This simple yet effective addition to our setup will help us maintain the desired 12-14 hours of daily light exposure without the need for manual intervention.
Using a timer has several benefits:
• Convenience: By automating the light schedule, you won’t have to worry about turning the grow light on and off each day. This not only saves time but also ensures you don’t accidentally leave the light on for too long or forget to turn it on at all.
• Consistency: Plants, including our potatoes, thrive when they receive consistent light patterns. A timer ensures the grow light operates on a regular schedule, which promotes healthier growth and ultimately, a better harvest.
• Energy Efficiency: Running your grow light on a timer can help reduce energy consumption by preventing accidental overuse of the light. This is not only eco-friendly but also cost-effective in the long run.
To set up the timer, simply plug the Spider Farmer SF2000 into the timer and set the desired on and off times according to the recommended light exposure for our potato plants.
Once everything is set, you can sit back and watch your Red Norland potatoes flourish under the consistent and controlled light provided by your SF2000 and timer combo!
My Bucket System – Double 5-Gallon Buckets
Ready to get started with our potato-growing project? Let’s dive into one of the most important aspects: setting up the double 5-gallon bucket system.
This nifty setup is designed to provide our Red Norland potatoes with the ideal environment for growing strong and healthy.
In this section, we’ll explore the ins and outs of the double bucket system, including how to ensure proper drainage and how to set up the buckets for optimal results.
So, grab your buckets, and let’s create the perfect home for our spud-tacular friends!
The Magic of the Double 5-Gallon Bucket System
Let’s begin by understanding how the double 5-gallon bucket system works. Essentially, this setup involves nesting one 5-gallon bucket inside another, with the top bucket containing our growing medium and potato plants.
The bottom bucket serves as a reservoir to catch any excess water that drains from the top bucket, preventing overwatering and keeping our growing area clean and mess-free.
This clever system not only simplifies maintenance but also promotes healthy potato growth.
These container gardens also work well for other plants too. I have used a five-gallon bucket system for tomato plants, peppers, and sweet potatoes.
Drainage: The Key to Happy Potatoes
Proper drainage is crucial for the success of our 5-gallon bucket potato garden.
Without adequate drainage, excess water can accumulate in the growing medium, leading to root rot, a lack of oxygen, and ultimately, unhappy potatoes.
By ensuring that our double bucket system has effective drainage, we create an environment where our Red Norland potatoes can flourish.
Drilling for Success: Creating Drainage Holes
To set up our double bucket system, we’ll first need to create drainage holes in the bottom of the top bucket. Here’s how to do it:
• Gather your materials: You’ll need a drill, a 3/16 to 1/4-inch drill bit, and your 5-gallon bucket.
• Prepare the bucket: Make sure the bucket is clean and free of any debris. This will ensure a smooth drilling process and reduce the risk of cracking the bucket.
• Drill the holes: Using the drill and the appropriate drill bit, create multiple holes evenly spaced across the bottom of your bucket. I aimed for holes about a half-inch apart. I wanted to make sure to provide good drainage.
• Nest the buckets: Once the holes are drilled, place the top bucket inside the bottom bucket, and you’re ready to start adding the growing medium and planting your potatoes.
With our double 5-gallon bucket system set up and ready to go, we’re one step closer to a bountiful harvest of homegrown Red Norland potatoes!
My Growing Medium – Coco Coir

Now that our double 5-gallon bucket system is in place, it’s time to choose the perfect growing medium for our Red Norland potatoes.
In this case, we’ll be using coco coir, a fantastic and sustainable option that offers numerous benefits for our potato plants.
In this section, we’ll delve into the world of coco coir, discuss its advantages, and learn how to prepare it for our bucket garden.
So let’s dive in and get our hands dirty with this amazing growing medium that will provide a cozy home for our spud friends!
The Many Perks of Coco Coir
Coco coir, made from the fibrous husks of coconuts, has quickly become a popular growing medium for a variety of plants, including our Red Norland potatoes.
Here are some advantages of using coco coir in our 5-gallon bucket system:
• Excellent water retention: Coco coir can hold up to 10 times its weight in water, ensuring our potato plants stay well-hydrated.
• Proper aeration: The natural structure of coco coir allows for excellent airflow, which is vital for healthy root development and overall plant growth.
• Pest resistance: Coco coir is naturally resistant to many pests and diseases, providing our potatoes with a safer growing environment.
• Sustainability: As a byproduct of the coconut industry, coco coir is an eco-friendly and renewable resource.
• Reusable: Unlike peat moss or peat-based soil mixes coco coir can be reused several times.
Prepping the Coco Coir for Planting
Before using coco coir in our bucket garden, we’ll need to prepare it properly:
Hydration: Coco coir often comes in compressed blocks. To rehydrate it, soak the block in water for a few hours or until it has expanded and softened.
Fluffing: Once fully hydrated, break apart and fluff the coco coir to create a light, airy texture.
")
You Can Buy Canna Coco Bricks On Amazon
Rinsing (optional): Some coco coir products may contain excess salts. If necessary, rinse the coir with fresh water to reduce the salt content.
If you use a high-quality coco coir product like Canna Coco you will never need to worry about salt levels. It is available loose or as bricks.

You can buy loose canna coco on Amazon
I prefer to use the bricks. They are easier to store and easy to rehydrate. The bricks make about 10 gallons of coco.
Filling the bucket: Add the prepared coco coir to the top bucket of our double 5-gallon bucket system, filling it up to about halfway.
Alternative Growing Mediums and Comparisons
While coco coir is our chosen medium for this project, there are other options to consider.
You will want to use a good soil mix for planting potatoes. Don’t try to use garden soil.
Potting mix: Another good option is a high-quality, well-draining potting mix that can also work well for growing potatoes in a bucket.
However, potting mixes can vary significantly and may require more frequent watering than coco coir or the addition of extra perlite to improve drainage.
Peat moss: Similar to coco coir, peat moss offers good water retention and aeration. However, peat moss is not a sustainable option, as it is sourced from non-renewable peat bogs.
Peat moss also compacts and is extremely hard to water if it dries out.
Each growing medium has its pros and cons, but for our Red Norland potatoes, coco coir provides an excellent balance of water retention, aeration, and sustainability, making it the ideal choice for our 5-gallon bucket garden.
Fertilizing Coco Coir
Coco coir by itself makes a great growing medium but it does not provide much in the way of nutrients so it needs to be fed.
Priming Coco Coir
Using coco coir is a bit different than using other mediums.
Here are a few tips to get the most out of it:
Feeding With Coco Coir
Coco coir needs to be primed with calcium and magnesium before it is used.
If you are using the Jacks 3-2-1 these elements are provided but I like to precharge my coco before using it.
 I use CaliMagic as a calmag supplement and found it to be the best. When I soak my brick I add 2 1/2 -3 gallons of water per brick and I add 3 ml of this per gallon.
Coco coir needs the calmag to work properly and be able to provide all the additional nutrients your plant needs.
Never Use Plain Water
Using plain water will upset the ability of your coco to feed your plants.
With coco coir, you feed every time you water.
If you must water without fertilizing you can add a little bit of calmag to the water first.
My Nutrients – Jack’s 3-2-1 Formula
Feeding our Red Norland potatoes the right nutrients is essential for a healthy and bountiful harvest. That’s where Jack’s 3-2-1 formula comes in!
This well-rounded nutrient solution provides our potato plants with the perfect balance of essential elements they need to grow and thrive.
In this section, we’ll dive into the benefits of using Jack’s 3-2-1 formula, discuss how to properly mix and apply it, and explore why it’s the ideal choice for our 5-gallon bucket potato garden.
So let’s nourish our spuds and set them up for success with the help of Jack’s 3-2-1 formula!
Unraveling Jack’s 3-2-1 Formula
)")
Buy Jack’s Part A and B On Amazon
Jack’s 3-2-1 formula is a popular nutrient solution that consists of three key components:
3 parts (5-12-26): This component provides essential nutrients like nitrogen, phosphorus, potassium, and micronutrients.
2 parts Calcium Nitrate (15.5-0-0): Calcium nitrate supplies calcium and nitrogen, both crucial for healthy plant development.
1 part Magnesium Sulfate (Epsom Salt): This component delivers magnesium and sulfur, which are vital for photosynthesis and overall plant growth. This is simply Epsom salts that you can buy at any pharmacy.
When combined, these ingredients create a well-balanced nutrient solution that supports our Red Norland potatoes throughout their growth cycle.
This mix is a low-cost economical fertilizer that is used by many commercial growers and greenhouses.
Mixing and Applying the Nutrients
To ensure our potato plants get the most out of Jack’s 3-2-1 formula, we need to mix and apply it properly:
Mixing: In a container, mix the three components in the specified ratios with water.
Make sure to dissolve each component separately before combining them.
Application: Water your potato plants with the nutrient solution, ensuring that the coco coir is thoroughly moistened.
Be careful not to overwater, as this can lead to root rot or other issues.
Frequency: Apply the Jack’s 3-2-1 formula every time you water usually every 1-2 weeks, depending on your potatoes’ needs.
Don’t let your coco get dry out as it works best when kept consistently moist.
Keep an eye on their growth and adjust the frequency accordingly.
The Role of Nutrients in Potato Growth
Providing our Red Norland potatoes with the right nutrients is crucial for their overall health and productivity.
Nutrients play essential roles in various processes, including:
Vegetative growth: Nitrogen, phosphorus, and potassium promote strong stem and leaf development, helping our potatoes grow tall and robust.
Root development: Calcium and phosphorus support healthy root formation, which is vital for absorbing water and nutrients.
Photosynthesis: Magnesium and sulfur play key roles in photosynthesis, the process by which our potatoes convert sunlight into energy.
By supplying our potato plants with the balanced nutrition provided by Jack’s 3-2-1 formula, we set the stage for a successful harvest of delicious, homegrown Red Norland potatoes.
If you want to grow potatoes without commercial fertilizers consider adding bone meal to your coco. You can use fish emulsion or blood meal. Don’t try to use manure as it promotes scab disease.
Jack’s 3-2-1 Easy Mixing Instructions
Some people measure by weight but these powders can absorb moisture that can change their weights.
Besides weighing things out is a PITA so I measure it by volume.
3 teaspoons of Jack’s Hydroponic, 2 teaspoons of Calcium Nitrate, and 1 teaspoon of Epsom Salts (Magnesium Sulphate) dissolved in 5-Gallons of RO water will make a mix that tests at 1400 ppms and a pH of 5.8 – 5.9
I would suggest using this mix at half-strength to start because we are feeding every time we water.
Watch your plants and they will tell you if they need more. Overfertilizing is just as bad as underfertilizing and generally with most plants less is more.
My Growing Method
Growing potatoes in a 5-gallon bucket is an exciting and rewarding process, but it’s essential to use the right growing method to ensure a successful harvest.
In this section, we’ll discuss our unique approach to growing Red Norland potatoes in our double bucket system.
We’ll cover how to plant the seed potatoes, when and how to add more coco coir as the plants grow, and what to expect as our potatoes progress through their growth cycle.
So let’s roll up our sleeves and get ready to cultivate a thriving potato garden using our tried-and-true growing method!
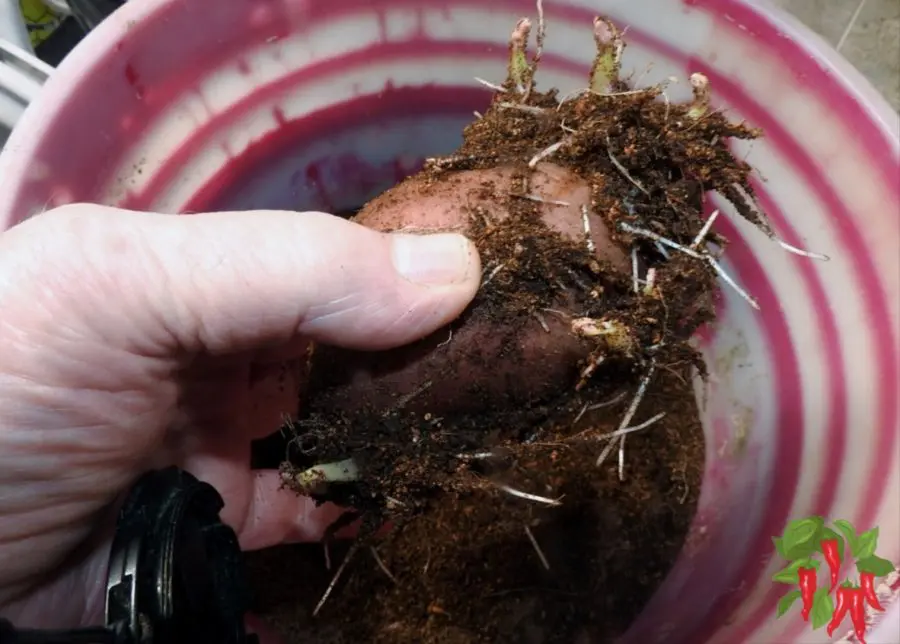
Planting the Seed Potato: Halfway to Success
Our growing method begins with planting the seed potato in the perfect spot within our bucket system. To do this:
Start by burying the seed potato about halfway up the top bucket filled with coco coir.
Ensure the “eyes” of the seed potato are facing upward, as this is where the sprouts will emerge. Cover the potato with a layer of soil a few inches deep.
Water the coco coir thoroughly, making sure it’s moist but not soaking wet.
Keep an eye on the moisture levels in the coco coir, and water as needed to maintain consistent moisture.
How Many Potatoes?
You might be wondering about the number of potatoes to plant in your bucket. I only plant one. Potatoes are large vigorous plants and one is plenty.
Some people cut their potatoes into sections each with a few eyes but I prefer to plant one whole potato with multiple eyes on it.
You should begin to see new shoots emerging in a few weeks.
Adding Coco Coir: Supporting Spud Growth
As our potato plant grows, we’ll want to support the development of more potatoes by gradually adding more coco coir to the bucket:
Once the plant reaches about 6-8 inches in height, add more coco coir to cover half of the plant’s height.
This will encourage the plant to produce additional potatoes along its buried stem.
Continue to add coco coir as the plant grows, always keeping about half of the plant’s height exposed to light.
Fill the bucket until you reach about 1-2 inches below the top of the bucket rim, allowing enough space for watering and airflow.
Now most of the hard work is done. Now your job shifts to watering and fertilizing your potato plant.
Monitoring and Adjusting: Nurturing Our Potatoes
Throughout the growing process, it’s essential to keep a close eye on our Red Norland potatoes and make adjustments as needed:
Monitor the moisture levels in the coco coir, and water consistently to prevent the growing medium from drying out or becoming too saturated.
Check for signs of nutrient deficiencies or imbalances and adjust the Jack’s 3-2-1 formula application as needed.
Keep an eye on the overall health of the plant, watching for any signs of pests or diseases, and address issues promptly.
By following this growing method, we’re setting up our Red Norland potatoes for a successful and bountiful harvest, all within the compact and efficient space of our double 5-gallon bucket system.
Documenting and Updating as the Grow Progresses
As we embark on this exciting journey of growing Red Norland potatoes in our 5-gallon bucket system, we believe it’s essential to document and share our progress along the way.
In this section, we’ll cover the importance of keeping track of our potato plants’ development, what milestones to look out for, and how to update fellow gardening enthusiasts on our potato-growing adventure.
So, let’s get ready to capture the ups and downs, the triumphs and challenges, and, of course, the joy of watching our potatoes grow from tiny seedlings to a bountiful harvest!
Capturing the Journey: Why Documenting Matters
Documenting the growing process of our Red Norland potatoes is not only fun but also highly beneficial.
Here’s why it’s important:
Learning from experience: Keeping track of our successes and challenges helps us refine our growing techniques and better understand our plants’ needs.
Sharing knowledge: Documenting our progress allows us to share our experience with fellow gardeners and inspire others to try growing potatoes in 5-gallon buckets.
Celebrating milestones: Recording our potato plants’ development enables us to appreciate their growth and celebrate each stage of the process.
Staying in Touch: Regular Updates on Plant Growth
To keep ourselves and others informed about our potato-growing journey, we’ll provide regular updates on our plants’ growth:
Photos And Videos: Capture images and videos of the plants at different stages, from sprouting to harvest, to visually document their progress.
Written updates: Share details about the plants’ growth, including measurements, observations, and any noteworthy events.
Timelines: Create a timeline of key milestones, such as when the plants first sprouted, when we added more coco coir, and when flowers appeared.
Adapting on the Fly: Adjustments Based on Observations
As we document our potato plants’ progress, we may need to make adjustments to ensure their continued health and growth:
Watering and nutrients: Based on our observations, we might need to modify our watering schedule or adjust the nutrient application to better meet our plants’ needs.
Pest and disease management: If we notice any signs of pests or diseases, we’ll take appropriate action to address the issue and protect our plants.
Environmental factors: We’ll keep an eye on factors such as temperature, humidity, and light exposure, and make any necessary changes to ensure optimal growing conditions for our Red Norland potatoes.
By documenting and updating our growth progress, we can learn from our experience, share our knowledge, and adapt our approach to cultivating a thriving potato garden in our 5-gallon bucket system.
FAQs
Growing potatoes in a 5-gallon bucket has become increasingly popular for those with limited space, or for those who want to try container gardening.
It’s a simple, cost-effective method that allows you to control the growing conditions of your potatoes more closely.
Below are some commonly asked questions and their answers to help you get started on your own bucket potato garden.
Q: How many potatoes will grow in a 5-gallon bucket?
A: One seed potato is enough a 5-gallon bucket. The yield can vary, but generally, you can expect about 5-10 potatoes per bucket depending on the growing conditions and the variety of potatoes.
Q: How long does it take potatoes to grow in a 5-gallon bucket?
A: The growing time can vary depending on the potato variety, but generally, it takes about 10-12 weeks from planting to harvest.
Q: Is it safe to grow potatoes in 5-gallon buckets?
A: Yes, it is safe as long as the bucket is food-grade and has not been used to store chemicals. Ensure that you drill drainage holes in the bottom for proper water management.
Q: What is the best soil for potatoes in buckets?
A: A well-drained soil that’s rich in organic matter is ideal. I prefer to use coco coir. Mixing potting soil with compost is often a good choice. The pH should be slightly acidic, around 6.0.
Growing potatoes in a 5-gallon bucket can be a fulfilling experience, just make sure to pay attention to soil quality, water, and sunlight for optimal results.
Week 1 Planting A Potato In A 5-Gallon Bucket
Here is a video shot on planting day. More updates will follow.
Day 7 Potatoes Are Up
Welcome to my latest video, where I will be talking about growing potatoes in a 5-gallon bucket.
If you’ve ever dreamed of harvesting your very own delicious and nutritious potatoes but were worried about space, this is the perfect solution for you!
In today’s video, a week has passed and our seed potato has some very heathy shoots and they should reach the top of the bucket later this week at which point I will remove their lower leaves and bury them in coco coir to within an inch of the bucket top.
Growing Potatoes In A 5-Gallon Bucket – Harvest
This is a Red Norland potato plant in a 5-gallon bucket. Growth was really strong at first and it was crowding out my other veggies.
I tried tying it up but it did not seem to like that much. After a while, the vines started to die back and I decided to harvest.
I think harvesting was a bit premature and most of the potatoes are fairly small.
I will try again with a new plant and hopefully get better results next time.
Read more: Apartment Kitchen Garden (Apartment Gardening Tips For Beginners)