
Discover how a closet drip system for vegetables can transform your indoor gardening! Simple, efficient, and perfect for busy lifestyles.
Why Build a Closet Drip System?
- A closet drip system for vegetables is an automated, space-saving hydroponic setup.
- It uses top-feed drip irrigation, allowing plants to receive water and nutrients efficiently.
- This system is ideal for indoor gardening, especially in small spaces like closets.
- It ensures consistent plant growth with minimal effort.
Set Up a Closet Drip System For Vegetables
Ever thought about growing your own veggies in a small space? With a closet drip system for vegetables, you can do just that!
This guide walks you through setting up an easy, automated system to grow fresh vegetables in your closet. It’s perfect for urban dwellers or anyone looking to make the most of limited space.
I want to show you how to set up a closet drip system for vegetables. It will be a recirculating hydroponic drip system. Your veggies will love it!
A recirculating drip system uses top-feed drip lines for each plant. Plants sit in a tray where the water drains back into a reservoir beneath the plants. There it is recirculated back with a pump on a timer.
In a previous article and video, I showed you how to set up a closet to grow vegetables. I also said I would explain how my closet drip system for vegetables works.
Here is a link to that article and video:
Building A Closet Drip System For Vegetables
This article and video will show you how to build a closet drip system for vegetables.
This is a recirculating hydroponic system that uses top feed drip irrigation and it’s not that hard or expensive to build.
Top Feed Vs Bottom Feeding
There are a lot of ways to water a plant. Flood and drain floods the pot from the bottom up.
There are SIPs (sub-irrigated planters) and other bottom watering systems, and they all work pretty well.
But watering from the top down is how mother nature does it and plants have adapted to top watering.
So, there is no point in trying to fight nature.
So, the first thing we are going to do is water from the top down. This is called top feed drip.
We are also going to build a top-feed drip watering system that is automated.
Is Drip Irrigation Good For Vegetable Gardens?
Yes, drip irrigation is the best watering system for your vegetables because it can be automated. It also meters feeding and watering.
That way you don’t have to go in and water every day by hand. In this day and age, many of us have a full plate and it is easy to forget or put off caring for our plants.
Want to take off for a few days? With an automated watering system, you can without losing your plants.
Skipping watering can harm or even kill your vegetable plants. With an automated system, we know our veggies will be watered every day.
Automated Drip Irrigation With Multiple Daily Feedings
Plants grow faster and do better when they get multiple smaller feedings throughout the day as opposed to being flooded once every day or two.
Plants are a lot like people, and they are habitual. They do better when fed at the same time and same amount.
It’s a lot like you expecting lunch at noon and dinner at six.
They never run out of food and their roots don’t have to search far for food. They can spend their energy growing and fruiting instead.
Because they are receiving nutrients on an almost constant basis, we can feed them less plant food.
And that is the beauty of hydroponics and why it outperforms growing in soil.
Water Watering Times
All you really need to do is determine watering intervals, fill the reservoir with nutrients, and monitor the level to make sure it doesn’t go down too far. Plants can drink quite a bit.
Your drip system will use a submersible pump on a timer. Watering and feeding your vegetables is all taken care of automatically.
The timing and length of your waterings is going to be something you’ll have to work out for yourself because it can vary a lot.
It’s going to depend a lot on the size of your pots, your grow medium, your pump size, and also on how big your plants are.
My pots are two and a half gallons they’re filled with grow stones which unfortunately are not being made anymore.
Because this is hydroponics you want to use an inert media and that means grow stones or you can use hydroton instead. That is made from little clay balls that have been oven-fired and they work well.
You just have to wash Hydroton before you use it because there’ll be a lot of red dust and other stuff inside the bag.
If you’re using hydroton or grow stones your plants are going to need to be watered fairly frequently.
They don’t hold a whole lot of water for very long so you will want to water several times a day.
Usually, plants are not watered during their night or dark cycle.
In my closet I usually run for about five minutes on and then I run about three hours or four hours in between waterings.
Really it just depends a lot on the plants. Small plants don’t need as much water as a large plant that is fruiting.
Take heart though if you are using a grow medium like hydroton it is almost impossible to overwater.
Basic Layout For Your Drip System
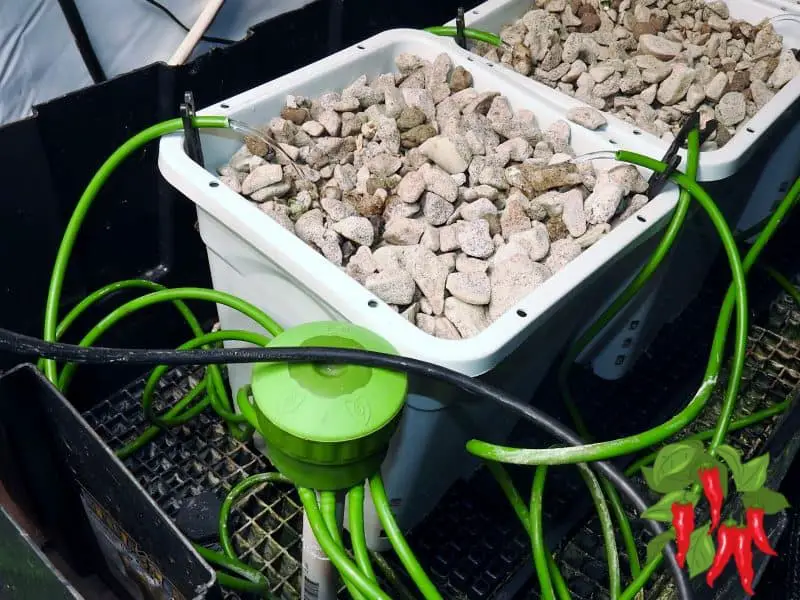
Your pots will need to sit in a tray or tote that is above your reservoir. You can use any size tray to hold them. I run two 40-gallon totes in my closet.
The totes sit on boards I raised up high enough to set a reservoir beneath them. You can also use shelving to hold your totes up.
IMPORTANT!
Remember this is a closet and height is limited. In addition to the height of your tray, you need to allow room for your plants to grow and also room for your lights.
So even if your closet has 8-foot ceilings you will want to keep your reservoir and plant tray as low as possible.
You will need to drill two holes in your tray and install Botanicare flood and drain fittings. One fitting will send nutrients up to the tray and the other will drain off the nutrients. More on this in a bit.
You will have a reservoir down below your plant tray and in my closet, I am using a 20-gallon utility tub that I got from Home Depot for about $13. It’s about two feet by three feet by about eight inches high.
You can use any size tub or tote for your reservoir, but 20 gallons is a good size. If it is smaller you will have to refill it much more often.
You will want to keep it covered so light doesn’t get in. Otherwise, algae can grow inside.
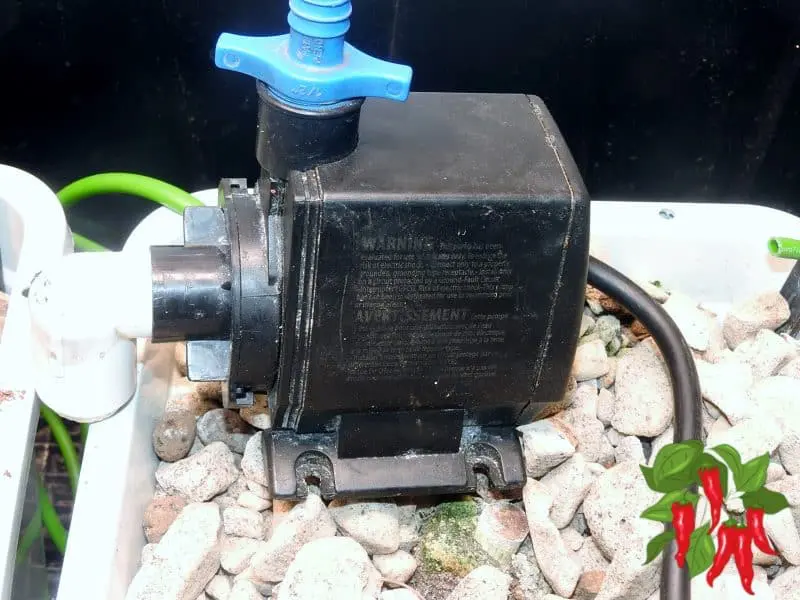
EcoPlus 396 Pump
In my reservoir, there is a pump. I use an EcoPlus 396 pump. It runs both totes. It comes with a bunch of fittings to hook it up.

I added a 1/2inch street elbow to the intake. This allows me to draw from the bottom of my reservoir.
In my system, I run two totes with it for a total of 16 dripper lines. Each drip manifold has 8 outlets.
It is connected to a tee and then there are two 1/2-inch OD lengths of tubing running from it to each of my totes. It is hard to show this but here is a picture:
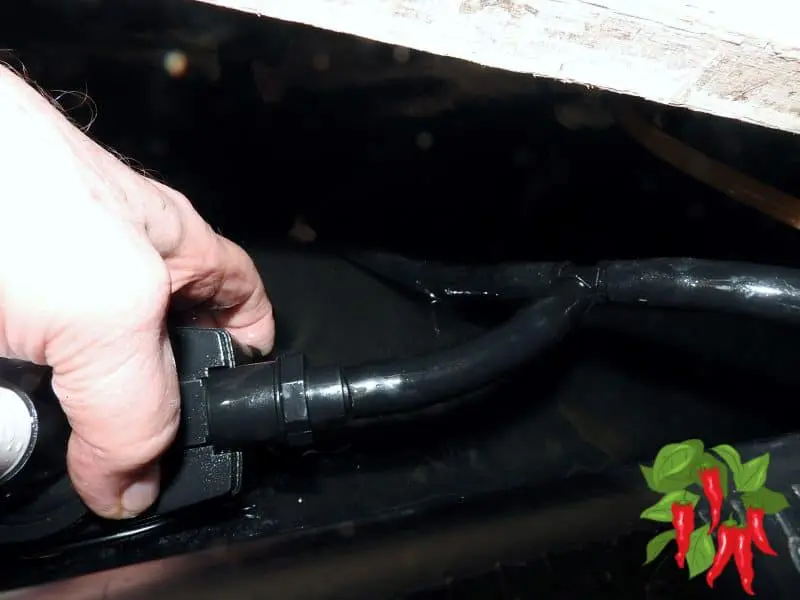
You can see a short piece of tubing from the pump to a tee. There is tubing running to each intake fitting.
I also have an inline valve in each line you can’t see to make sure flow can be controlled to each or to turn off a tote.
Installing The Flood And Drain Fittings
The totes that I’m using are set on boards as I said. I have holes drilled through the boards for the intake and the drain fittings.
My drain goes directly into my reservoir like a waterfall and the intake fitting is supplied from the pump in the reservoir.
What you’re going to need to set this up is these Botanicare flood and drain fittings.
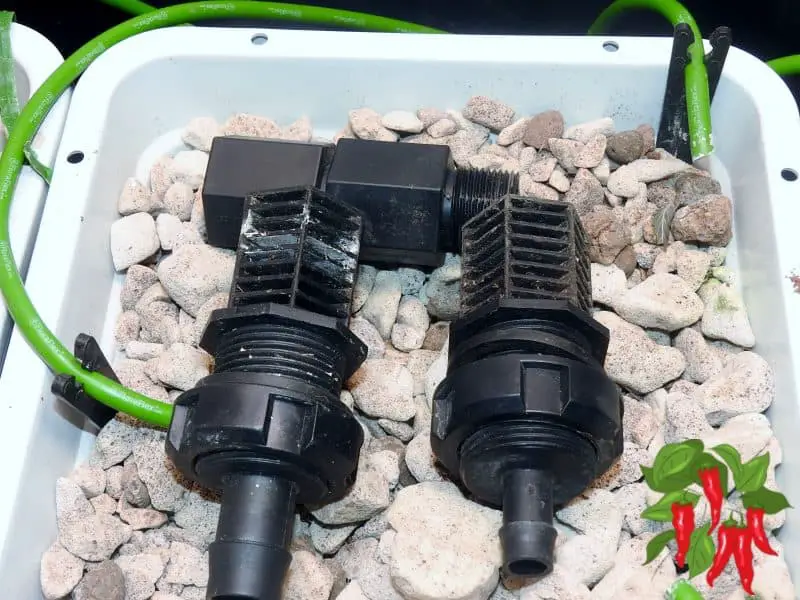
The 3/4-inch fitting is for the drain and the 1/2-inch fitting is for intake.
Your drain fitting comes with multiple sections so you can adjust the height if you’re going to flood.
But for this type of system, you’re not going to use them. But you want the screen fitting on top of both the flood and drain fittings as in the picture above.
Also, you will notice each fitting comes with a rubber gasket. Do not install it on the inside of your tote. The gasket goes on the outside of your tote.
Because grow stones and hydroton float you need to use the screens on top of both fittings. You don’t want them to get into your reservoir where your pump might suck them up.
To get these fittings installed you’re going to have to drill 2 holes in your tote. Usually, they are placed on the end of the tray.
If you’re using Botanicare fittings I use a 1 1/4-inch hole saw and the hole will be a little bit tight, but you should be able to screw the fittings into it.
If you use a different brand the hole sizes may be different. Measure twice, cut once is good advice. You can make a hole a bit bigger, but you can’t make it smaller.
Installing Your Drip Irrigation Manifold
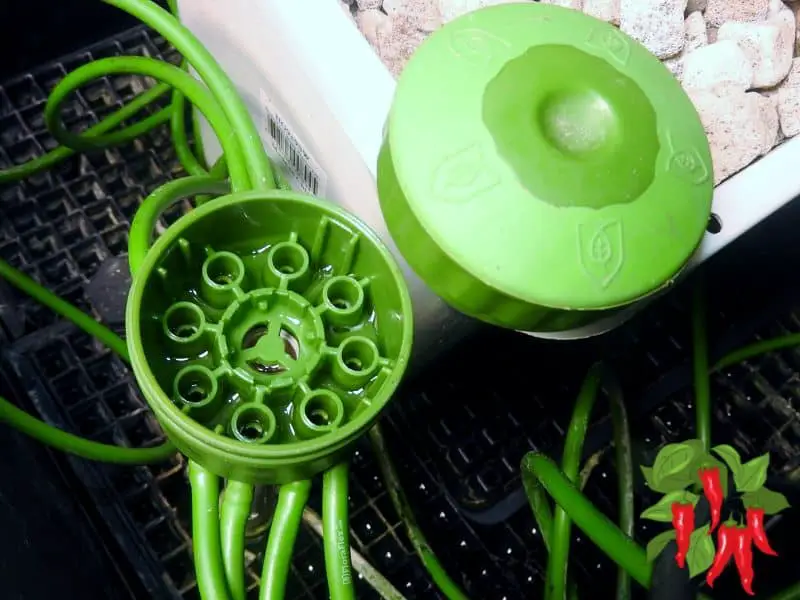
This is a FloraFlex Open Flow Drip Irrigation Manifold. That is what you want to use.
It has 8 outlets but if you want to use less you can use a small loop of tubing between 2 outlets.
Or you can add a line and just let it drain into your tray. That’s what I do because it doesn’t affect flow rates.
They make manifolds that meter the water flow, but this is for drip emitters.
We are not going to use drip emitters because they are prone to clogging.
Instead, we will use open-ended drip lines in our pots. We don’t want to water constantly.
Intermittent watering with some dry back is more natural and helps promote more root growth.
We want to water with preset intervals and times because this also promotes run off which flushes out excess salts.
The basic purpose of a drip manifold is to distribute water evenly from the reservoir to your plants.
You should use the FloraFlex tubing to do this. It is very flexible. Most black tubing you find is way too rigid and will be very difficult to use.

FloraFlex 760456 100-ft. 1/4″ OD Tubing
Also, it is important to cut all your drip lines at the same length so they will provide equal water flow to each pot.
You’re going to need a short length of 1/2 inch PVC pipe to use as a standpipe.
You’re going to need a half-inch slip to half-inch male adapter on one end. Your drip manifold will screw onto this fitting.
The other end of this pipe will screw into your flood fitting. Obviously, you won’t be using the screen shown in the picture. But the thread inside is a 3/4-inch NPT thread.
So, you will use a 3/4-inch male to 1/2-inch slip fitting here. But finding that fitting on Amazon can be kind of tricky.
I would buy it at Home Depot or Lowes, they should have it and you won’t need to buy 10 of them.
If you can’t find it for some reason you can use a 3/4-inch male to 3/4 slip and add a 3/4 to 1/2 bushing to it.
That’s the hardest part of setting up your closet drip system for vegetables in my opinion. If you can handle that you can handle anything here.
By the way, it is not necessary to glue these fittings together. The pump is low-pressure. They should fit snugly enough without glue.
In addition to using open-ended drip lines, I also use multiple drippers per pot. I use at least 2 per pot and sometimes as many as 4 lines.
Just in case one drip line should get clogged your plants will still get watered.
You can use drip stakes to support your feed lines and keep them in place. I bought mine at Lowes.
Usually, clogs are rare and if they do occur it is usually in the manifold and not in the tubing.
Multiple drip lines in a pot also help provide more uniform watering.
Grow Media And Feeding Your Drip System
Because this is a hydroponic system, we are going to do things a bit differently than growing in soil. No messy soil to deal with. Yay!
So, we are going to use a true hydroponic grow medium like hydroton. You can reuse hydroton over and over again.
Other Media Choices
Some people use lava rock, and it works well but it is much heavier than hydroton.
You also can use chunky perlite, but it is not really reusable because it crumbles over time.
Once you buy hydroton you are done buying any more unless you expand your drip vegetable garden.
How To Reuse Hydroton
I have been using my grow stones for over 3 years now. After a crop, I remove as many roots as I can and pop it in a 350-degree oven for about 30 minutes.
You can disinfect your grow media with a soak in bleach. You might even try microwaving it. But you should do this after a grow.
Because we are using a media like this, we need to treat and feed it a bit differently than soil.
It doesn’t have any buffering qualities like soil or cocoa does and that means you feed at a lower level.
What’s going to happen is these plants are going to get what they need almost constantly.
Because they’re being fed constantly, they don’t need as many nutrients all at the same time as if you were hand watering.
Another thing about growing this way is you will want to use hydroponic nutrients.
Because if you use organics, stuff like that could plug your emitters and it’s just not made for a hydroponic system. It’s made for soil.
You’ll get better results with hydroponics if you use nutrients that are designed for a recirculating system.
Your plants will grow faster, mature faster and they will probably yield more too.
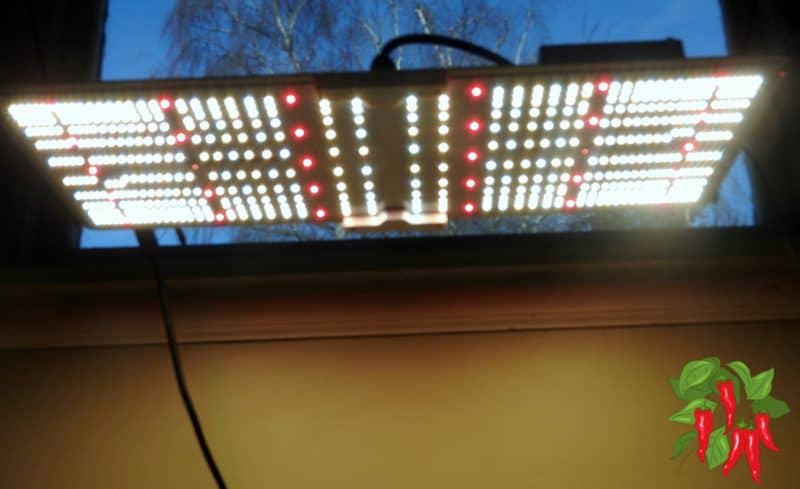
Lighting Is Important For Your Drip System
You do need to have good lighting in the closet drip system for vegetables.
You know you can’t grow plants in the dark they are photosynthetic they need light, and most vegetables need a lot of light.
But if your lighting is on point and you get your watering schedule dialed in, you’ll be able to really grow some nice vegetables in there.
With good lighting 12 hours of light daily is plenty. You will also need a timer for your lights.
I am running this Spider Farmer SF 2000 in my DWC kitchen garden. It works great and is affordable but not cheaply made. It puts out 200 watts of full-spectrum light. It can cover a 2 x 4 area very well.
Starting Your Plants
You can start your vegetable plants from seed, or you can buy transplants from a nursery.
I’m getting ready to set some tomatoes in my closet. What I do is sprout my seeds in a moist paper towel inside a small plastic container.
Once they have started to sprout I transplant them into small pots filled with coco. In a few weeks, they will fill the container with roots.
When they’re big enough and I see I have roots coming out the bottom of the pot I know it is time to carefully unpot them and set them in the middle of the grow stones.
When you set your plants in and before you start your drip system up make sure that the hydroton that you use is totally soaked.
That way water will go through the medium evenly. Because sometimes you can get channeling.
When that happens the water just runs straight down and out the bottom of the pot, and it doesn’t move sideways much.
But if your media is already wet it’ll spread out much better.
You might have to start out actually top-feeding your plants by hand for the first few days until they get roots down into the hydroton.
But after that everything is automatic. You just plug your pump into a timer. You can start with three or four hours between waterings.
Always water until you’re getting runoff out the bottom of your pots which might be three minutes or so.
I run my drippers for five minutes just because I want a good amount of runoff.
That way I know I am always flushing out any old nutrients and eliminating any salt buildup.
Do You Know What Is In Your Water?
Like I said this system recirculates unused nutrients. So, after it goes out the bottom of the pots it will go down through the drain into the reservoir again and it will be re-fed.
But plants don’t always eat the same stuff equally so your reservoir can become unbalanced over time.
Because plants will eat more of certain things at certain times you will probably want to change your reservoir every two weeks.
Even though you can measure the parts per million in your reservoir it doesn’t tell you what nutrients they’re coming from.
So, all the calcium could be gone. All magnesium could be gone but there could be a lot more nitrogen and potassium than you want.
So, it’s a good idea to change the reservoir at regular intervals.
Once you get this drip system set up, it pretty much runs on autopilot so there’s not a whole lot that you need to do other than monitor
your reservoir’s water levels and your nutrient levels.
For that, you really should have a TDS meter and a pH pen at the minimum. Or you can buy an all-in-one meter like the Hanna combo meter I use.
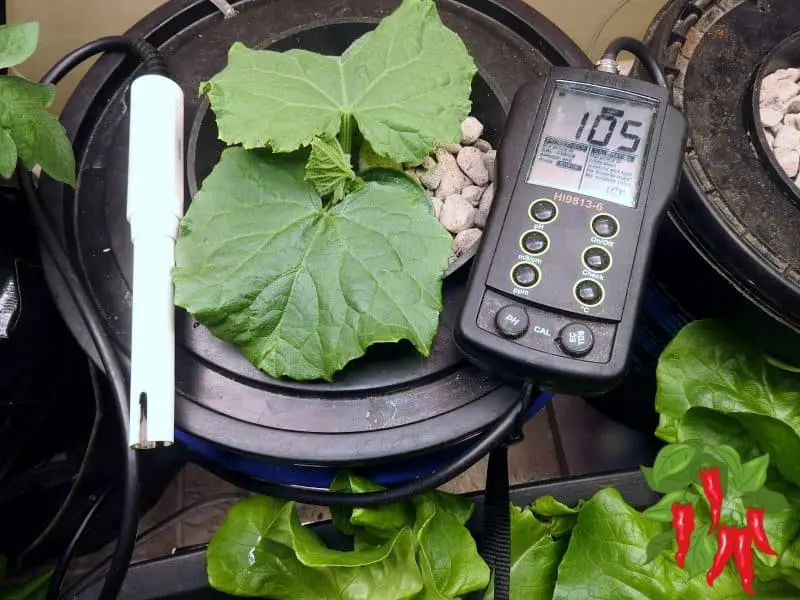
They’re expensive I know, about 300 bucks. But you can buy a TDS pen and a pH pen for probably 20 bucks each on Amazon.

They’re not as accurate but they’re probably good enough and you know you’ll want to check reservoir at least every couple of days.
I recommend you start feeding at half the strength the manufacturer recommends.
Do You Need Reverse Osmosis Water?
Luckily I don’t need to use reverse osmosis water because my tap water comes out at only 30 parts per million. It’s almost RO
But if you’re using well water, or your city water has a lot of dissolved nutrients in it you might want to run RO water just because you don’t know what’s in it.
You know some cities have really hard water and hard water can be a problem because it can have a lot of calcium and magnesium in it and that can cause scaling which can clog your feed lines over time.
But it can also have a lot of other things in it that you don’t want. If you have hard water, you’re probably going to want to run reverse osmosis water instead.
If your water is above 150 ppm it can interfere with the nutrient balance by adding too much of the wrong things.
You can buy an RO system for between 100-200 bucks and make your own RO water from your tap water so that’s an option.
Closet Drip System For Vegetables Material List
I recommend buying any totes or tubs you need at Home Depot or Lowes. They will be much cheaper there.
Likewise, buy any PVC pipe and fittings from them. You might find hydroton there too.
The links below go to Amazon and prices are pretty good for them.
Botanicare Ebb & Flow Fitting Kit with 2 Extensions
FloraFlex 760456 100-ft. 1/4″ OD Tubing
Hydrofarm GROWT GMC25L 25 Liter Bag
Closet Drip System FAQs
Are you considering setting up a closet drip system for your vegetable gardening but have some questions? You’re not alone!
Many indoor gardeners are turning to this innovative method for its space-saving and efficient qualities.
Whether you’re curious about the basics, the setup process, or the maintenance of such a system, we’ve got you covered. Below are some frequently asked questions that will guide you through understanding and implementing a closet drip system for growing vegetables.
From the nuts and bolts of how it works, to automation possibilities, benefits over traditional methods, and the essential supplies needed, these answers aim to provide you with a clearer path towards creating your own thriving indoor garden.
Let’s dive into these queries to help you get started on your closet gardening adventure!
Q1: What is a closet drip system and how does it work?
A1: A closet drip system is a type of hydroponic setup designed for small spaces, like closets.
It works by using a top-feed drip irrigation method, where water and nutrients are delivered directly to the plants’ roots.
The system includes a reservoir for nutrient-rich water, which is circulated to the plants via a pump and drip lines.
Excess water drains back into the reservoir, making it a sustainable and efficient way to grow vegetables indoors.
Q2: Can I automate my closet drip system?
A2: Yes, a closet drip system can be fully automated. By using a timer to control the water pump, you can set specific intervals for watering your plants.
You will also need a timer to control the lighting cycle which should be about 12 hours on and 12 hours off.
This automation ensures consistent moisture and nutrient delivery without the need for daily manual watering, perfect for those with busy schedules or for times when you are away from home.
Q3: What are the benefits of using a drip system over other methods?
A3: The drip system offers several advantages, especially for indoor gardening.
It provides precise watering, reducing water waste and ensuring that each plant receives the right amount of moisture and nutrients.
This method mimics natural rainfall, promoting healthier plant growth.
Additionally, it minimizes the chances of overwatering and root rot, common issues in traditional gardening methods.
Q4: What supplies do I need to start my own closet drip system?
A4: To set up a closet drip system, you’ll need a few key components: a reservoir or container to hold the nutrient solution, a submersible pump, top-feed drip lines, and a timer for automation.
You’ll also need grow trays or totes to hold the plants, grow media like hydroton or grow stones, and hydroponic nutrients.
Additional items like pH meters and TDS pens can help in maintaining the ideal nutrient solution for your vegetables.
Closet Drip System For Vegetables Final
So that’s the basics of setting up a closet drip system for vegetables. This system will work really well for vegetables.
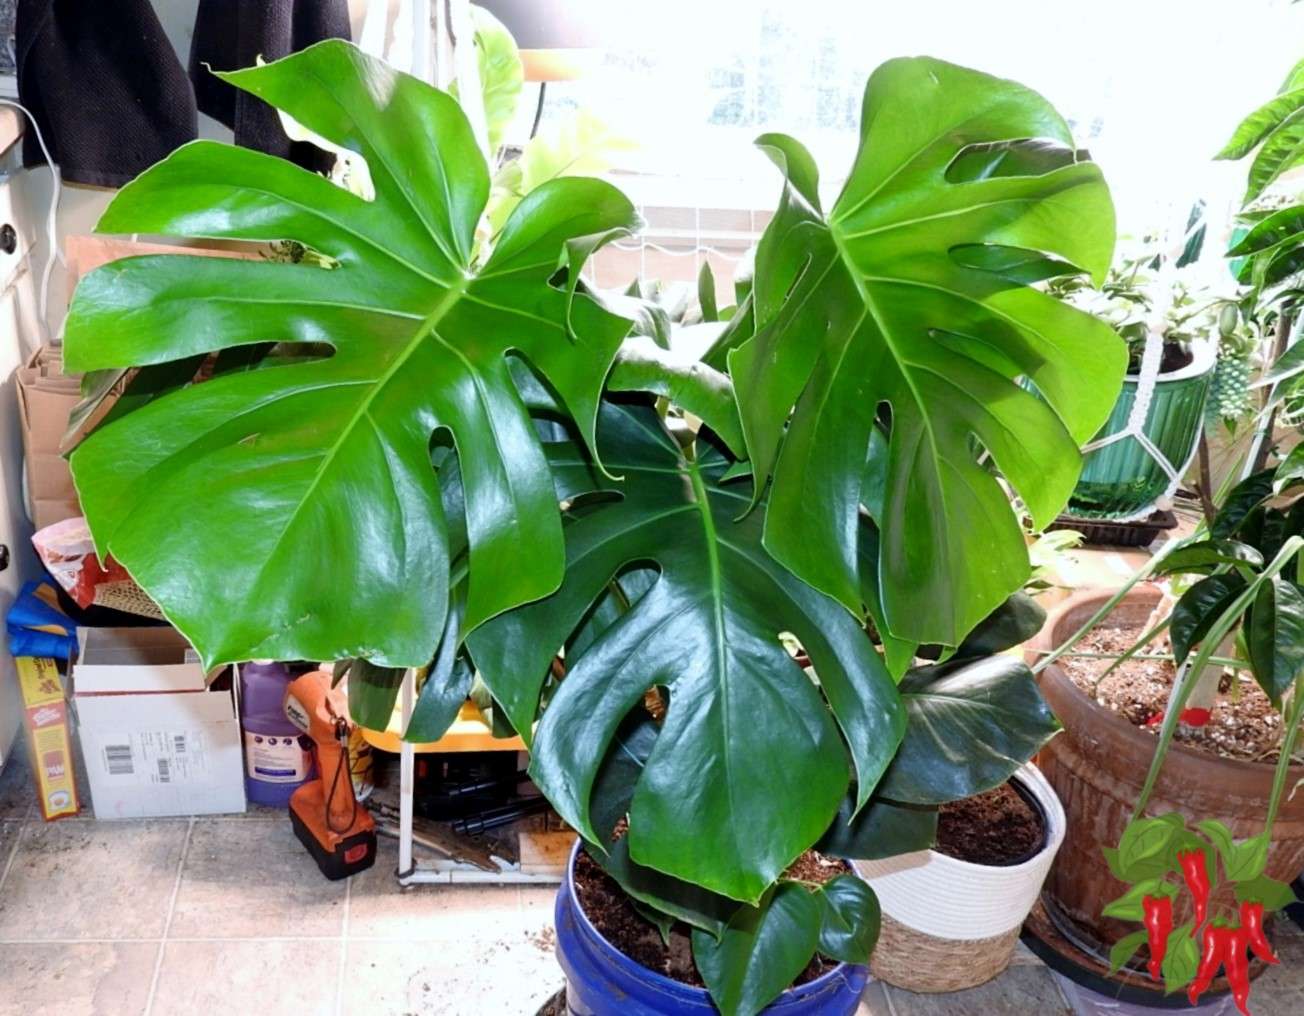
It will work for any crop but it’s best suited for larger plants like tomatoes and peppers.
I try to grow bush varieties of peppers and tomatoes to try to keep the height down.
I do have a trellis set up in my closet in case I need to use it for supporting taller plants.
It’s a good idea to spread out the tops of plants, so they get more light.
I’ll come back and update this closet drip system when I have some plants in here and that’ll give you a better idea of how it works.
But in the meantime, if you have a closet and you don’t want to hand water you can set up a drip system for your vegetables and they will thank you for it.
So, this is a great system. I have been using it for years, so it is time-tested and not experimental.
It is a pretty easy DIY project. It doesn’t cost a whole lot to set up and I think you’ll be very happy with the results. Good luck. Keep it green!
Sustainable Apartment Gardening
🏙️ Apartment Gardening
Turn your apartment into a thriving garden! Explore easy guides for veggies, herbs, fruits, and flowering plants—all grown indoors.
-
- 🥕 Harvesting Carrots in Containers
- 🍅 Growing Tomatoes Indoors For Beginners
- 🌱 The Best Vegetables To Grow Indoors
- 🥔 How To Grow Potatoes In A 5-Gallon Bucket Indoors
- 🧄 Growing Garlic Indoors In Pots
- 🥬 How To Grow Bok Choy Indoors
- 🫘 Growing Green Beans In Pots
- 🧅 Growing Leeks In Containers
- 🥕 How To Grow Carrots Indoors
- See all articles in our Apartment Gardening category

 Steve S. is the creator of