This post contains affiliate links. If you buy something from one of our links we may earn a commission. Thanks
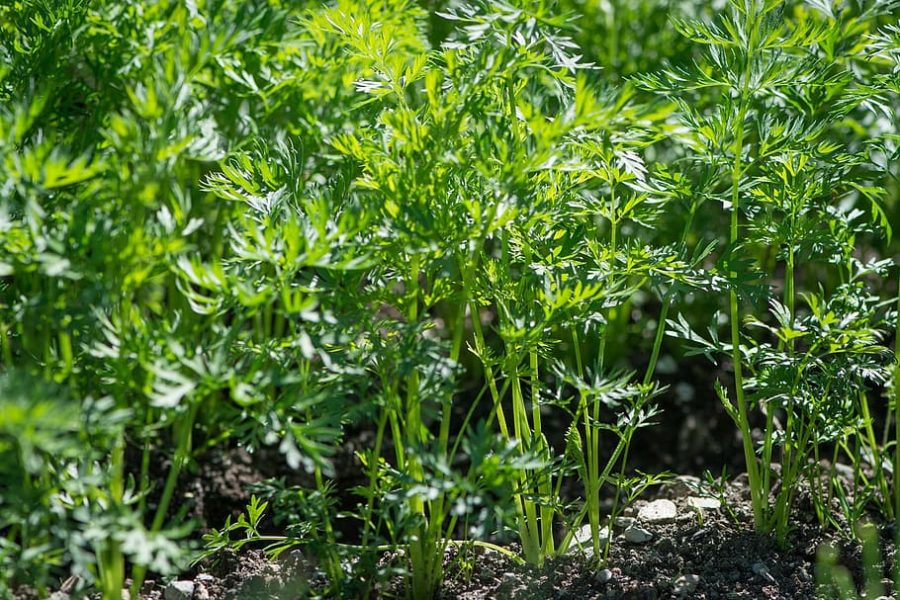
Discover the joy of growing carrots in pots indoors with our easy-to-follow guide, using coco coir to yield a vibrant, tasty harvest from the comfort of home!
Growing carrots indoors in pots is entirely possible with the right conditions. Choose a deep pot with drainage holes and fill it with loose, well-draining soil. Plant the seeds 1/4 inch deep, and keep the soil consistently moist. Provide at least 12-14 hours of artificial light or place near a sunny window for optimal growth.
Ever thought about growing carrots in pots, right in the comfort of your own home? Well, it’s time to bring that idea to life!
Our comprehensive guide will walk you through the process, step by step, using coco coir as the perfect growing medium.
Soon, you’ll be enjoying the crunch and flavor of homegrown carrot plants, straight from your indoor garden.
So, let’s get started and transform your indoor space into a thriving carrot haven!
Introduction-Growing Carrots In Pots Indoors
Are you ready to dive into the world of growing carrots in pots indoors? You’re in the right place!
In this blog post, we’ll explore everything you need to know, from selecting the perfect carrot variety to using coco coir as a growing medium.
We’ll discuss choosing the right container, planting and germinating carrot seeds, as well as caring for your growing carrots.
By the end of this guide, you’ll be well-equipped to start your own indoor carrot garden, and you’ll be one step closer to enjoying a fresh, homegrown harvest.
Let’s get started on this exciting journey!
The Perks of Indoor Carrot Gardening
Growing carrots indoors comes with a whole host of benefits that make it an appealing option for gardening enthusiasts.
One major advantage is the ability to control the growing environment, which means you can provide the perfect conditions for your carrots to thrive, regardless of the weather outside.
This also helps in keeping pests and diseases at bay.
Additionally, growing carrots indoors allows you to extend the growing season, so you can enjoy a fresh harvest all year round.
Plus, it’s a great way to make the most of your indoor space and add a touch of greenery to your home.
Embracing Container Carrot Cultivation
You might be wondering if growing carrots in containers indoors is really a feasible option.
The answer is a resounding yes! By choosing the right carrot variety and container, you can successfully grow healthy and delicious carrots indoors in small spaces.
Container gardening makes it easier to control the soil quality and moisture levels, ensuring your carrots have the best possible growing conditions.
Containers also don’t take up a lot of space indoors. It’s also the best way for those with limited outdoor space or who live in urban environments.
Coco Coir: The Ideal Growing Medium
Now, let’s talk about coco coir, the star of our indoor carrot growing show.
Coco coir is a natural, sustainable, and eco-friendly growing medium made from the fibrous husks of coconuts.
It boasts excellent water retention and aeration properties, making it an ideal choice for growing carrots in pots.
Additionally, coco coir is resistant to pests and diseases, and it’s free of soil-borne pathogens.
This means you can give your carrots a healthy, nurturing environment in which to grow, all while doing your part for the planet.
Try to avoid using potting mix which is made from peat moss and often contains perlite which can cause forked roots.
Coco coir provides a light airy growth medium of well-drained soil that root vegetables grow very well in.
Root crops like carrots can grow long and straight in coco coir.
Choosing the Right Carrot Variety
So, you’ve decided to embark on the exciting adventure of growing carrots in pots indoors. But where do you begin?
The first step is choosing the right variety of carrots to suit your indoor garden. With so many varieties of carrots out there, it might seem a bit overwhelming, but don’t worry!
We’re here to help you navigate the world of carrot varieties and pick the perfect one for your container garden.
In this section, we’ll explore different types of carrots, from short and round to long and slender, as well as some colorful heirlooms to add a touch of interest to your indoor harvest.
Let’s dive in and find your carrot soulmate!
Short and Round Varieties: Perfect for Pots
When it comes to growing carrots in pots, short and round varieties are a fantastic choice.
These compact carrots are well-suited for containers, as they don’t require as much depth to grow.
Some popular short and round varieties include ‘Parisian Market‘, ‘Romeo’, and ‘Atlas’. These cute little carrots pack a punch of flavor and are perfect for snacking, salads, and roasting.
Long and Slender Varieties: Ideal for Deeper Pots
If you have deeper pots, you can also consider growing long and slender carrot varieties.
These classic-looking carrots will need a bit more space to grow, but they’re well worth it.
Some great long and slender options include ‘Napoli‘, ‘Scarlet Nantes‘, and ‘Danvers Half Long‘. Just make sure you use a deep container to accommodate their growth, and you’ll be rewarded with delicious, crunchy fresh carrots.
Oxheart Varieties
Oxheart carrot types are well-suited for container cultivation.
These heart-shaped, orange carrots can reach weights of up to one pound and measure 5 to 6 inches in length and 3 to 4 inches in width.
They are an excellent option for container gardens or areas with shallow or dense soil, as they don’t require as much depth for growth compared to other varieties.
Nantes Half Long: My Top Choice
One of my personal favorites for growing in pots is the Nantes Half Long carrot.
This variety is a fantastic all-rounder, as it offers a beautiful balance between size and flavor.
With a sweet taste and a satisfying crunch, ‘Nantes Half Long’ carrots are the perfect type of carrot for both eating fresh and cooking.
They’re also relatively easy to grow, making them an excellent choice for indoor container gardening.
Colorful Heirloom Varieties: Add a Splash of Interest
If you’re looking to add a bit of excitement to your indoor carrot garden, why not try some colorful heirloom varieties?
These different varieties of carrots come in a range of colors, including purple, yellow, red, and even white.
Varieties like ‘Purple Haze’, ‘Lunar White’, and ‘Solar Yellow’ not only bring visual interest to your harvest but also offer a variety of flavors and textures to enjoy.
Give them a try, and you might just find a new favorite carrot to grow year after year.
Selecting the Perfect Container
Now that you’ve chosen the ideal carrot variety for your indoor garden, it’s time to find the perfect type of container to sow carrot seeds and nurture their growth.
Selecting the right container is crucial for the success of your potted carrot endeavors.
In this section, we’ll discuss the factors to consider when choosing a container, such as size, depth, materials, and drainage.
With our guidance, you’ll be well on your way to creating a thriving environment for your carrots to grow and flourish.
So, let’s explore the world of containers and find the perfect match for your soon-to-be-planted carrots!
Size and Depth: Finding the Perfect Fit
When selecting a container for your carrots, it’s essential to consider the appropriate size and depth for your chosen variety.
As a general rule, the pot should be at least twice as deep as the mature length of your carrot variety.
This allows room for the carrots to grow without being stunted or deformed. For short and round varieties, a pot with a depth of 8-10 inches will do the trick.
For longer and slender varieties, opt for a container that is at least 12-14 inches deep to accommodate their growth.
Materials: Plastic vs. Fabric Pots
When it comes to pot materials, you have a couple of great options: plastic and fabric pots.
Plastic pots are lightweight, durable, and often more affordable than other materials. They also retain moisture well, which is important for growing carrots. Make sure your pot has drainage holes.
Fabric pots, on the other hand, are an increasingly popular choice among gardeners.
They’re made from breathable materials that allow for better aeration and drainage, which can be beneficial for carrot growth.
Fabric pots also encourage healthier root systems, as the roots are air-pruned when they reach the edge of the pot. This helps prevent root circling and promotes a more robust root structure.
I tried growing carrots in standard 2 and 3 gallon fabric pots and although they grew well I could see the pots were not deep enough.
If you want to use fabric pots you want to use potato growing bags which are taller than regular fabric pots.
Drainage and Saucers: Keeping Things Balanced
Good drainage is crucial for the success of your container-grown carrots. Carrots need consistent moisture but don’t want to be sitting in soggy soil.
Choose a container with drainage holes to ensure excess water can escape, preventing root rot and other issues. To protect your indoor surfaces and catch any excess water, place a saucer under your container.
This will also help maintain an ideal moisture level in the coco coir and keep your carrots happy and healthy.
Preparing Coco Coir for Carrot Cultivation
You’ve chosen the perfect carrot variety and container, and now it’s time to prepare the coco coir – the star-growing medium for your indoor carrot garden.
In this section, we’ll cover everything you need to know about getting your coco coir ready for planting.
We’ll discuss the benefits of using coco coir for indoor gardening, as well as how to properly hydrate and prepare it for your carrot cultivation journey.
With our help, you’ll be well on your way to providing your carrots with a cozy and nurturing home to grow in.
So let’s dive into the wonderful world of coco coir and get your indoor carrot garden off to a great start!
Coco Coir Benefits: A Game Changer for Indoor Gardening
Coco coir has become increasingly popular among indoor gardeners and for good reason!
This eco-friendly growing medium, made from coconut husks, boasts several benefits that make it an excellent choice for growing carrots in pots.
Its fibrous structure ensures excellent water retention while maintaining proper aeration, creating the perfect balance for healthy root growth.
Plus, coco coir is naturally resistant to pests and diseases, and it’s free of soil-borne pathogens, providing your carrots with a clean and nurturing environment in which to grow.
Hydrating and Preparing Coco Coir: A Step-by-Step Guide
When you first purchase coco coir, it often comes in a compressed block or brick.
Before using it as a growing medium, you’ll need to properly hydrate and prepare it.
Here’s how to rehydrate coco bricks:
• Place the coco coir block or brick in a large container.
• Add water to the container, following the manufacturer’s instructions for the recommended amount.
• Warm water can speed up the hydration process.
• Allow the coco coir to absorb the water, which usually takes about 15-30 minutes.
• As it hydrates, it will expand and become fluffy.
• Use your hands or a gardening tool to break apart the hydrated coco coir, ensuring there are no clumps or compacted areas.
• Your coco coir is now ready to be used in your container!
Enhancing Coco Coir with Nutrients: Boosting Carrot Growth
While coco coir is an excellent growing medium on its own, it’s relatively low in nutrients.
To ensure your carrots receive the necessary nutrients for optimal growth, you’ll want to amend the coco coir with a high-quality organic fertilizer or compost.
Mix the fertilizer or compost into the hydrated coco coir, following the recommended ratios on the product packaging.
Be sure to choose a balanced fertilizer that provides essential nutrients like nitrogen, phosphorus, and potassium to support strong and healthy carrot growth.
By amending your coco coir with nutrients, you’ll give your carrots the best possible start in their new indoor home!
Planting and Germinating Carrot Seeds

With your carrot variety selected, a container chosen, and coco coir prepared, it’s finally time to get your hands dirty and plant those carrot seeds!
In this section, we’ll guide you through the process of planting and germinating carrot seeds, ensuring they get off to a great start in your indoor garden.
We’ll cover everything from seed spacing and planting depth to providing the ideal conditions for germination.
With a bit of patience and care, you’ll soon see those tiny green seedlings emerge, marking the beginning of your journey to a bountiful indoor carrot harvest.
Let’s get planting!
Seed Spacing and Planting Depth: Giving Carrots Room to Grow
To ensure your carrots have ample space to grow and develop, it’s essential to follow proper seed spacing and planting depth guidelines.
Carrot seeds should be sown about 1-2 inches apart to allow enough room for the roots to expand.
Planting depth is equally important. Sow seeds about 1/4 to 1/2 inch deep in the prepared coco coir.
This shallow depth encourages better germination rates and prevents the seeds from being buried too deep to sprout.
Even Distribution Techniques: No More Clumped Carrots
Carrot seeds are tiny, which can make it challenging to distribute them evenly in your container. To make this task easier, try the following techniques:
• Mix the seeds with sand or fine vermiculite, which will help separate them and make it easier to sow them more evenly.
• Use a seed dispenser or a small, pinch-and-sprinkle motion to control the number of seeds you’re sowing at once.
• After sowing, gently rake your fingers over the soil surface of the coco coir to ensure the seeds are covered and evenly distributed.
Germination Conditions: Temperature and Humidity
To encourage successful germination, you’ll need to provide your carrot seeds with the optimal temperature and humidity conditions.
Carrot seeds typically germinate best in temperatures ranging from 60-75°F (16-24°C).
If your indoor environment has cooler temperatures than this, consider using a seedling heat mat to maintain consistent warmth.
Humidity is also essential for germination. To maintain the necessary moisture levels, cover your container with a clear plastic lid or plastic wrap.
This will create a greenhouse-like environment that keeps the coco coir moist and encourages germination.
Be sure to check the moisture levels daily and mist the surface lightly with water if needed.
Once you see the first signs of germination, remove the plastic covering to prevent mold and allow for proper air circulation.
How Long Do Carrot Seeds Take To Sprout?
Carrot seeds typically take about 10-21 days to germinate and sprout, depending on the variety and the environmental conditions provided.
Keep in mind that carrots prefer consistent moisture levels and temperatures within the range of 60-75°F (16-24°C) for optimal germination.
Patience is key, as some carrot seeds may take longer to sprout than others.
Just make sure to maintain the ideal conditions and keep an eye on your seeds during the germination process.
Caring for Your Carrots as They Grow
Now that your carrot seeds are planted and starting to sprout, it’s time to focus on providing them with the love and care they need to thrive.
In this section, we’ll share valuable tips and guidance on how to care for your carrots as they grow and develop in their indoor container garden.
We’ll discuss essential aspects of carrot care, including watering, fertilizing, thinning, and monitoring for pests and diseases.
With a little attention and dedication, you’ll be well on your way to cultivating a bountiful and delicious harvest of homegrown carrots.
Let’s explore the ins and outs of carrot care to ensure your indoor garden flourishes!
Watering Techniques: Quenching Your Carrots’ Thirst
Proper watering is essential for the success of your potted carrots.
It’s important to maintain consistently moist, but not soggy, coco coir to encourage strong root development.
Here are some techniques to ensure your carrots receive the right amount of water:
• Water your carrots from the bottom by placing your container in a tray or saucer filled with water.
This allows the coco coir to absorb water evenly and prevents disturbing the seeds or seedlings.
• Use a spray bottle to gently water the surface of the coco coir without displacing seeds or seedlings.
• Monitor the moisture level of the coco coir regularly and adjust your watering frequency as needed, ensuring it remains consistently moist but not waterlogged.
Fertilizing: Nourishing Your Growing Carrots
To support your carrots’ growth, you’ll need to provide them with the necessary nutrients through regular fertilization.
Use a balanced liquid organic fertilizer, such as one with an N-P-K ratio of 5-5-5, and apply it according to the product’s instructions.
You can start fertilizing your carrots once they have developed their first true leaves, and continue feeding them every 2-4 weeks throughout their growing cycle.
Light and Temperature: Creating a Cozy Carrot Home
For optimal growth, carrots require a good amount of light and consistent temperatures.
Provide your carrots with 6-8 hours of bright full sun each day. If you don’t have access to sufficient natural light, consider supplementing with grow lights.
Keep the temperature within the 60-75°F (16-24°C) range to support healthy growth and prevent your carrots from becoming stressed.
Thinning Seedlings: Giving Your Carrots Room to Breathe
As your carrot seedlings grow, it’s essential to thin them out, ensuring they have enough space to develop strong roots and avoid competing for nutrients.
Once your seedlings are about 1-2 inches tall, thin them out so they’re approximately 1-2 inches apart.
To thin the seedlings, gently pinch or snip off the weaker seedlings at the soil level, being careful not to disturb the roots of the remaining plants.
By thinning your carrots, you’ll promote healthier growth and a more bountiful harvest.
Pest and Disease Control for Indoor Carrots
Growing carrots indoors certainly has its advantages, but that doesn’t mean they’re completely immune to pests and diseases.
In this section, we’ll explore the potential challenges your indoor carrot garden may face and provide you with effective, eco-friendly solutions to keep your carrots healthy and thriving.
From common pests like aphids and spider mites to fungal diseases, we’ve got you covered.
With our helpful tips and tricks, you’ll be well-equipped to protect your indoor carrot oasis and ensure a successful, bountiful harvest.
Let’s dive into the world of pest and disease control to safeguard your carrot-growing journey!
Common Pests: Prevention and Protection
Even indoor carrots can be susceptible to common pests, but don’t worry – there are effective ways to prevent and control these pesky critters.
Here are some common pests and how to prevent them:
Aphids: Tiny, soft-bodied insects that feed on plant sap. To prevent and control aphids, regularly inspect your plants and wipe off any infestations with a damp cloth. You can also use insecticidal soap or neem oil to treat aphids.
Spider mites: Microscopic mites that create fine webs on leaves and feed on plant tissue. Increase humidity to deter spider mites and treat infestations with insecticidal soap or neem oil.
Fungus gnats: Small flying insects that lay eggs in moist soil or growing media. Allow the top layer of your coco coir to dry out slightly between waterings and use yellow sticky traps to catch adult gnats.
Early Signs of Disease: Spotting and Treating Trouble
Carrots grown indoors can also be prone to certain diseases. Keep an eye out for early signs of trouble, and take action as soon as possible.
Here are some common diseases and how to treat them:
Damping off: A fungal disease that causes seedlings to collapse and die.
Prevent damping off by maintaining good air circulation, using sterile coco coir, and avoiding overwatering.
Leaf blight: Fungal diseases that cause leaf spots and yellowing. Remove affected leaves, and treat your plants with a fungicide if necessary.
Root rot: A fungal disease that affects the roots, causing them to turn brown or black and become mushy.
Prevent root rot by providing proper drainage and avoiding overwatering. Coco coir is naturally resistant to root rot but it can still occur.
If root rot occurs, you can try to remove the affected plants and treat the remaining plants with a fungicide but it is probably best to start over again with fresh coco and don’t overwater this time.
Air Circulation and Cleanliness: A Healthy Growing Environment
Maintaining good air circulation and cleanliness around your indoor carrot garden is essential for preventing pests and diseases.
Here are some tips to create a healthy growing environment:
• Ensure proper spacing between plants to allow air to circulate freely.
• Use a small fan to provide gentle air movement, which can help prevent the growth of mold and deter pests.
• Keep the growing area clean and free from debris, which can harbor pests and diseases.
• Regularly inspect your plants for signs of pests or diseases, and take action promptly to address any issues.
Tackling Pests and Diseases: Treatments for Indoor Carrots
 In this section, we’ll dive deeper into pests and diseases that can affect your indoor carrot garden, along with effective treatments to keep your plants healthy and thriving.
While growing carrots indoors offers protection from many outdoor threats, it’s still essential to stay vigilant and know how to manage these challenges.
From identifying the culprits to implementing eco-friendly treatments, we’ll help you safeguard your carrots and ensure a successful harvest.
Let’s arm ourselves with knowledge and conquer the pests and diseases that may come our way!
Pest Identification and Treatment
Common pests that can affect your indoor carrots include:
Aphids: To treat aphids, use insecticidal soap or neem oil, and apply according to the product instructions.
You can also introduce beneficial insects, such as ladybugs or lacewings, which feed on aphids.
Spider mites: Manage spider mites by increasing humidity and regularly misting your plants with water.
Insecticidal soap or neem oil can also help control spider mite infestations.
Fungus Gnat Control
Because coco coir should be kept moist it can attract fungus gnats. These pesky flies are the adults while the larvae are in the soil feeding on organic matter.
I have had fewer problems using bricks instead of bagged coco. I think the drying and pressing kills any that might be there.
Although they usually don’t damage healthy plants they can be annoying.
Fungus gnats: Use yellow sticky traps to catch adult gnats, and allow the top layer of your coco coir to dry out slightly between waterings to prevent their larvae from thriving.
Using a layer of sand or diatomaceous earth can act as a barrier to prevent the fliers from laying eggs in the soil.
Disease Identification and Treatment
Diseases that may affect your indoor carrots include:
Damping off: Prevent damping off by maintaining good air circulation, using sterile coco coir, and avoiding overwatering.
If damping off occurs, remove affected plants and treat the remaining plants with a fungicide.
Leaf blight: Remove affected leaves and ensure proper air circulation. Treat your plants with a fungicide if necessary.
Root rot: Provide good drainage and avoid overwatering to prevent root rot. If root rot occurs, remove the affected plants and treat the remaining plants with a fungicide.
Prevention Tips: Creating a Healthy Environment
An ounce of prevention is worth a pound of cure, so here are some tips to create a healthy growing environment and prevent pests and diseases:
• Inspect your plants regularly for signs of pests or diseases.
• Maintain good air circulation and cleanliness around your indoor carrot garden.
• Use sterile growing media, such as coco coir, to minimize the risk of introducing pathogens.
• Water your carrots appropriately, avoiding both overwatering and underwatering.
With these tips and treatments at your disposal, you’ll be well-equipped to protect your indoor carrot garden from pests and diseases, ensuring a bountiful and delicious harvest.
Harvesting Your Homegrown Carrot Crop
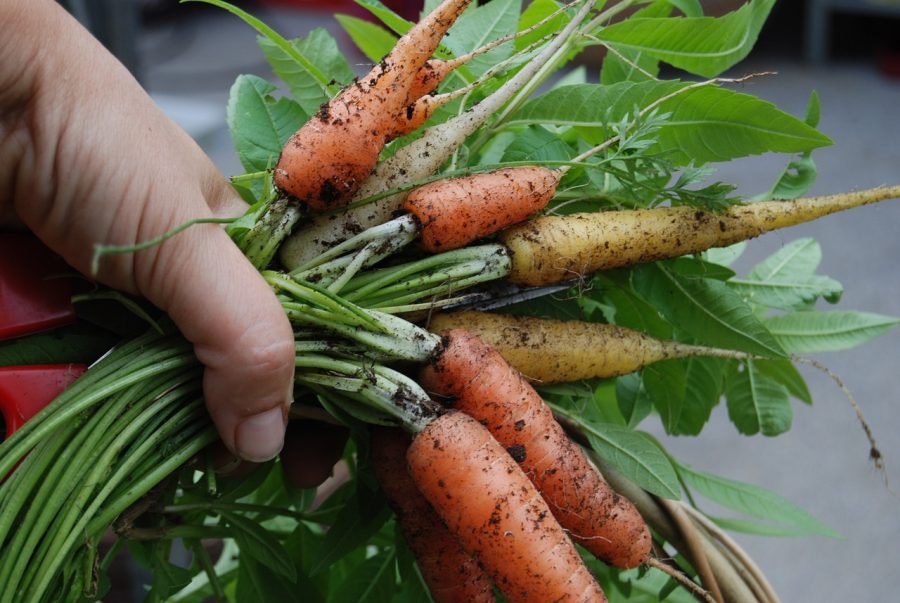
The moment you’ve been waiting for has finally arrived – it’s time to harvest your homegrown carrots!
In this section, we’ll guide you through the exciting process of harvesting your carrots, ensuring you get the most out of your indoor container garden.
We’ll cover how to determine when your carrots are ready to be picked, as well as tips for gently pulling them from the coco coir without causing any damage.
After all your hard work and dedication, you’ll be rewarded with a tasty and nutritious bounty to enjoy in your favorite dishes.
So, let’s dive into the world of carrot harvesting and savor the fruits (or roots) of your labor!
Harvest Readiness: When to Pluck Your Carrots
Knowing when your carrots are ready for harvest is crucial to ensure you’re getting the most flavorful and nutritious roots.
Here are some indicators that your carrots are ready to be picked:
Check the days to maturity listed on the seed packet to estimate the approximate harvest time.
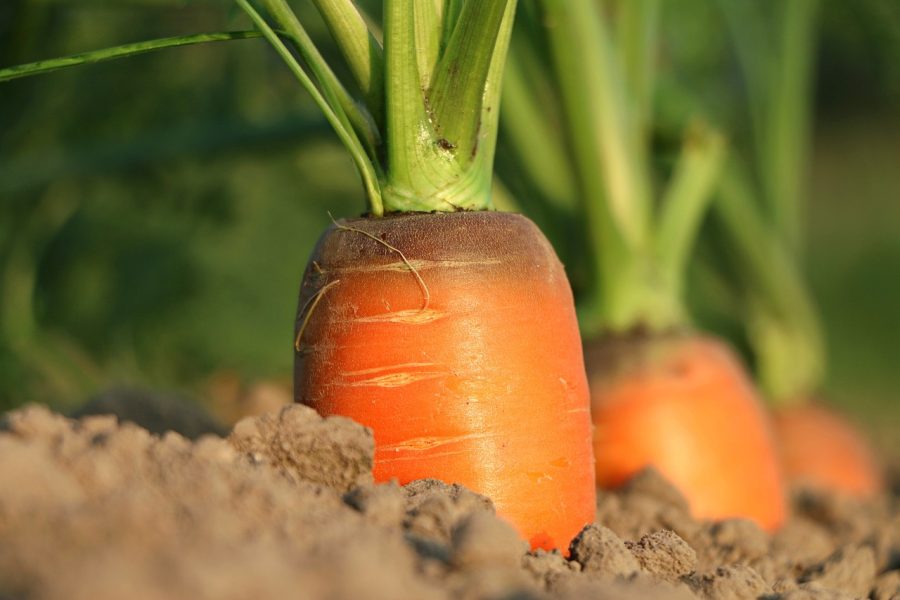
Observe the size of the carrot shoulders emerging from the coco coir – a diameter of 1/2 to 3/4 inches is a good indication that your carrots are ready.
Gently brush away some coco coir to reveal the carrot’s color and size, which can give you a better idea of its maturity.
Some folks like to harvest baby carrots which will be ready much sooner.
A good idea is to wait a bit longer to thin your carrot roots so the thinnings can be used as little finger carrots.
Gentle Harvesting: Pulling Carrots with Care
To harvest your carrots without damaging them, follow these tips for a successful and gentle extraction:
• Water the coco coir well before harvesting to soften the growing medium and make it easier to pull the carrots out.
• Grasp the carrot’s foliage close to the base, where it connects to the root.
• Gently wiggle the carrot back and forth while applying upward pressure to slowly pull it out of the coco coir.
• Avoid yanking the carrot tops, which can damage the root or cause it to snap off from the foliage.
Storing and Preserving: Making the Most of Your Harvest
To enjoy your freshly harvested carrots for as long as possible, consider these storage and preservation methods:
Remove the foliage from the carrots, leaving about 1/2 inch of stem attached. This prevents the greens from drawing moisture and nutrients from the roots.
Store unwashed carrots in a cool, dark, and humid environment, such as a refrigerator crisper drawer, in a perforated plastic bag, or wrapped in a damp cloth.
For longer-term preservation, consider freezing, pickling, or canning your carrots, ensuring you follow proper food safety guidelines.
Growing Carrots Indoors FAQs
Growing carrots indoors can seem like a daunting task if you’re new to it, but with a little bit of know-how, you can enjoy fresh, home-grown carrots even without a garden.
Whether it’s choosing the right variety of carrot, understanding the soil requirements, or figuring out the lighting, there are various aspects that you might have questions about.
To help you out, we’ve compiled a list of the most frequently asked questions about growing carrots indoors and provided the answers you need to get started.
Q: What kind of carrots are best for indoor growing?
A: Shorter carrot varieties like “Paris Market” or “Little Fingers” are best suited for indoor growing, especially if you’re using pots.
Q: How deep should the pot be for growing carrots indoors?
A: A pot with a depth of at least 10-12 inches is recommended for most carrot varieties. This allows enough room for the carrot to grow and for proper drainage.
Q: How much light do indoor carrots need?
A: Carrots require a lot of light, ideally 12-14 hours a day. If natural light is insufficient, supplementing with artificial light is advisable.
Q: How often should I water indoor carrot plants?
A: The soil should be kept consistently moist but not waterlogged. Overwatering can lead to root rot, while underwatering can result in dry and cracked carrots.
Growing Carrots in Pots Indoors Final Thoughts
As we wrap up our journey into the world of growing carrots in pots indoors, we hope you feel inspired and well-equipped to embark on your own container gardening adventure.
With the knowledge and tips we’ve shared throughout this guide, you’re now ready to cultivate a bountiful and delicious harvest of homegrown carrots right inside your own home.
Remember, patience, care, and a little bit of love are the key ingredients to a successful indoor garden.
So, grab your pots, coco coir, and carrot seeds, and let the fun begin! Here’s to enjoying the sweet taste of success as you savor your very own homegrown carrots. Happy gardening!
Reflecting on the Benefits: Indoor Carrot Cultivation
As we conclude our guide, let’s take a moment to reflect on the numerous benefits of growing carrots indoors:
Fresh, homegrown produce: Enjoy the unbeatable taste and nutritional value of homegrown carrots harvested straight from your indoor garden.
Year-round cultivation: Bypass the constraints of the outdoor growing season and grow delicious carrots all year long.
Pest and disease control: Growing carrots indoors reduces their exposure to pests and diseases, making it easier to maintain a healthy crop.
Troubleshooting Tips: Tackling Common Issues
Even experienced gardeners can encounter challenges, so here are some troubleshooting tips to help you overcome common issues when growing carrots indoors:
Slow germination: Ensure consistent moisture levels and appropriate temperatures to encourage timely germination. Be patient, as carrot seeds can take 10-21 days to sprout.
Leggy seedlings: Provide adequate light and proper spacing to prevent weak, stretched seedlings.
Deformed roots: Choose containers with sufficient depth, and ensure the coco coir is free of compaction to prevent misshapen carrots.
Encouragement for Future Endeavors: Keep Growing
Lastly, we want to encourage you to continue exploring the world of indoor gardening.
Growing carrots in pots indoors is just the beginning – there are countless other fruits, vegetables, and herbs to experiment with in your indoor garden.
Keep learning, experimenting, and most importantly, enjoying the process.
The experience you gain from cultivating your own produce will not only enhance your gardening skills but also create lasting memories.
Happy gardening, and may your indoor garden flourish!
Read more: Apartment Kitchen Garden (Apartment Gardening Tips For Beginners)


